
How to Build a Simple Drill Press Table
We’re going to make the most of our drill press by building a simple drill press table.
The Shortcomings of Most Drill Presses
Drill presses are awesome tools. They can do a lot of things and can really save you time with quick repeatability and precise holes. Out of the box though, they came up just a bit short for woodworkers. Most presses come with cast iron tables of various sizes. These are great because they are super durable and drill presses will take a beating. But these tables usually fall short because 1) they aren’t very big (especially on benchtop models) and 2) they lack the zero clearance feature so important to woodworkers.
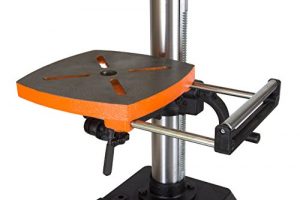
Cast iron tables are common to most drill presses.
What is Zero Clearance?
Zero clearance means the workpiece is full supported around the drill bit (or saw blade in the case of table saws, miter saws, etc) where it will exit the wood. Zero clearance on a drill press table is important because it prevents tear-out. In the case of a drill press (or just a regular drill), tear-out happens when the bit pushes through the back of the hole and brings wood fibers along with it leaving a very unsightly hole. If we can rest the workpiece on a scrap piece of wood then when we drill out the back of the hole there will be nowhere for those fibers to go and they will stay in tact.
The size of the table can be an issue when dealing with larger workpieces. Smaller table = less support. Small tables can make it harder to keep larger pieces stable.
If you’re thinking you can solve these issues by just grabbing a scrap piece of plywood and clamping it to the cast iron table, you’re right, you can, and most of us do that until we build our own tables. But there is a better way.
Let’s Take it a Step Further Though
The scrap piece of plywood gets the job done but with just a little bit of effort you can build with a lot of adjustability and reusable inserts so you always have a nice, zero clearance table.
A drill press table with a fence and a stop block will allow you to drill a hole in the exact same location of multiple parts. Not only is there a precision pay off but you can drill these holes much fasters than you can without the stop block.
By using zero clearance inserts we can ensure that as long as we have inserts (that we make ourselves out of scrap) we’ll have a fresh surface for drilling.
The Design
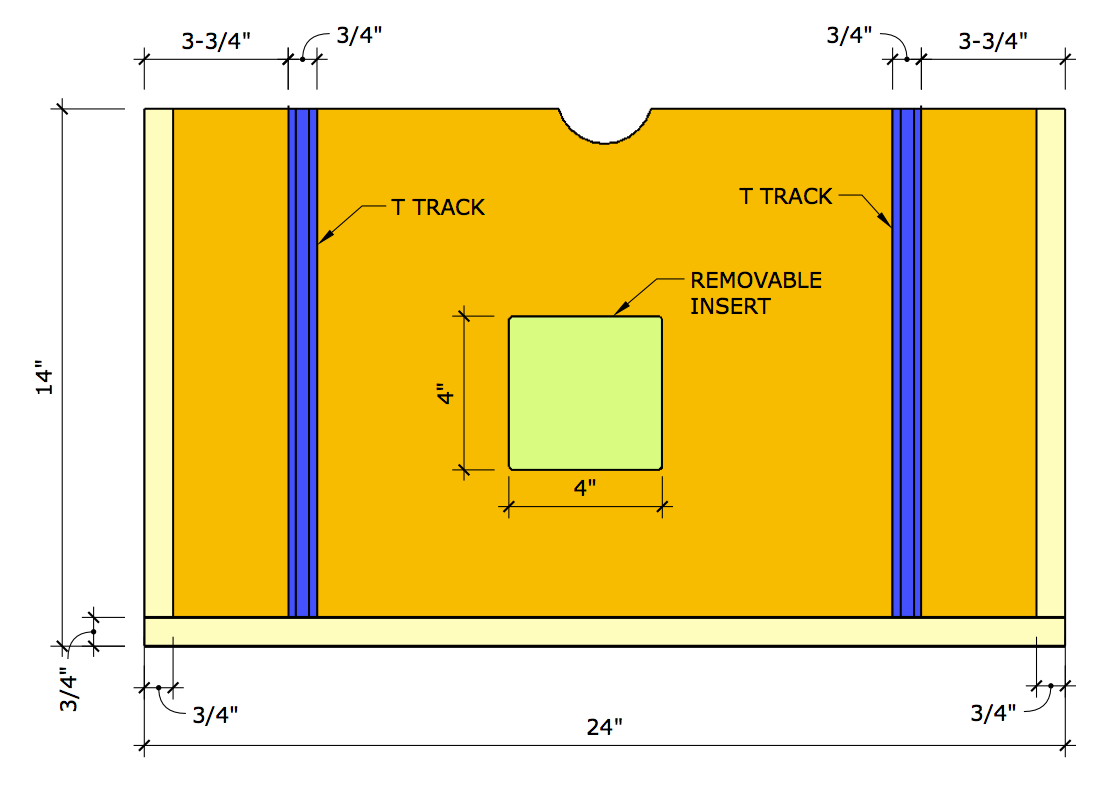
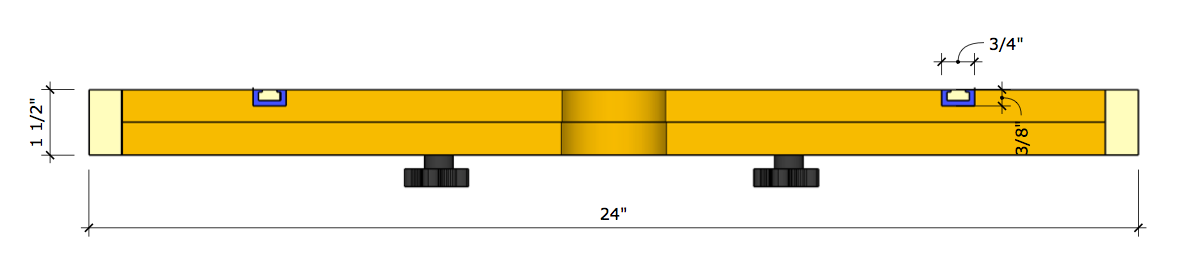
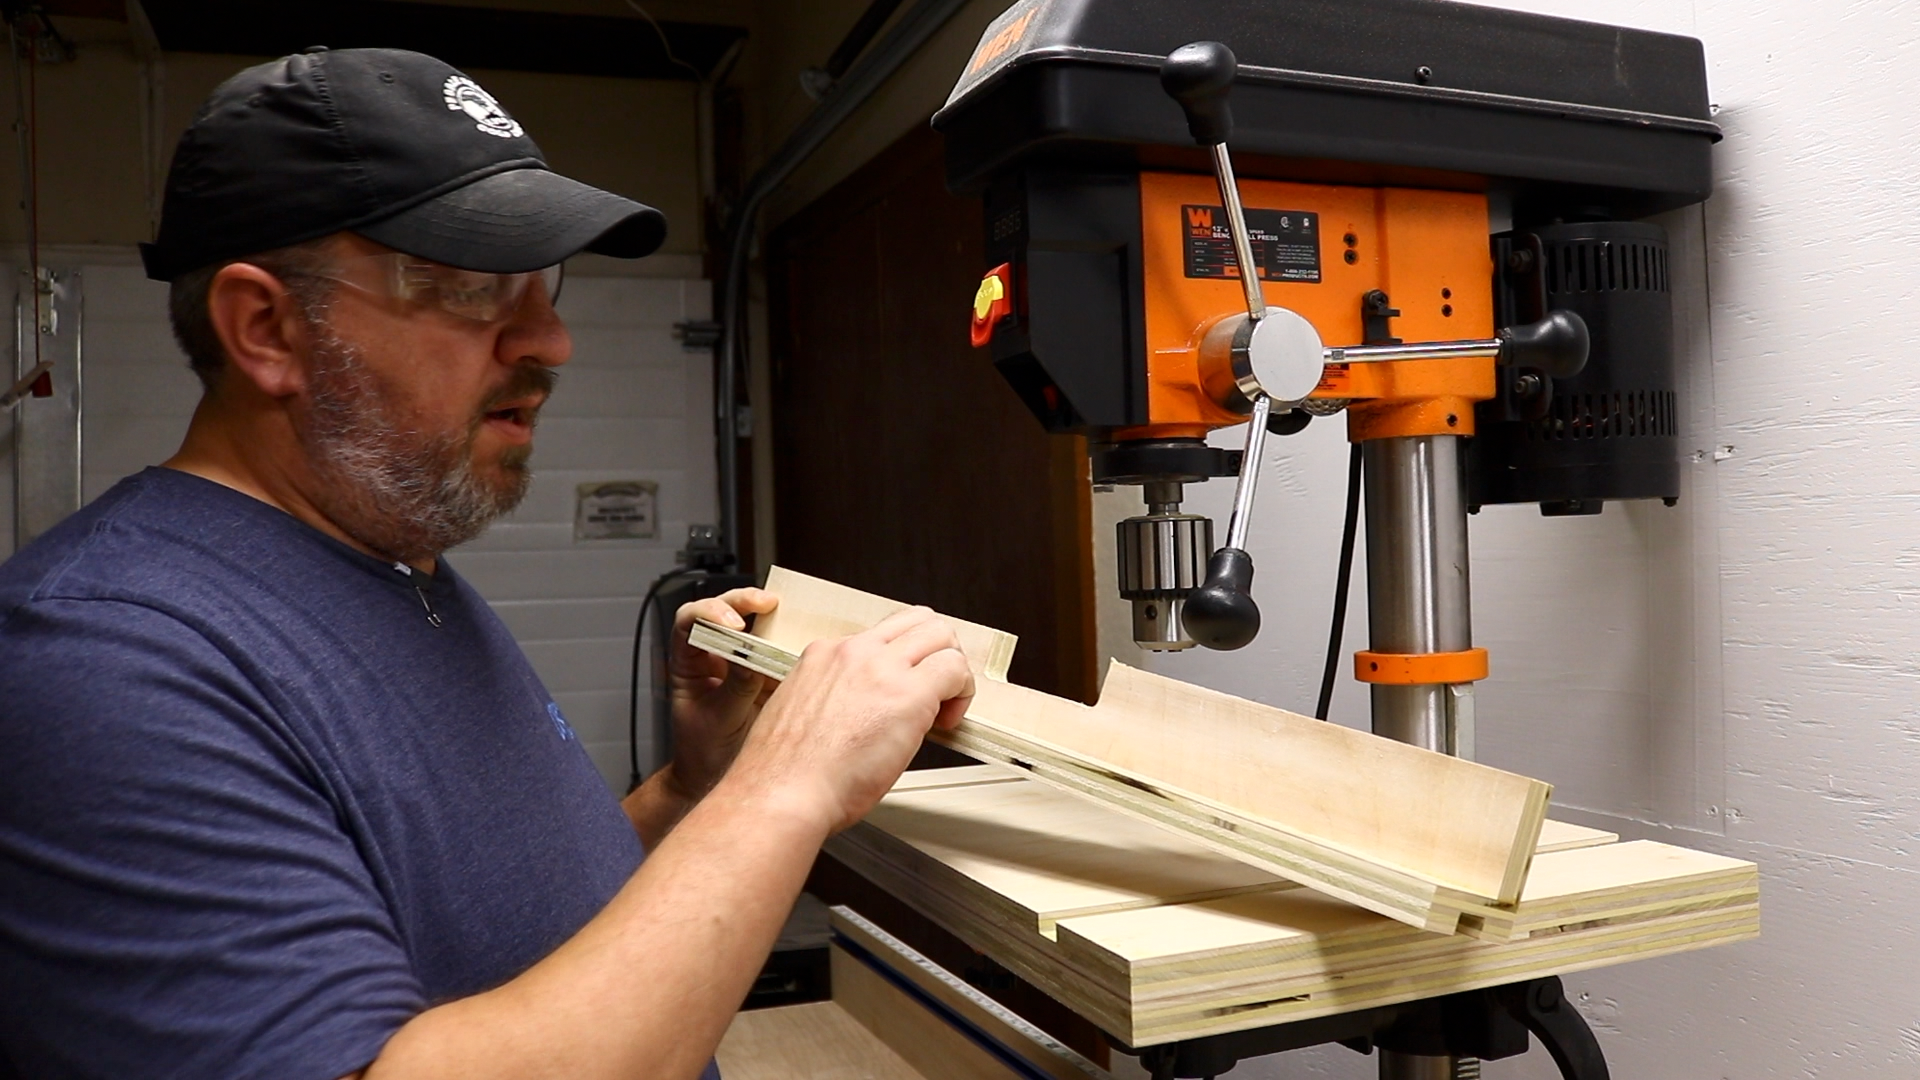
My drill press table is extremely simple. I built it out of scraps and hardware I already had on hand. It is 24″ wide, 14″ deep and 1-1/2″ thick. There’s really not a whole lot that went into this design but there are a couple of considerations that need to be made.
- Depending on your drill press, the crank to raise and lower the table might be impeded by a custom drill press table. When I started designing my table I laid a piece of plywood on the cast iron table to ensure my crank handle cleared the plywood. It did, so I am all good from this perspective. Or so I thought. More on that later.
- If you start drilling into your table you’ll mangle it up pretty quickly. The best way to handle this issue is to make the table accept inserts that can be replaced.
- We need to make sure we take the drill press chuck into consideration when designing the fence. If the fence is too high, it can impede the chuck as you bring it down towards the workpiece. One way to fix this is to make a cut out where the chuck could possibly hit the fence. The fence in my design isn’t very tall so I figured I would just leave it as is and start using it because I can always go back later to make this notch.
Dimensions and Layout
The location of the t track is really up to you. This layout seemed to work for me. However, think about your work and the kind of parts for which you commonly use your drill press. These tracks are not only for the fence. They can be used for hold downs. The location and size of your insert is also dependent on your drill press and how you use it. If you use a lot of big hole saws or forstner bits then you might think about making your inserts bigger than what I have specified.

Materials and Tools
Lumber and Sheet Goods
- 2 – 23″ x 14″ x 3/4″ plywood
- 1 – 24″ x 2-1/2″ x 3/4″ plywood
- 1 – 24″ x 2″ x 3/4″ plywood
- 1 – 24″ x 4″ x 1/2″ plywood (for 6 inserts)
- 1 – 2-1/2″ x 2-1/2″ x 3/4″ plywood
- 1 – 24″ x 1-1/2″ x 3/4″ hardwood
- 2 – 13-1/4″ x 1-1/2″ x 3/4 hardwood
Hardware and Fasteners
- 1 – 24″ T Track – https://geni.us/TMtWk
- 1 – 36″ T Track – https://geni.us/4j2grf6
- ~2 – Packs #8 x 1/2″ Countersink Screws – https://tinyurl.com/ya56etkj
- 4 – 1/4″ – 20 x 1-1/2″ Star Knob* – https://geni.us/dz6emU3
- 1 – Pack 1/4″ – 20 x 1-1/2″ T Bolt* – https://geni.us/9d46CDG
- 1 – Pack 1/4″ – 20 Star Thru Knob* – https://geni.us/skbpRmy
- 1 – Pack 1/4″ – 20 Threaded Inserts* – https://geni.us/Y0RZypQ
- Wood Glue – https://geni.us/OTITAC
*I put these links here to illustrate what is needed. I don’t recommend buying from these links and do recommend buying something like this from Woodcraft: Jig Hardware Kit. This includes more than enough for this project and also is a good set for other projects. Woodcraft and Rockler also offer each of these items individually.
Tools I will be using in this build
- Craftsman Drill and Impact Driver – https://geni.us/yzREx2
- Bosch Router – https://geni.us/CqVydG
- WEN 12″ Drill Press – https://geni.us/u0X3QB
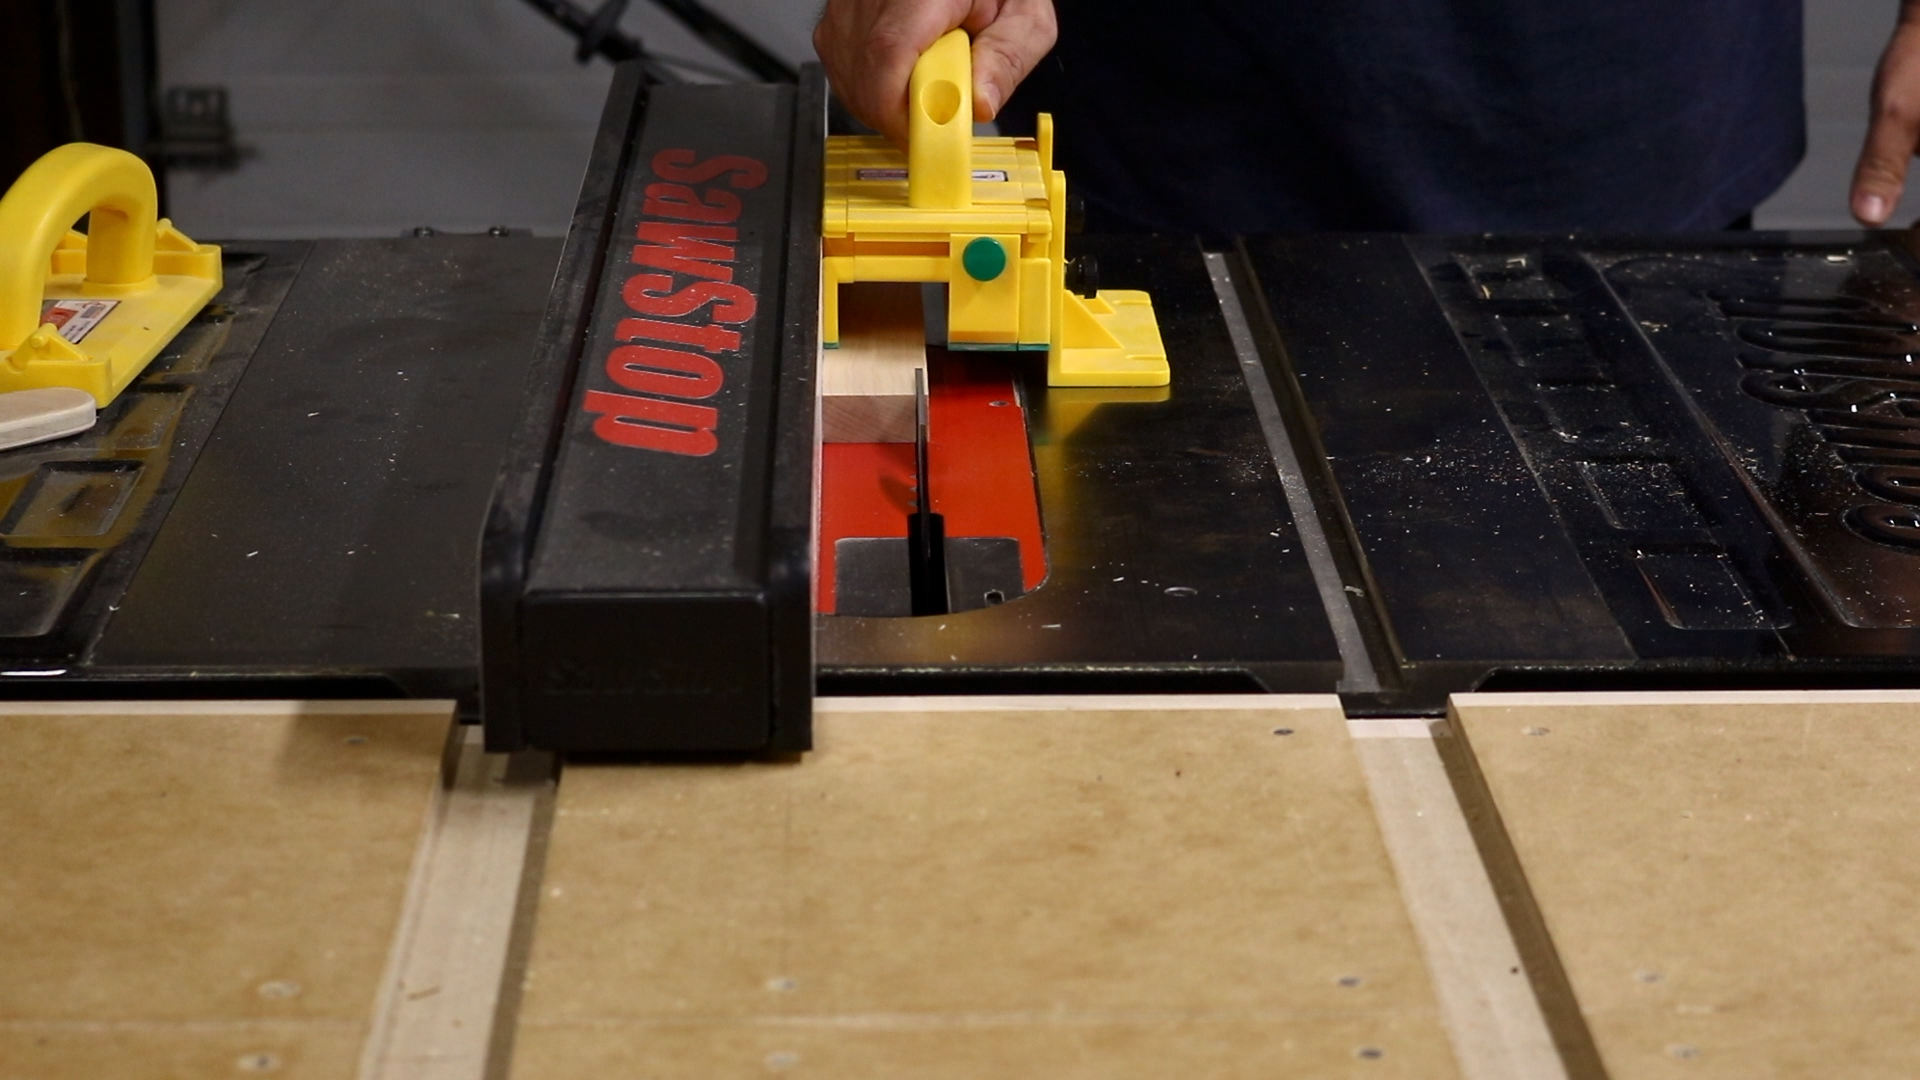
- SawStop CNS Contractor Table saw – https://geni.us/bropyjj
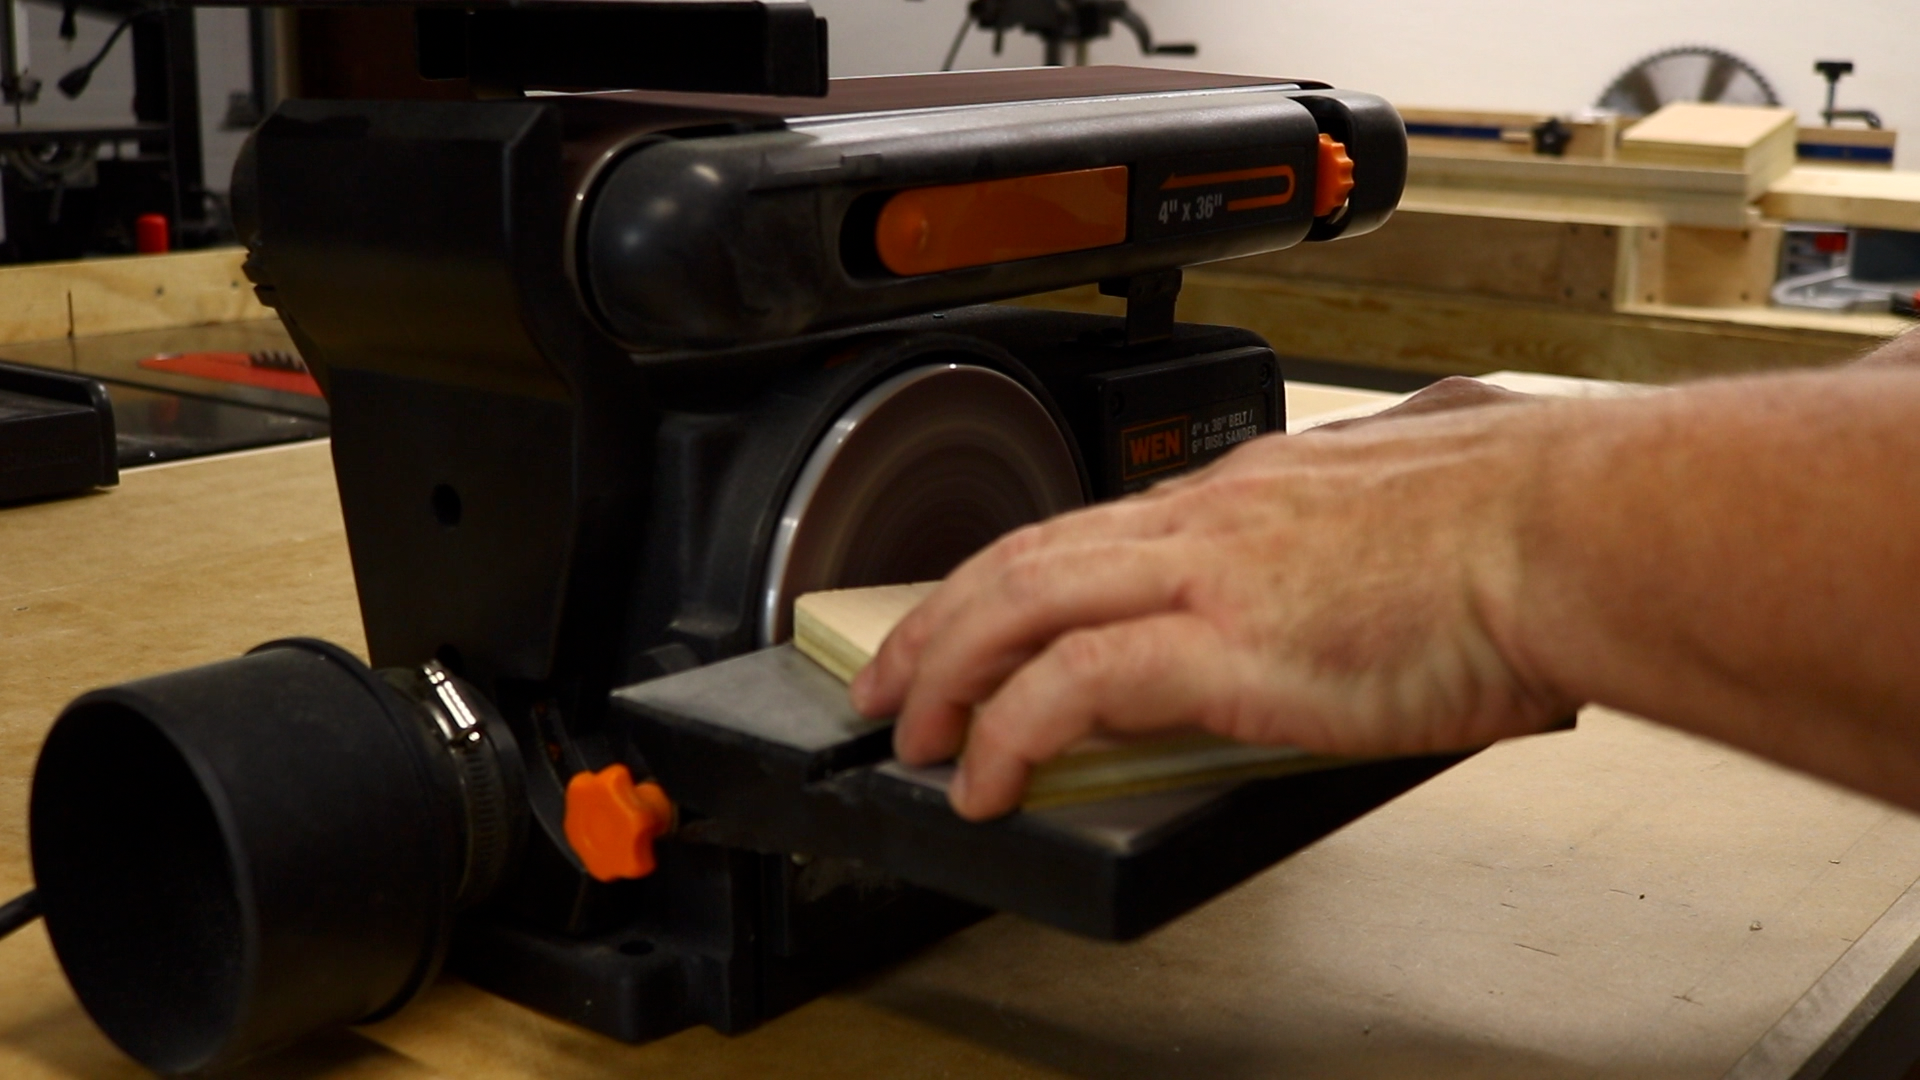
- WEN 4″ x 36″ Belt/Disc sander – https://geni.us/DkASCk
- WEN Oscillating Spindle Sander – https://geni.us/hEBa
- Dewalt Random Orbital Sander – https://geni.us/ebPt
- Bosch Glide 12″ Miter Saw – https://geni.us/waPb
- Craftsman Cordless Jigaw – https://geni.us/Ir9l7ZL
- Microjig GRR-RIPPER – https://geni.us/Qo1O
- Microjig GRR-RIP Push Block – https://geni.us/3WkGsF8
- Dewalt 8″ Dado Set – https://geni.us/AUrrCG
theaveragecraftsman.com is a participant in the Amazon Services LLC Associates Program, an affiliate advertising program designed to provide a means for sites to earn advertising fees by advertising and linking to amazon.com
Let’s Start Building!
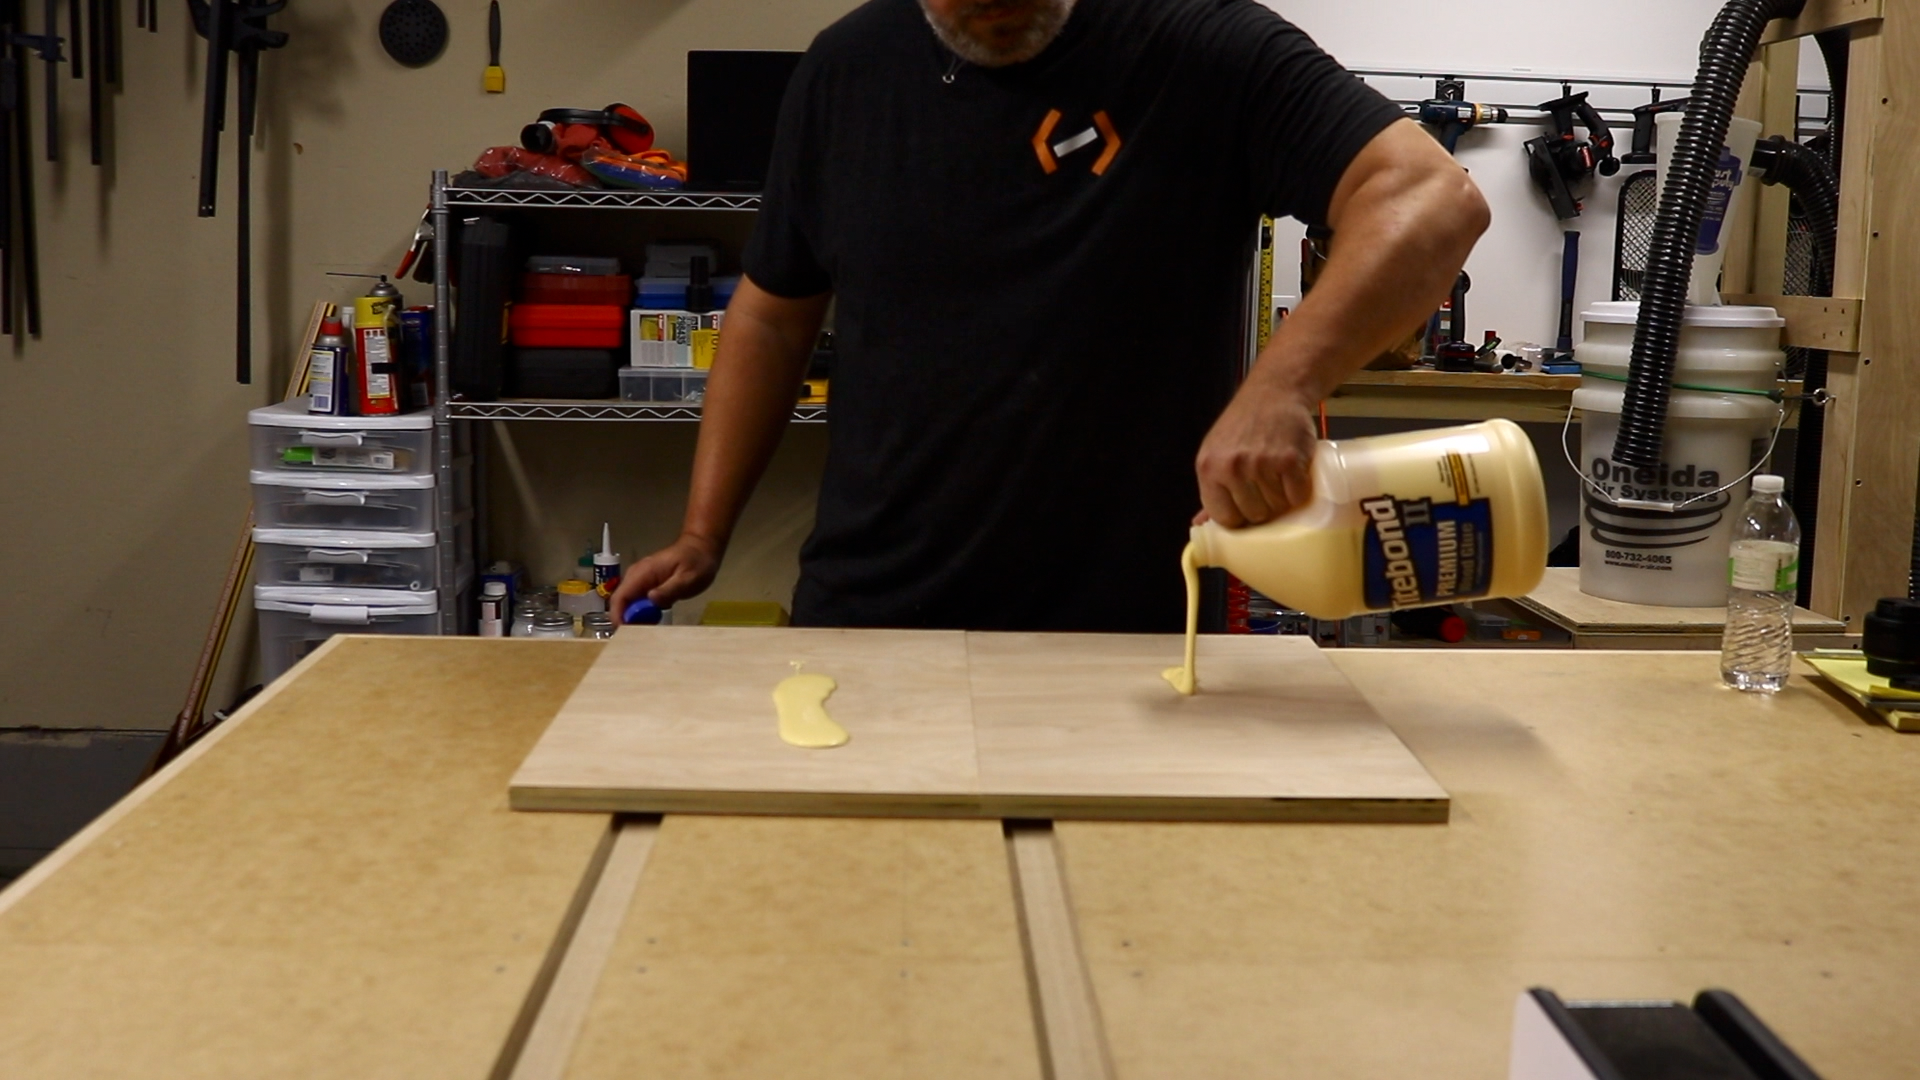
The First Cuts and Glue Up
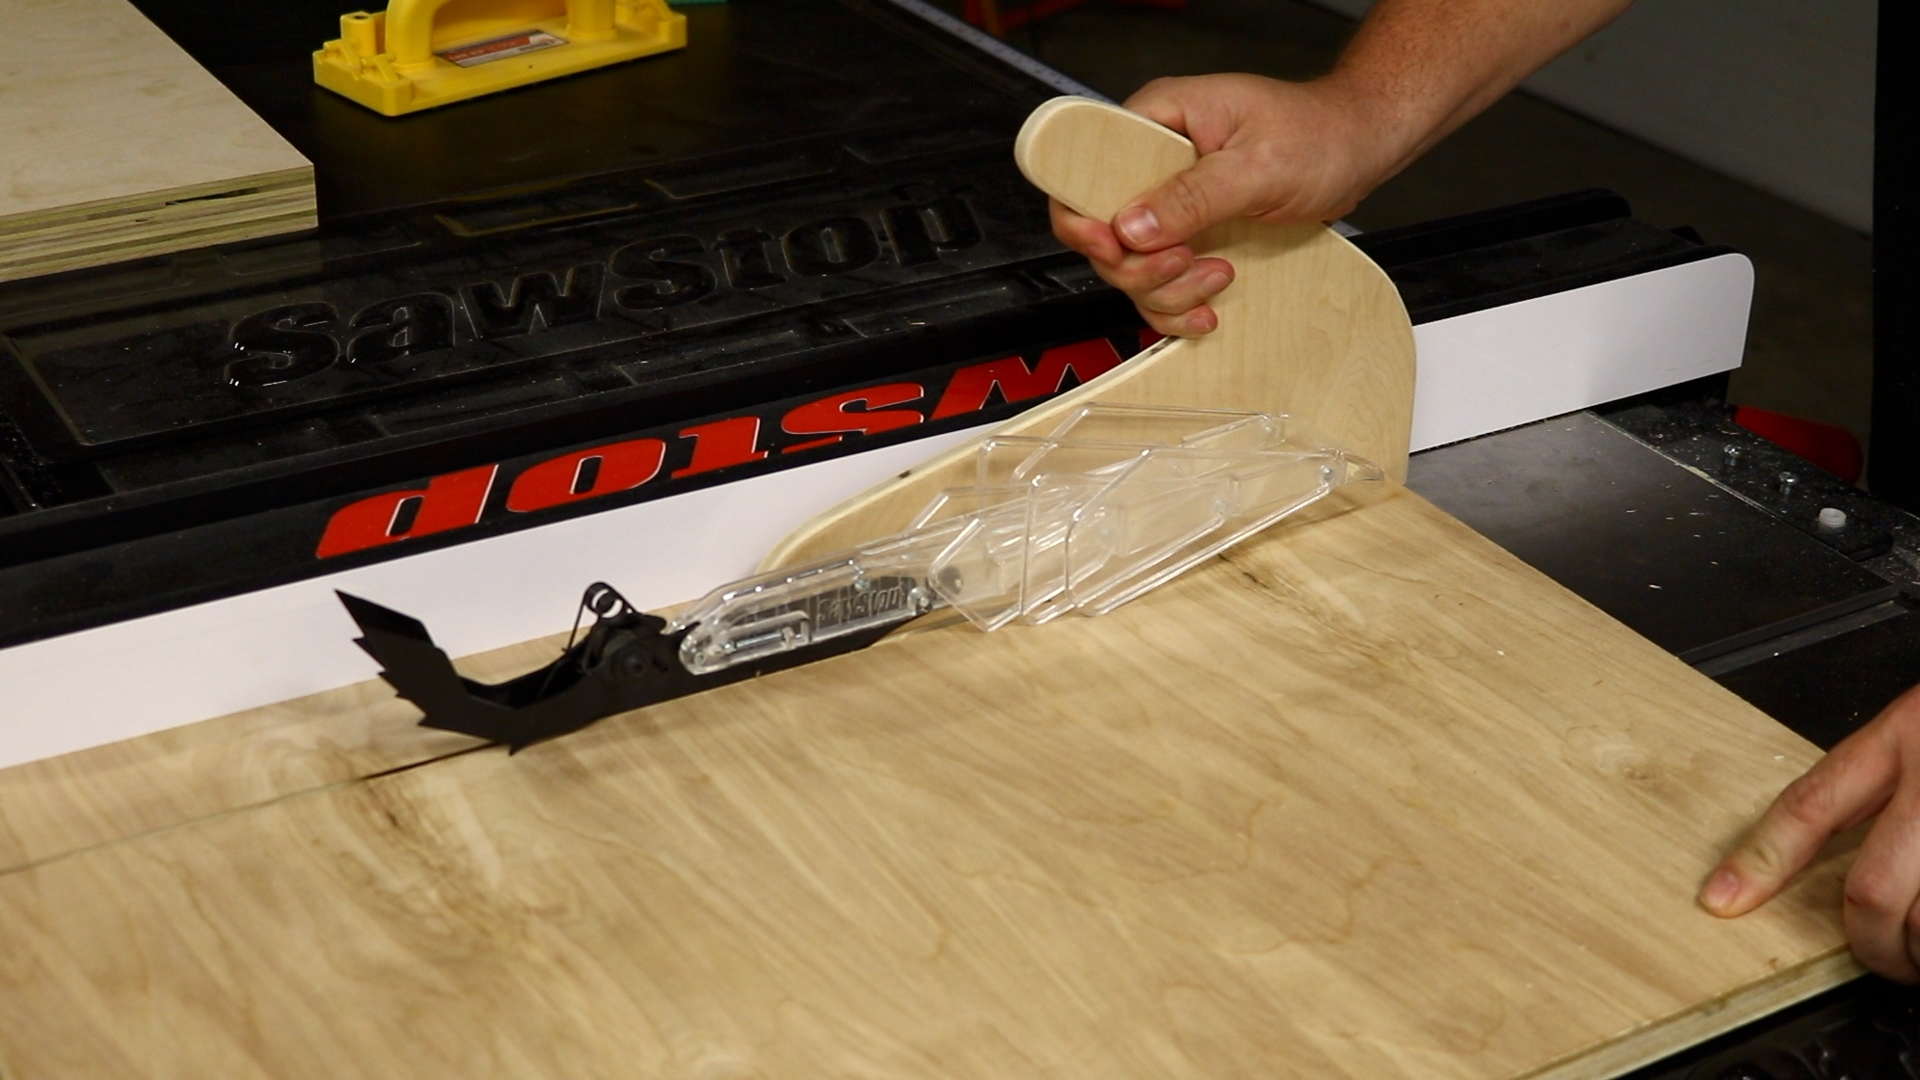
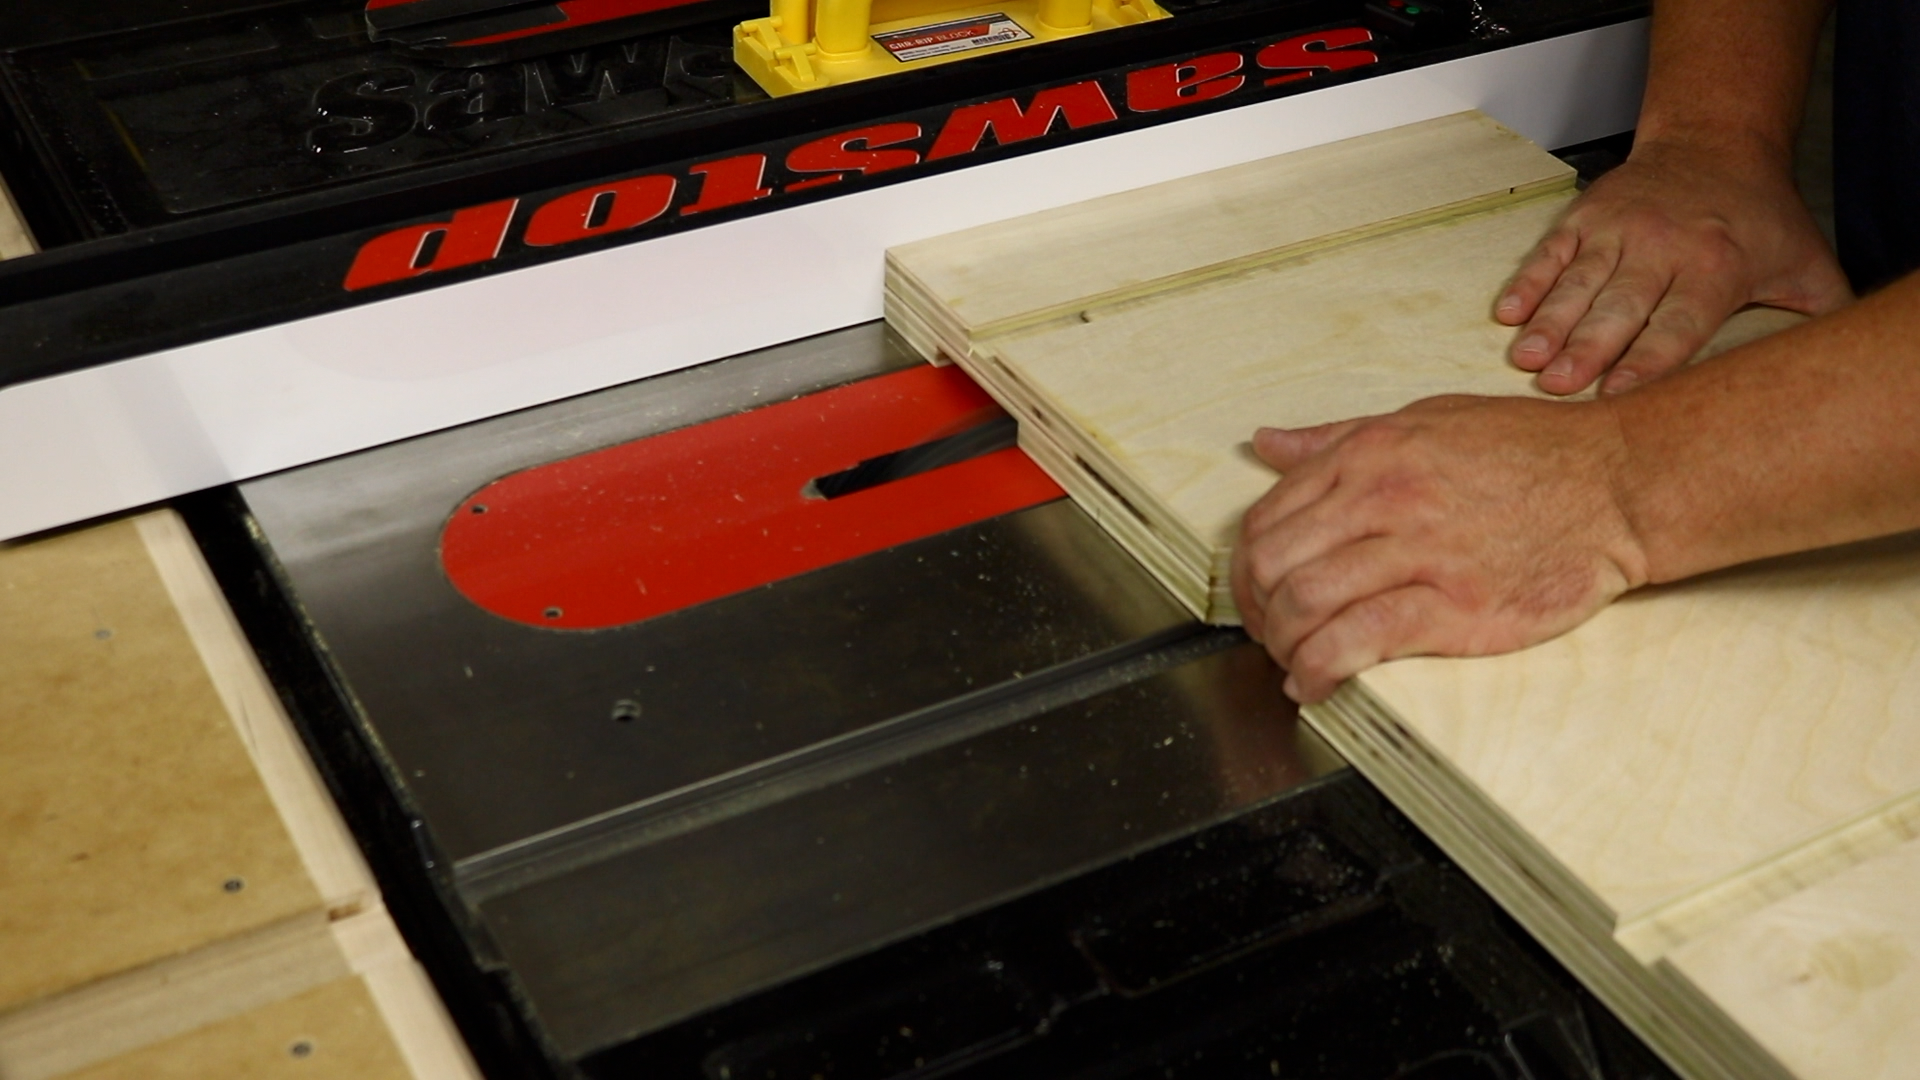
I started out at the table saw by breaking down a piece of plywood for the two halves of the top. These cuts are about a 1/4″ oversize so I could trim all sides nice and flush after the glue up.
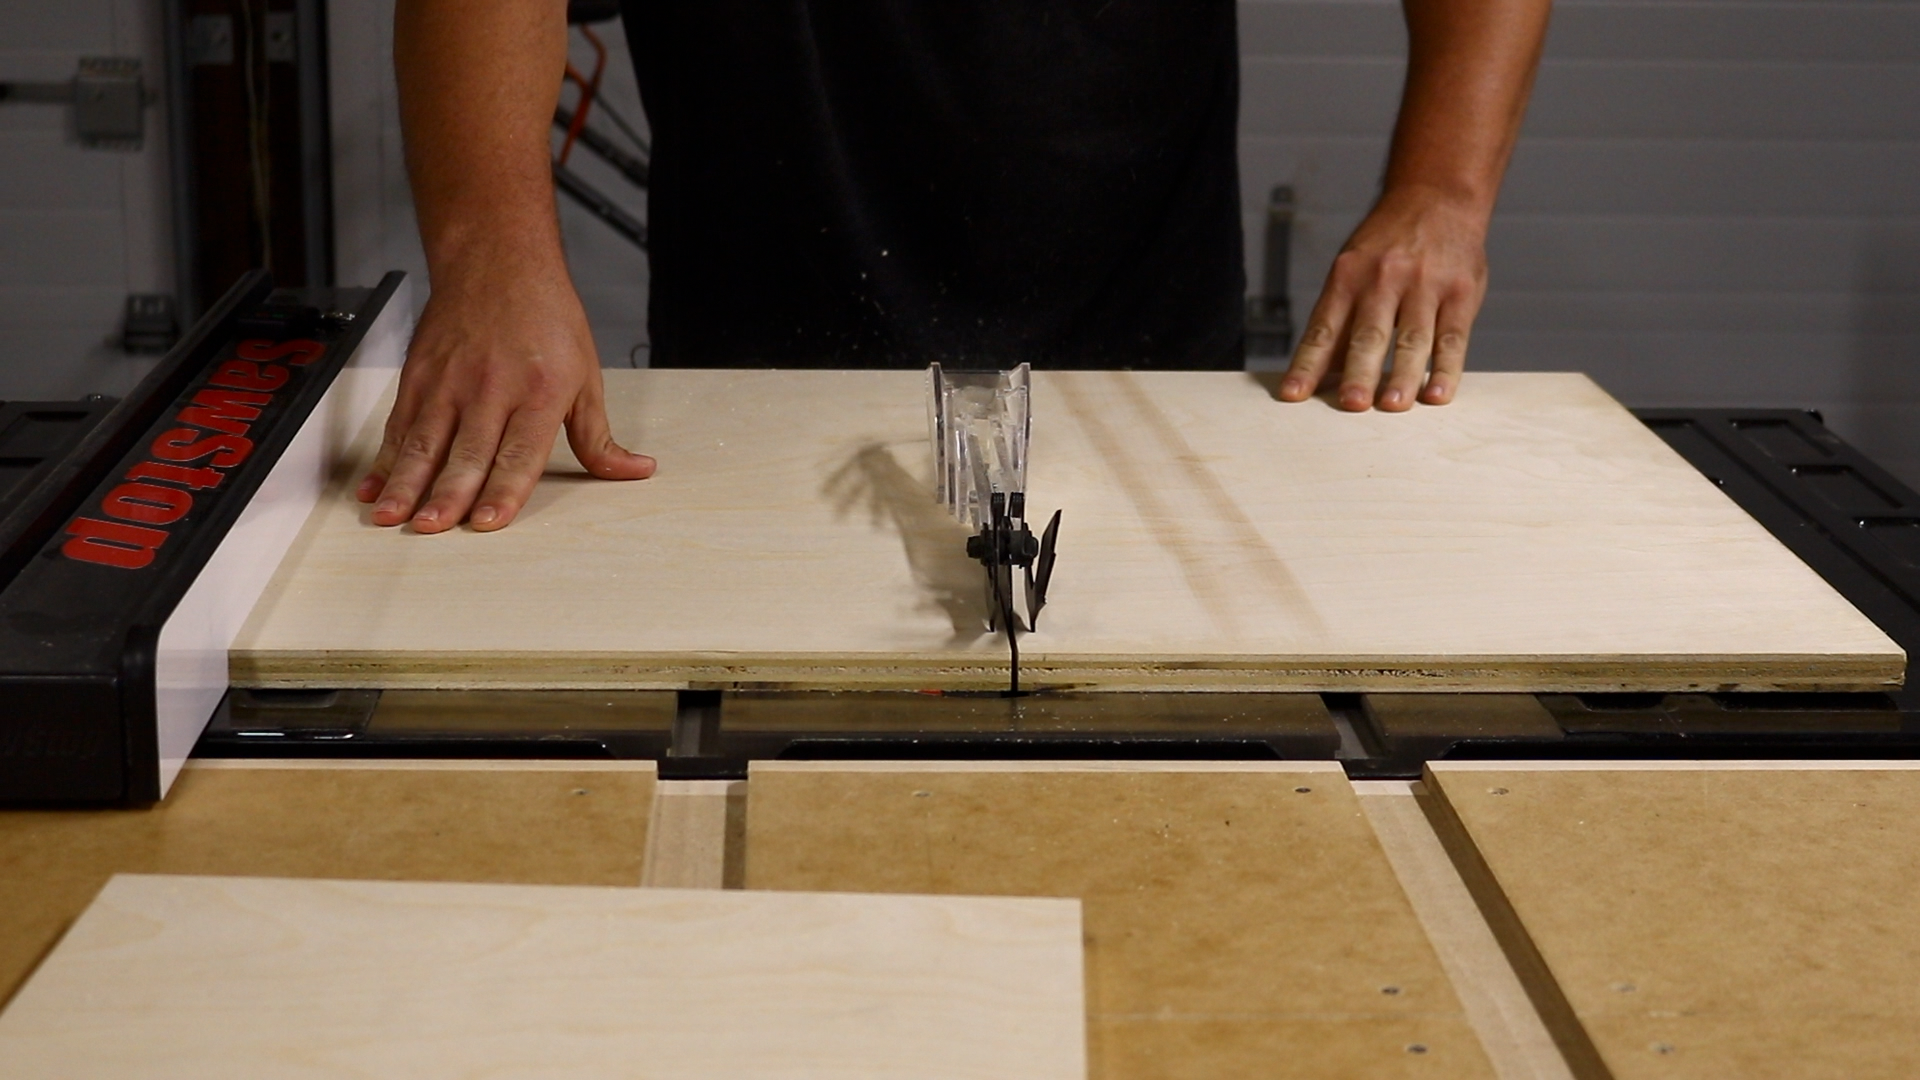
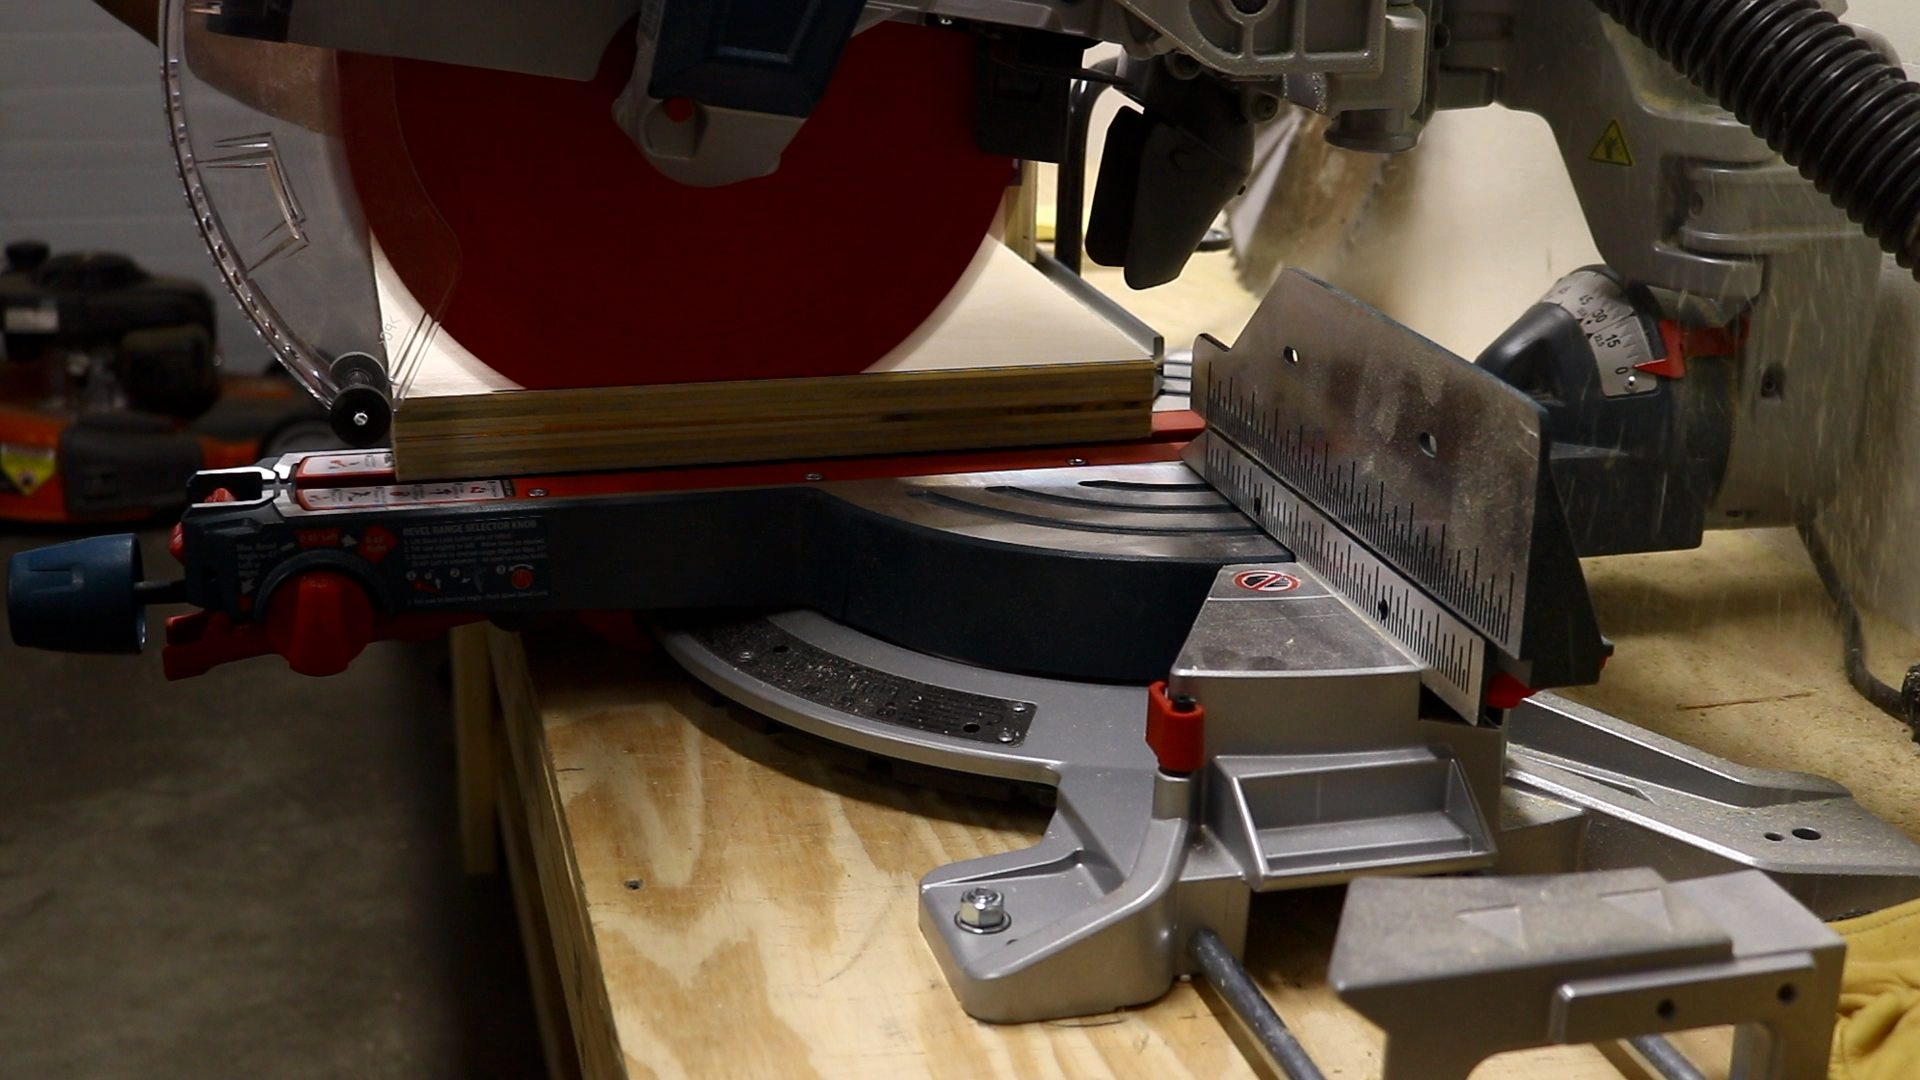
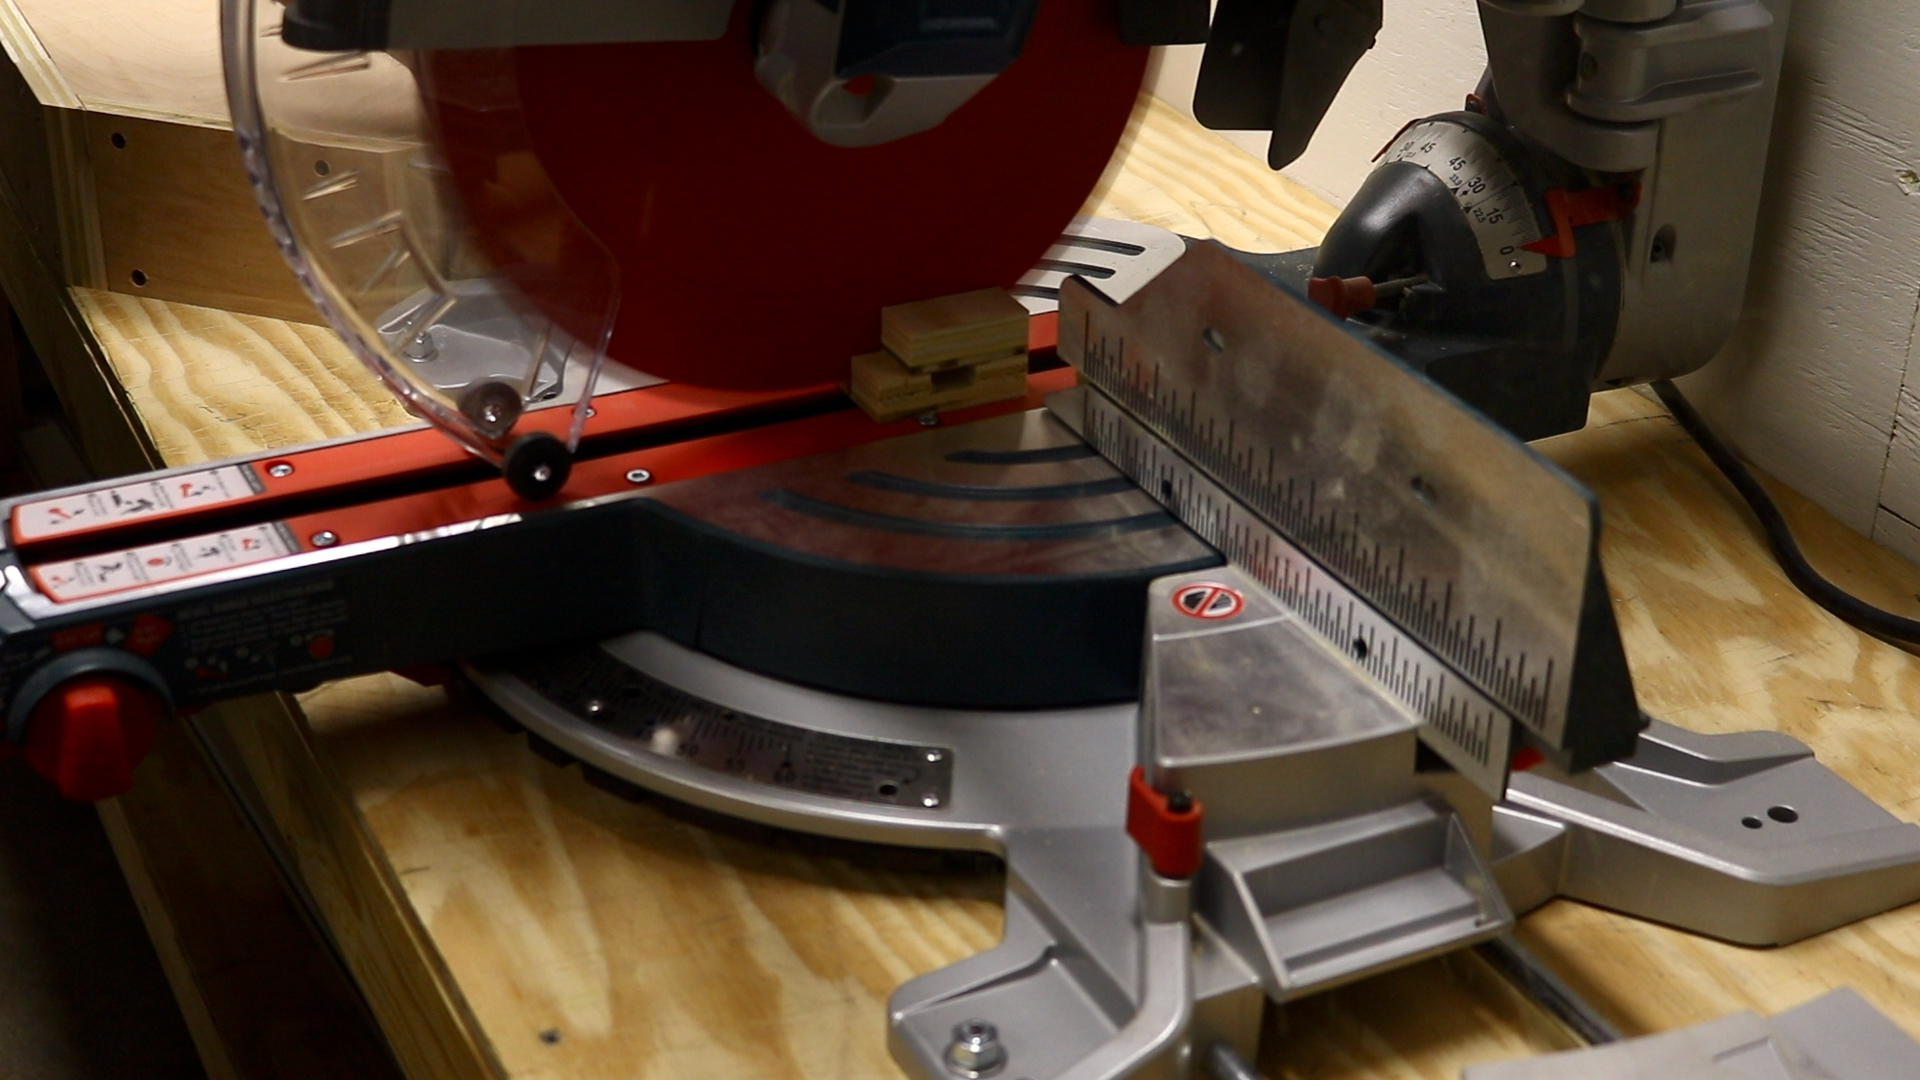
I then cut these parts to size at the miter saw.
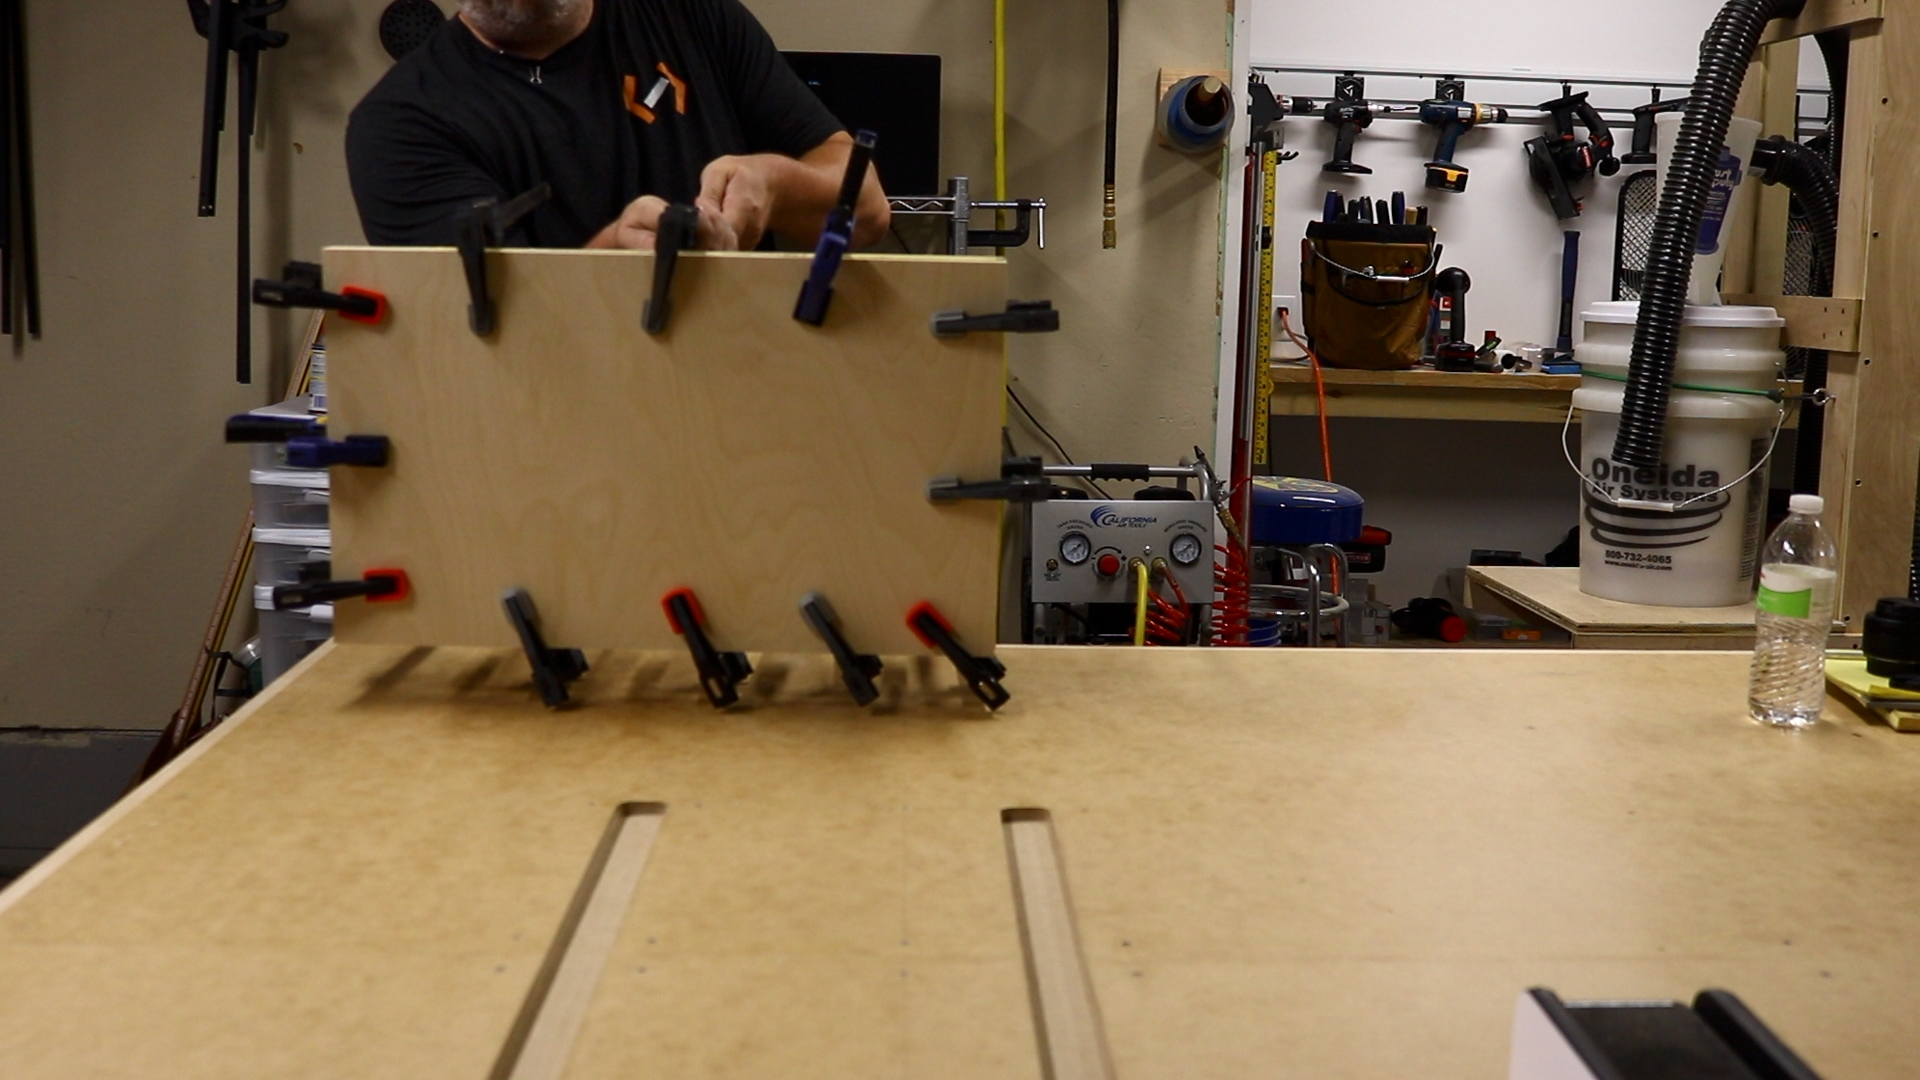
Time to glue the two parts together. I made sure that the two pieces were offset about an 1/8″. This would give me one good edge to reference on the table saw when cutting it down to its final size. Make sure that that the edges don’t overlap each other. It will make it more difficult when cutting it to size at the table saw.
Lots of clamps.
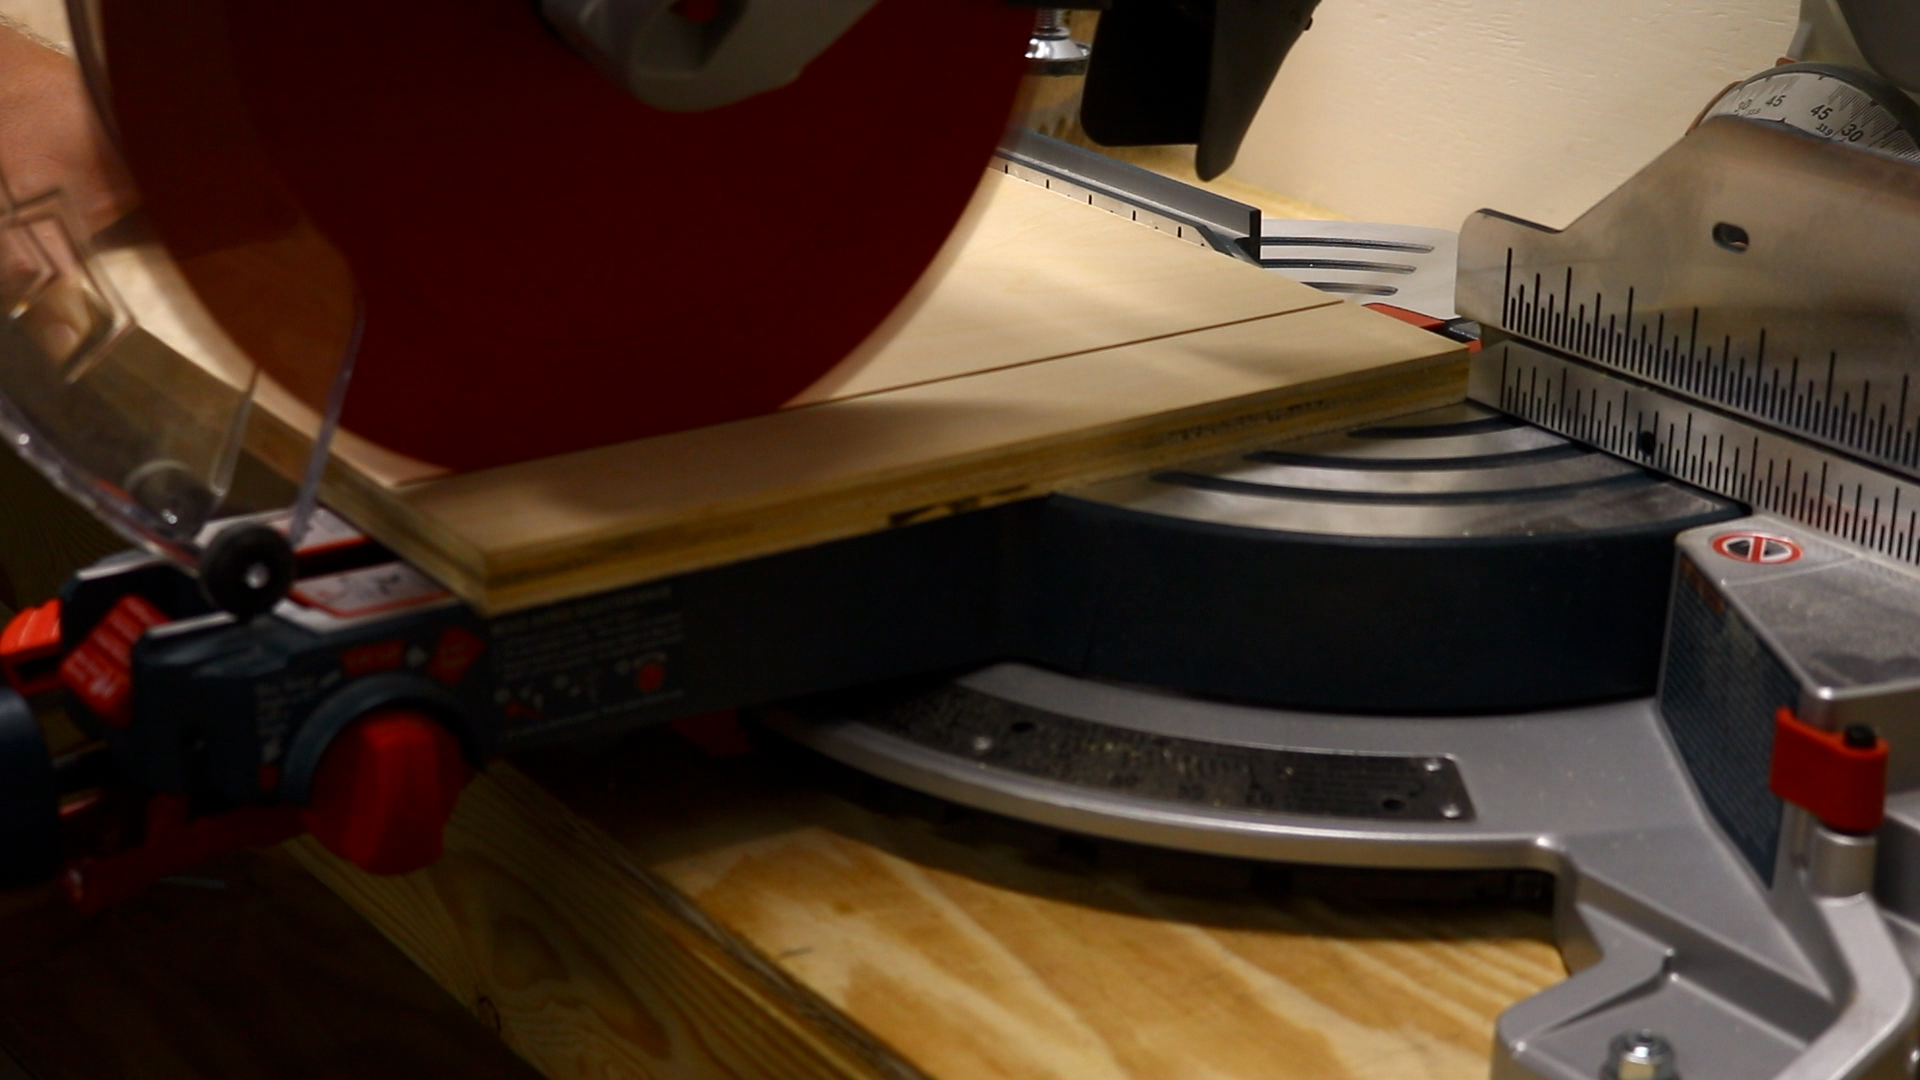
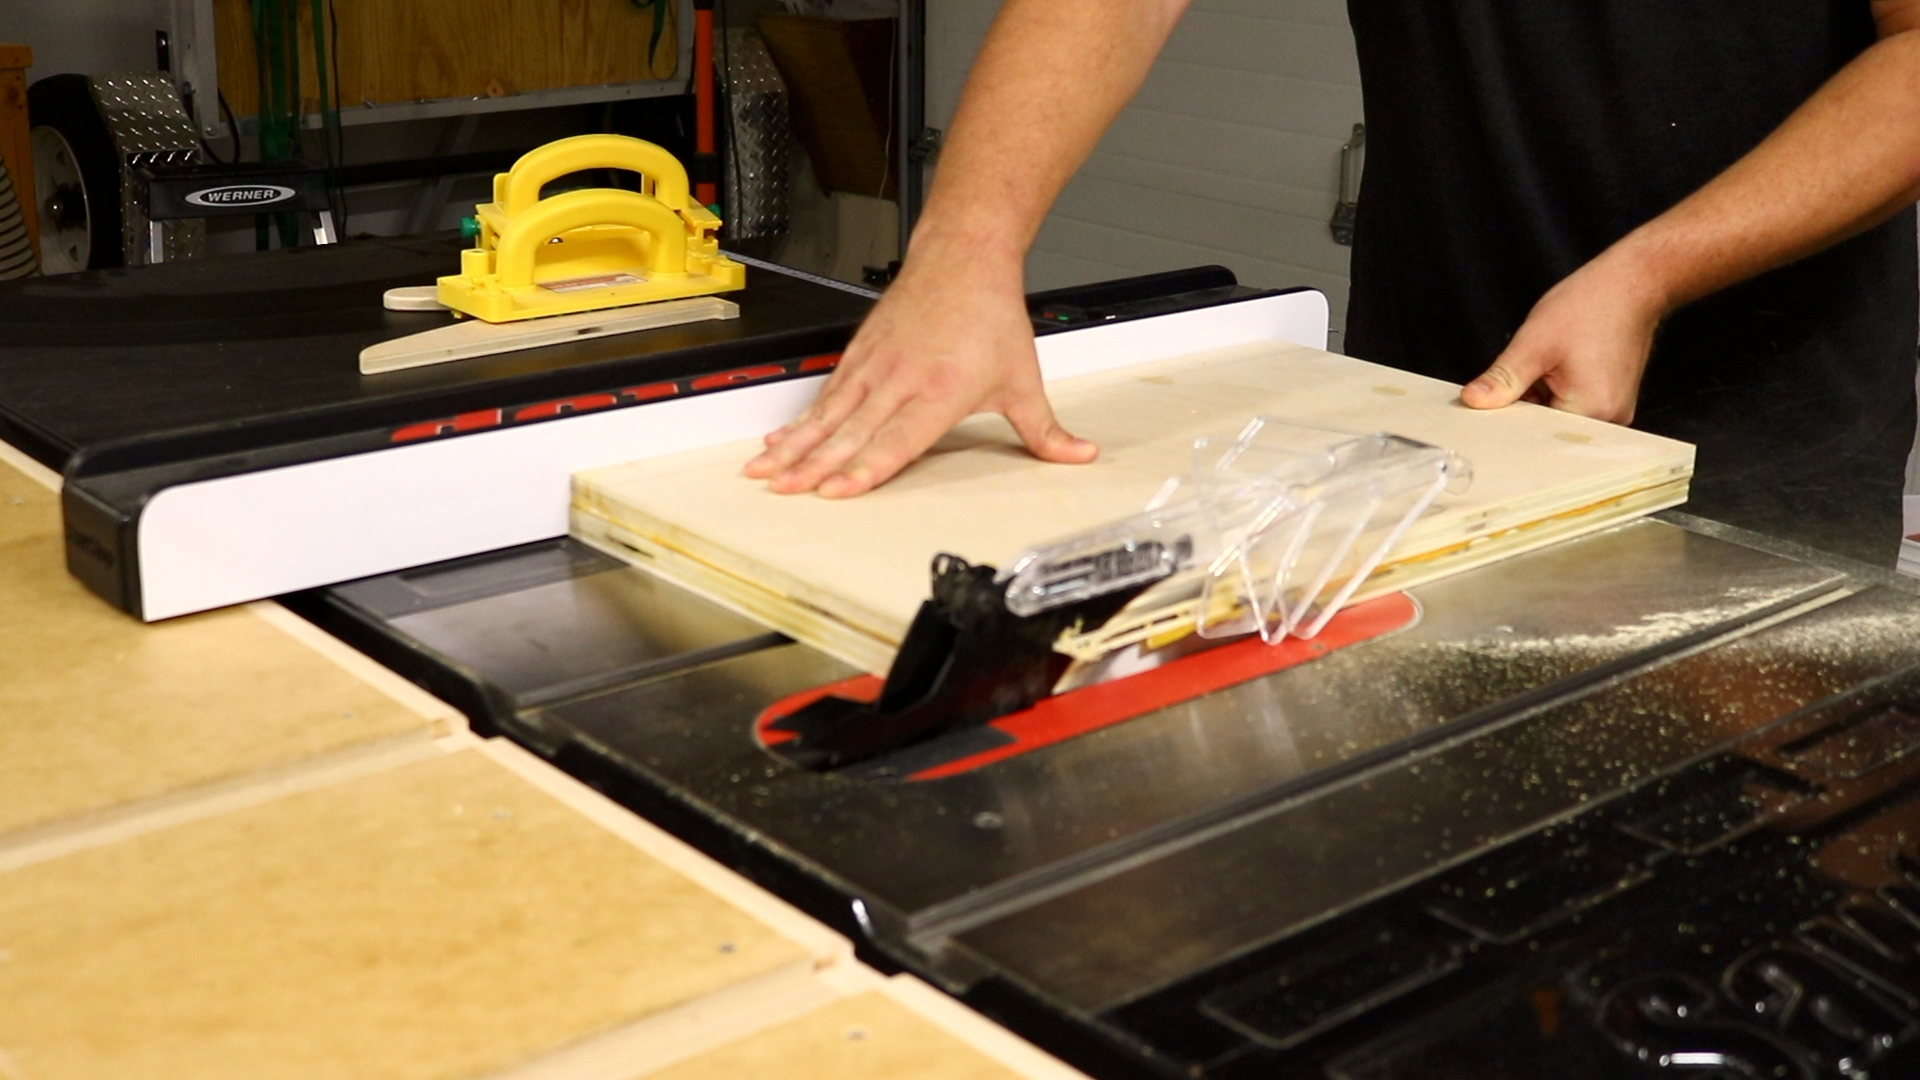
Cutting the Drill Press Table to Final Size
I trimmed one side of the top to get a good edge and then flipped it over and brought it to its final width.
I then took it to the miter saw where I did the same thing for the length.
To make the table sit about an inch behind the face of the column I cut out a notch on the table with my jigsaw. This would allow the fence to sit further back on the table which created more space on the top.
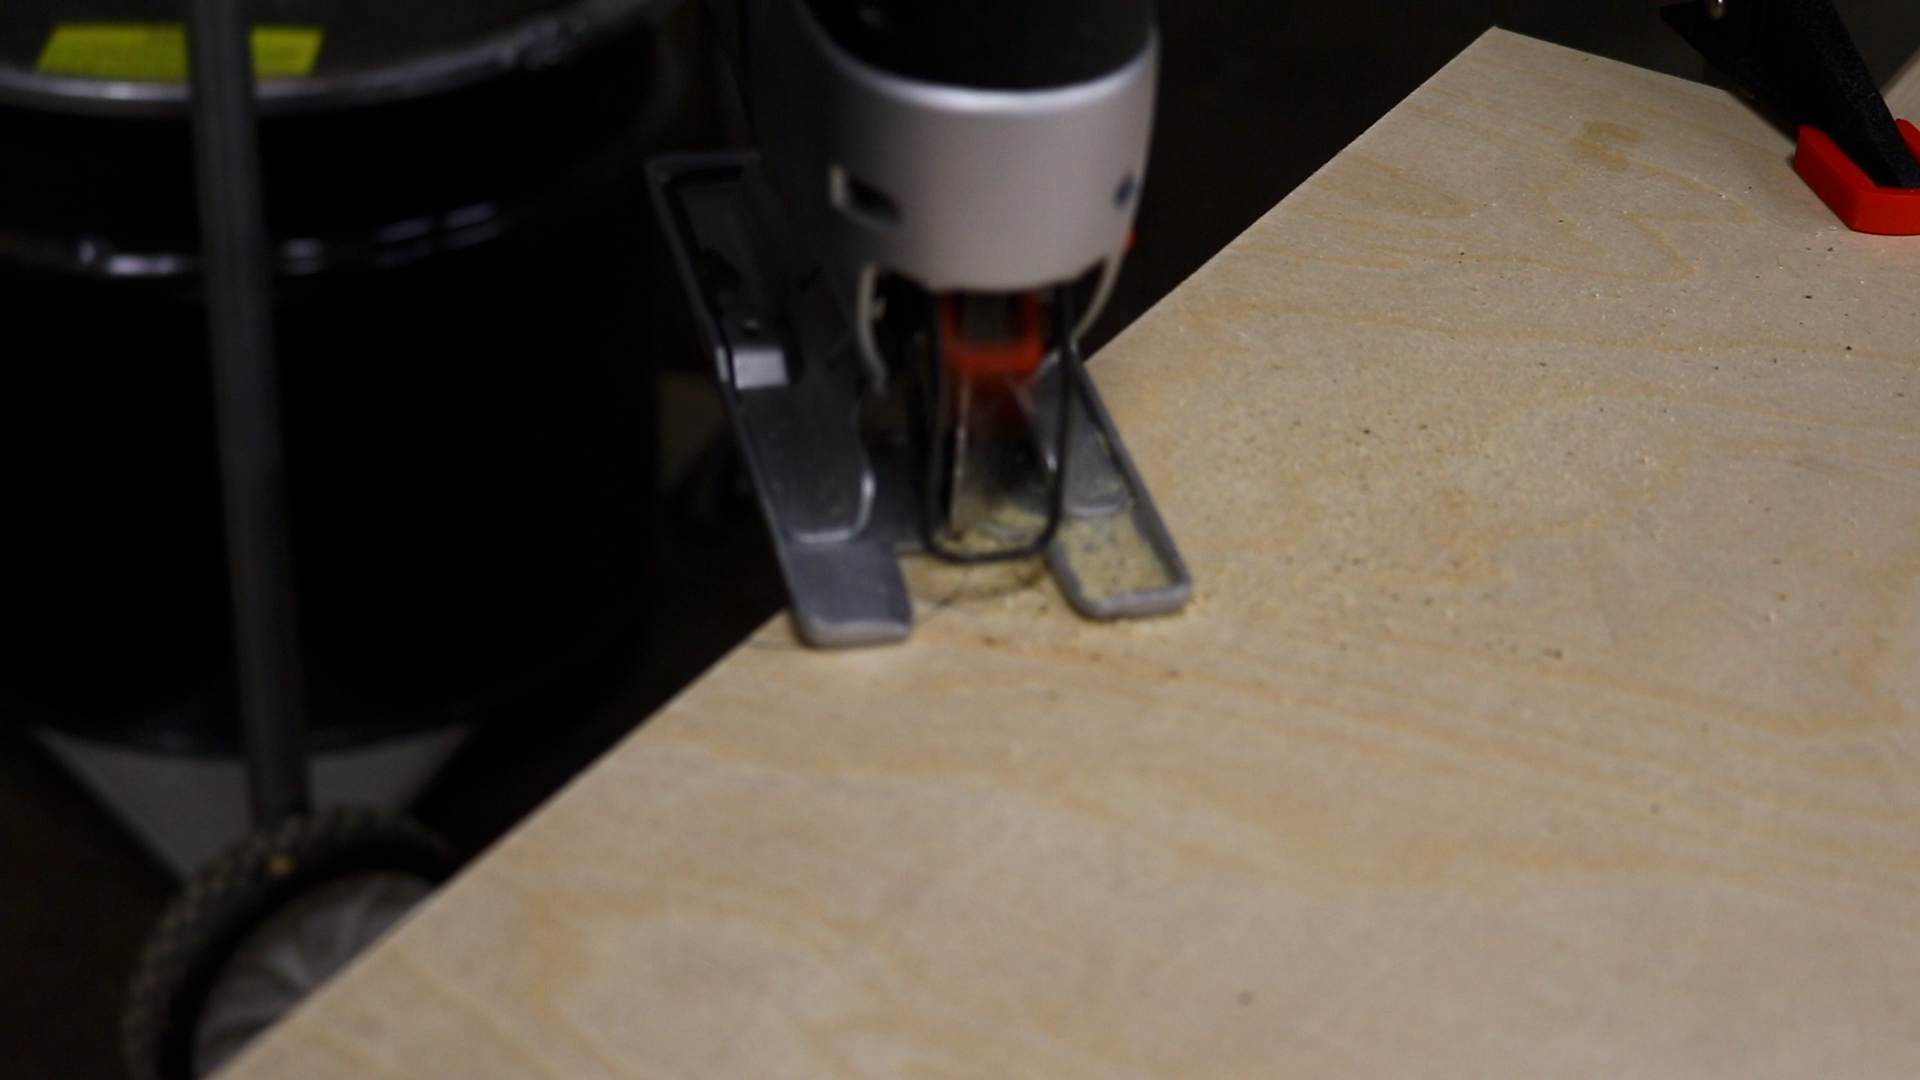
Adding the Post Notch
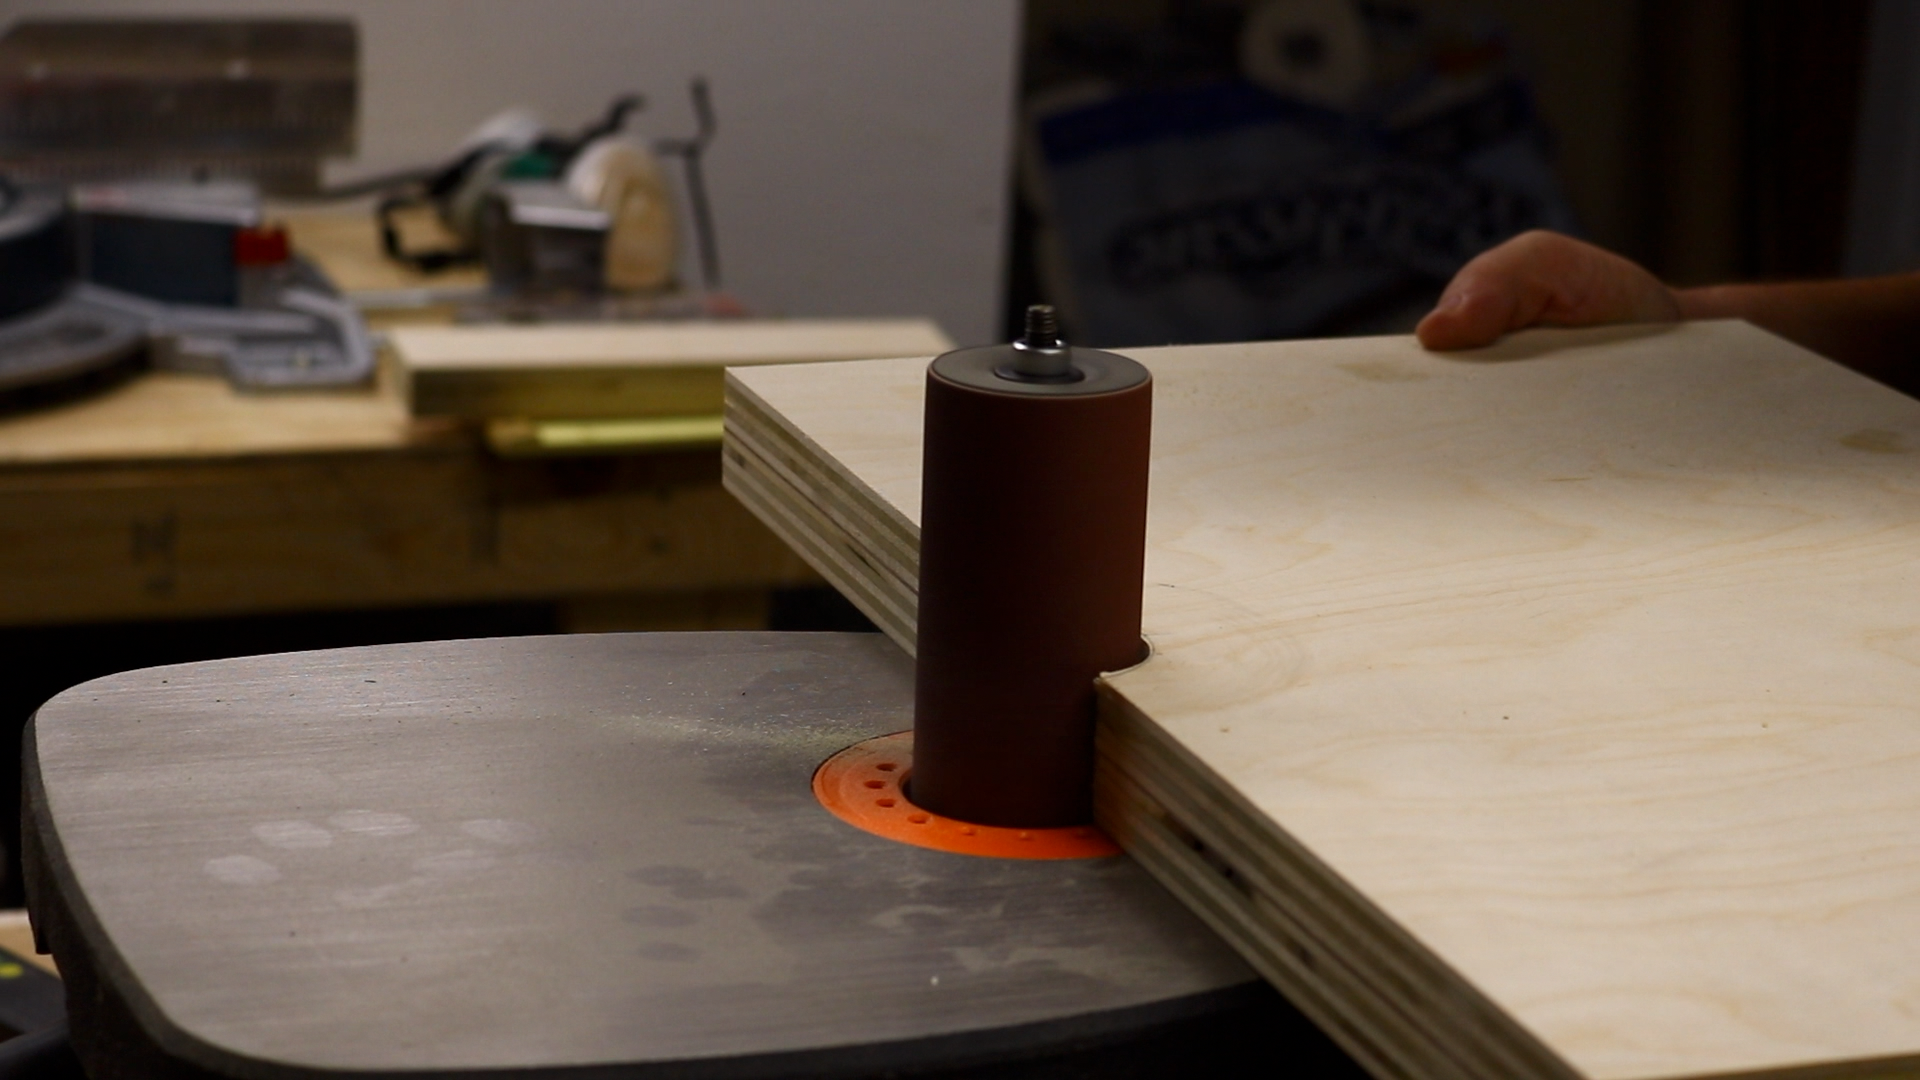
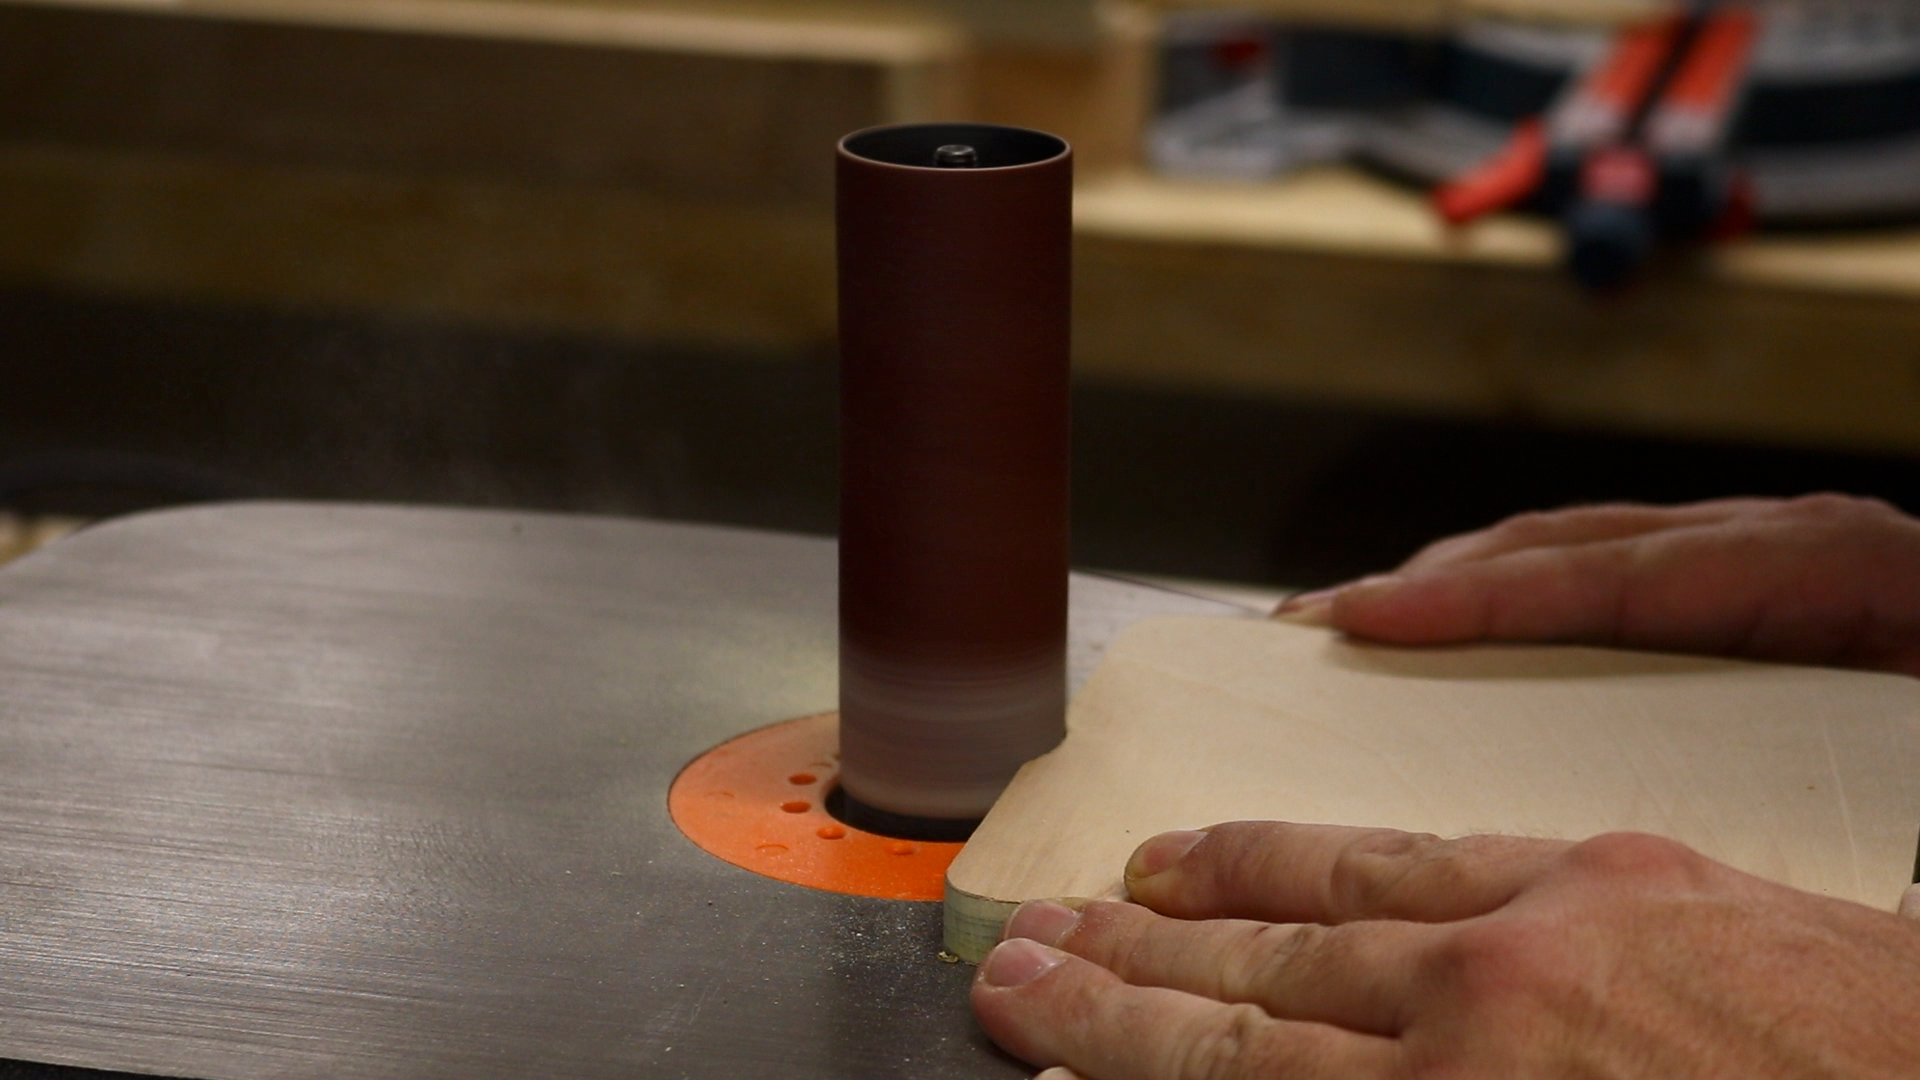
My jigsaw is not great so I made that cut really rough and then finished it up on the spindle sander.
The Fence
It was now time to start on the fence. I cut the two fence pieces to width on the table saw.
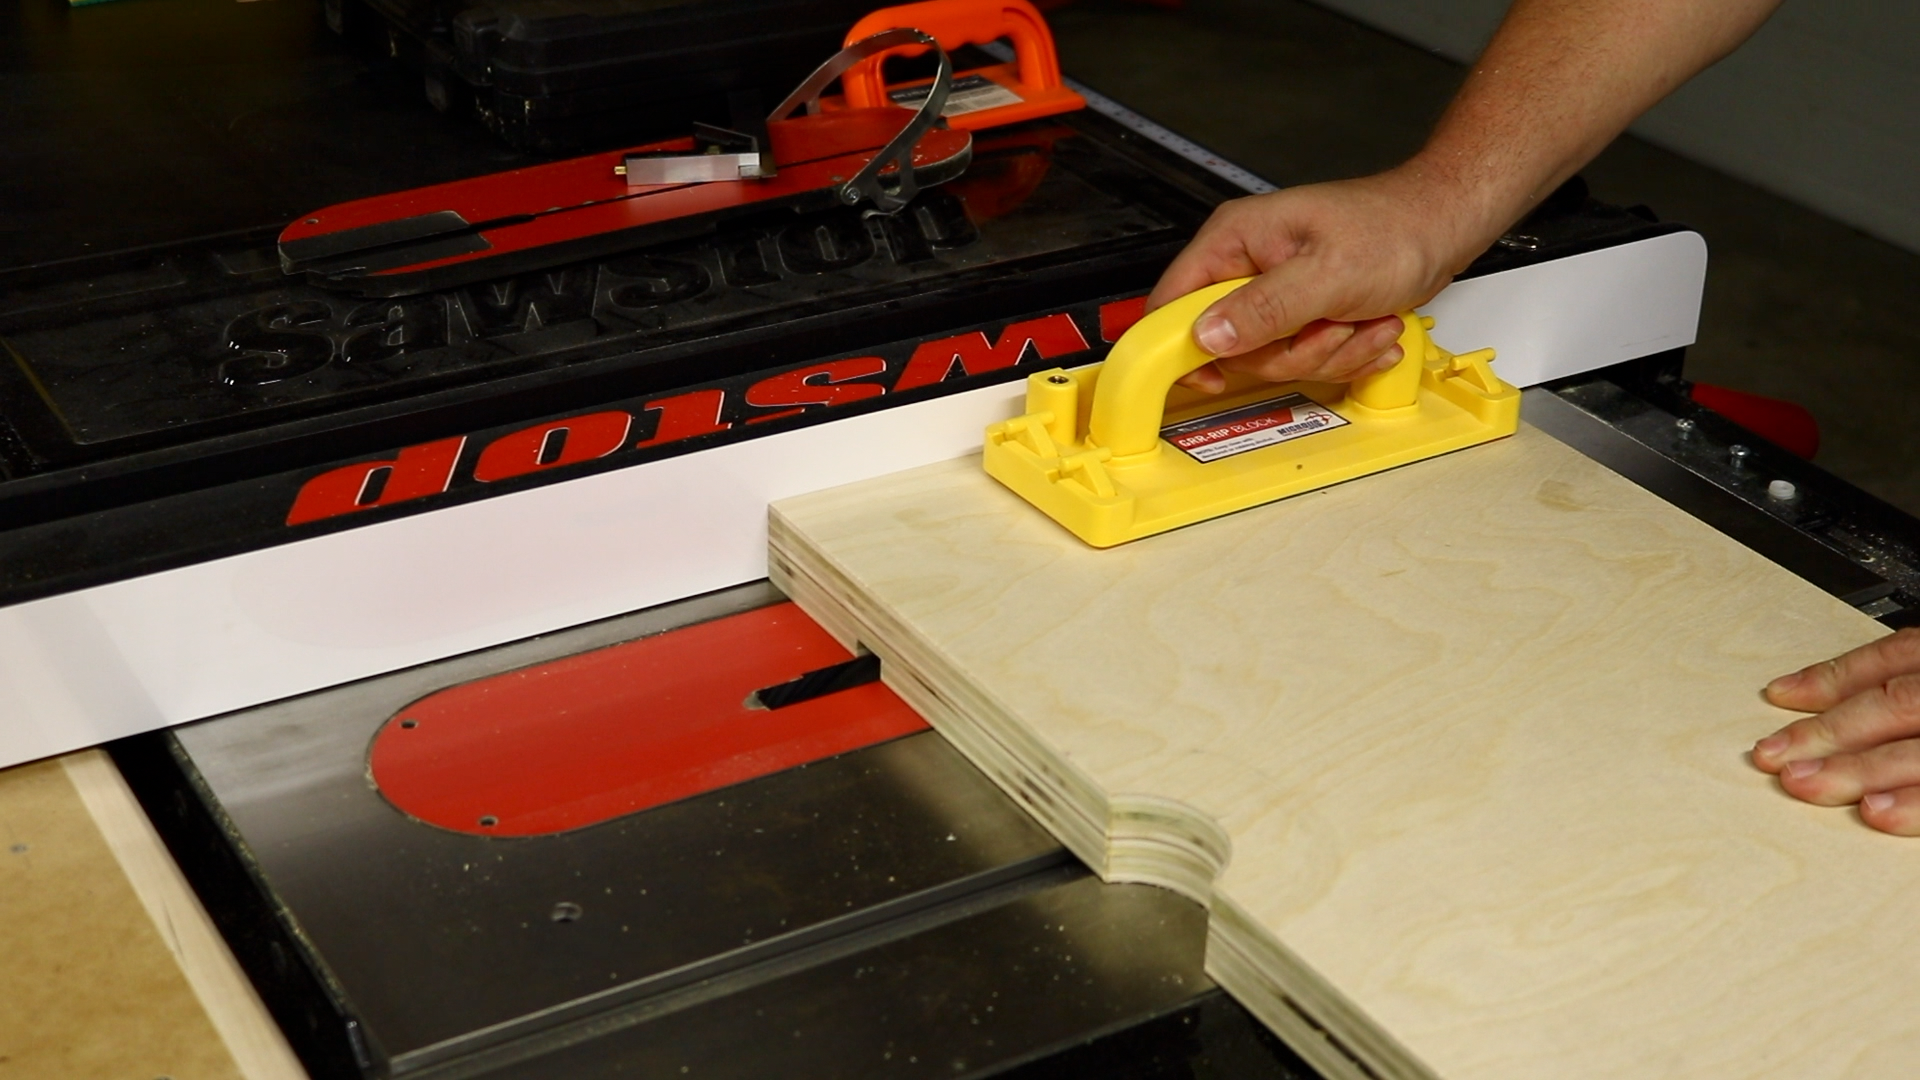
I then cut a 3/4″ x 3/8″ deep dado on the vertical piece of the fence. When you are cutting dados you want to make sure that you get a consistent depth along the entire cut. I do that by using my GRR-RIP push block. The GRR-RIP push block was not used the first time and I did not get a consistent depth and the t track did not sit in the dado very well and I had to go back and cut it again.
Two dados were cut the same size on the top.
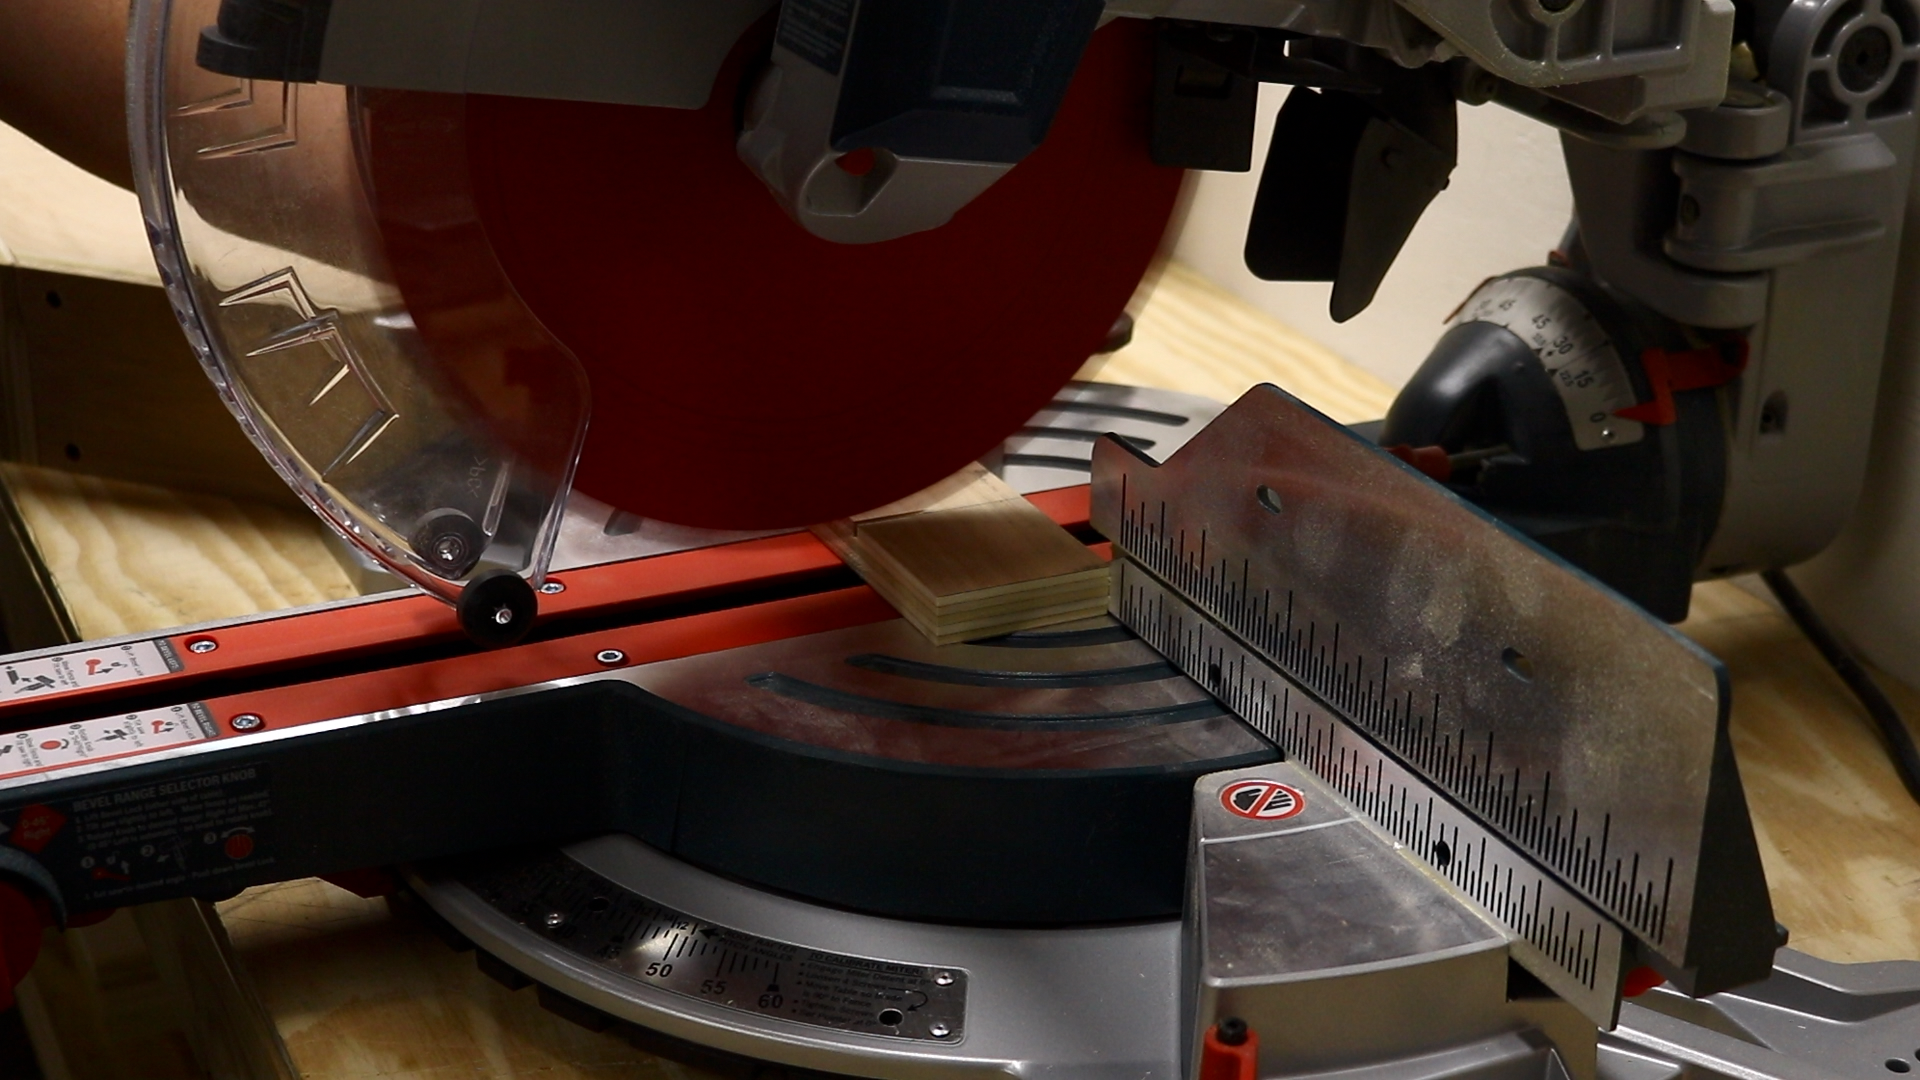
I then took the fence pieces to the miter saw to bring them to their final length.
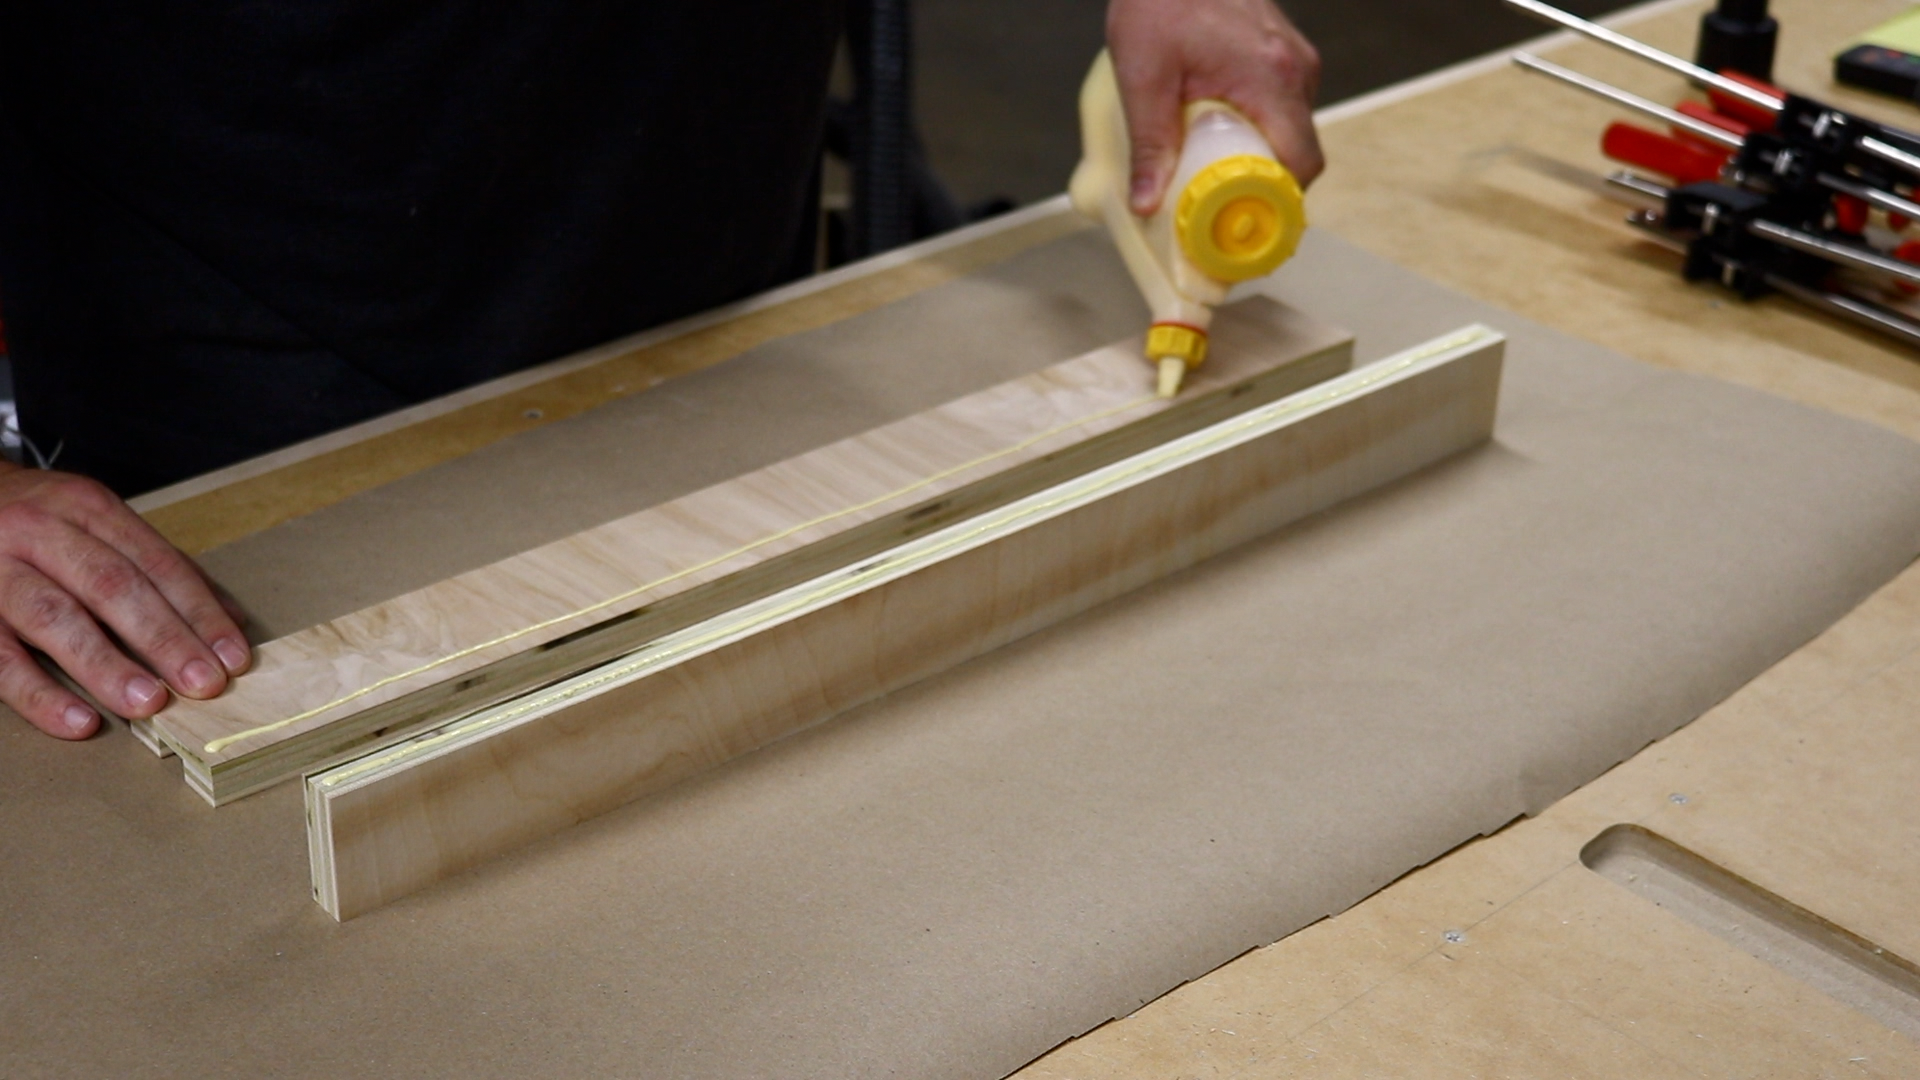
I could now glue up the fence.
The fence also needed a notch for the column.
Adapting on the Fly
Since the table is now sitting back further, the crank for the table elevation hits the table so I needed to cut out a part of the underside of the table to fix this. Really examine your table and its relation to the hand crank. Some drill presses have really large cranks which can make this part a little difficult. As long as you figure it out beforehand you should be okay. I made a change in my design after starting the build so this was unexpected. Luckily it was an easy fix.
Trimming Out the Drill Press Table
It was now time to start cutting the trim pieces. I used maple for my trim as I had some scraps lying around. Just about any hardwood would work for the trim.
When you glue on the trim pieces you want to have the table upside down so you can get the top of the table and the top of the trim nice and flush.

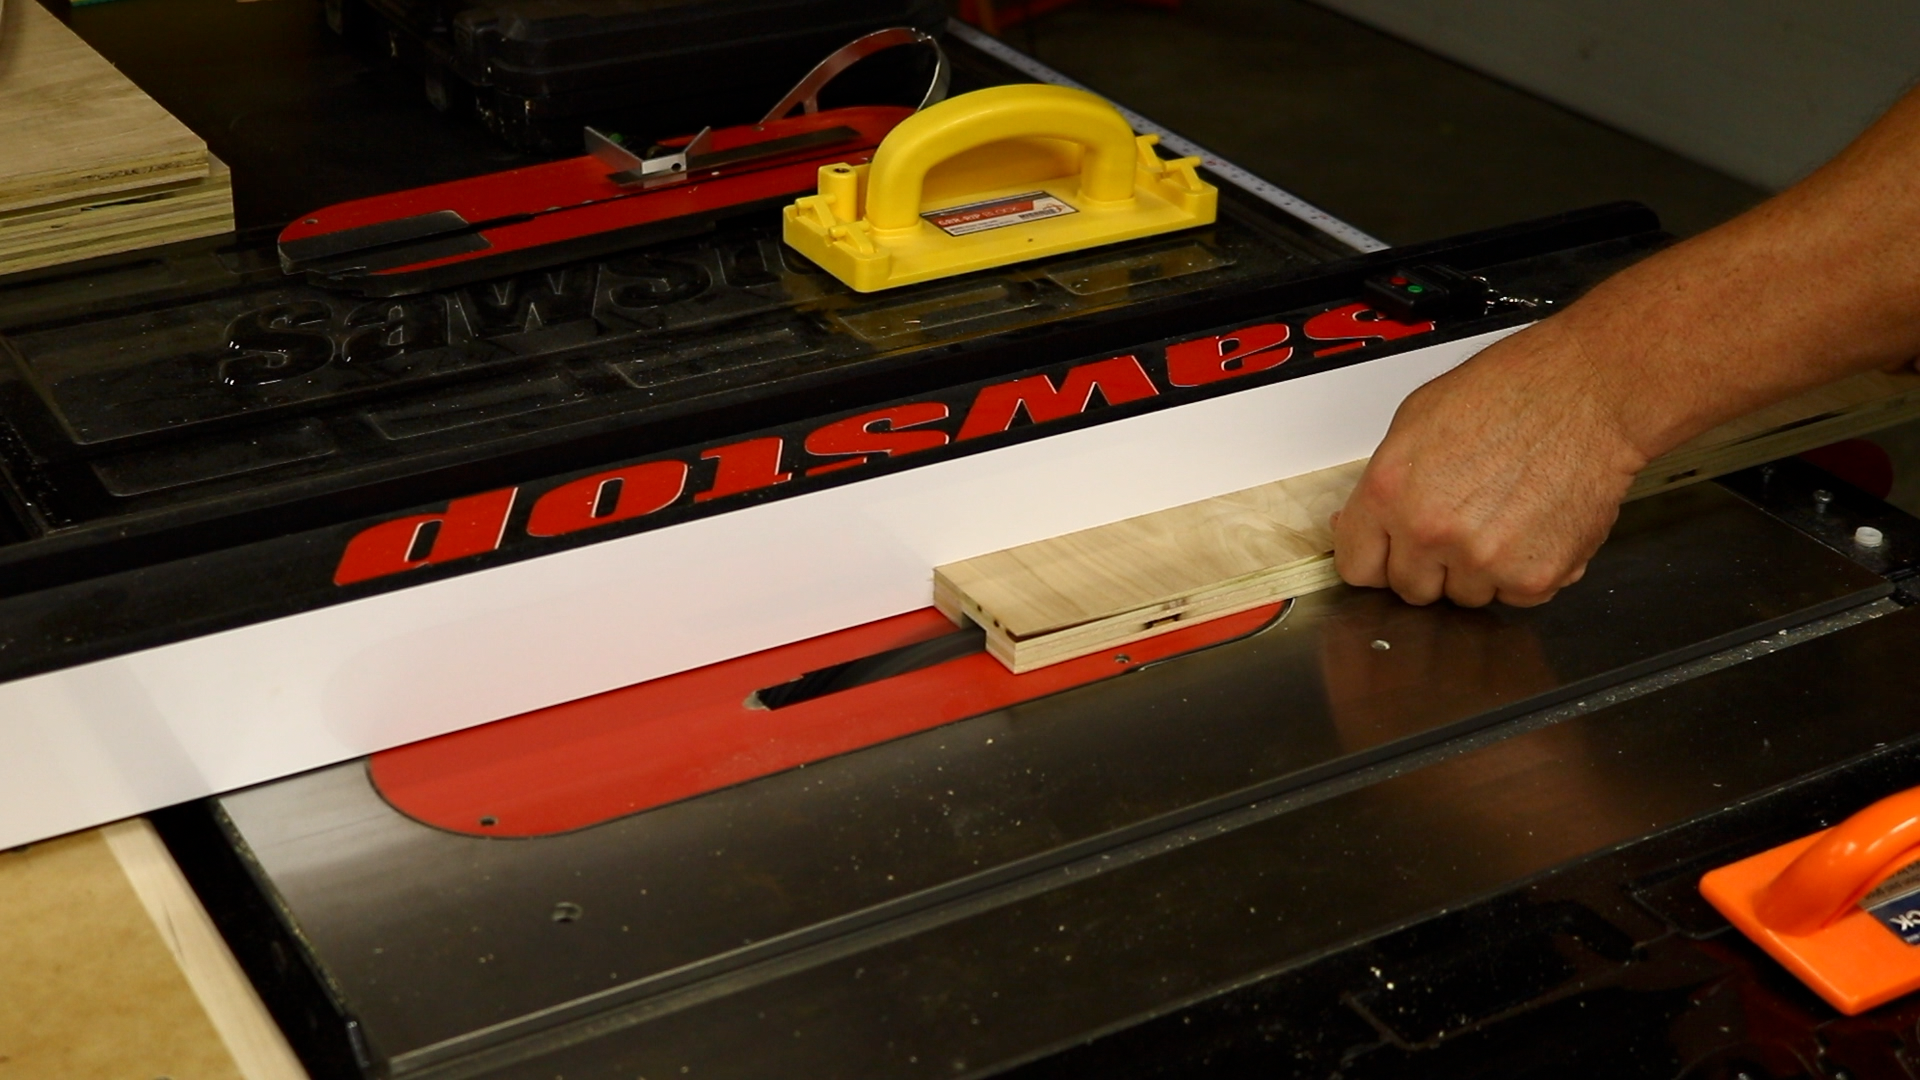
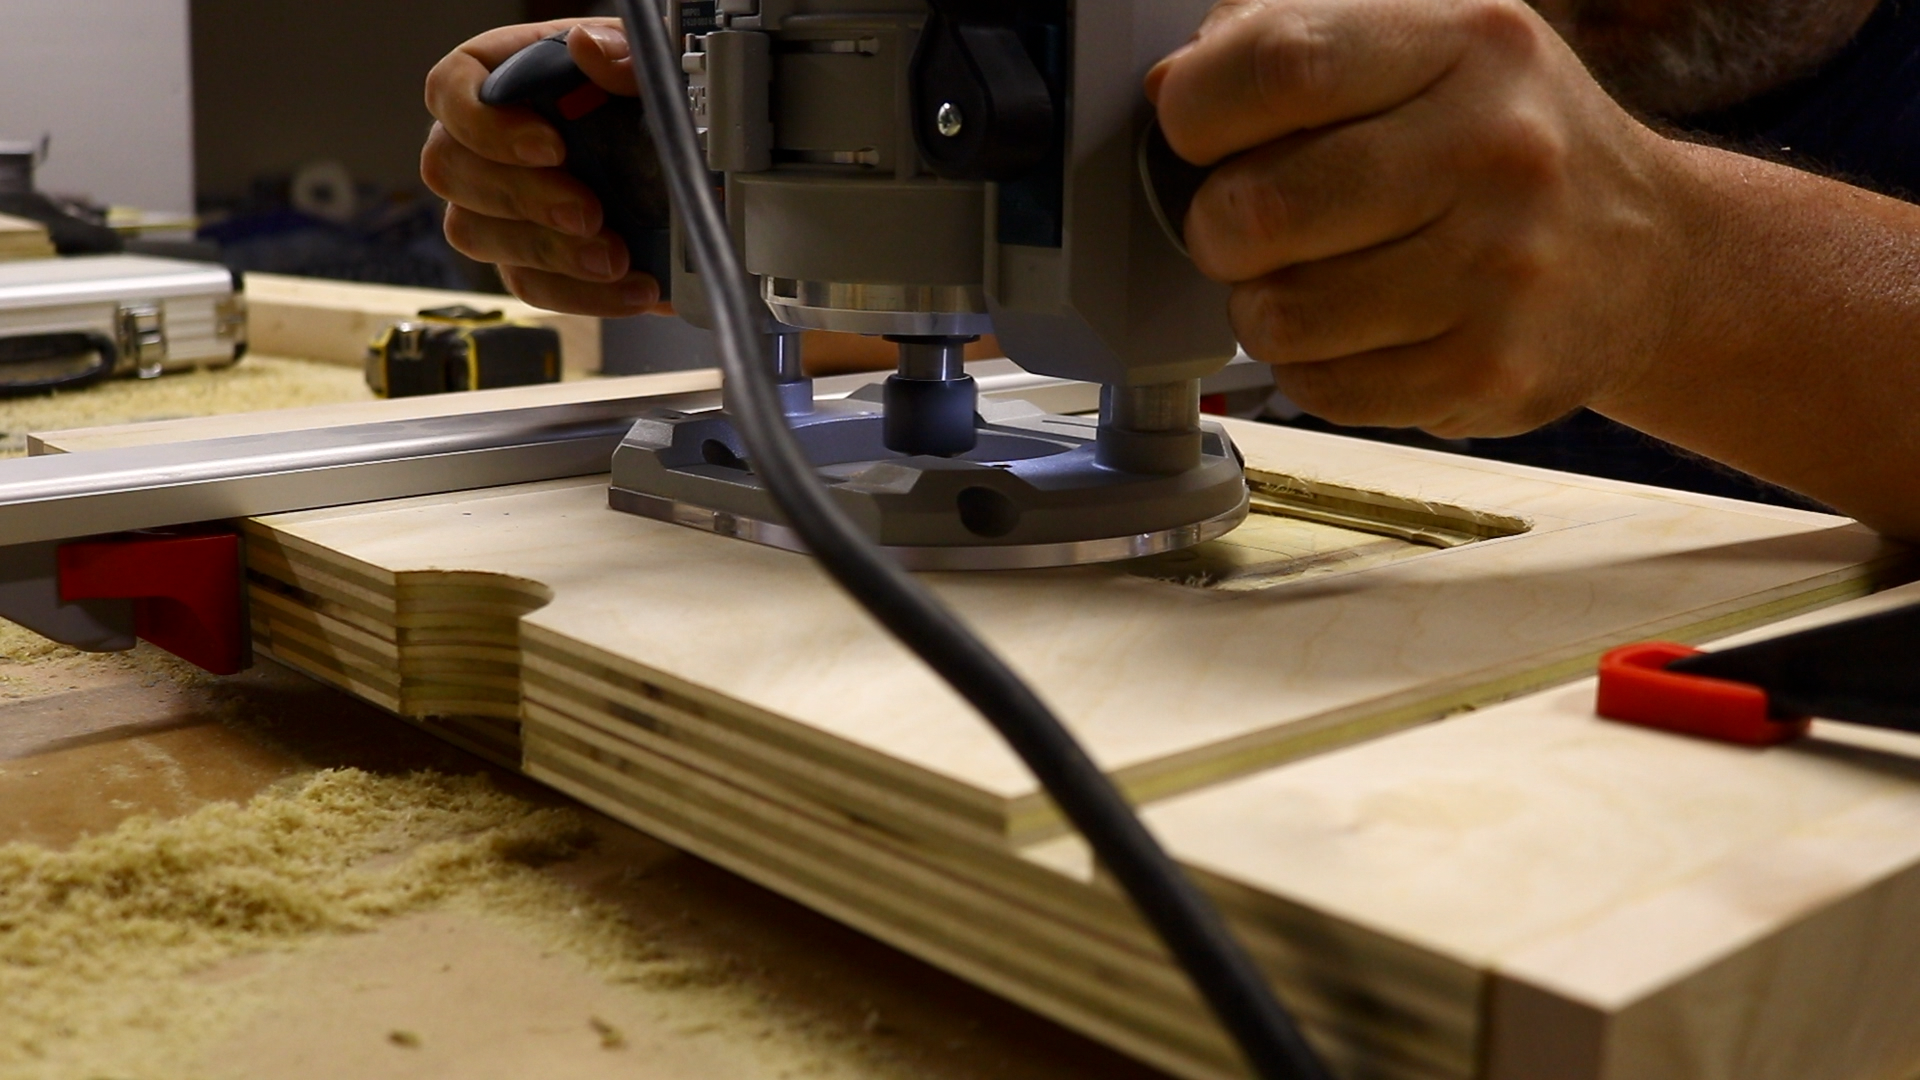
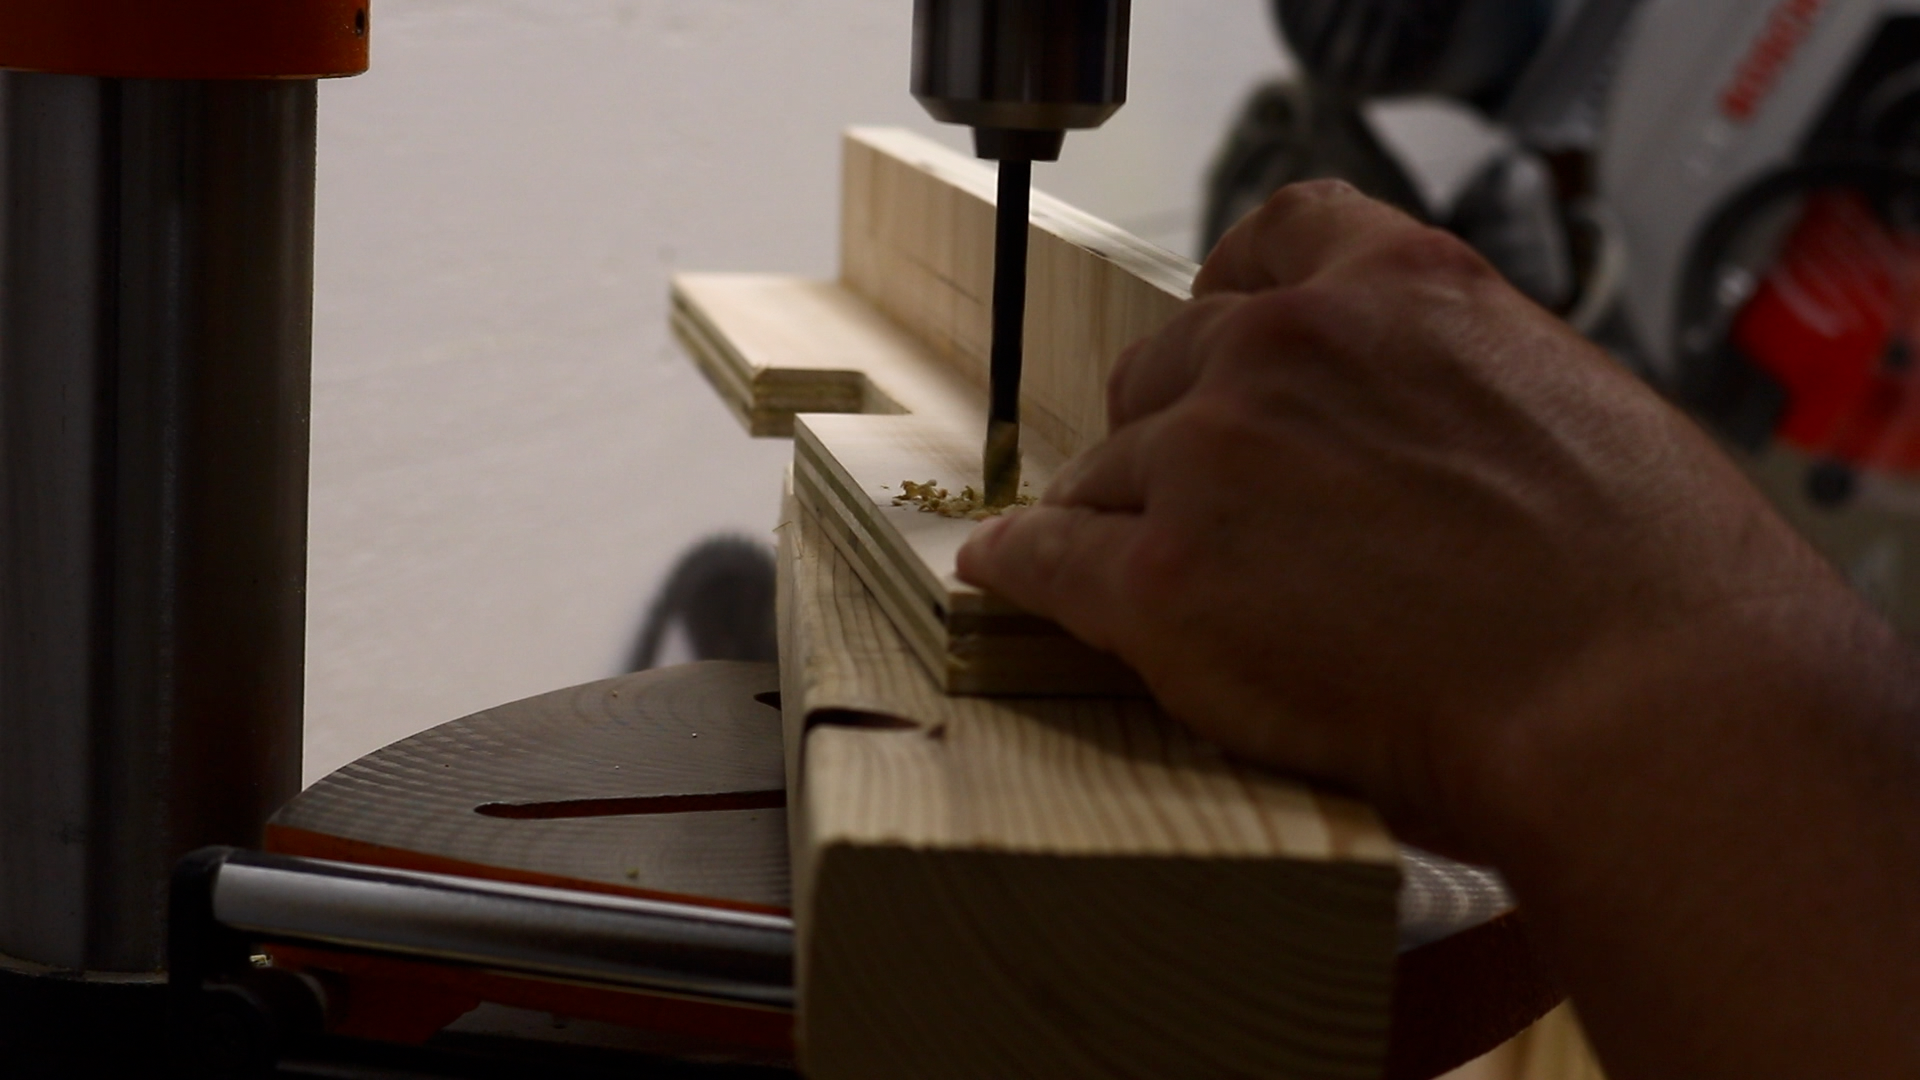
Making the Zero Clearance Inserts
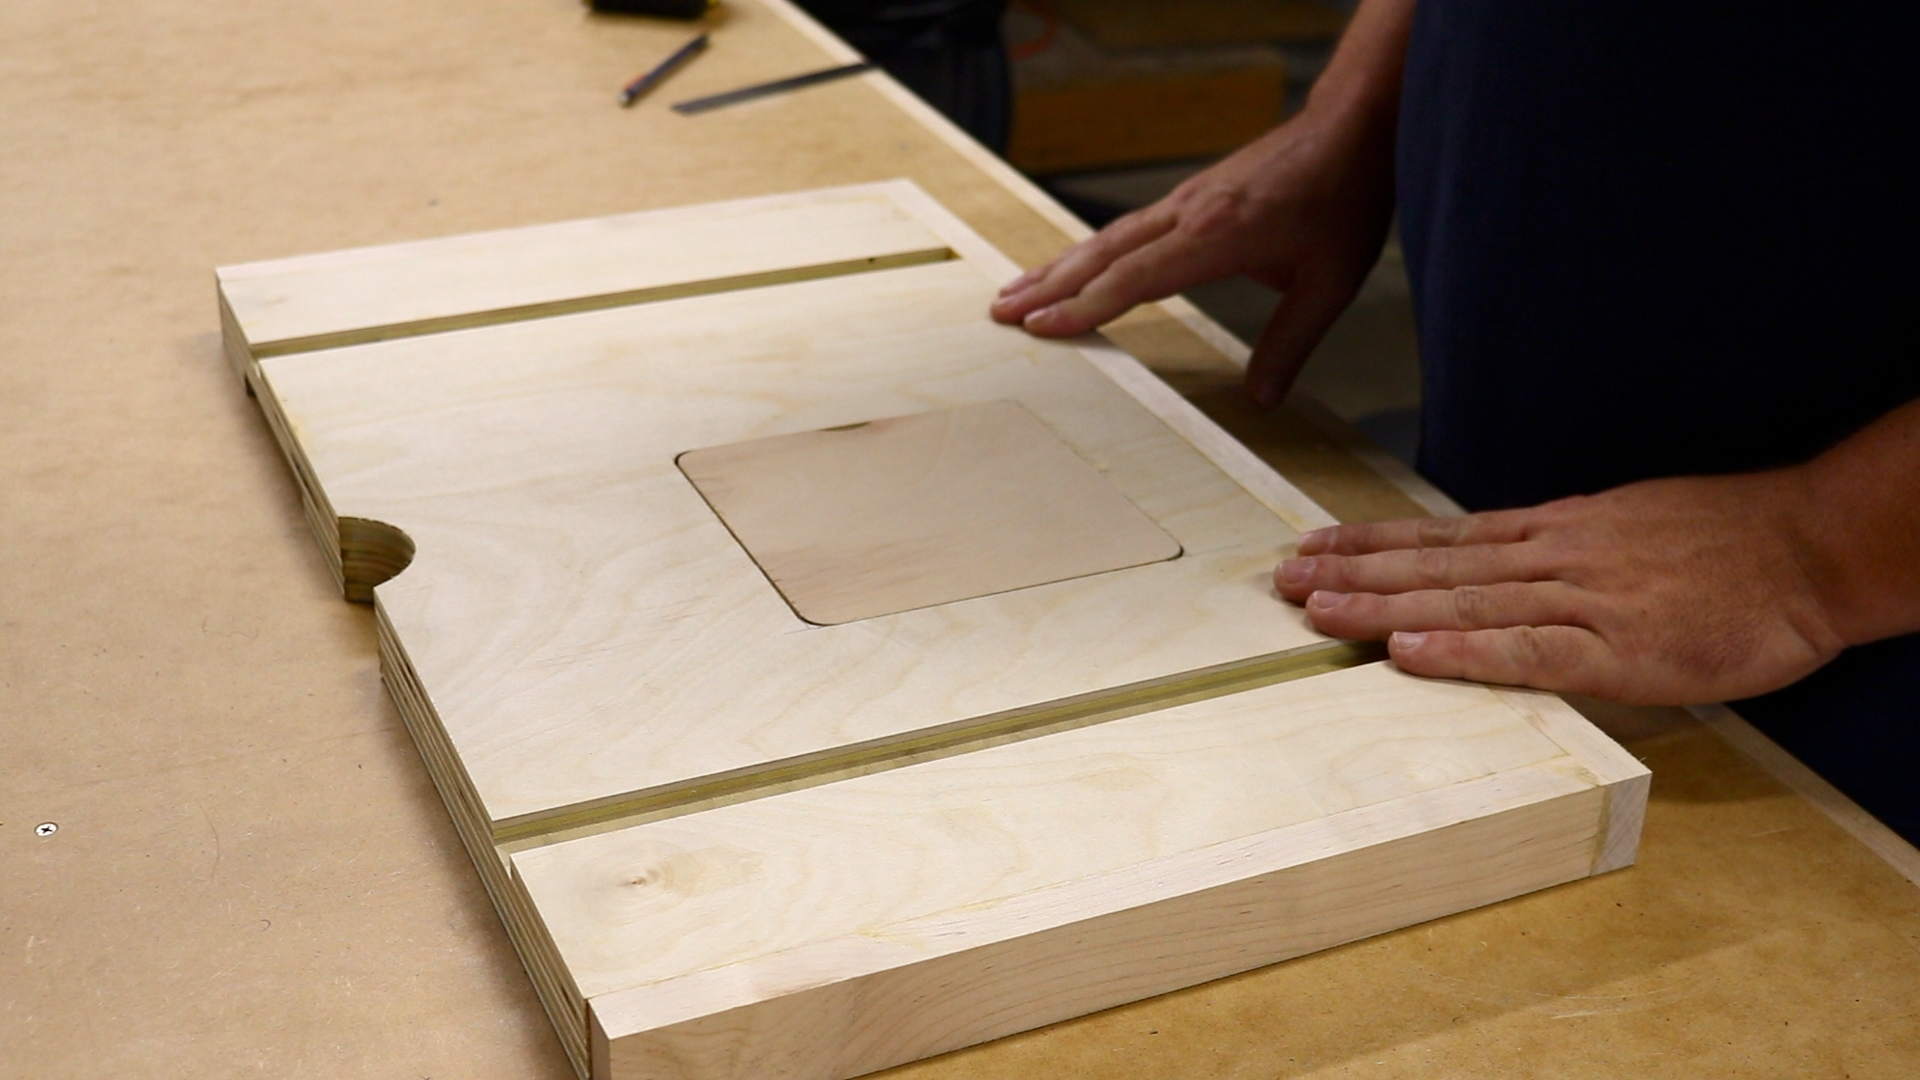
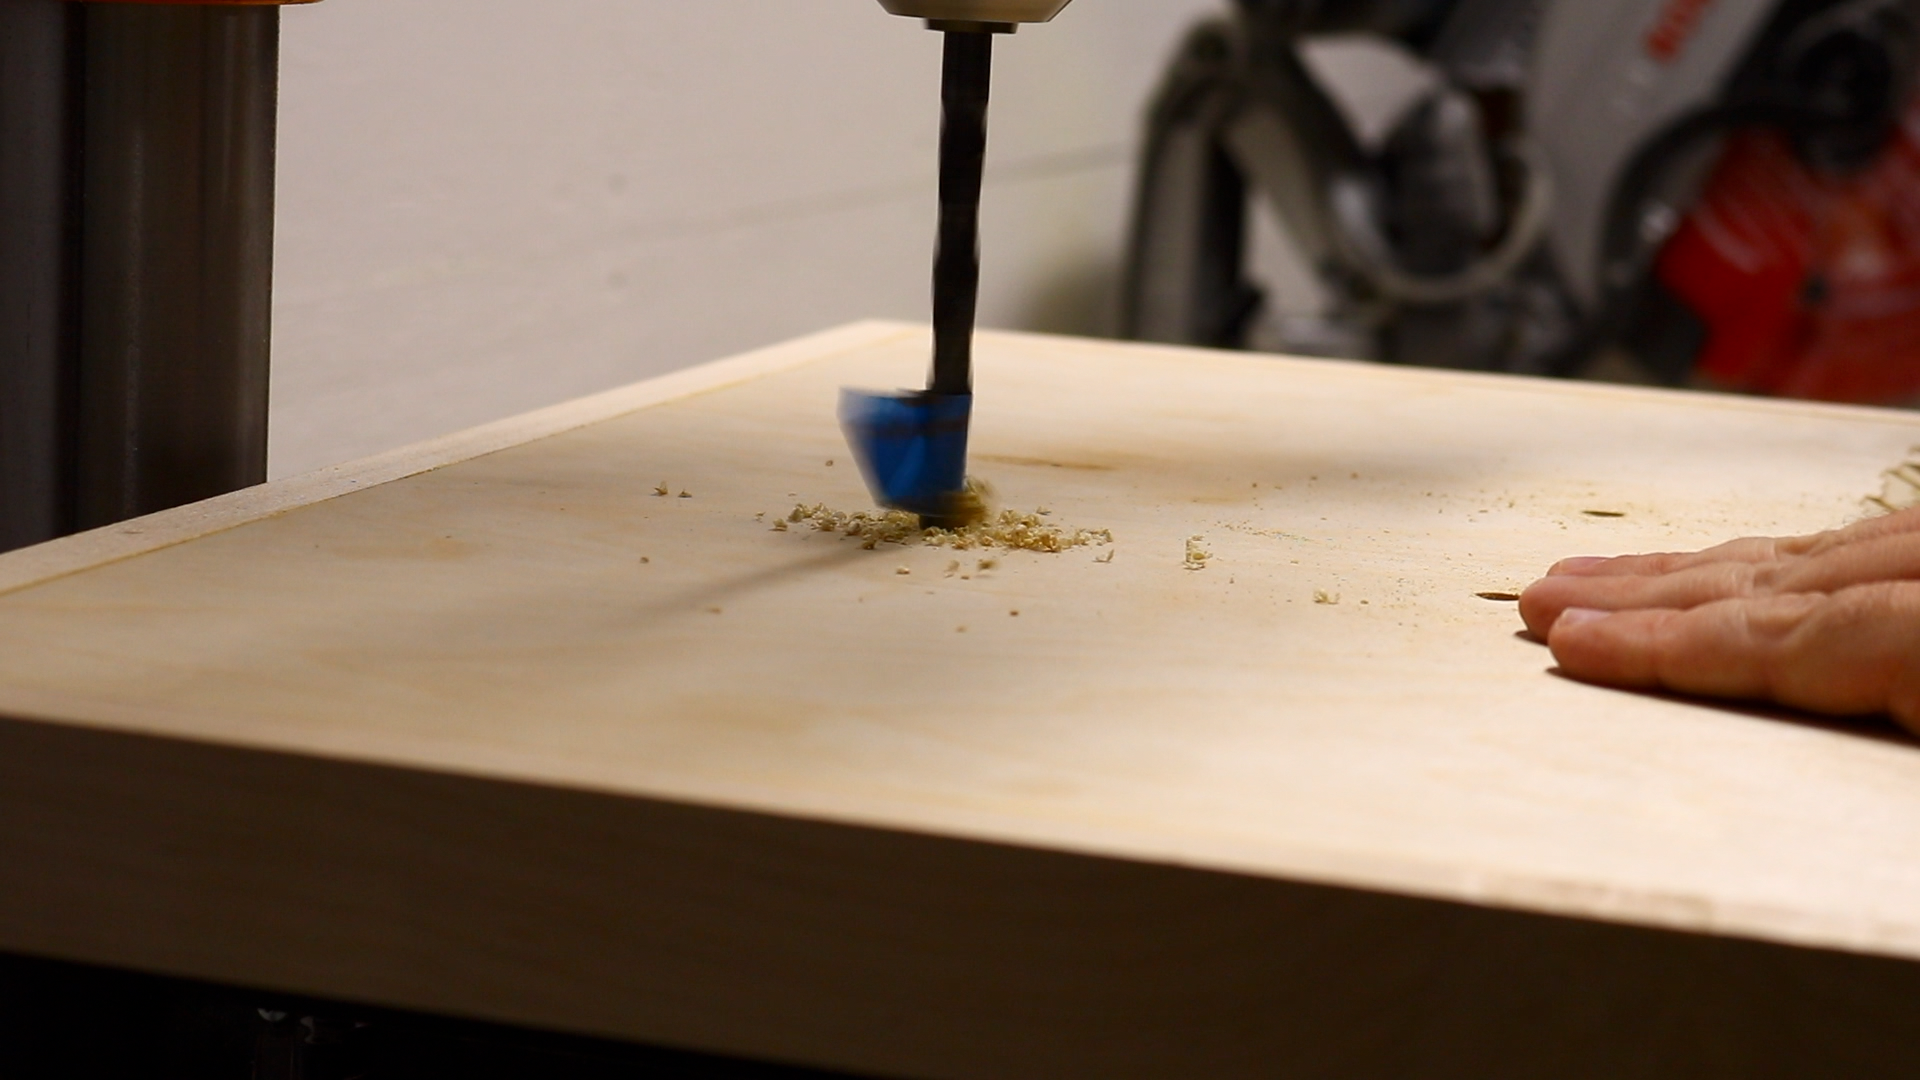
We want to make sure we don’t destroy our table every time we drill a hole. The best way to do this is to make disposable inserts. I am making my inserts 4″ x 4″. To make the inserts work correctly they need to be located on the table so you can rotate the insert after using them a few times. This means offsetting them a bit. Since my inserts are 4″ x 4″ I drilled a hole in the center of the table and then drew the insert location so that the hole was in the middle of the upper right quadrant of the insert. Now when you are ready to rotate the insert the bottom right quadrant rotates up and into position.

I hogged out the majority of the insert material freehand and then clamped down a straight edge to precisely finish the outline.
I cut a bunch of 4″ x 4″ inserts and then rounded the corners on my disc sander.
Using the spindle sander I could easy make some finger holes to easily remove the inserts.
The finished insert in its place.
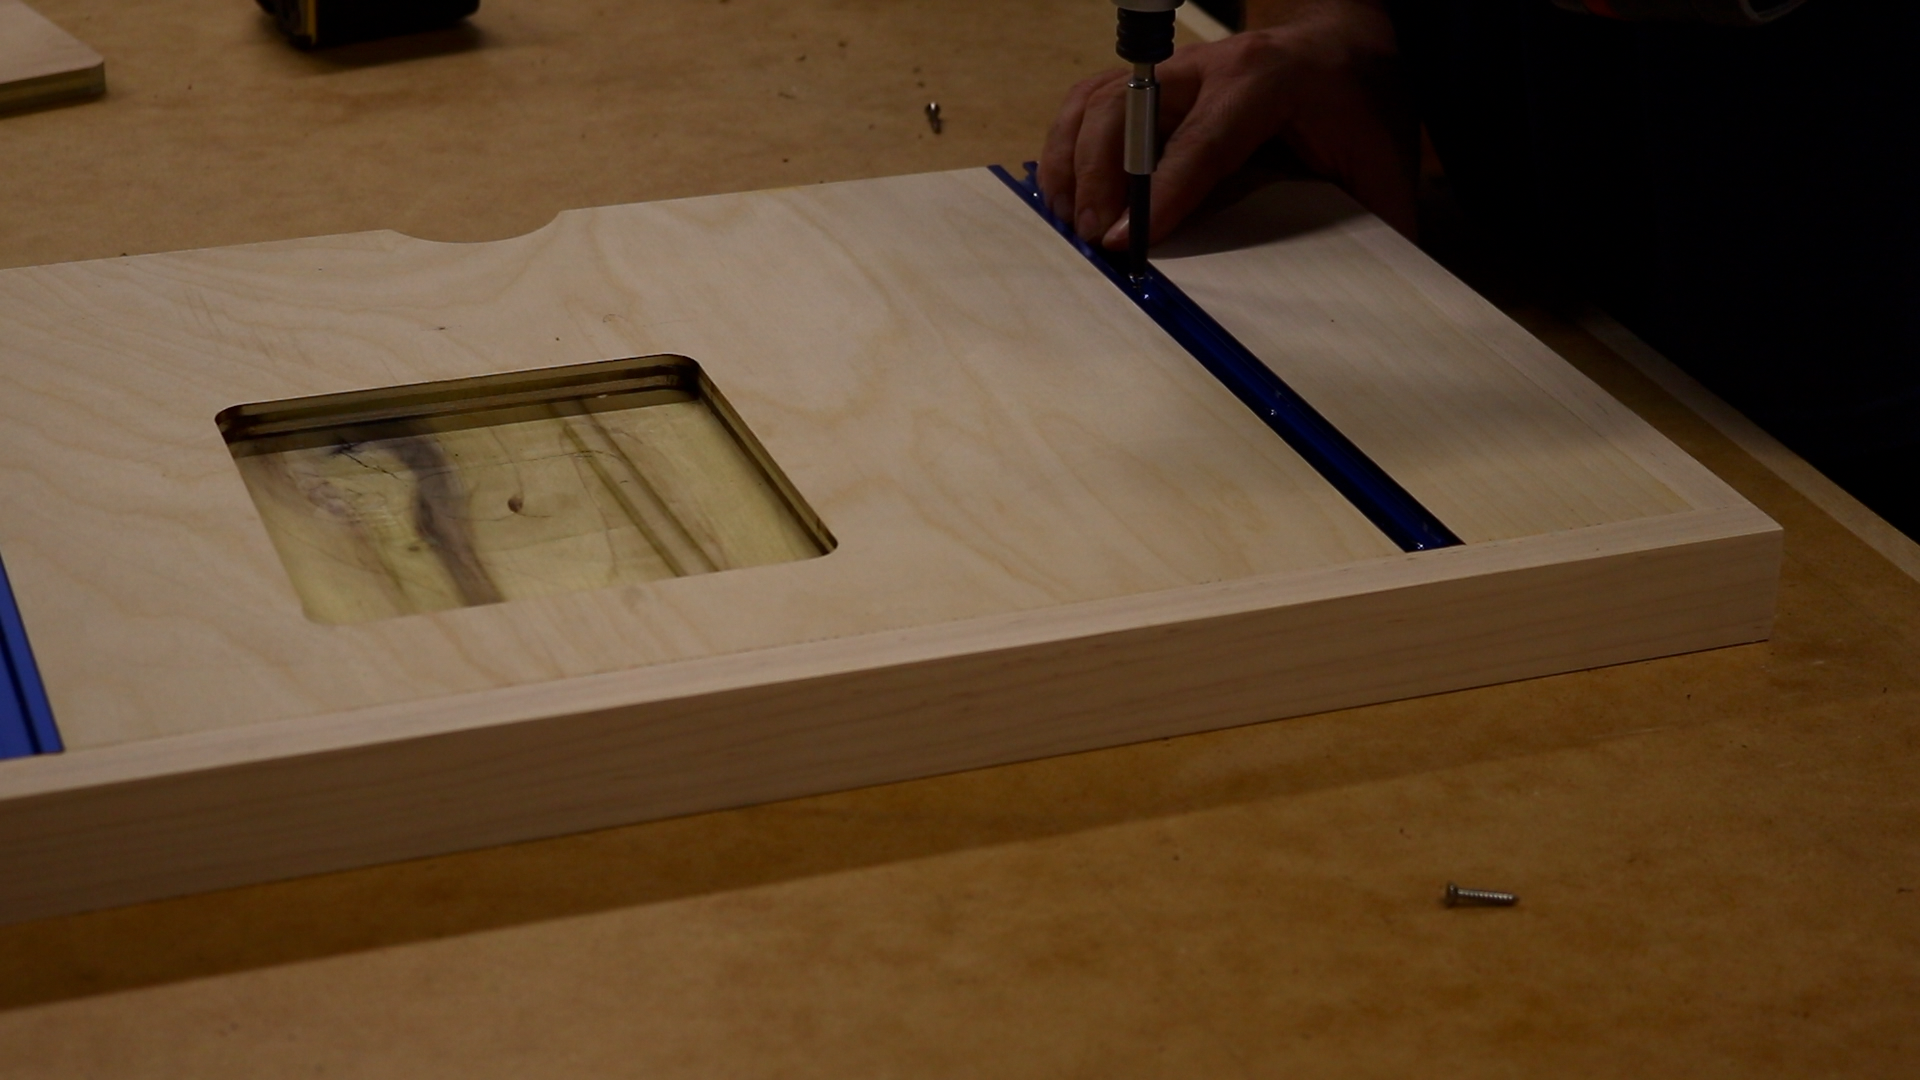
Adding the T Tracks
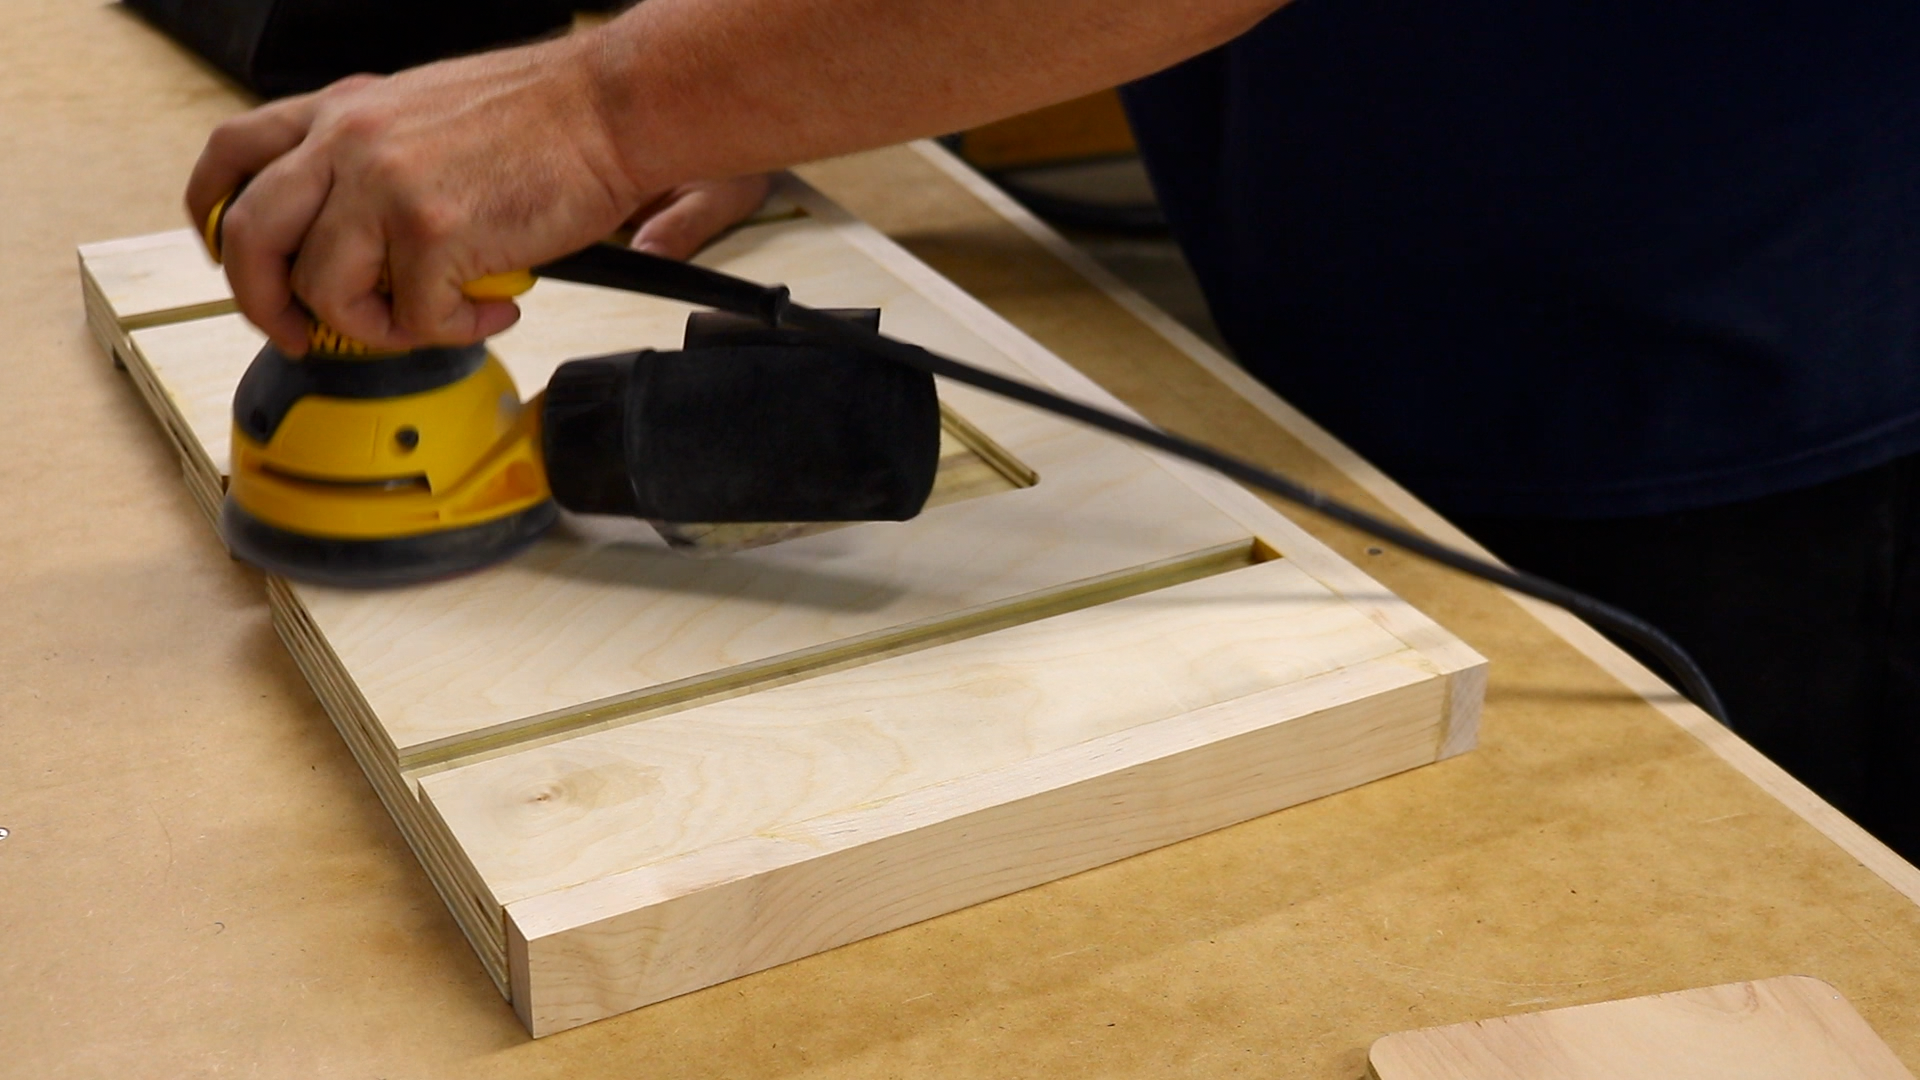
I hit the table and fence with 120 and then 220 sandpaper using my random orbital sander.
To attach the fence I drilled two 1/4″ holes on the bottom part of the fence in line with the t track.
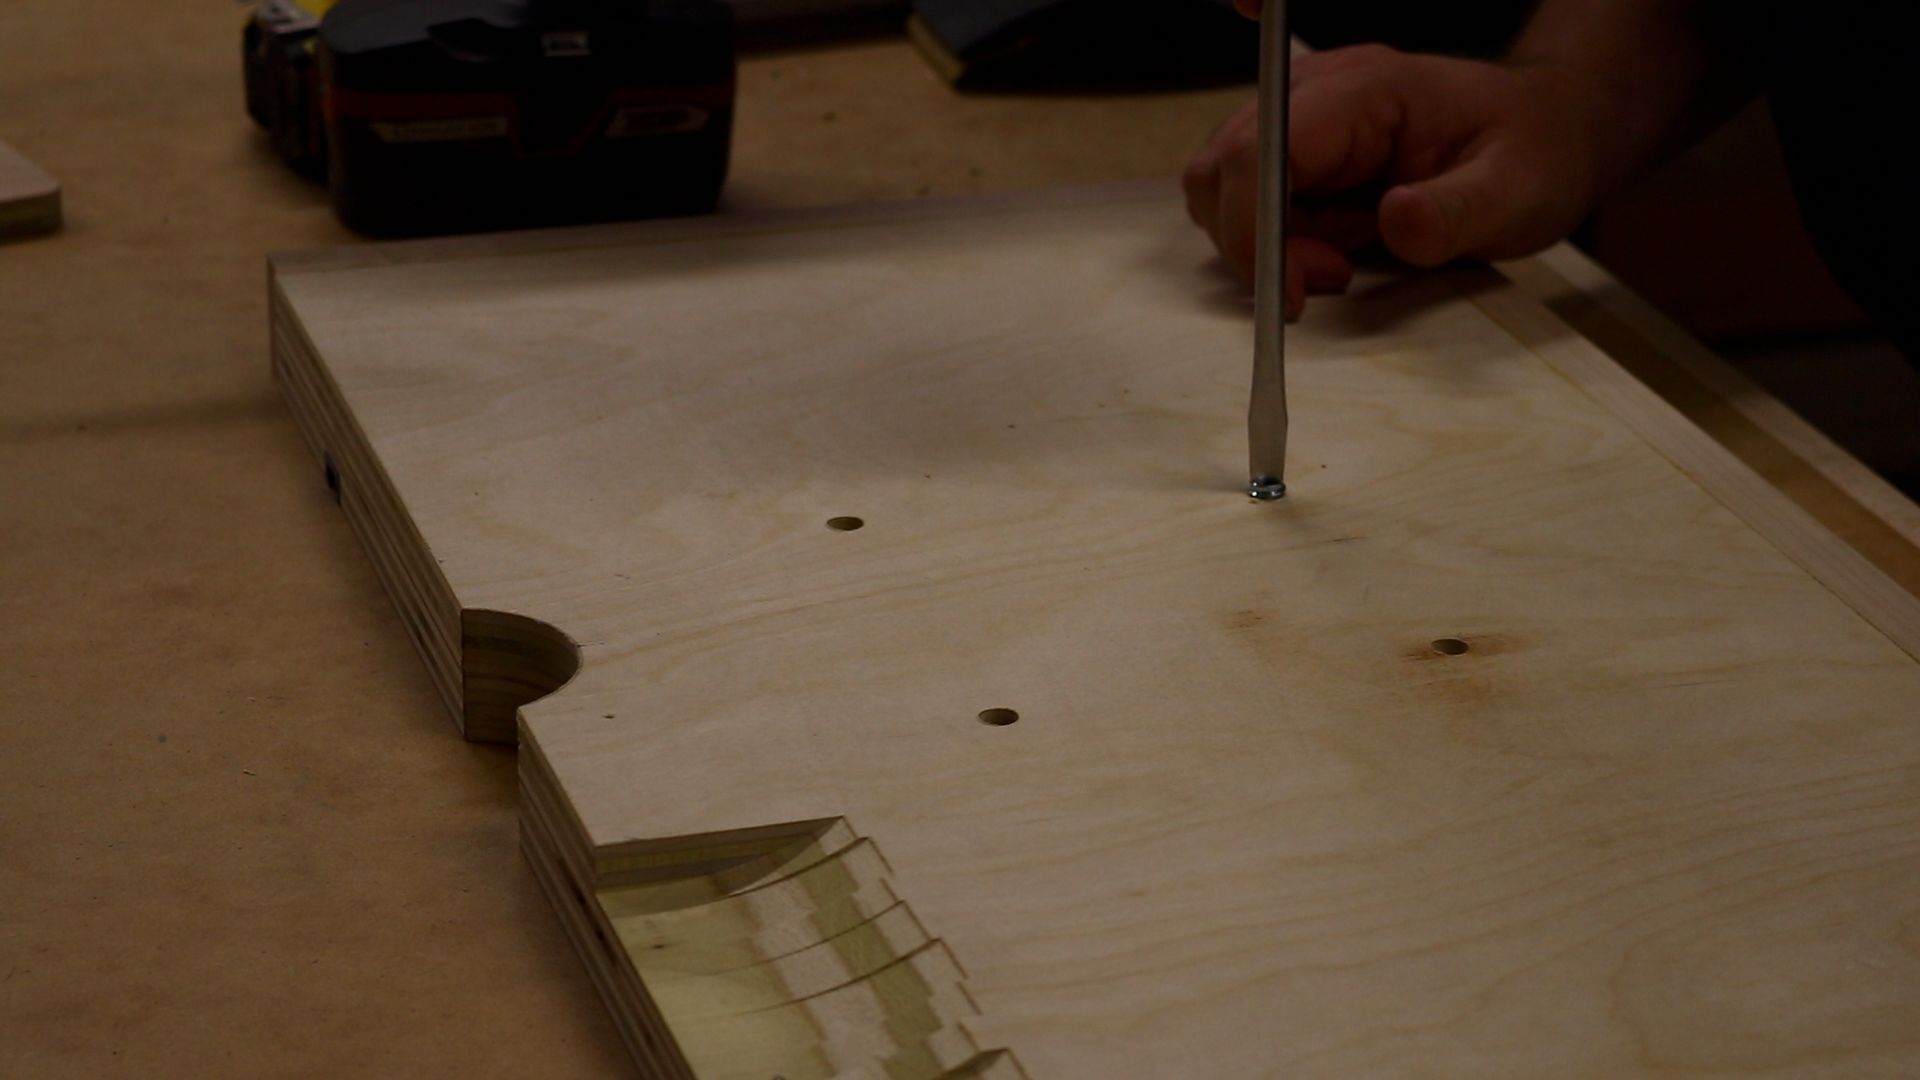
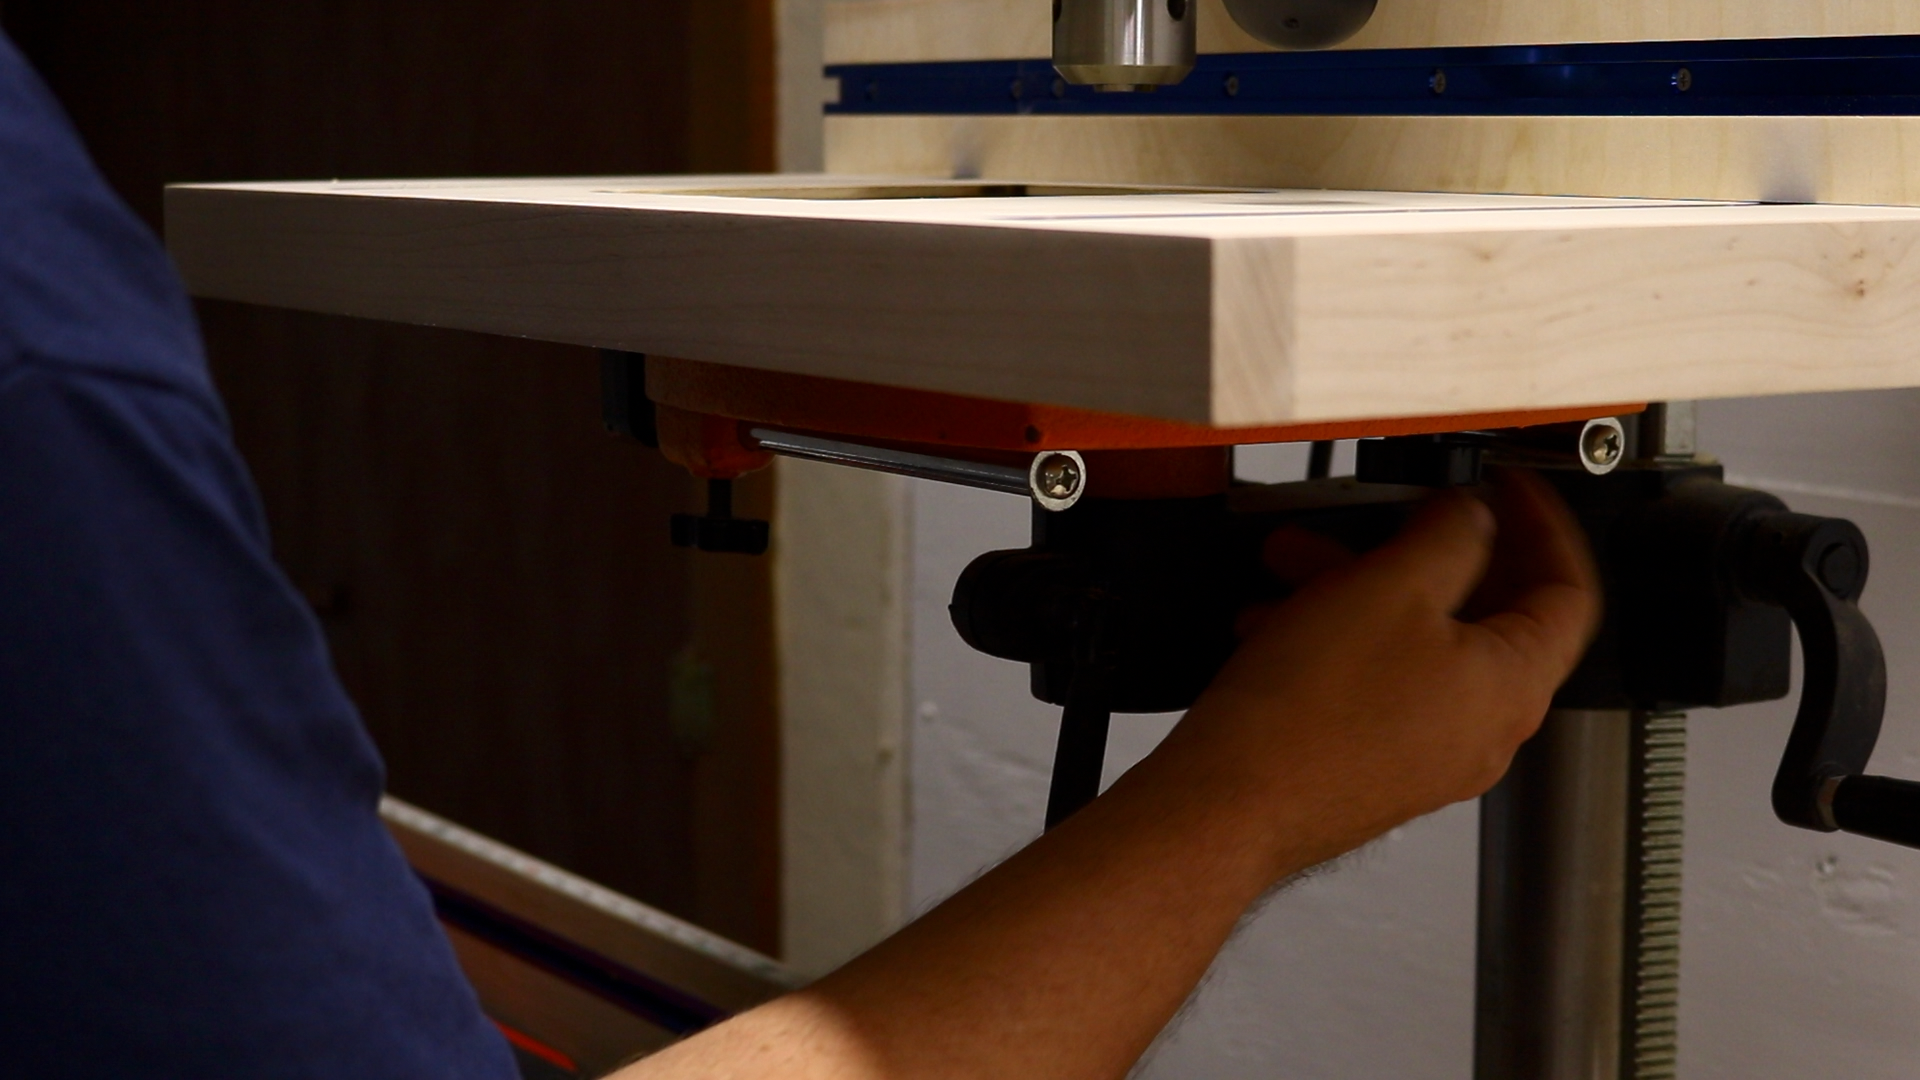
To attach the table to the cast iron table I decided to use threaded inserts in the bottom of the table. I could then use star knobs to lock the table into position. This worked for my drill press, and it should for yours, but double check your setup. There are many different ways you can attach these tables.
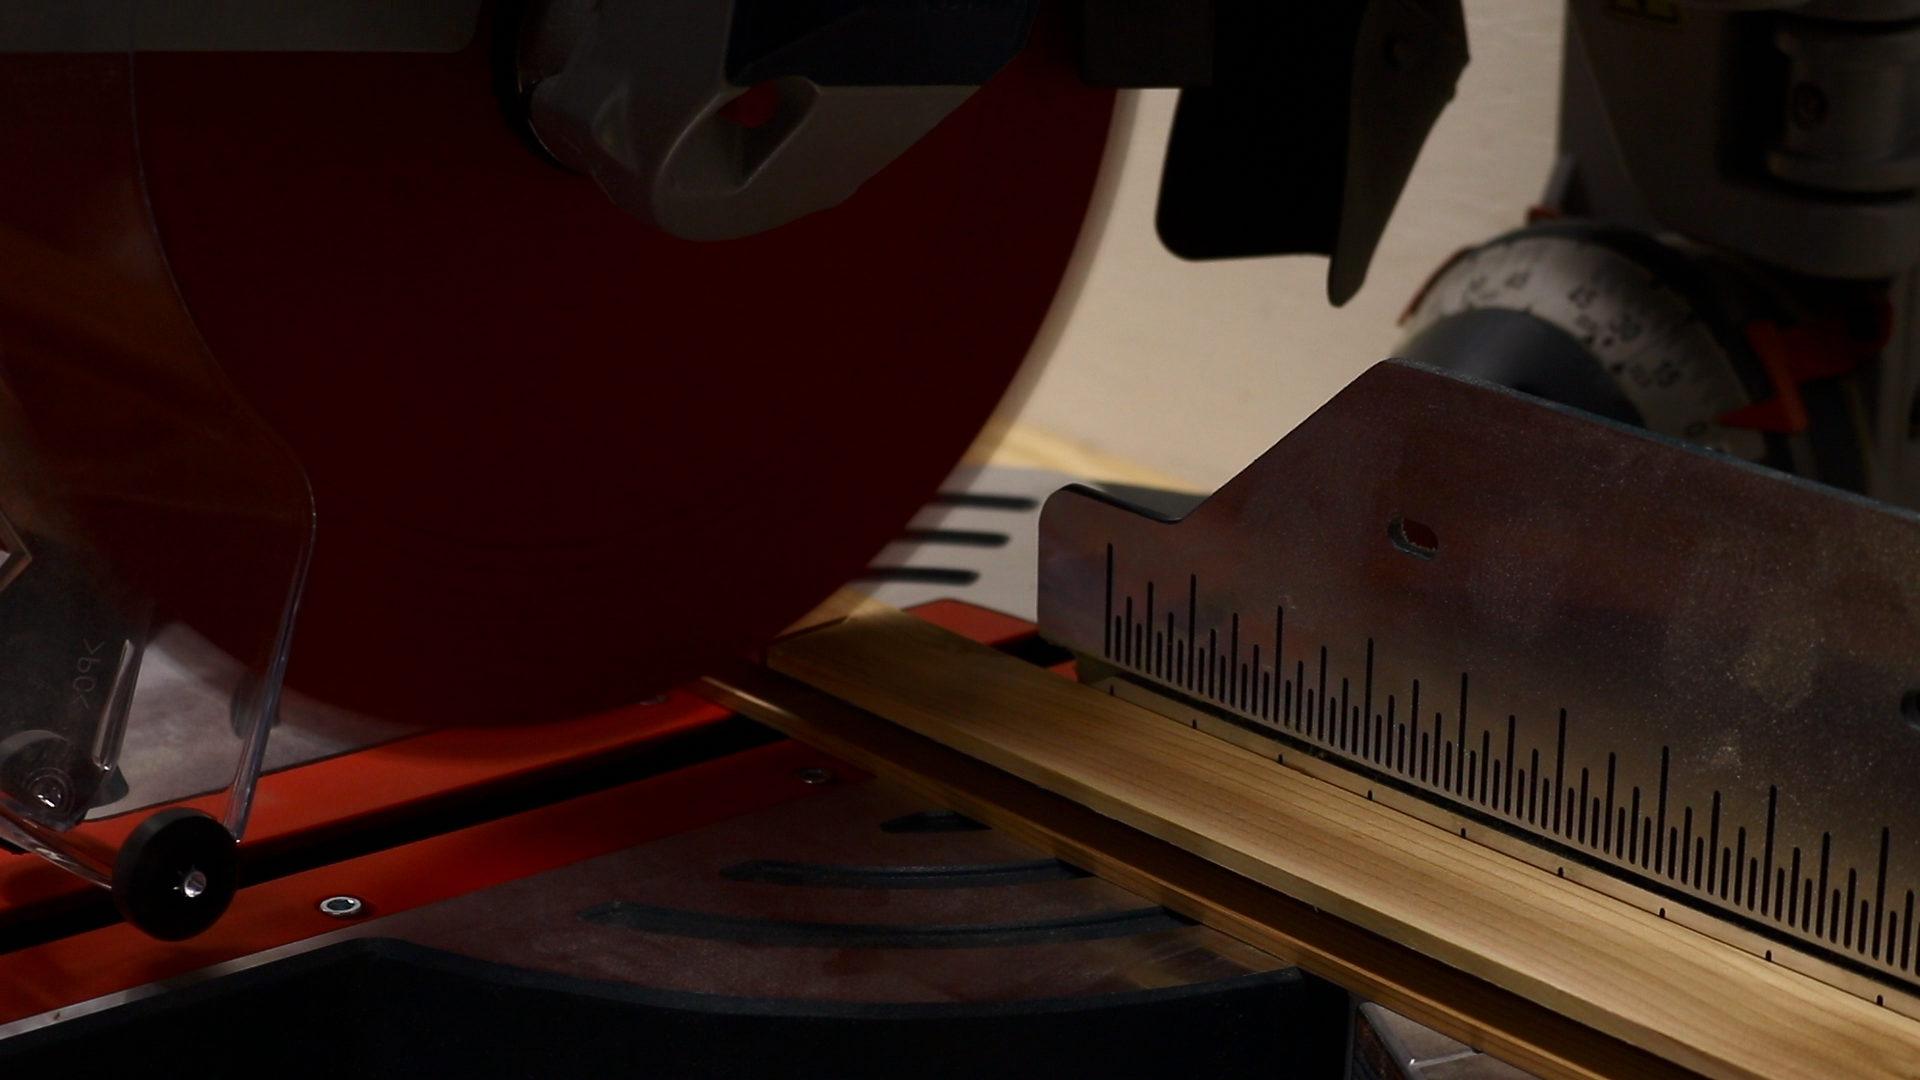
To install the t tracks I first needed to cut them to size. You can cut these on your miter saw if you have a high tooth blade (60 or higher). The key is to go very slowly. It’s also a good idea to sandwich some wood around the t track when cutting.
The t tracks were attached by drilling some pilot holes and then screwing in #8 x 1/2″ screws.
The threaded inserts screw in nicely with a flat blade screwdriver.
I then attached the t track to the fence. Be careful here, if you’re using 1/2″ screws they will probably poke out the back of the fence.

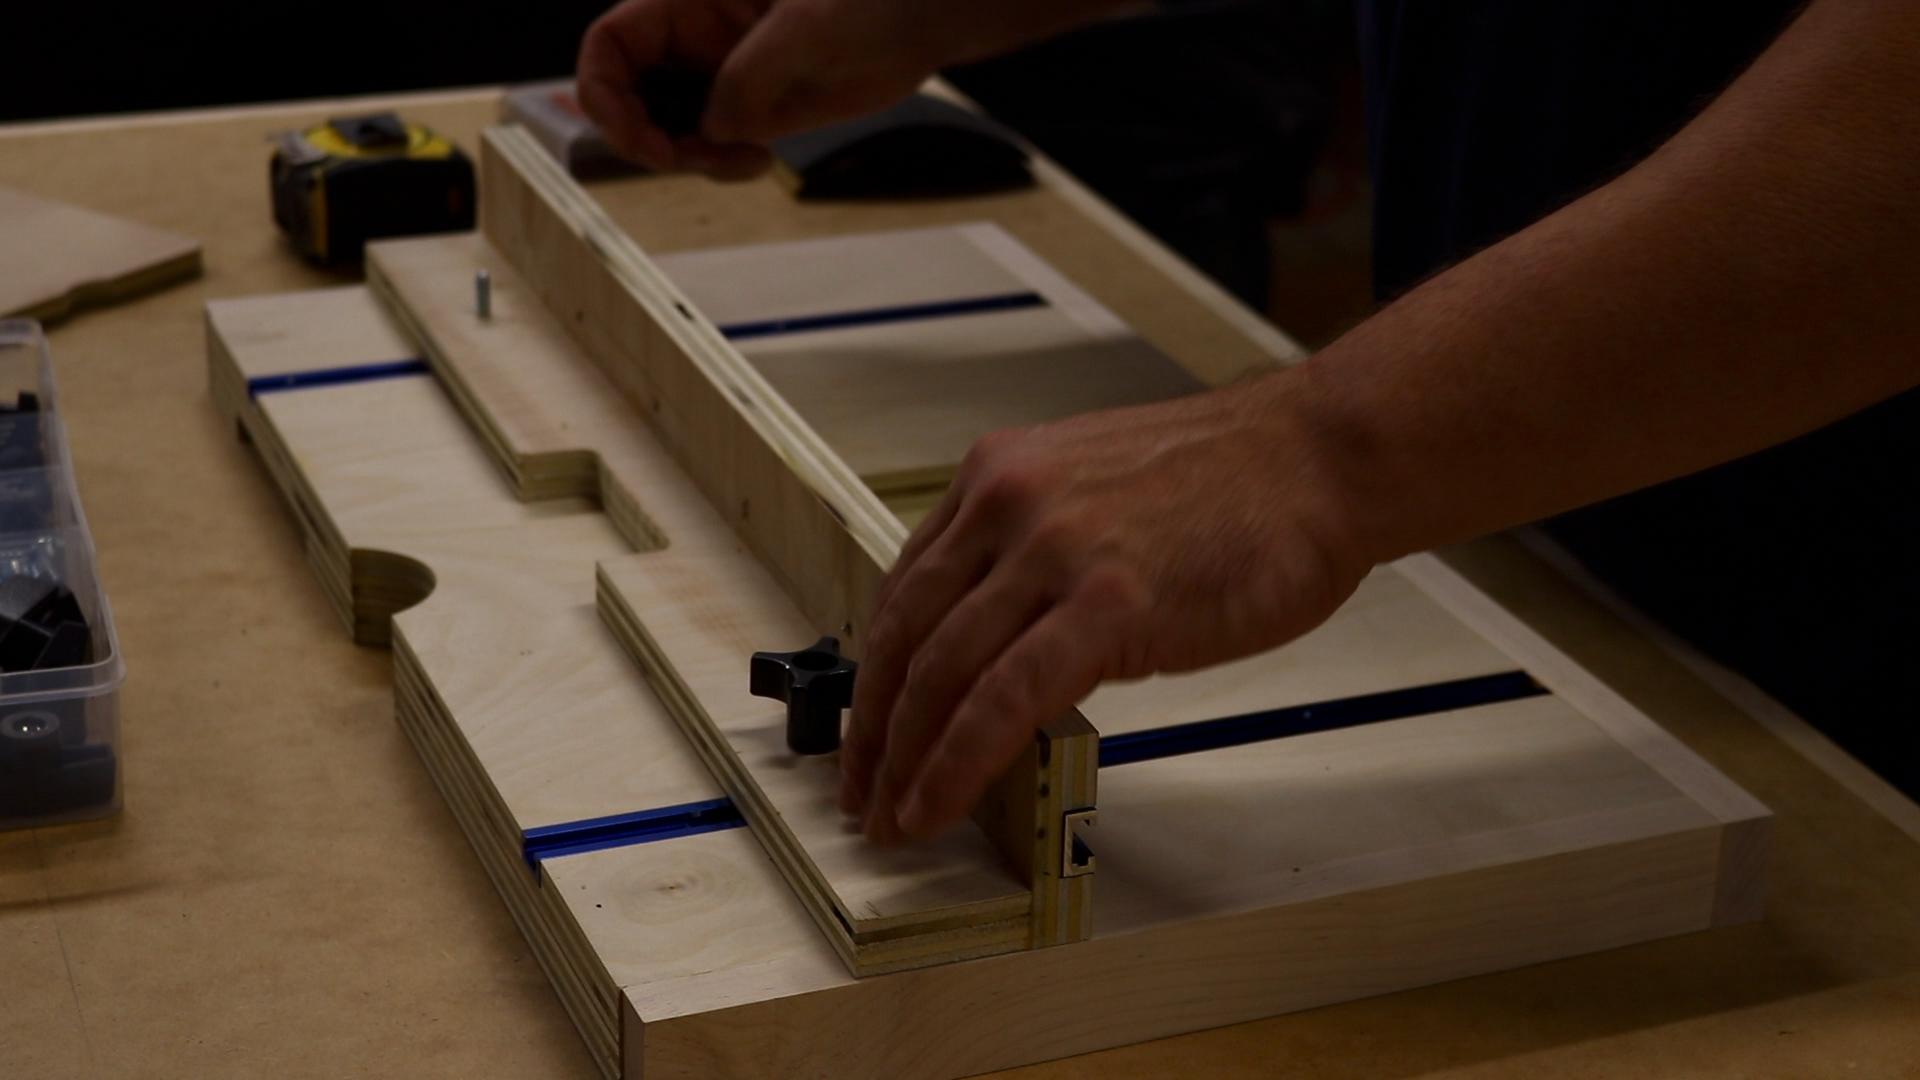
With the fence assembly complete I attached it to the top with 1-1/2″ long 1/4-20 t bolts and star thru knobs.
Attaching the Drill Press Table to the Drill Press
I was then able to attach the drill press table to the cast iron table with 1-1/2″ star knobs.
The Stop Block
The last thing needed to complete this drill press table is the stop the block. I cut a 2-1/2″ x 2-1/2″ piece of plywood for the stop block.
I then drilled a whole in the center and attached it to the fence with a 1″ long 1/4-20 t bolt and knob.

With that, the drill press table was done!

Final Thoughts
Not a lot to say on this one. This drill press table was a very easy project that delivers quite a bit of bang for the buck in my opinion. I now have a big(er), stable surface which makes securing parts much easier and the stop block allows for the drilling of accurately repeatable holes.
I would love to hear any feedback you have on this project, the build article, the video or just about anything related to this site. Please leave a comment below and let me know how your drill press table project turned out!
32 Comments
Thank you very much for this idea of a table top for my drill stand.Must excellent showing and keep up[
the good work. You can be pleased that I will get the plans for this project, Tks again
Tom
My pleasure! Thanks for watching and reading!
I have this WEN drill press, so this project is a perfect fit for me !
Thanks you !!!
Ed
My pleasure! Hope it works out well for you!
I also have this Wen drill press. Thank you for a great design and video. Great drill press, however, it needs a lot of modification for some of my woodworking projects. Your design is perfect for my guitar and project builds. I made a adjustable shop vac hose holder that I will attached to the new drill press table and life is good. Thank you for sharing and much success.
I plan to add some sort of dust collection as well. Thanks for watching and commenting!
Very nice drill press table. I see you have a few Wen tools. Do you like them? I’m building my workshop and the Wen Tools warehouse is up the road from me. I can get some good deals, so it might be worth it.
Yeah, they have worked well so far. I wish I would have gotten a bigger band saw but the 10″ works well for smaller stuff.
I just built this drill press table. I have an older Craftsman so I made a few minor changes. My table does not have through holes, so mine will have through holes with cap screws in counter sunk holes. The table has T slots, so I will use The T nuts in the table and cap screwsThrough the counter sunk holes.
Thank you for the video and article. Very nice table.
Thanks! Hope yours works out well!
Thanks for the idea and instructions on the drill press table. I have a 16″ Delta that I had put a piece of plywood on years ago and wanted a nicer one. Made my new one 25 1/2″ X 18″ X 1 1/2″ thick and to alleviate the problem with the handle I added another smaller piece of plywood in the middle with 3/8″ carriage bolt, glued with hot melt that went flush to the outside of cast table with hardwood boards that just slide over the edges and are held in place with wing nuts. That way if I want to take the top off I just loosen the wing nuts and slide the top off, no looking. I also beveled the bottom plywood in the back. I also used round zero clearance inserts, using a 4 1/8″ hole saw and then sanding arbor I enlarged the hole to 4 1/4″. Then I used a 4 1/2″ hole saw on leftover pieces of plywood and made inserts, the plugs were a perfect fit after sanding. Anyway it looks and works great.
Awesome, Gerald! I like the changes you made. Hope the table works well for you. Thanks for watching and commenting!
Nice project. Nice presentation.
However…You didn’t really explain how you attached the table. I don’t see any bolt holes on top? Is that the “threaded insert” you show?
Thanks!
Waiting for glue to dry.
Fred, yes, I used the inserts and star knobs. Most drill presses will have holes in their tables so just put inserts where those holes are and it will attach very easily. Thanks for the comment!
Tim…great video and nice design. Built mine just like yours with one exception. I’m not that good with free handing a router nor with, as I found out, drafting a perfect square. So I cut the 4″ inserts first on the table saw, so they were a perfect square) and then used those to mark out for the hole (after offset locating it first). I cut the hole with my jigsaw (a pretty good DeWalt jigsaw) cutting to the inside edge of the pencil mark and then used the table saw again to refine the inserts for a perfect fit. Thanks again…Gus
More than one way to skin a cat. Thanks for watching! Hope you like the table.
The necessity is the mother of all inventions, great inventor please continue your creative labour and sharing attitude, in my opinion is not so simple, it was just very well explained how to build it.
What a great table, intend on doing it this weekend.
Couple of questions though if I may.
1. What are the vertical t-track used for?
2. Whilst doing some research there are a couple of other builds that show a chamfer on the bottom edge of the fence. They mention that this helps in not trapping sawdust/chips? Is this worth doing?
Thanks heaps, a great site!
Hey Adian,
Thanks for watching and commenting. By vertical, do you mean the front to back T track? Those are for adjusting the fence.
Yeah, the groove on the bottom is something I wish I would have done. I still could but I’ve been lazy about it.
Good luck!
Thank you Tim! You helped make the buy/make decision. Should have been an easy decision anyway, we woodworkers are lucky now to have projects to keep us busy in the shop!
What is your opinion on adding a HPL surface? Prevent warping from humidity? I have the HPL sheet so need something to do with it!
Very good website and instructions.
Bill Wells
Olympia WA
Hey Bill, I think an HPL top would be great. Good luck on your build. Thanks for watching!
Thank you for posting this valuable video and instructions. I was able to make my own using them. I have a radial drill press so I didn’t have to worry about the table crank getting in the way. Thank you again.
Thanks, Ken!
Great build – thanks! When I made mine, I simply cut the 4″ square for the inserts into one of the sheets of plywood before gluing them together. Easy! Then, instead of having to make finger holes on each insert, I made them in the plywood on either side of the hole where the inserts go. I haven’t used the table yet, but it sure dressed up my drill press!
How do I obtain the plans with sketches and pictures. I am able to see the video but I am unable to get the pdf plans with the pictures.
Is it possible to get the video? I am a beginner at woodworking. My e-mail is [email protected]
Hope to hear soon
Mike
Hi Mike, thanks for commenting. The only plans available are on this page. There’s really not a lot to it so that’s why I included the sketches at the top of this page.
Thanks
These guides are really amazing ! So many thanks to you for sharing. Can I share your ideas among with my friends through social media ?
Thanks. Yes, you can share. Links only.
Great build, definitely going to use your plans, thanks for posting. What bits did you use in the router to make the hole, it seems you use two different bits.
One bit. 3/4″ straight bit. Thanks for watching and commenting!
[…] How to Build a Simple Drill Press Table – The Average … […]
[…] The Average Craftsman […]