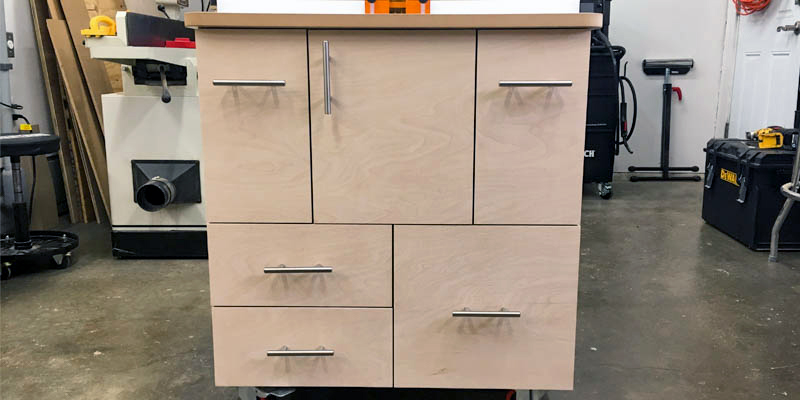
How to Build a Router Table Cabinet
If you have a router table then a router table cabinet is a logical next step. A router table cabinet helps with dust collection and gives you a single location to store all of your bits and router accessories. In today’s build article we’re going to build a router table cabinet that should work with just about any router table. It can hold 50+ router bits, featherboards, wrenches, routers, and just about anything else router related. It’s also mobile so you can store it out of the way when it’s not in use.
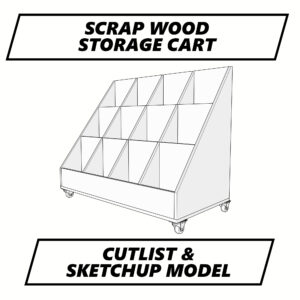
Detailed plans that include both SketchUp and Fusion 360 models are available in my store.

Materials and Tools for Building the Router Table Cabinet
Lumber and Sheet Goods
- *2 – 48″ x 96″ x 3/4″ plywood – I used PureBond birch plywood from Home Depot (love this stuff!) but any 3/4″ plywood will work – https://tinyurl.com/y7q4zcnp
- *1 – 48″ x 96″ x 1/2″ plywood – http://tinyurl.com/yy6z3x5w
*if you change the drawer bottoms and cabinet back to 3/4″ you can get away with using just two sheets total
Hardware and Fasteners
- #8 x 1 1/4″ Wood Screws – https://amzn.to/2DwllL8
- #8 x 1/2″ Panhead Sheetmetal Screw – https://amzn.to/2MXlQCo
- 1-1/4″ Pocket Hole Screws – https://amzn.to/2LBV1FB
- Alpine Hardware 3″ Bar Pulls (25 Pack) – https://amzn.to/2I4y4ub
- Friho 20″ Full Extension Drawer Slides (10 Pairs) – https://amzn.to/2WQ7EQa
- Berta Half Overlay Hinges (10 Pack) – https://amzn.to/2tiBQWo
- 3″ Locking Casters (4 Pack) – https://amzn.to/2WWbJ5h
- #10 x 3/4″ Wood Screws – https://amzn.to/2DughXG
- #10 Finish Washers – https://amzn.to/2EgEKBE
- 1 1/4″ Brad Nails – https://amzn.to/2N36Fb2
Tools I will be using in this build
- DeWalt FlexVolt Track Saw Kit – https://amzn.to/2JRikWR
- DeWalt 20V Max Drill and Impact Driver – https://amzn.to/2SSVaIx
- Kreg Face Clamp – https://amzn.to/2uSM2Xd
- DeWalt Random Orbital Sander – https://amzn.to/2GHssoy
- Kreg Right Angle Clamp – https://amzn.to/2A4dshO
- Kreg Jig K4 Pocket Hole System – https://amzn.to/2Lzjs6I
- Bosch MRC23EVSK Router – https://amzn.to/2tfCXqb
- Kreg Cabinet Jig Set – https://amzn.to/2GAeN1g
- Whiteside Rabbeting Bit Set – https://amzn.to/2GgmSsA
- SawStop CNS Contractor Table saw – http://amzn.to/2mr6Lw2
- WEN 10″ Bandsaw – https://amzn.to/2Gyb30h
- DeWalt 20V Mac Cordless Jig Saw – https://amzn.to/2th0HtU
- Incra Miter 5000 – https://amzn.to/2I1lP1h
- Microjig GRR-RIPPER – http://amzn.to/2ruNUWM
- Oneida Mini Gorilla 1.5 HP Dust Collector – https://amzn.to/2tdEwEs
- Shop Vac – https://amzn.to/2TOCS8m
- Oneida Dust Deputy Deluxe Cyclone Separator Kit – https://amzn.to/2NE9ka7
- Snappy 5pc Countersink Drill Bit Set – https://amzn.to/2GmmGIg
- Snappy 5pc Self Centering Hinge Drill Bit Set – https://amzn.to/2WWpIYL
- Ridgid Brad Nailer – https://amzn.to/2WUaC6b
Dust Collection
- Dust Collection Flange with 4″ Port – https://amzn.to/2GjzgYO
- 4″ x 4″ x 2 1/2″ Dust Collection Adapter – https://amzn.to/2WX1jlQ
- 2 1/2″ Dust Collection Hose – https://amzn.to/2GAF67A
- 4″ Dust Collection Fitting – https://amzn.to/2tgrKW7
- 2 1/2″ Dust Collection Hose Clamps – https://amzn.to/2GjGdcC
- Rockler Dust Right Quick Change Adapters – http://bit.ly/2Nc4Vw1
Other Items Used to Complete the Router Table Cabinet
- Rockler Router Table Top – https://amzn.to/2GjRvgQ
- Rockler Router Table Fence – https://amzn.to/2Bw8wjV
- Weather Stripping – https://amzn.to/2Gz2MZX
- Rockler Router Table 4 pc Accessory Kit – https://amzn.to/2I3umRG
- Rockler Storage Bit Inserts (10 Packs) – https://tinyurl.com/y4e4grnw
theaveragecraftsman.com is a participant in the Amazon Services LLC Associates Program, an affiliate advertising program designed to provide a means for sites to earn advertising fees by advertising and linking to amazon.com
Router Table Cabinet Build
Breaking Down the Plywood Into Usable Parts
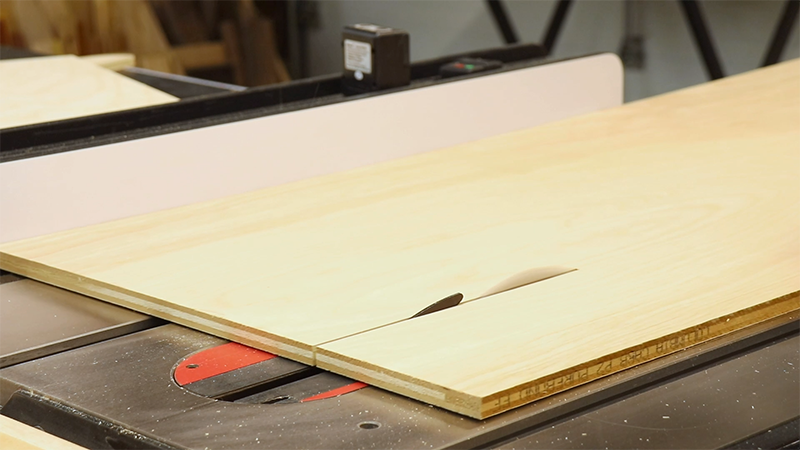
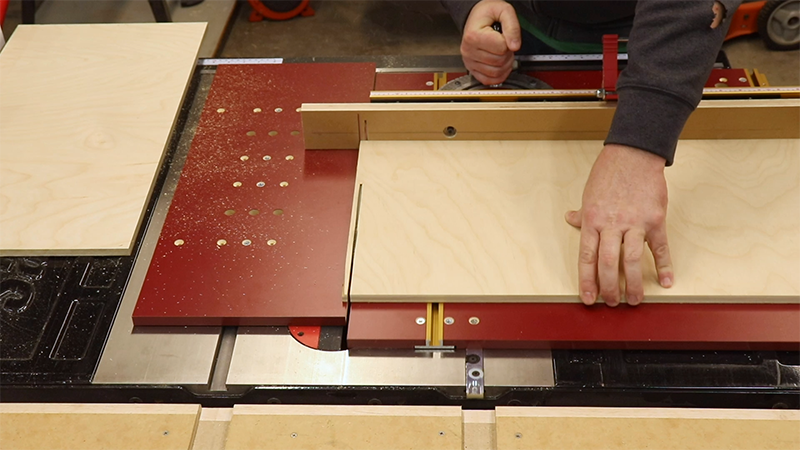
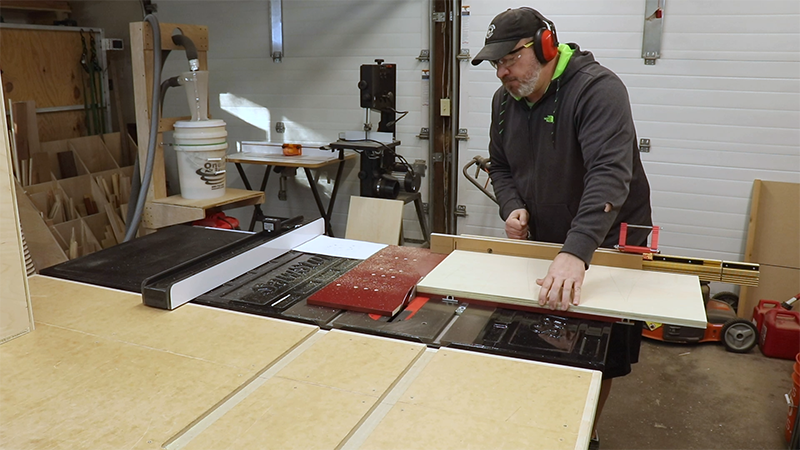
My first step was using my track saw to break down a couple of sheets of 3/4” plywood into more manageable pieces. When I use my track saw for this purpose I always leave the pieces oversized a quarter to half inch so I can square everything up at the table saw. I don’t count on the plywood being perfectly square and I find it difficult and too time consuming to try and get everything exact with a track saw.
The way I designed this cabinet requires two sheets of 3/4” and one sheet of 1/2” plywood. If you changed the drawer bottoms and back to 3/4” then you could get away with just two sheets. I used Purebond birch plywood from The Home Depot. It’s pretty much my goto for birch plywood. It’s a lot better quality than most of what you find in the big box stores yet it’s significantly cheaper than baltic birch. At least in the Kansas City area.
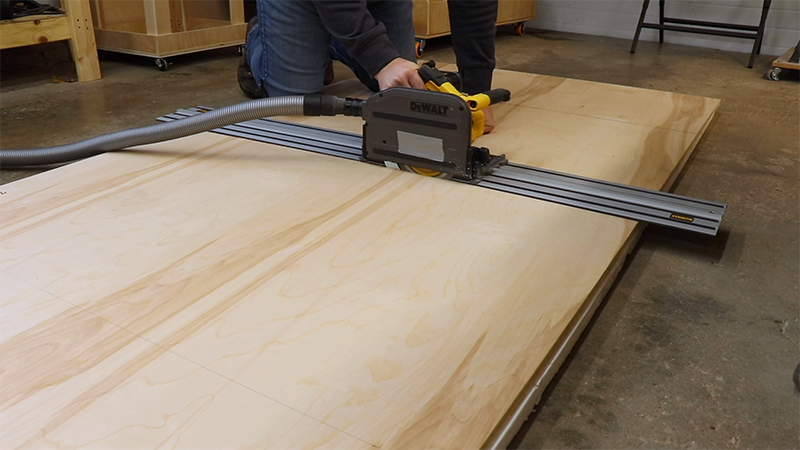
Breaking down the plywood with my track saw
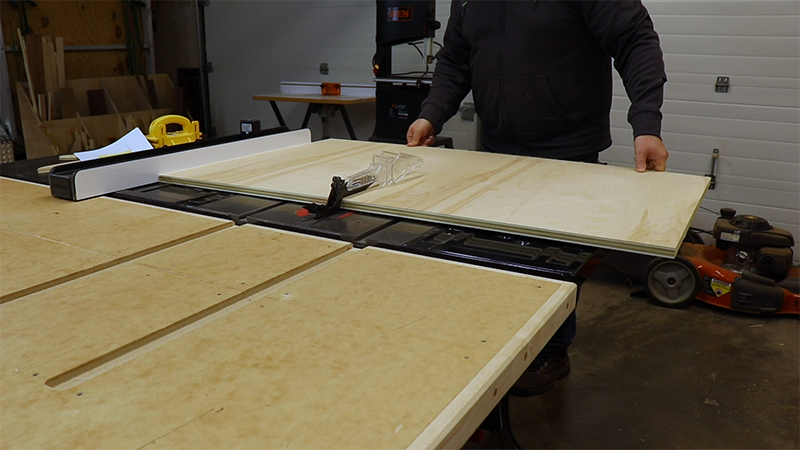
Breaking down the plywood with my table saw
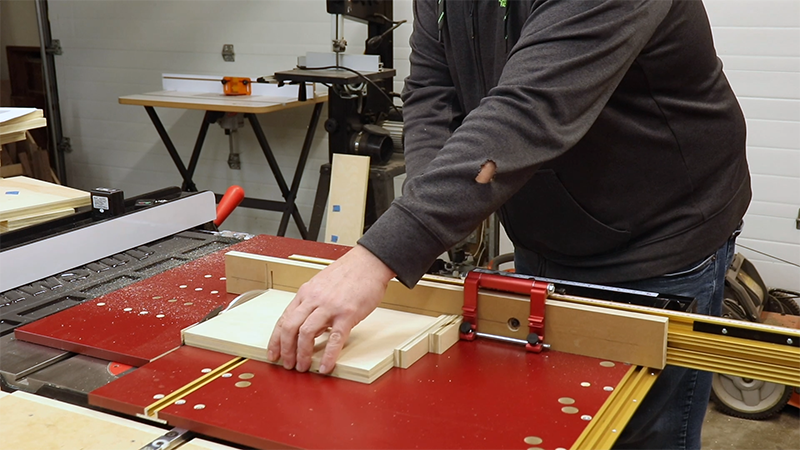
Once I had everything cut to width I used my miter sled to square up the ends and cut everything to length.
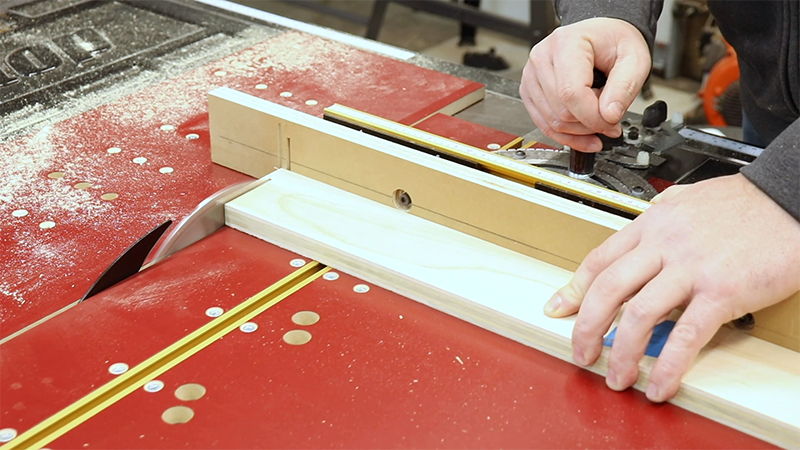
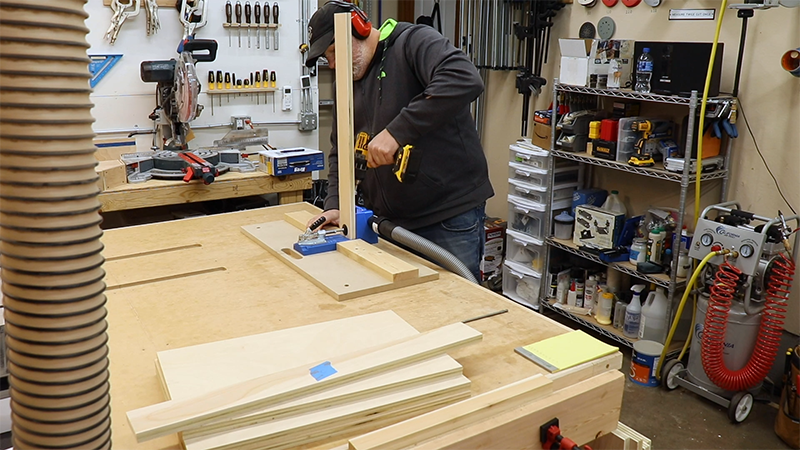
Using my Incra Miter 5000 to square up parts
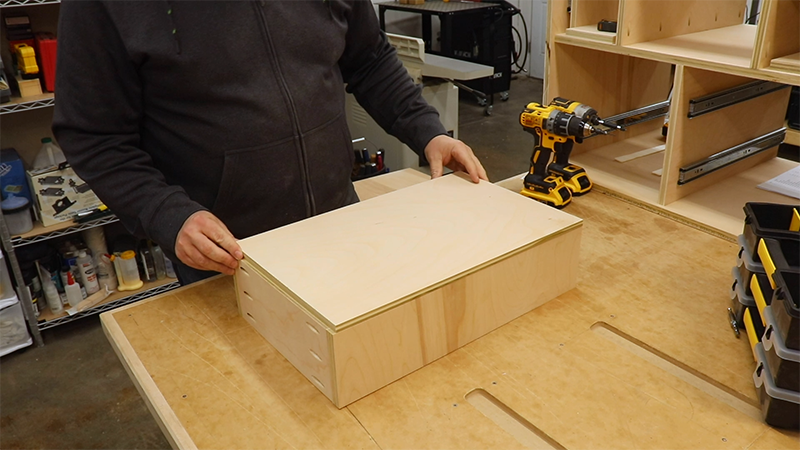
Starting assembly of the Router Table Cabinet Carcass
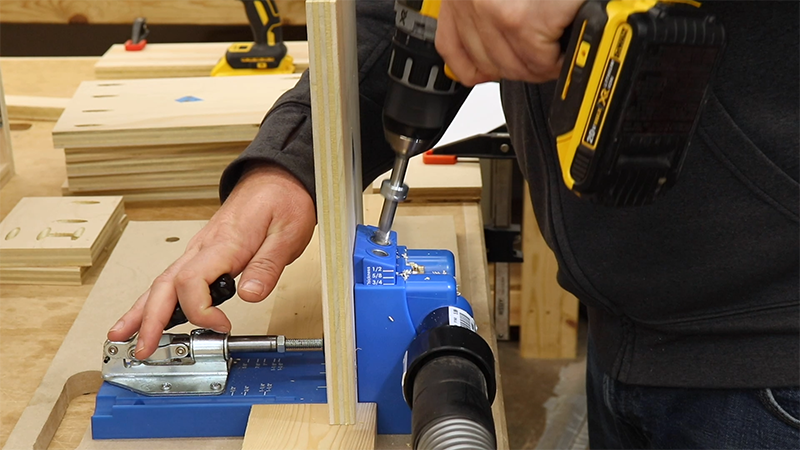
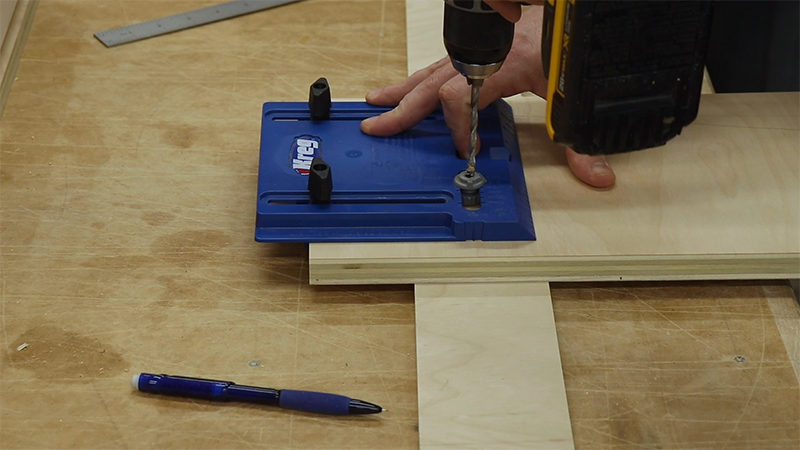
Pocket holes were used for all of the joinery on this cabinet so it was time to start drilling. They are quick and easy and plenty strong for this cabinet. I drilled holes for all of the carcass parts and then started assembly with 1 1/4″ pocket hole screws.
Drilling pocket holes in all of the parts
The bottom and the top stretchers were attached to the sides using pocket screws.
Attaching the bottom to the sides with pocket screws
Attaching the stretchers to the sides with pocket screws
The Interior Parts of the Router Table Cabinet
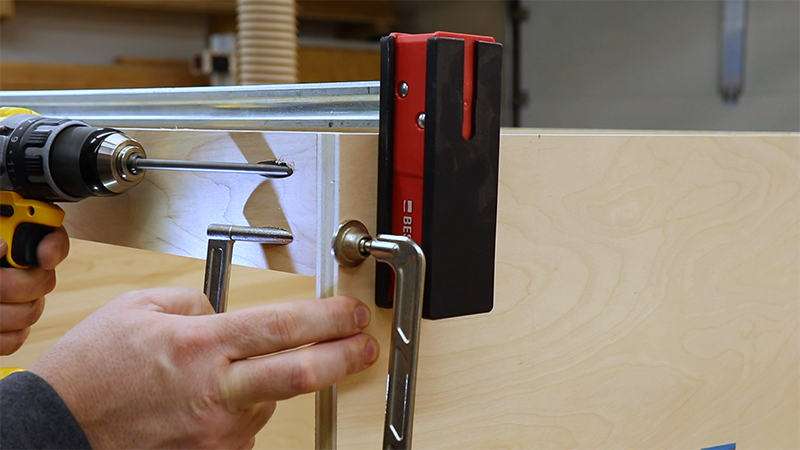
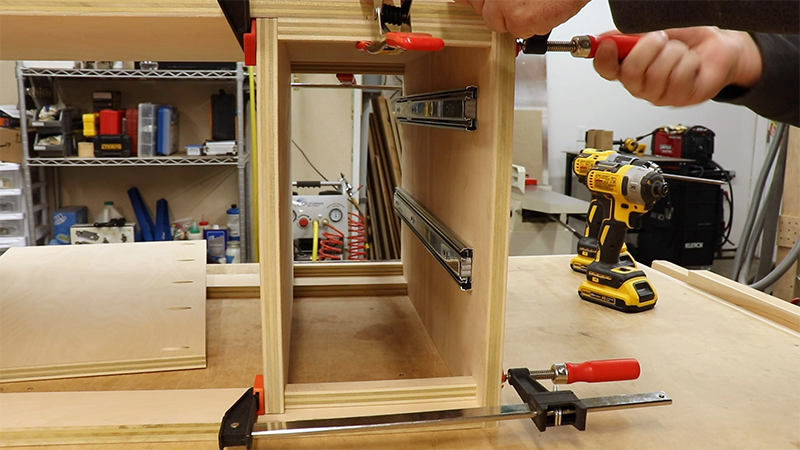
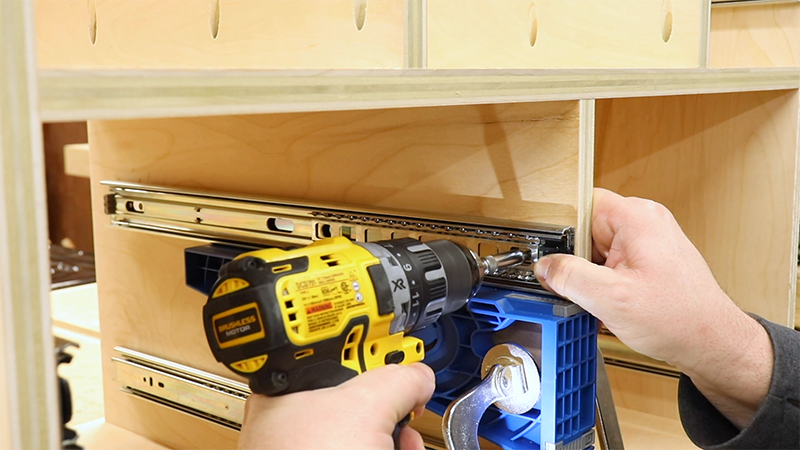
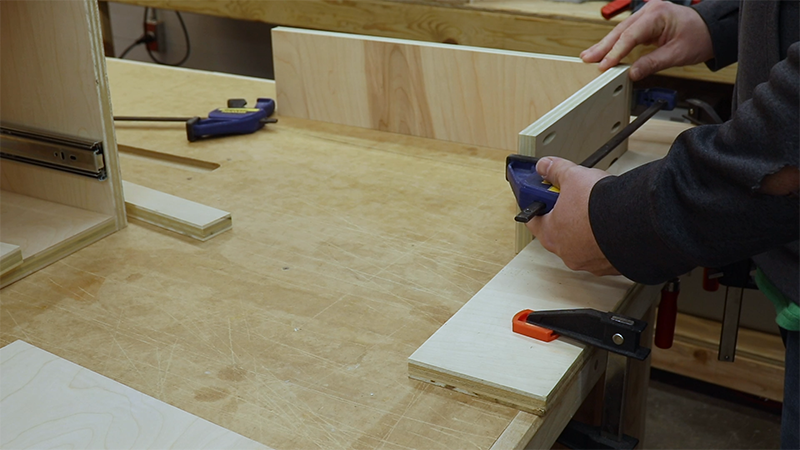
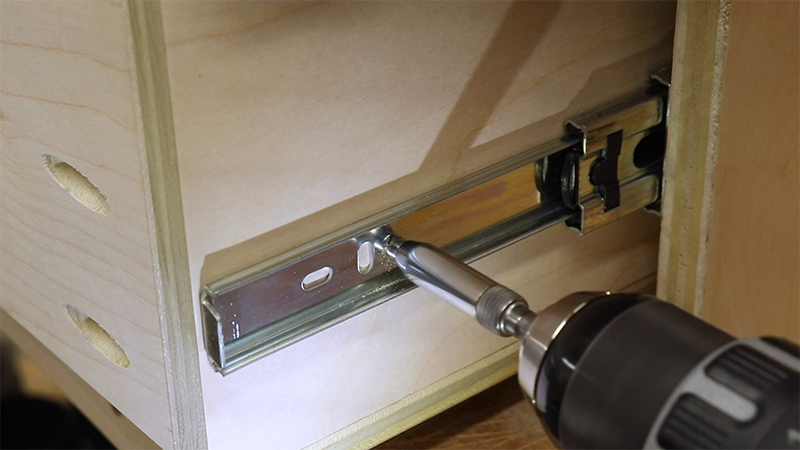
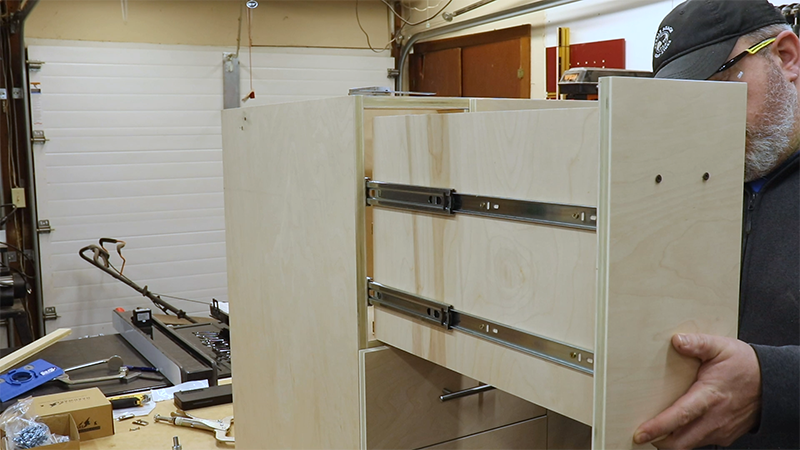
Before going any further with the carcass I needed to install the drawer slides for the two storage trays as I wouldn’t have room once the upper vertical dividers were in place. I used my Kreg drawer slide jig to align the slides. I’ve used this jig a few times now and I like it but just not sure it’s worth it. Using scraps for spacers is every bit as easy and accurate in my opinion. Also, depending on the placement of the slides, you might not even be able to use this jig.
I marked the location of the slides on the cabinet sides, attached the jig and then placed the slides. I used a #6 self centering bit to pre-drill the mounting holes and then secured the slides with the screws provided. Speaking of these slides, I found what I believe is a great deal on Amazon. These are 22” full extension slides with 100 pound capacity and I was able to get 10 pairs for about $70. They are linked above in the hardware list if you’re interested.
Always Leave Yourself Enough Room to Attach Drawer Slides
Attaching the drawer slides with the Kreg Drawer Slide Jig
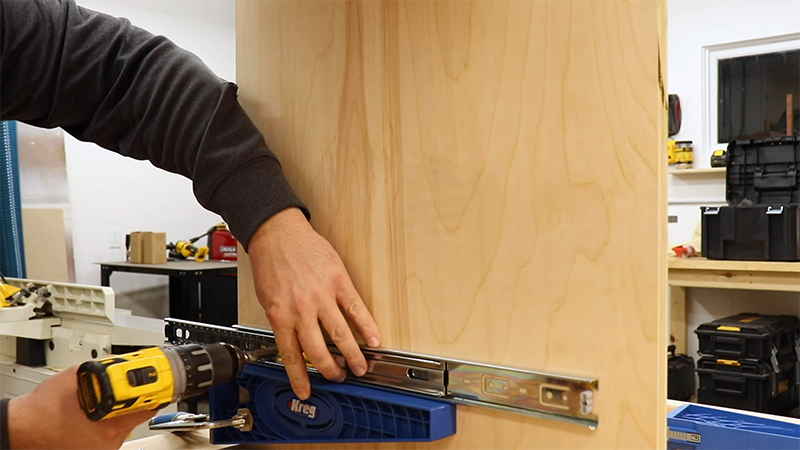
Attaching more slides with the Kreg Jig
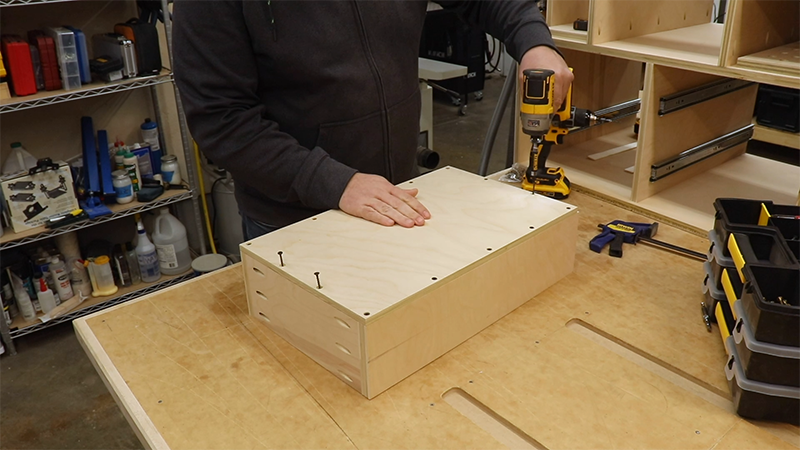
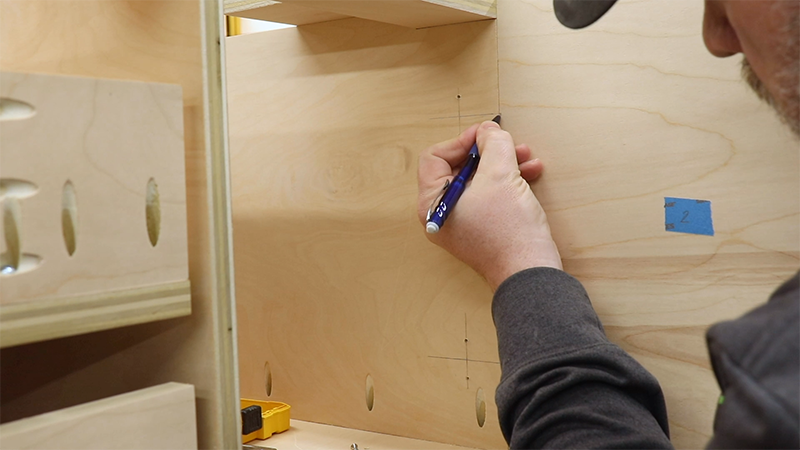
I turned my attention to interior cabinet parts. There is a horizontal divider, two upper vertical dividers and one lower vertical divider. The upper dividers needed to be notched out around the stretchers so I put them in place and marked out where I needed to cut and then took them over to the bandsaw. If you don’t have a bandsaw a jigsaw would work perfectly fine for these cuts.
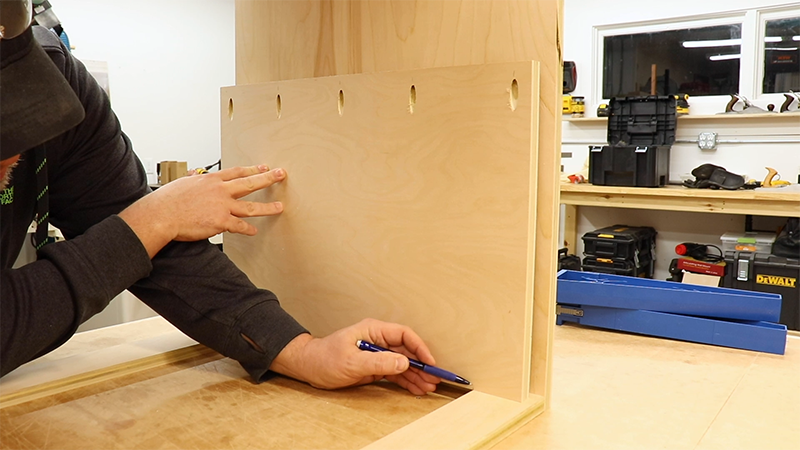
Marking the stretchers on the horizontal dividers
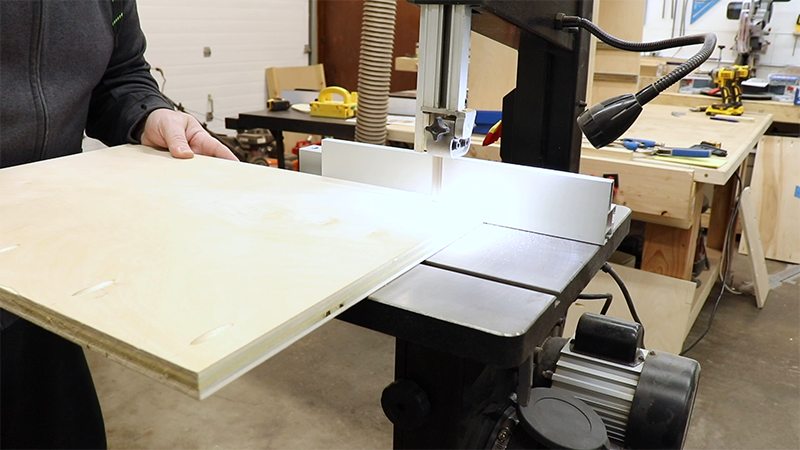
Using the bandsaw to cut away for the stretchers
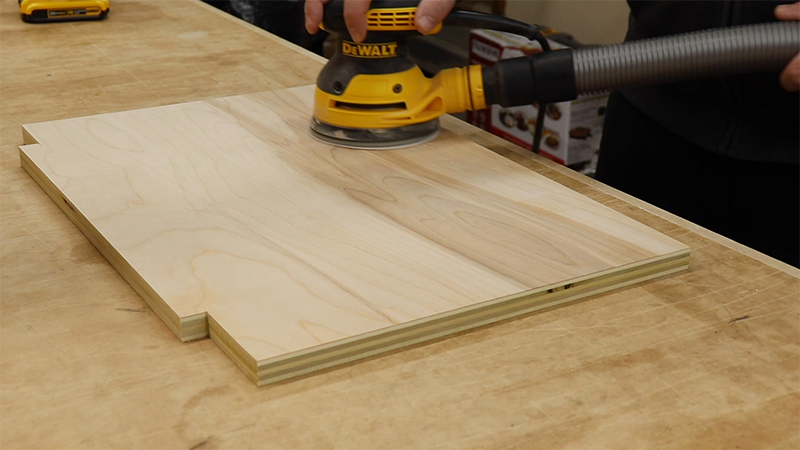
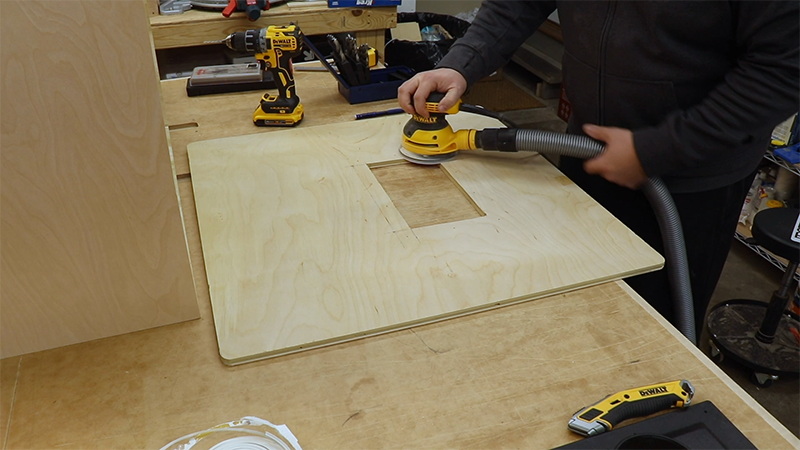
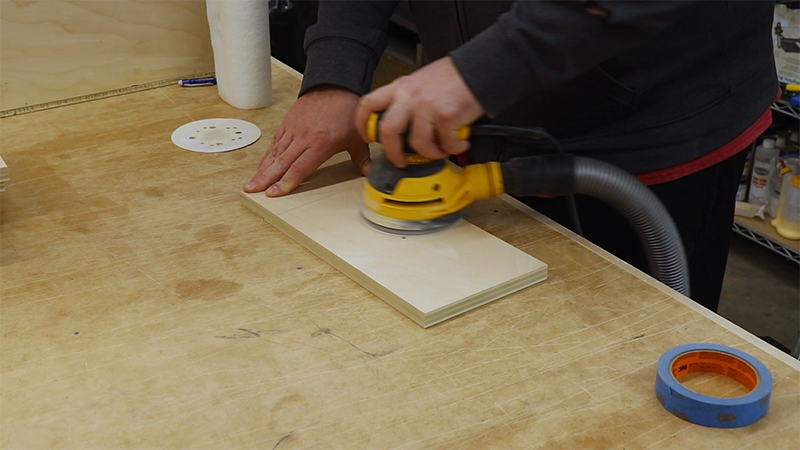
I sanded the dividers and the bottom to 220 before attaching them to the carcass. It’s just easier at this point rather after they are installed. I don’t like sanding or finishing so I take the opportunity anytime I can to make those steps easier on myself.
Sanding the dividers before installation
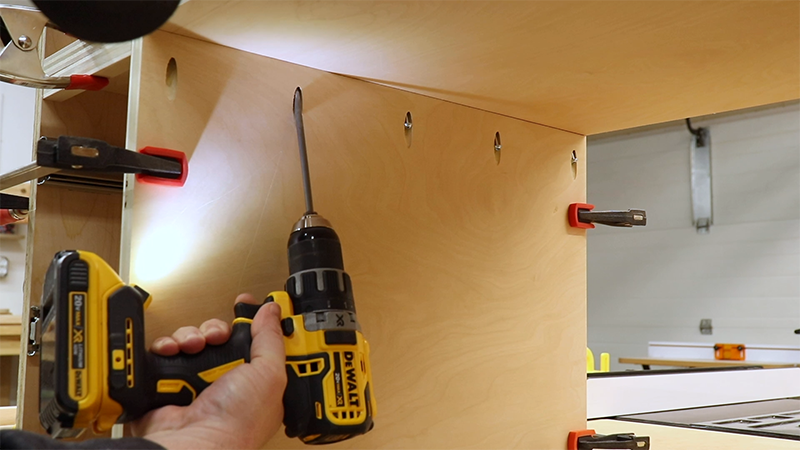
The vertical dividers were used to position the horizontal divider and then secured it with pocket screws.
Using the vertical dividers to space out the horizontal divider
Attaching the horizontal divider with pocket screws
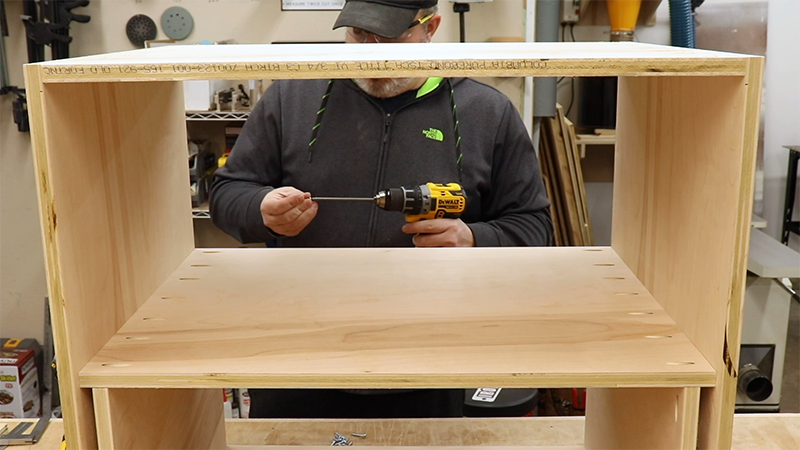
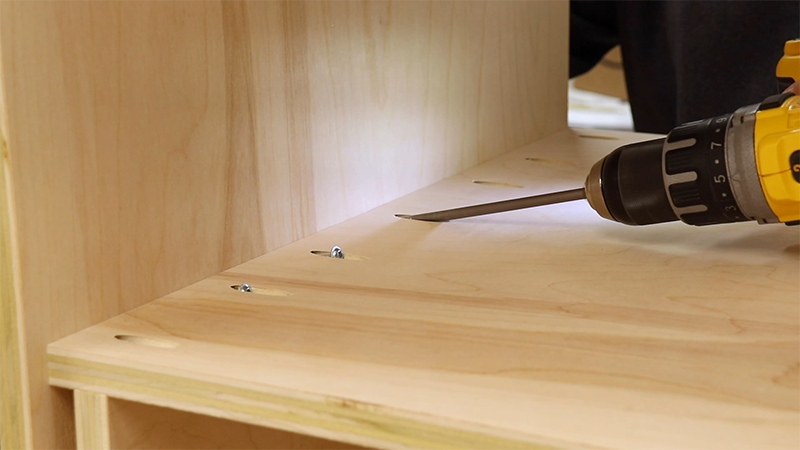
I then cut some spacers and clamped the vertical dividers in place. The bottom of the dividers were then attached to the horizontal divider with pocket screws and then I pre drilled and attached the tops to the cabinet stretchers with 1 1/4 inch screws.
Clamping scrap spacers to position the vertical dividers
Using pocket screws to attach the vertical dividers
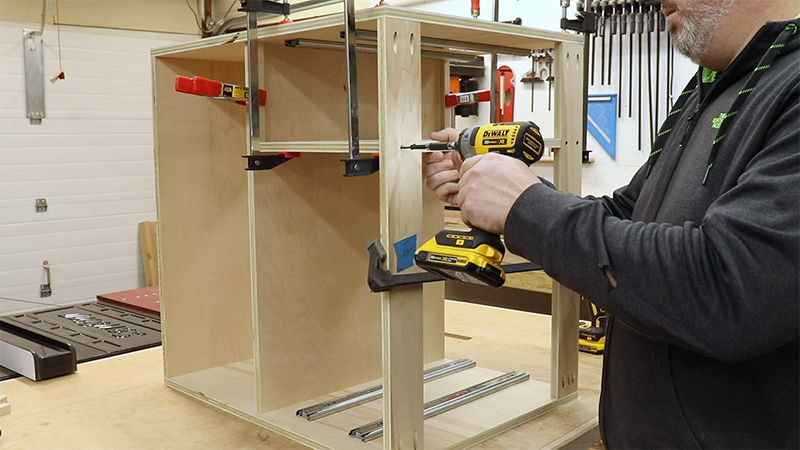
Attaching the vertical dividers to the stretchers
Installing the Drawer Slides and Assembling the Drawers and Pull Out Trays
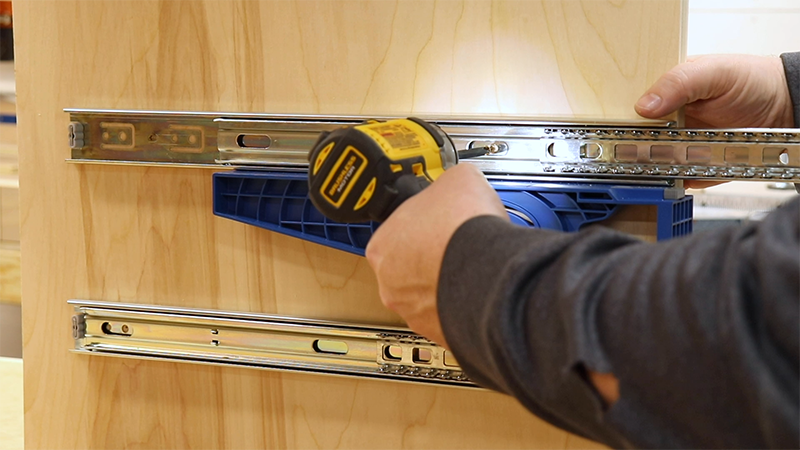
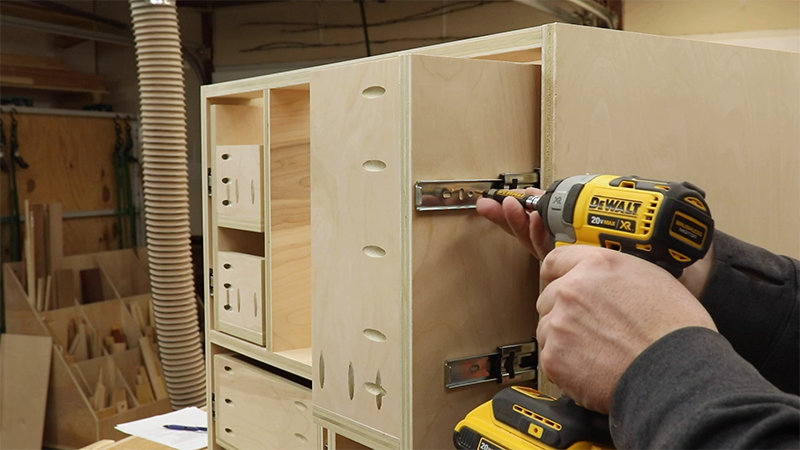
Moving on to the drawers and pull out trays, I installed the rest of the slides and measured the opening of the bottom drawers.
Installing the rest of the drawer slides
Easy Drawer Construction
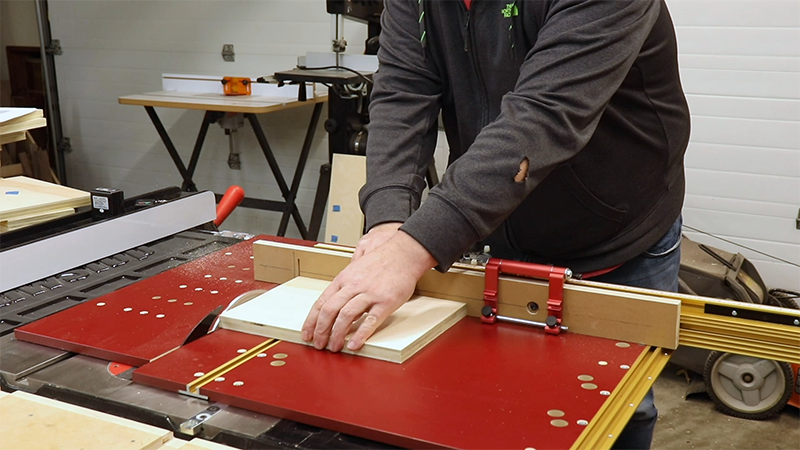
Back at the table saw I ripped down all the drawer and tray parts to size and cut the drawer sides to the length specified in the cut list with the miter sled. For the drawer fronts and backs I took a cue from Brad Rodriguez over at Fix This Build That (http://fixthisbuildthat.com) and I measured the drawer openings. Let’s say that measurement was 15 inches, so I set my stop block on my miter sled to 15 inches and put two cut offs of the same plywood against the stop block and slid the fronts and backs up against those two cut offs. This gives you perfectly sized drawers with a lot less math. I pretty much used all of Brad’s techniques on drawer construction which you can find in this video: https://www.youtube.com/watch?v=Ilda2kqORZI
Breaking down plywood into drawer parts
Squaring up the drawer parts
Using two cutoffs to accurately measure drawers fronts and backs
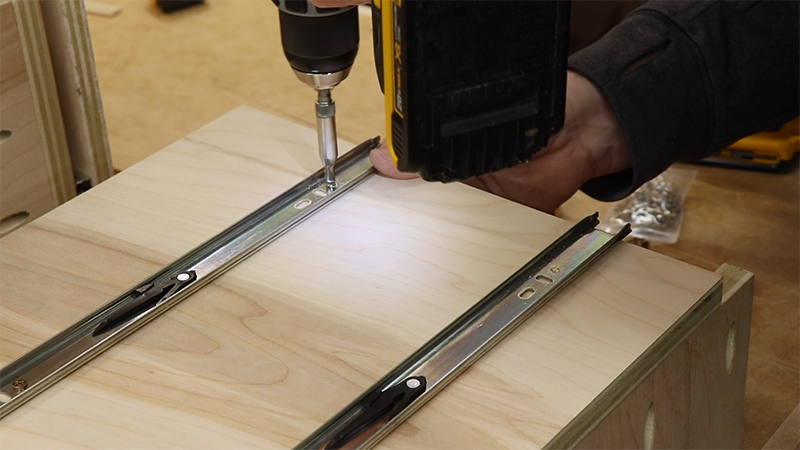
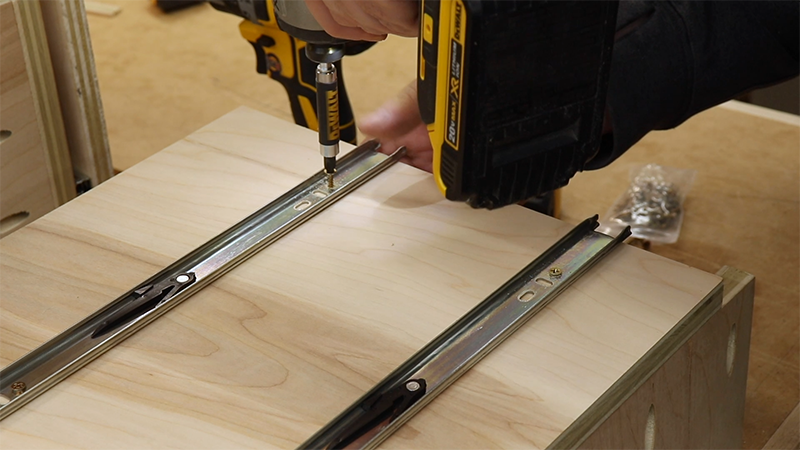
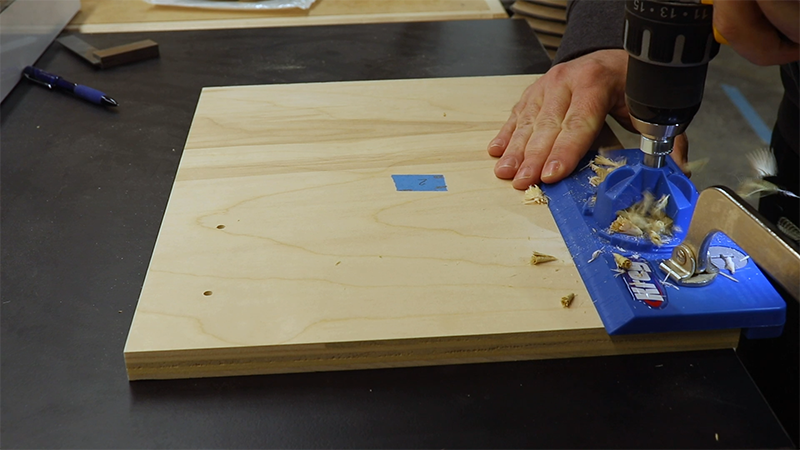
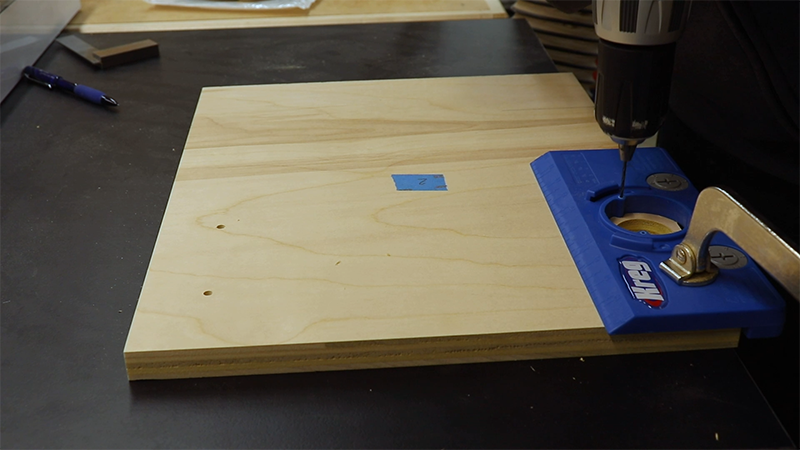
With all of the drawer and tray parts cut I pulled out the pocket hole jig again and drilled holes in all of the parts.
Drilling pocket holes in all of the drawer parts
Router Bit Storage
For the bit storage trays I am using Rockler’s router bit storage inserts. All you have to do is drill a 5/8 inch hole and then push the inserts into the holes. The inserts hold either 1/4 or 1/2 inch shank bits. If you don’t want to buy those inserts then you’ll need to drill out 1/4 and 1/2 inch holes depending on the size of your bits. Be careful about drilling all the way through though, if you do, you’ll need to line the bottom of the trays with something to keep some of the smaller bits from falling through. You could also set a depth stop when drilling.
I started to mark out where I wanted the inserts on the tray and ran into my first mistake. I should have drilled out these holes before drilling the pocket holes which ended up being in the way quite a bit. It would have been a lot easier to lay out all of the inserts and then drill the pocket holes.
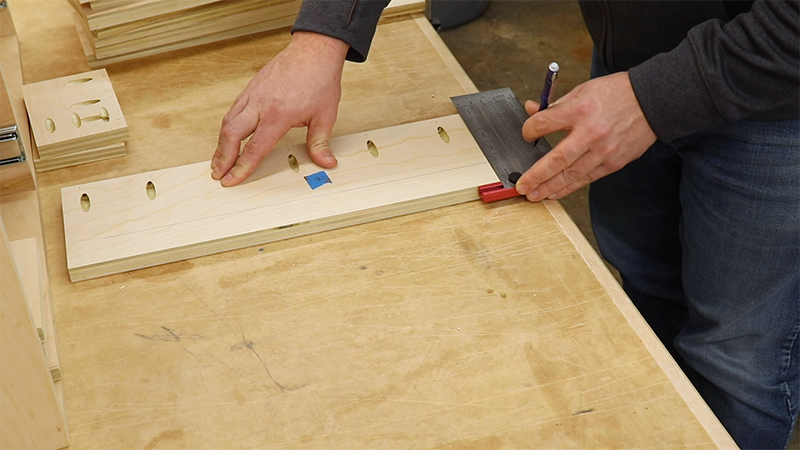
Marking out the router bit storage inserts
Once I got the layout done I took the trays to the drill press and used a 5/8 forstner bit to drill out all of the holes.
One of my next investments needs to be a decent set of forstner bits. This one was about as sharp as a spoon and I had a ton of tear-out.
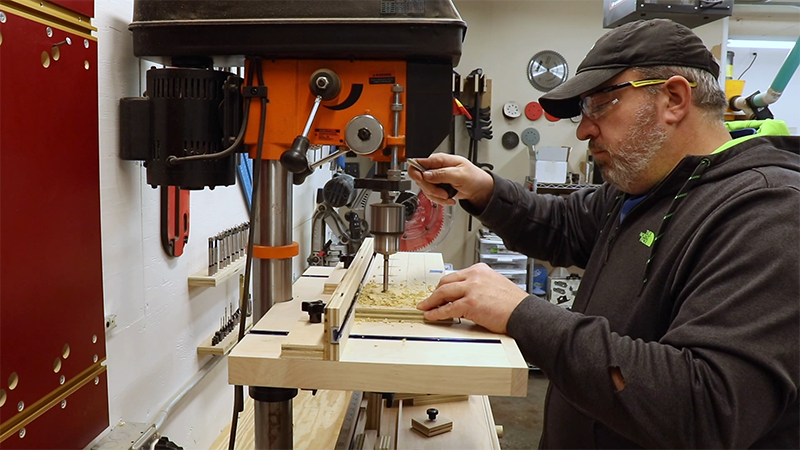
Drilling the holes for the router bit storage inserts
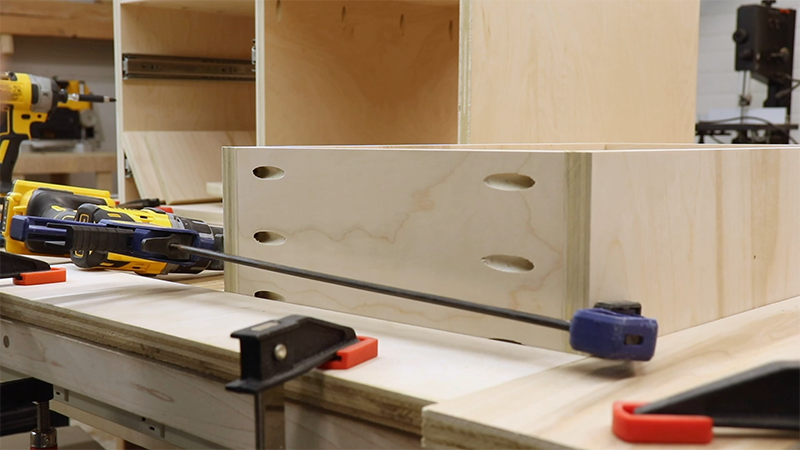
Drawer Assembly
It was now time to start assembling the drawers and trays. Keeping things square when I use pocket holes proves challenging for me so I’ve started making a squaring jig on my assembly table to help keep everything in line. I should probably just buy a few of those square clamps but only remember I need them once I am to this point. I used a combination of clamps and this squaring jig to make the drawers as square as possible.

Setting up a squaring jig for drawer assembly
Assembling the drawers
Using clamps to keep the drawers square
Assembling the drawers with pocket screws
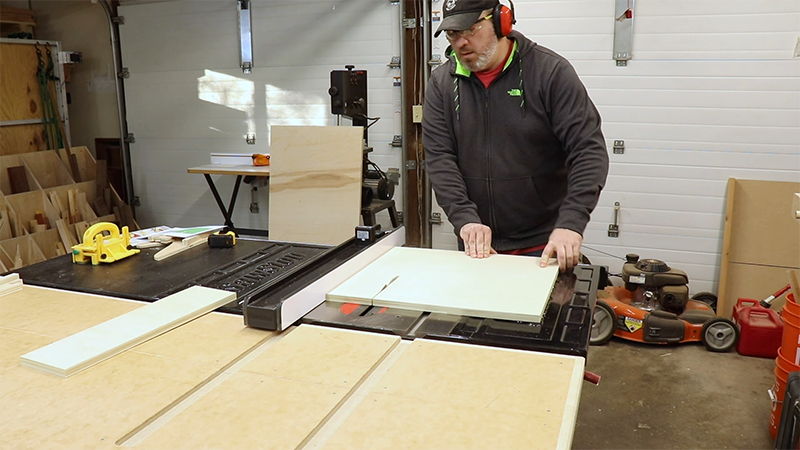
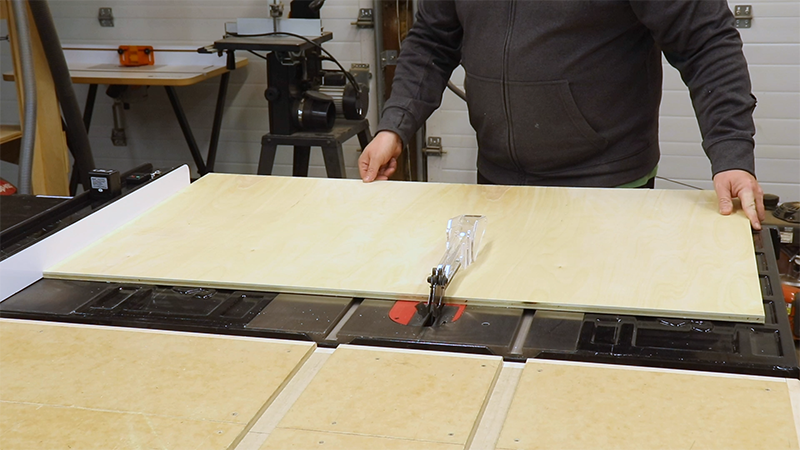
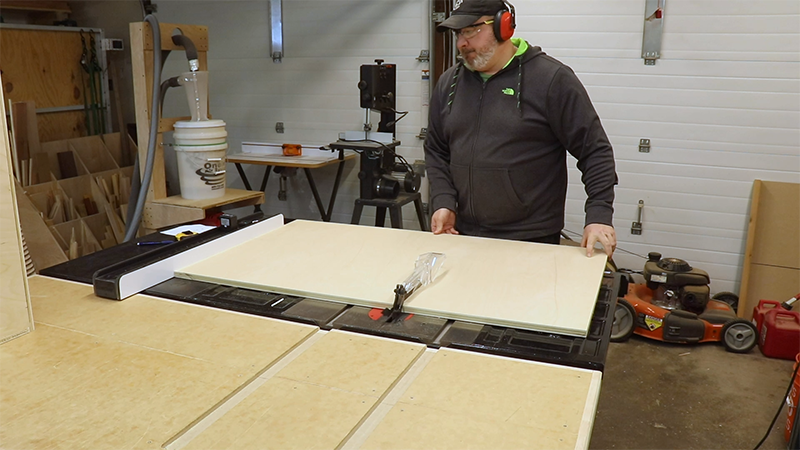
Back at the table saw to cut out the drawer bottoms. I used 1/2 inch for the bottoms and the back of the cabinet. Most people use 1/4 but it’s not that much more money to use half, they’re beefier, and I have a lot more use for 1/2 inch scraps than quarter. The bottoms were ripped to width and then I used the miter sled to square one end and then cut them to length.
Cutting the drawer bottoms on the table saw
Squaring the drawer bottoms on the miter sled
Mistake number 2. Yeah, cut the bottoms too short. Not sure where I made the error, but, whatever, they were close enough and it’s just shop furniture.
Realizing I mis-measured for the drawer bottoms
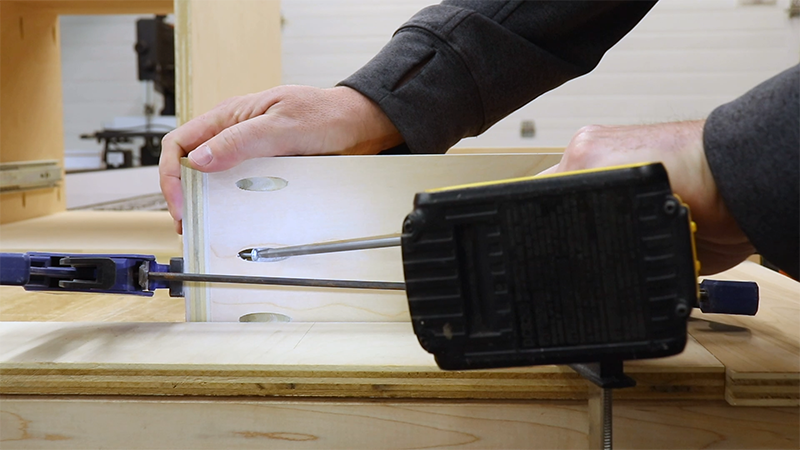
To attach the bottoms I drilled and countersunk for 1 1/4 inch screws.
Attaching the drawer bottoms
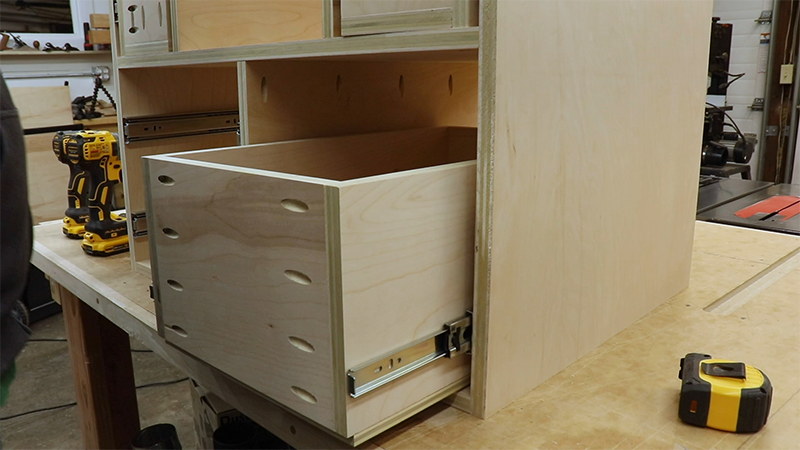
Installing the Drawers and Pull Out Trays
When installing the bottom drawers and the slide out trays I used paint stirrers as spacers on the bottom. I slid the drawer into place, pulled out the extensions and lined them up with the front of the drawer, used a self centering bit to drill pilot holes and then attached the first two holes of the extensions to the drawer with the screws provided. Afterwards, I removed the drawer from the slides and attached the rear parts of the extensions to the drawer sides. Rinse and repeat for the other drawers and trays.

Using paint stirrers for spacing of the drawers
Aligning the drawer slides with the front of the drawer
Using a self centering bit to drill pilot holes for the drawer slides

Sliding the drawer into the slides
Attaching the pull out trays to the drawer slides
Drilling the rear hole for the slides in the pull out tray
Fastening the drawer slide to the pull out tray
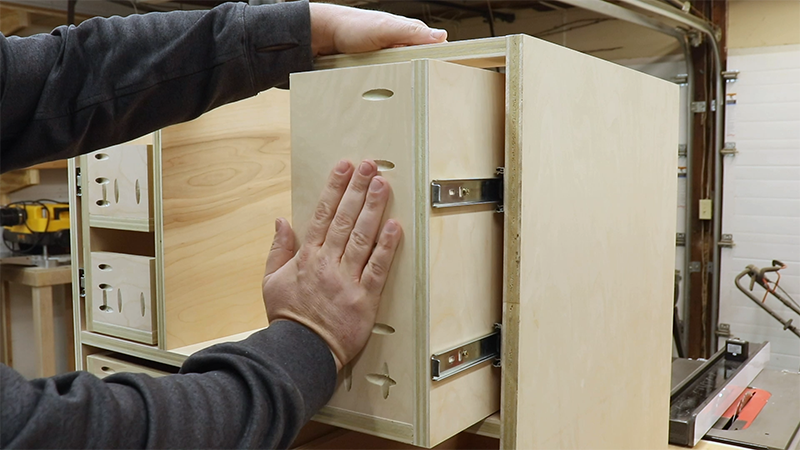
Sliding the pull out tray into the slides
Attaching the Back of the Router Table Cabinet
The cabinet has a 1/2 inch back on it that is recessed into the cabinet carcass with a hole cut for dust collection. I made a 3/8 inch rabbet using my router and this really cool multibit I found from Whiteside. It’s basically 8 bits in one. You just change out the bearing depending on how big of a rabbet you need. The largest bearing is for using it as a flush trim bit. There is a link up in the materials list if you’re interested in learning more.
Whiteside Multibit
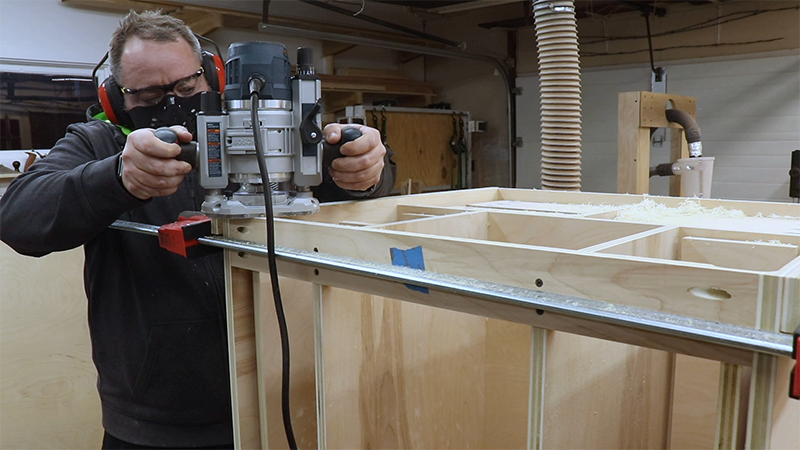
Routing out the rabbet for the back
Once the rabbet was made I cut the back to size over at the table saw and then rounded the corners with my jig saw.
Cutting out the back on the table saw
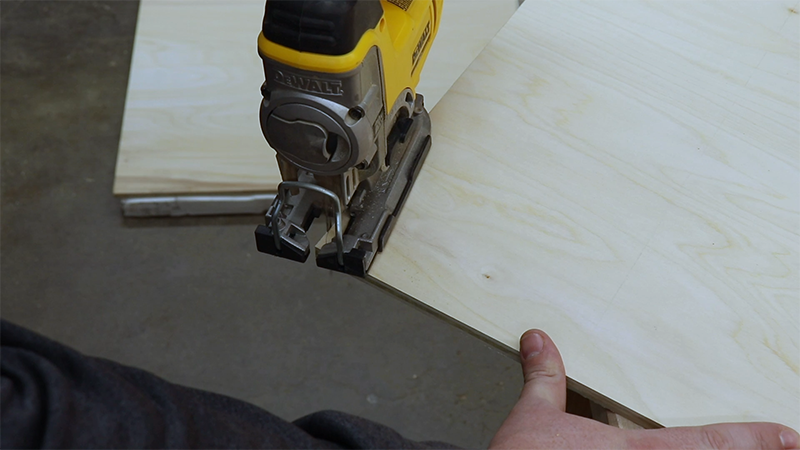
Rounding the corners of the back with the jigsaw
To make the opening for the dust collection port I drilled a hole in each corner and then connected them with the my jig saw.
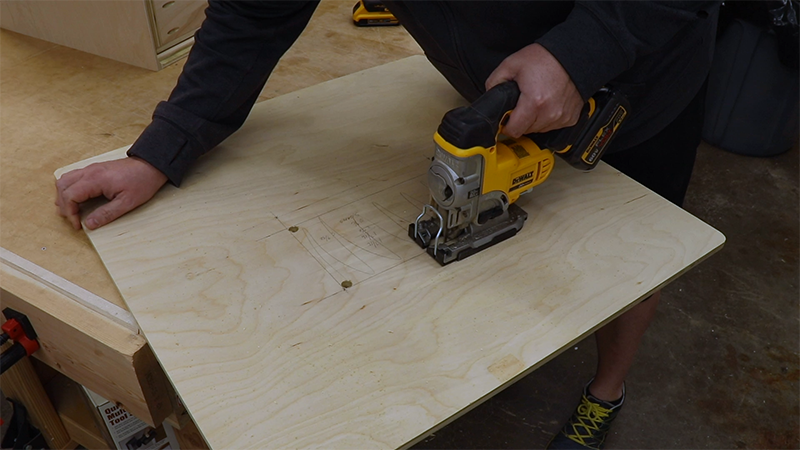
Cutting out the dust port on the back of the cabinet with the jigsaw
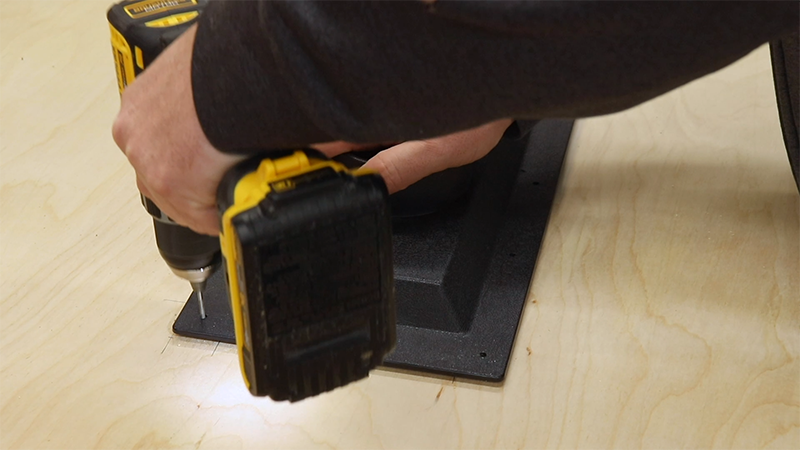
I used some 1/4 x 1/8 inch weatherstripping around the dust port, pre drilled some holes and then sanded the back. #8 1/2 inch screws were used to attach the dust port to the back which was then attached to the cabinet with 1 1/4 inch brad nails.
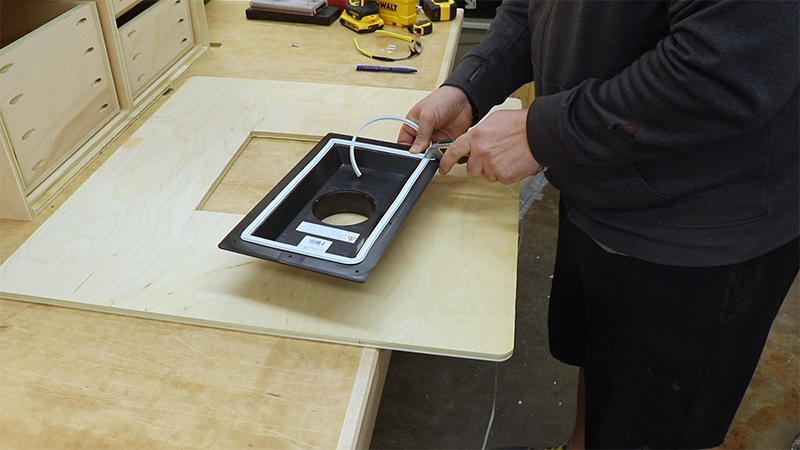
Applying weather stripping to the dust port
Drilling pilot holes for the dust port
Sanding the back
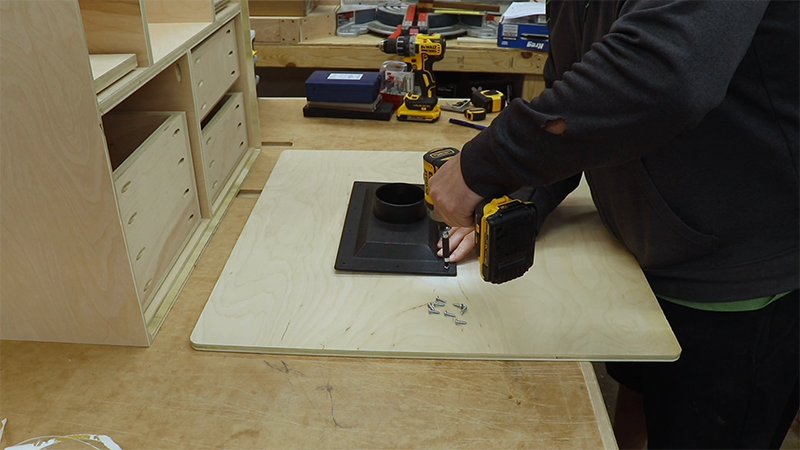
Attaching the dust port
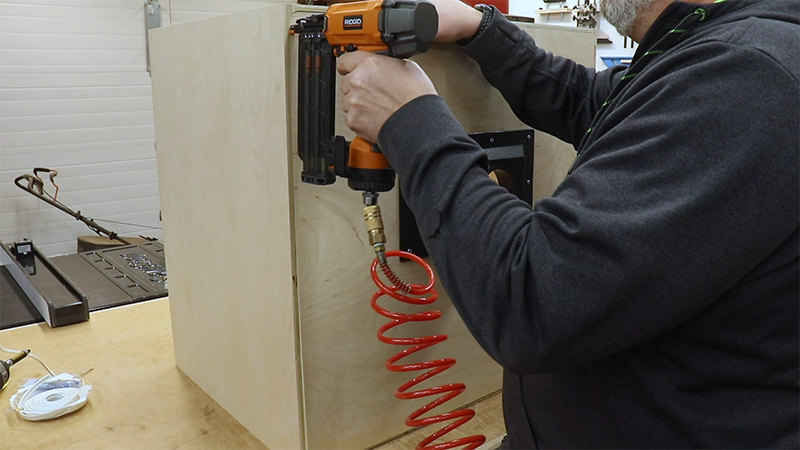
Attaching the back with brad nails
False Fronts, Pulls, and the Router Compartment Door
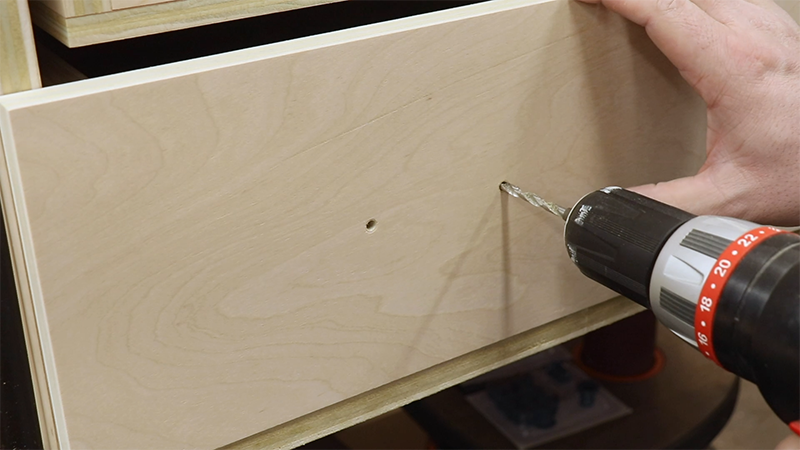
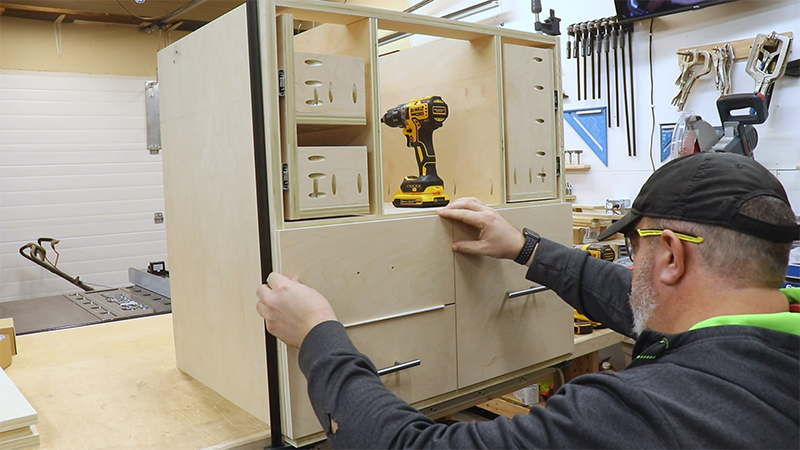
The only thing left on the cabinet is to put the false fronts on the drawers and trays and add the door to the router compartment. I wanted a continuous grain look so they were cut out from a single piece of the plywood. Once everything was cut I used the Kreg cabinet hardware jig to drill all of the holes for the drawer and door pulls. I finished up the fronts and door with a quick sanding.
Cutting out the drawer and tray fronts
Squaring up the drawer and tray fronts
Using the Kreg Cabinet Hardware jig to position the pulls
Sanding the drawer and tray fronts
Installing False Fronts the Easy Way
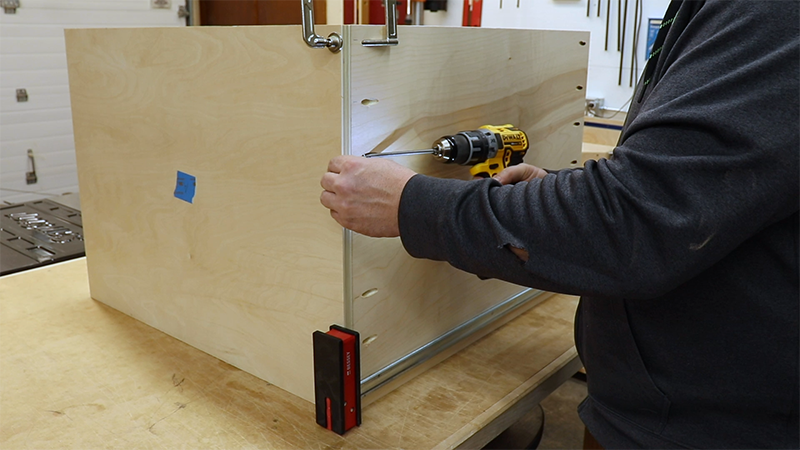
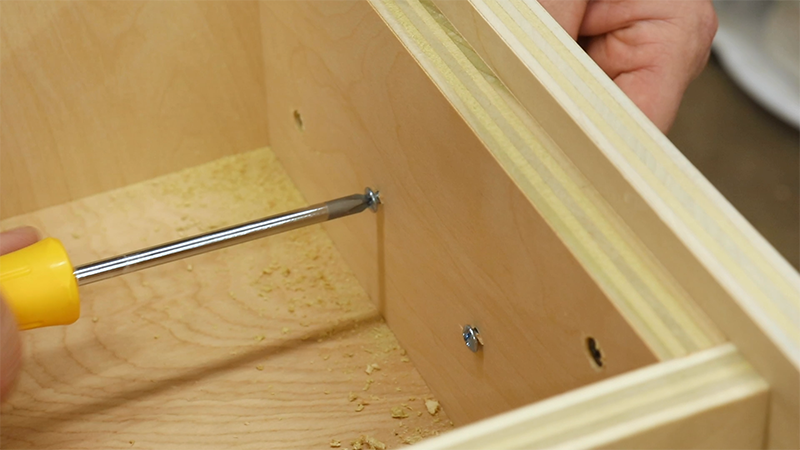
I clamped a straight edge on the bottom of the cabinet to line up the bottom of the drawer fronts. Once the fronts were positioned where I wanted them they were screwed to the drawer through the holes that were drilled for the pulls. This was a trick I learned from The Wood Whisperer. It’s a clamp free way of accurately positioning the drawer fronts. Just pull out the drawer and you can permanently fasten the fronts on from the inside with #8 1 1/4 inch screws, remove the temporary screws and attach the pulls.
Clamping a straight edge to the bottom of the cabinet
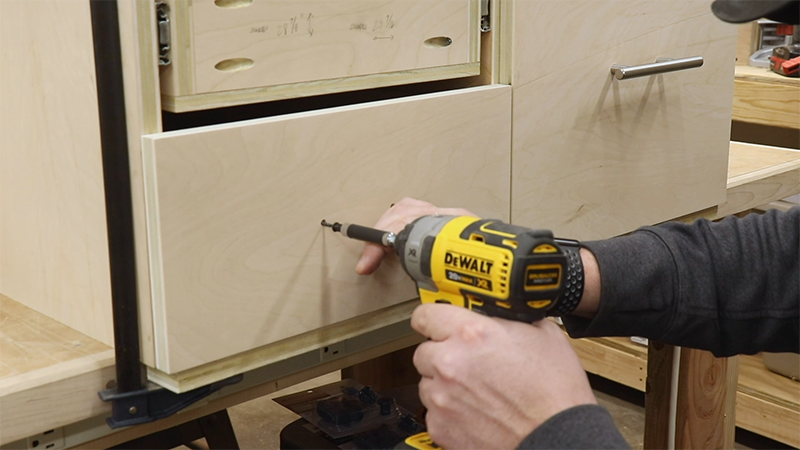
Temporarily attaching the false fronts with screws

Predrilling the false fronts
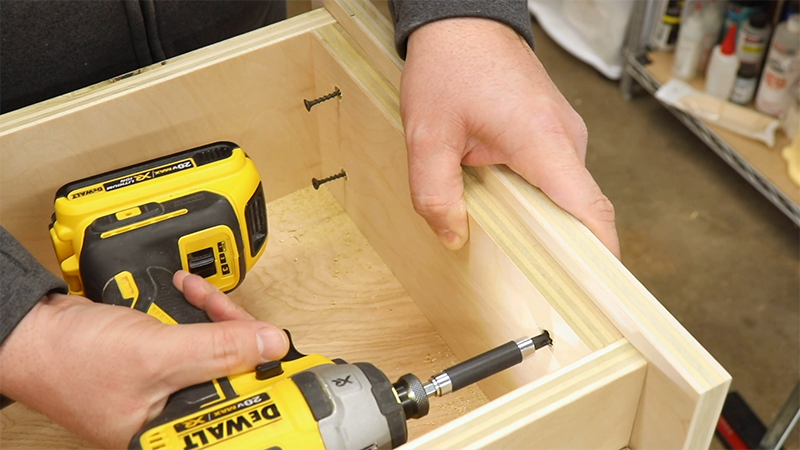
Permanently attaching the false fronts with screws
Drilling out the drawers for the pulls
Attaching the pulls
Aligning the drawer false fronts
Mounting the Hinges
I mounted the hinges on the cabinet and then transferred their centerlines to the door. Half overlay European hinges were used on the door and again I reached for a Kreg jig. This time it was the door hinge jig and this, along with the cabinet hardware jig, is well worth the money in my opinion. All you have to do is position the jig and use the included forstner bit to drill the hinge cup and then use the provided drill guides for the pilot holes.
Marking the door hinges on the door
Using the Kreg Door Hinge jig
Drilling the pilot holes for the hinges
The hinges were then attached to the door and cabinet with a few provided screws. After a couple of adjustments and adding the pull, the door and drawers were done.
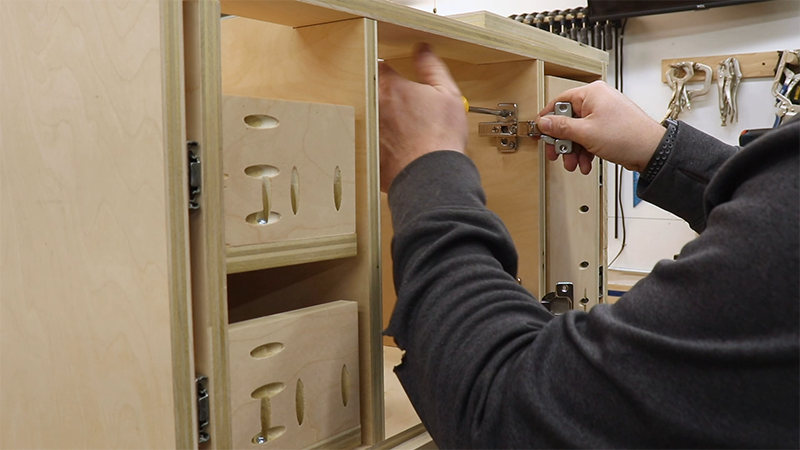
Attaching the hinges to the cabinet
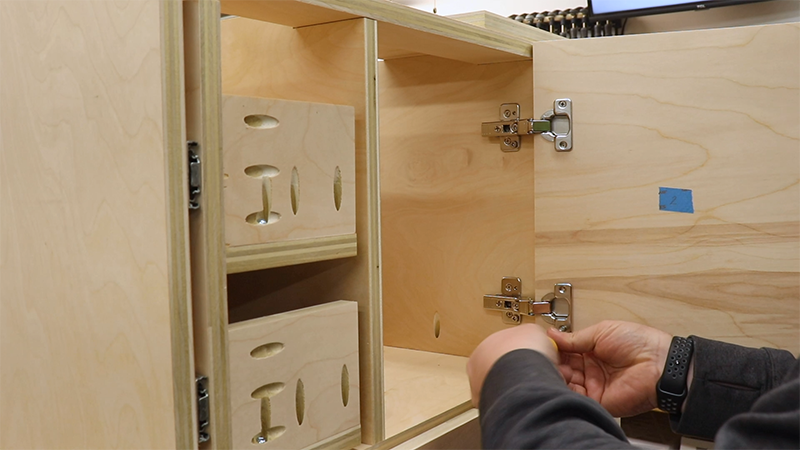
Attaching the door to the hinges
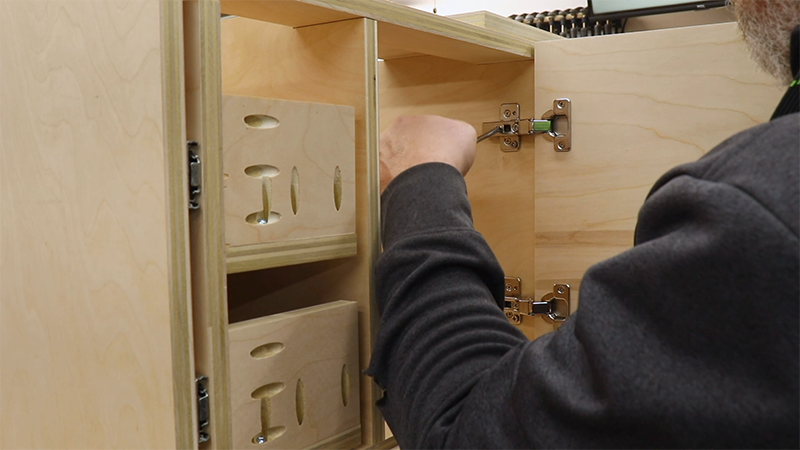
Adjusting the doors
Attaching the pull to the door
Attaching the false fronts to the trays
Making it Mobile
I want this thing to be mobile so I attached some 4 inch locking casters with #10 x 3/4 inch screws and finish washers.
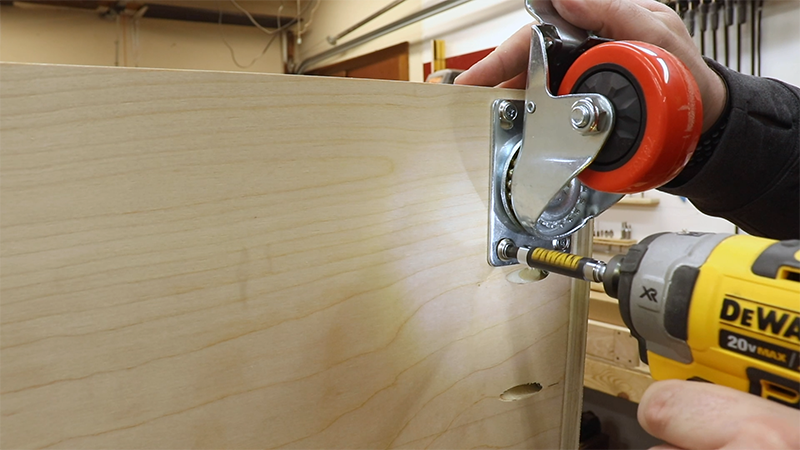
Attaching the casters to the bottom of the cabinet
Attaching the Router Table Top
After a quick sanding of the sides it was time to attach the router table top. I used a Rocker top for my table and installed it by pre drilling and then driving #8 x 1 1/4 inch screws through the cabinet stretchers into the top.
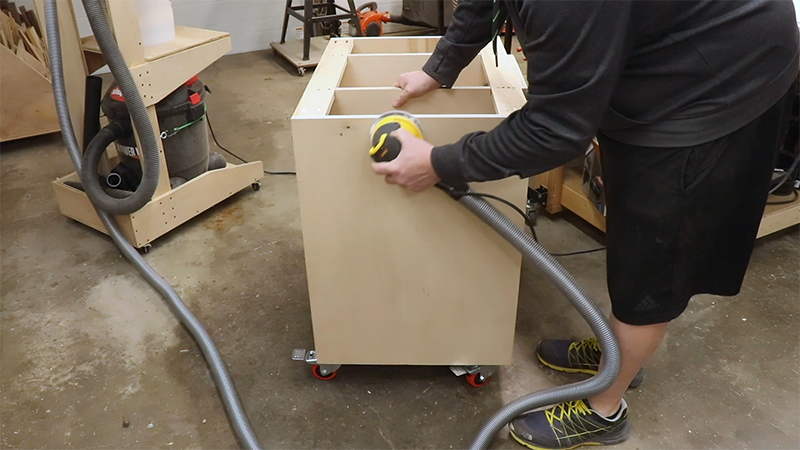
Sanding the sides of the cabinet

Positioning the top on the cabinet

Attaching the top to the cabinet
This was mistake #3. I didn’t have the pull out trays in when I positioned the top so the fronts were protruding beyond the corner of the top and it looks pretty terrible. I removed the screws and repositioned it on the cabinet and it looks much better.
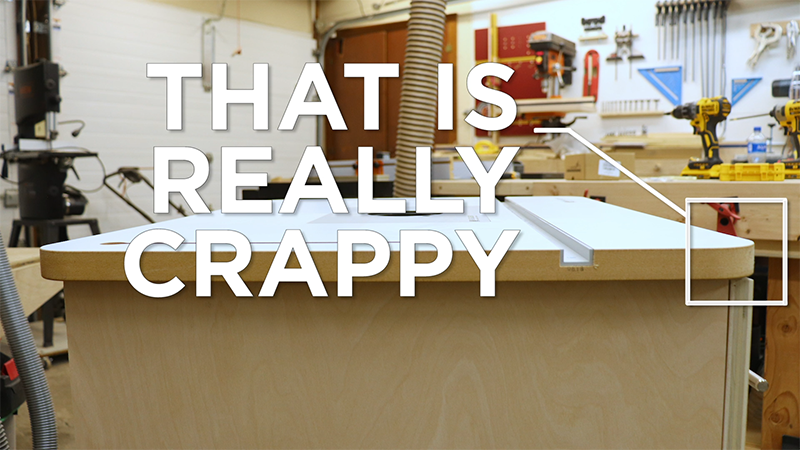
Positioning mistake
Door extending past the top
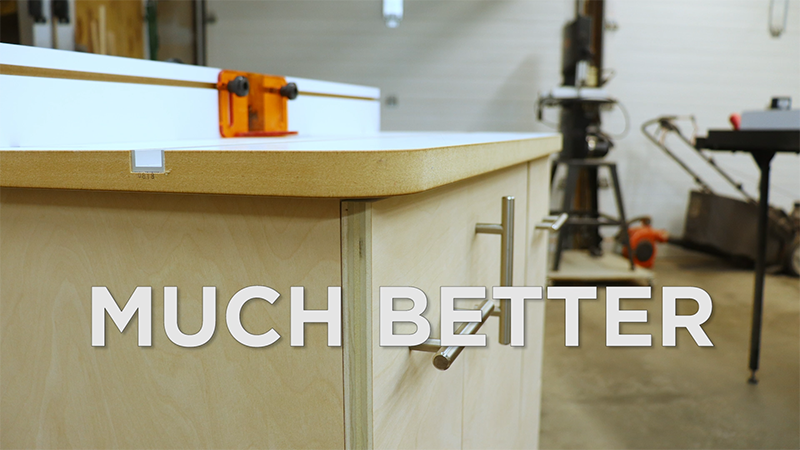
Repositioned top
Dust Collection
Now on to dust collection. I threw this together pretty quickly and we’ll see how it works with some use. It has over and under the table collection and uses the Rockler dust right adapters to connect to my collector. When it’s all hooked up it’s quite obtrusive but I don’t use the router table a ton so it shouldn’t be much of a problem. It also disconnects and stores in the router compartment quite quickly.
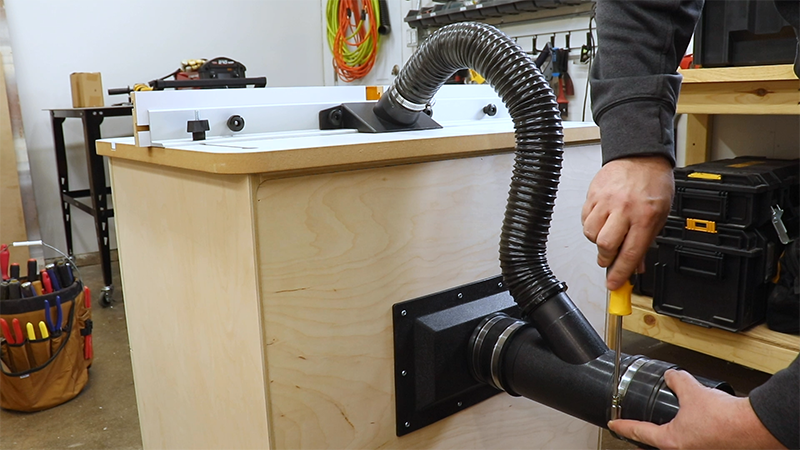
Adding the dust collection
Filling it Up
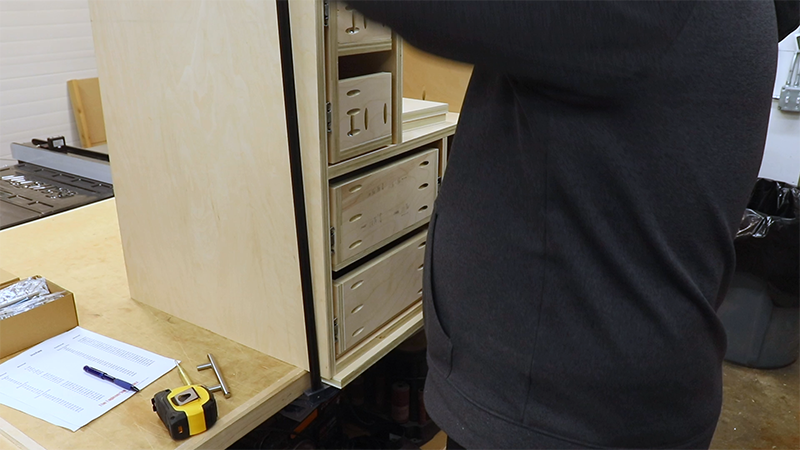
Time to fill this thing up. As I said earlier, I bought Rockler router bit storage inserts and they work great. I have almost 60 inserts on the two shelves and could easily add more down the road if needed.
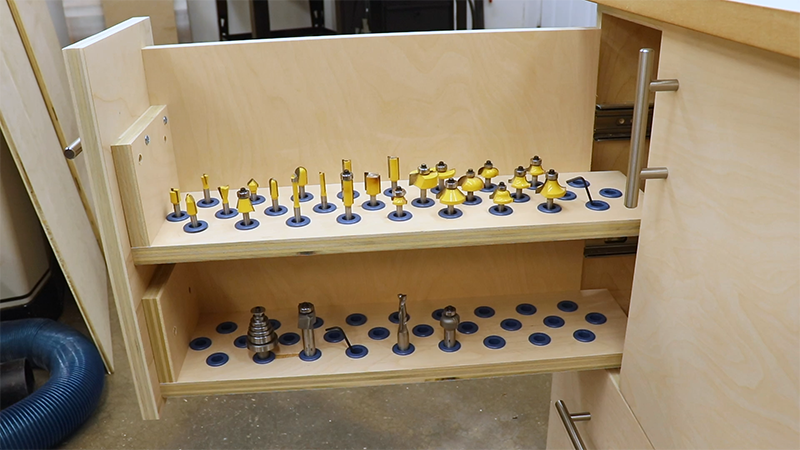
Filling up the router bit trays
Anything router related filled up the rest of the storage. I did not fill up the right side pull out tray as I am planning on getting a new router and router lift soon and those will have the accessories that I want to store on that side of the cabinet.
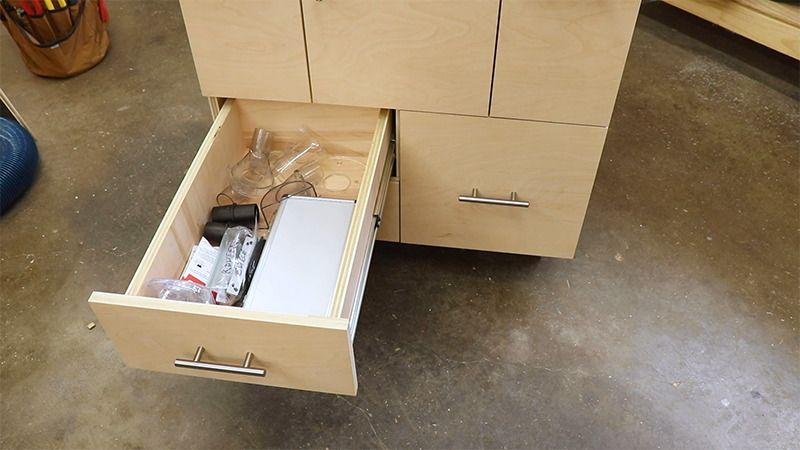
Filling up the drawers
That’s a Wrap
That does it for another project in the Average Craftsman shop. I have some projects coming up where I will utilize the router table quite a bit so I am glad I made this cabinet. My shop is severely lacking storage space so this was a good start to try and tackle that problem.
Please let me know what you thought of this build in the comments down below. I would love to hear any feedback or suggestions on what can be done to make this router table cabinet better. I’d also like to know if you enjoyed the video and article for this build.
Don’t forget, plans are available for this project on my shop page. Happy building! See ya on the next project.


0 Comment