How to Install a Ductless Mini Split
Welcome to another Average Craftsman build article. Actually, we’re not really building anything today, we’re installing. Installing what? Glad you asked. I will be walking you through my installation of a Pioneer Ductless Mini Split.
First, we’ll discuss how a mini split functions and then we’ll look at my situation and needs for heating and cooling my shop. We’ll then discuss some other options I had and why I ultimately decided on a ductless mini split.
One item of note before we get started. While a lot of what I am discussing in this article could apply to a home/room/office/whatever, I will mainly be talking in terms of a workshop. Specifically, my workshop. While a traditional ducted HVAC system is certainly an option for a workshop, for this article’s sake and budgetary concerns, we’re going to act like they don’t exist.
What’s Ductless Mini Split?
A ductless mini split is a form of heat pump that contains an indoor and outdoor unit. The indoor unit (air handler) is mounted high on the wall in the room/space you are wanting to heat/cool. The outdoor unit (compressor) can be mounted up to X feet away. The X depends on the size of unit. In the case of my Pioneer mini split, X is 100 feet. Smaller units need to be closer while larger units can be further away.
Uh, Okay, What’s a Heat Pump?
Well, let’s start with the opening line from the Heat Pump entry on Wikipedia:
A heat pump is a device that transfers heat energy from a source of heat to a destination called a “heat sink”. Heat pumps are designed to move thermal energy in the opposite direction of spontaneous heat transfer by absorbing heat from a cold space and releasing it to a warmer one. A heat pump uses a small amount of external power to accomplish the work of transferring energy from the heat source to the heat sink.
Moves heat from cold to warm. Hrm, let’s think about that in regards to air conditioning and heating.
When a heat pump is in heat mode it will take the heat from the outside air and put it into the space being heated. In air conditioning mode, it does the opposite, takes heat from inside and puts it outside.
How Does a Heat Pump Heat In Cold Weather?
Even when it’s cold outside, there is still heat in the air. However, this is where heat pumps used to fall a bit short. Older heat pumps had trouble operating under 20 or 30 degrees. That makes sense, it’s cold outside therefore there can’t be much heat. Enter inverter technology. Now, I am not an engineer or HVAC expert so I am not even going to attempt to explain the technical aspects of inverters. The only things I know are this, inverters:
- are more efficient
- can operate in extremely cold temperatures
My Heating and Cooling Needs
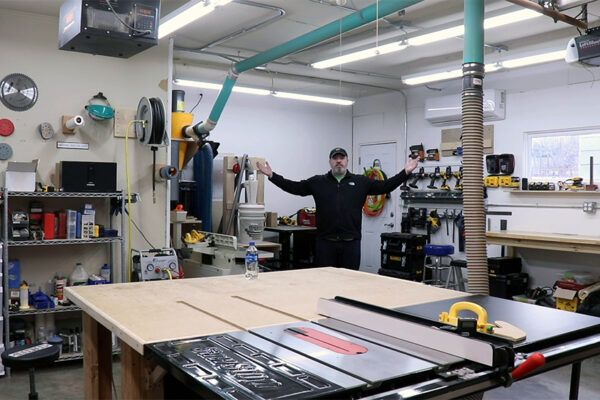
My Space
The shop is a pretty average two car garage. It’s a little oddly shaped so it’s feels smaller than it is but the total area 476 square feet which is pretty average. A 22′ x 22′ garage is 484 square feet. The walls are well insulated but the ceiling is completely uninsulated. In fact, the ceiling is sagging in the middle which has created gaps in the ceiling hoover board. There is also a small attic access that is not covered. All in all, the ceiling situation is not ideal. Any heat that enters my garage goes right out through the ceiling.
My Climate
I live in Kansas City so I deal with pretty cold winters and hot, humid summers. This was my first full summer and winter working in this shop. The summer was okay. It wasn’t unbearable (though we did have a fairly mild summer) with a fan but I was far from comfortable. The worst part was the humidity and I knew that, at some point, air conditioning was in my shop’s future. This winter started out extremely mild as well and I worked in my shop with a light jacket and small heater through Christmas. Then, the bottom dropped out.
The week between Christmas and New Year’s was pretty brutal (for us Kansas Citians at least, you northerners and Canadians, don’t judge me). Our nights got down to 10 and 15 (Fahrenheit) below zero and highs were in the low single digits. During this time it dropped to 25-30 degrees in my shop. I don’t know about you, but screw that! I don’t mind it being chilly in my shop but that’s Hoth territory and it takes the fun right out working. It also sucks because you have to take your finishes and put them inside the house so they don’t spoil.
My Options
During the summer I looked into mini splits and came to the conclusion that I didn’t want to spend that kind of money. The summer wasn’t fun but I knew I could handle it again if needed with some more fan support. I then figured I could just get a heater for the winter so I started looking into those when the temps dropped. I could go with electric space heaters, wall heaters, propane or kerosene space heaters, or an electric ceiling mount heater. Some people use wood stoves but that seemed like a pain. I also didn’t give gas heaters (that connect to my home’s gas line) much time due to the cost involved in running the line.
Once I started researching all of these options I came to the conclusion that they were going to be one or all of the following:
- Expensive/Inefficient
- Noisy
- Smelly
- Intermittent (I couldn’t leave it running 24/7)
Had I picked any of those options it probably would have been a ceiling mounted electric heater. One of those would have cost $300-400 and used a ton of electricity. When I started to entertain that high of a cost just for heat, mini splits started to get back into the conversations going on inside my head. I figured it would it cost another $300-400 (or more) to cool.
Giving the Mini Split a Second Chance
During my initial research into mini splits I came to the conclusion that it would cost around $3000-4000 to get my shop set up. That was $1500-2000 for the unit and another $1000-2000 for install. That was nowhere near my budget but I figured I’d start looking at units again as well as look into DIY installation. During this latest round of research I ran across quite a few people using this Pioneer brand with a number of them being DIY installed.
I talked to a Pioneer salesperson, gave them the specs on my space, and they recommended an 18,000 BTU, 20.8 SEER unit which came in at a little over $1100. The great thing about this unit is that it can continue to heat when the outside temperature drops as low as -13 degrees. While not often, it can get that cold in my area so I definitely wanted to ensure that the unit could handle those temps.
How to Handle Installation
At this point, I was serious about a mini split. I just had to get over the installation part and try to avoid as much cost there as possible. 90% of installing these units is pretty simple. Especially if you’re comfortable doing electrical and you have power close by. Honestly, if you’re not comfortable doing electrical, then just leave the whole thing to a professional. Other than electrical, the trickiest part is connecting the indoor unit to the outdoor unit. This involves flaring copper connections, pressure testing, vacuum pumping, and possibly adding refrigerant. That takes some pricey tools and quite a bit of experience.
At this point, I decided to reach out to some folks on a neighborhood website so see if anyone knew of an HVAC tech that would help with that part of the install. A contractor responded and recommended a guy he has used quite a bit. I gave the guy a call and he said he would do it for a couple hundred bucks and even come over beforehand to walk me through some of the trickier parts of the install. I was now looking at less than $1500 for a heating and cooling solution. Sign me up. I placed my order for the Pioneer unit. It arrived about a week later and it was time to dive in.
Before we get started with the install let me say this…
*****ELECTRICITY IS DANGEROUS. HVAC WORK IS DANGEROUS. PLEASE CONSULT A PROFESSIONAL SHOULD YOU CHOOSE TO INSTALL YOUR OWN MINI SPLIT SYSTEM. THIS ARTICLE IF FOR INFORMATIONAL PURPOSES ONLY. DO ALL WORK AT YOUR OWN RISK*****
Materials and Tools
Tool I Will Be Using
- DeWalt 20V Max Drill and Impact Driver – http://amzn.to/2mt5nJj
- Torpedo Level – http://amzn.to/2EmdYcp
- 24″ Level – http://amzn.to/2nV5E9n
- Milwaukee Hole Saw Kit – http://amzn.to/2H7v9we
- Milwaukee Insulated Screwdrivers – http://amzn.to/2Hc6nLB
- Klein Tools 1/2″ EMT Conduit Bender – http://amzn.to/2Bs01az
- DeWalt FlexVolt Grinder – http://amzn.to/2H9ChrW
- Klein Tools Conduit Reamer – http://amzn.to/2EEmlzx
- Southwire Wire Strippers – http://amzn.to/2EANQKf
Materials Required*
*this is really going to depend heavily on your specific situation
- 30 AMP A/C Disconnect – http://amzn.to/2EBJvq7
- 6′ LiquidTight Conduit – https://tinyurl.com/yay46m57
- 12 Ga THHN/THWN Solid Copper Wire (Black) – http://amzn.to/2H9Uaac
- 12 Ga THHN/THWN Solid Copper Wire (White) – http://amzn.to/2Hc7YRB
- 12 Ga THHN/THWN Solid Copper Wire (Green) – http://amzn.to/2H8olyi
- Flex Shot Clear Rubber Sealant – http://amzn.to/2H9Um9q
theaveragecraftsman.com is a participant in the Amazon Services LLC Associates Program, an affiliate advertising program designed to provide a means for sites to earn advertising fees by advertising and linking to amazon.com
Let’s Install This Sucker
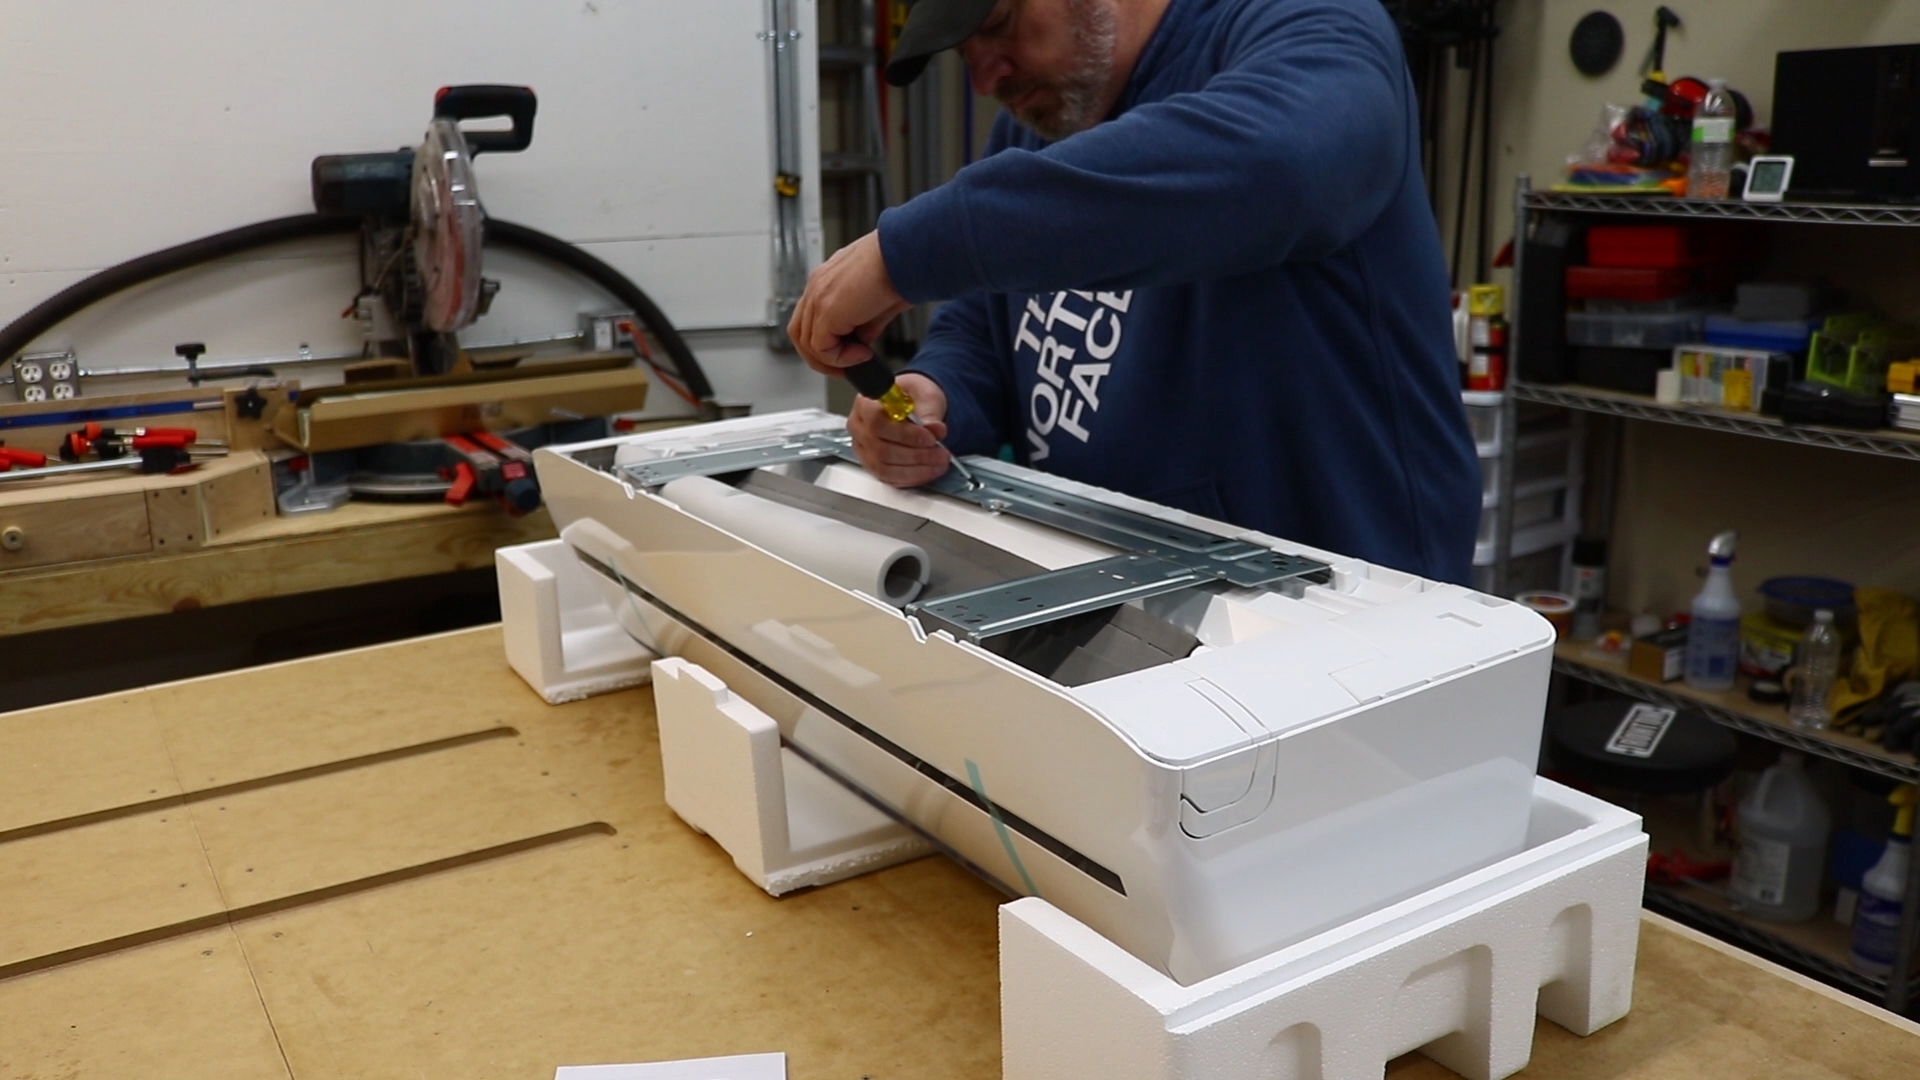
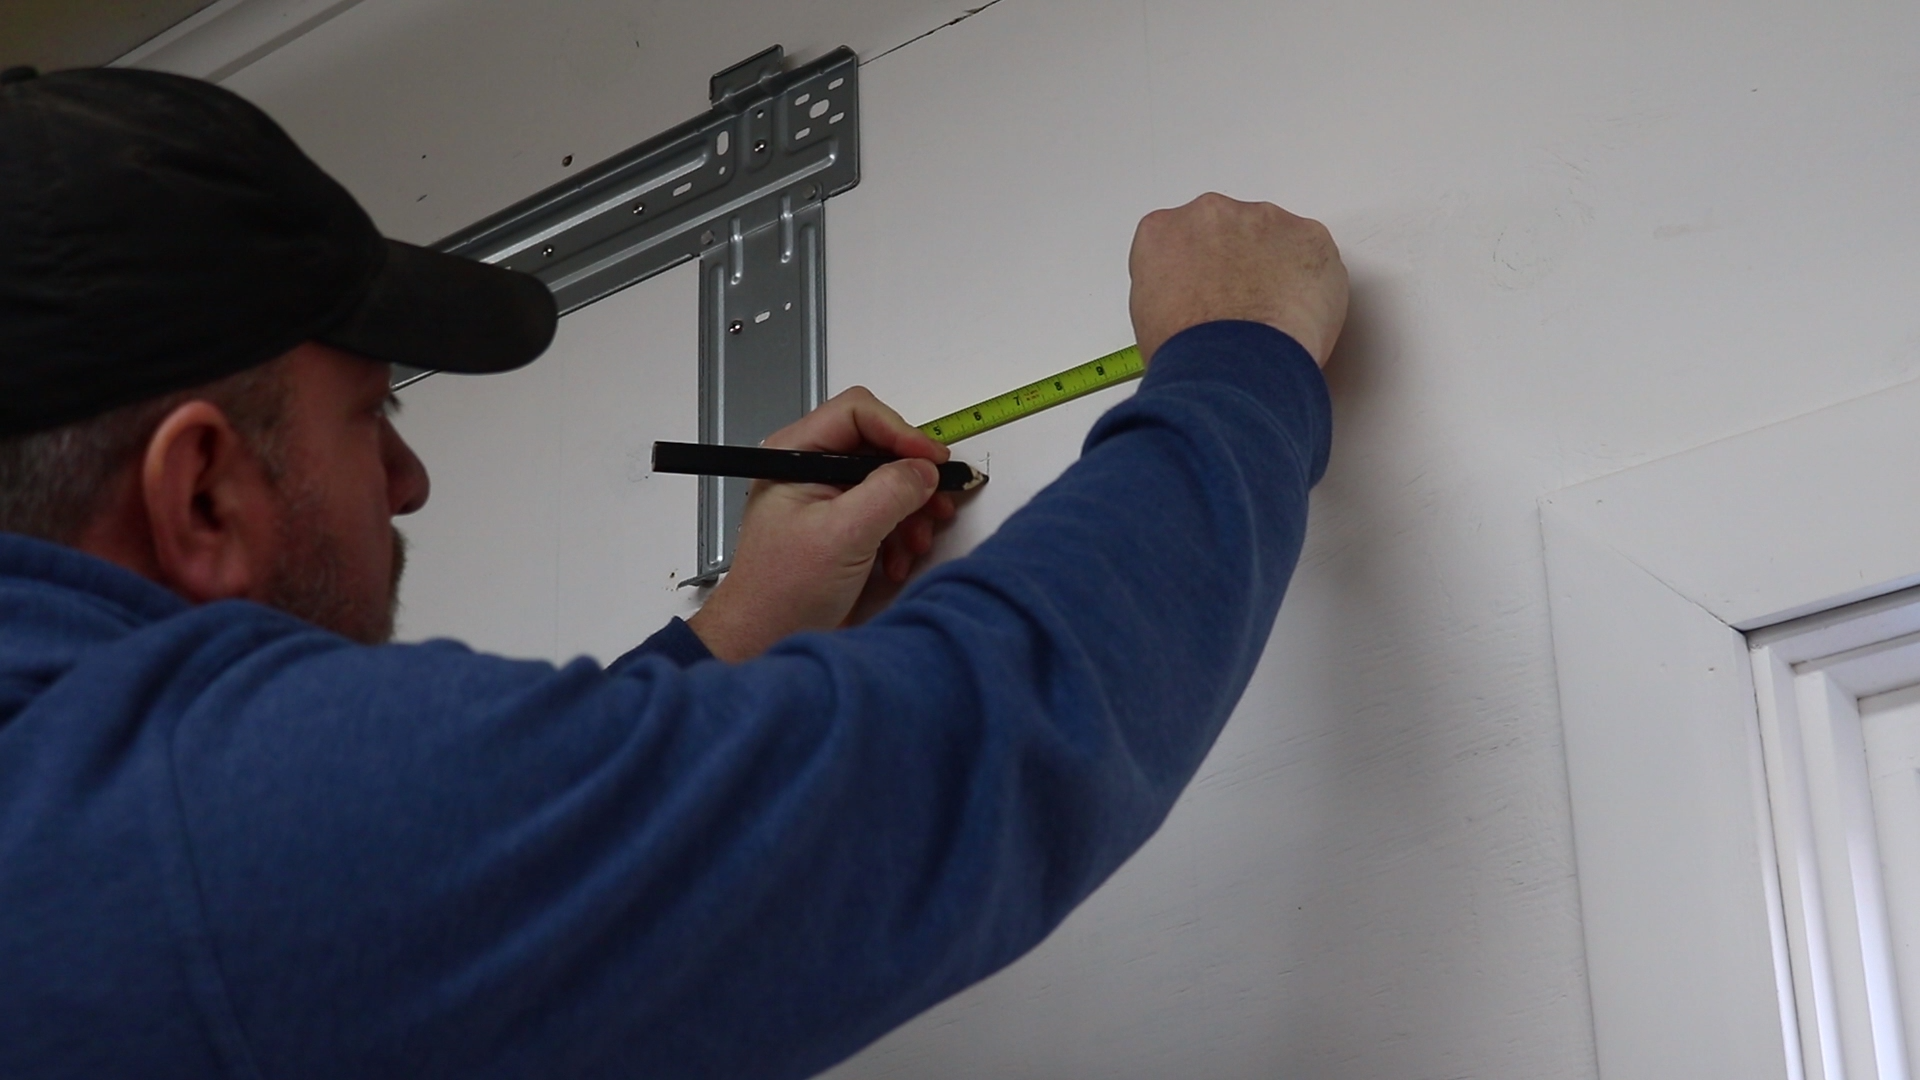
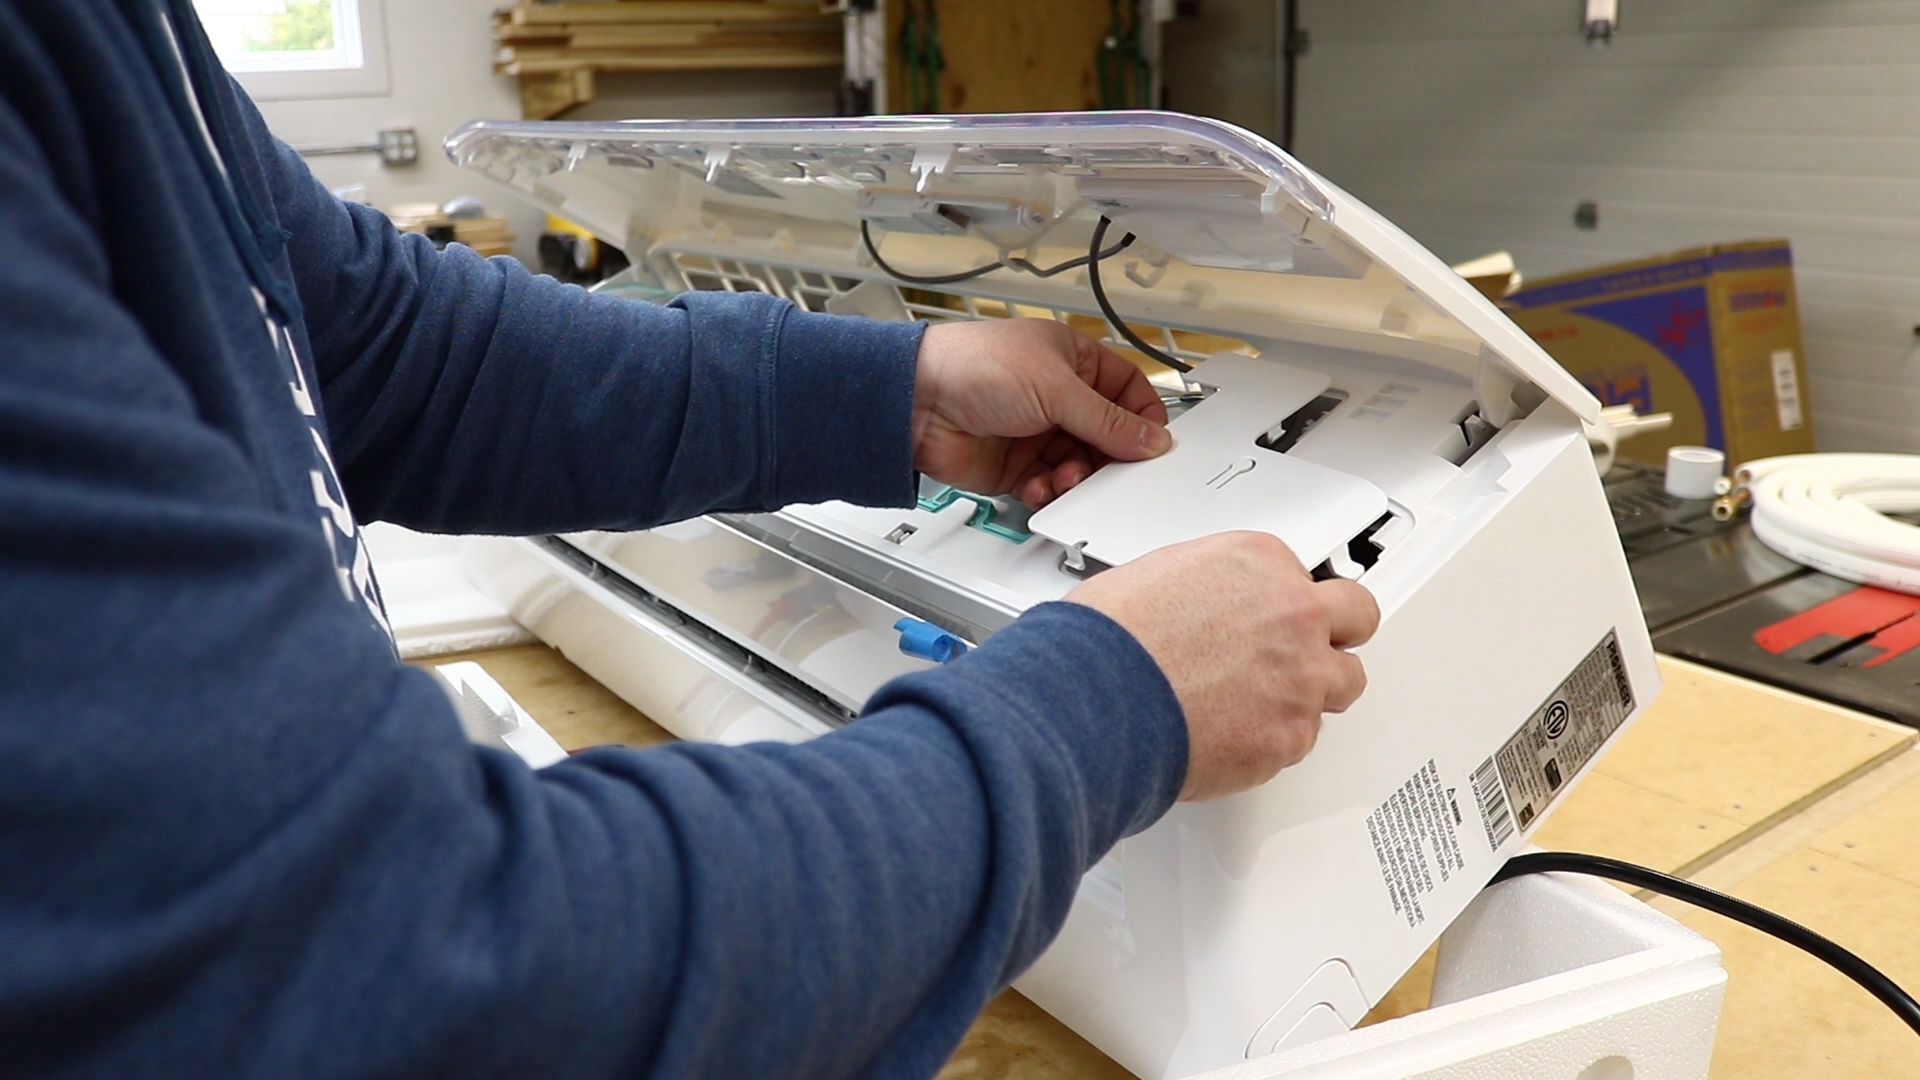
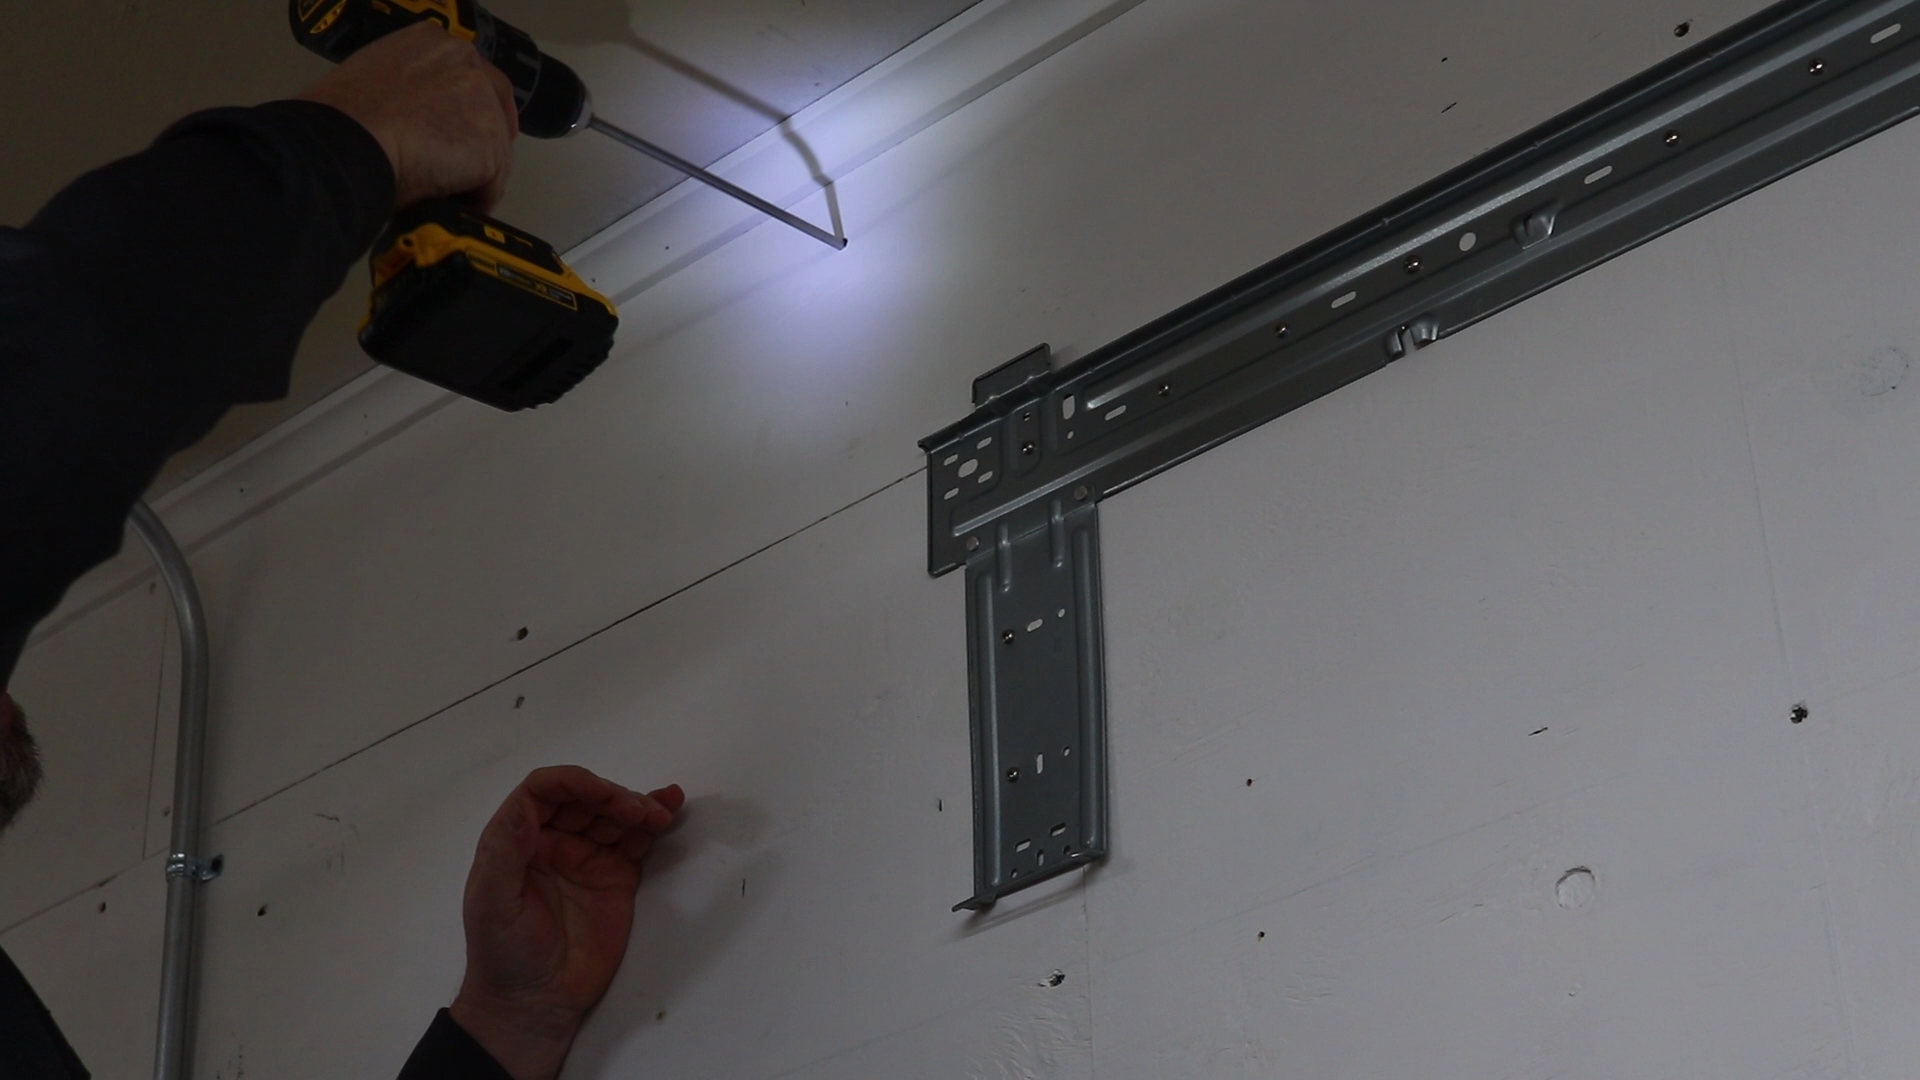
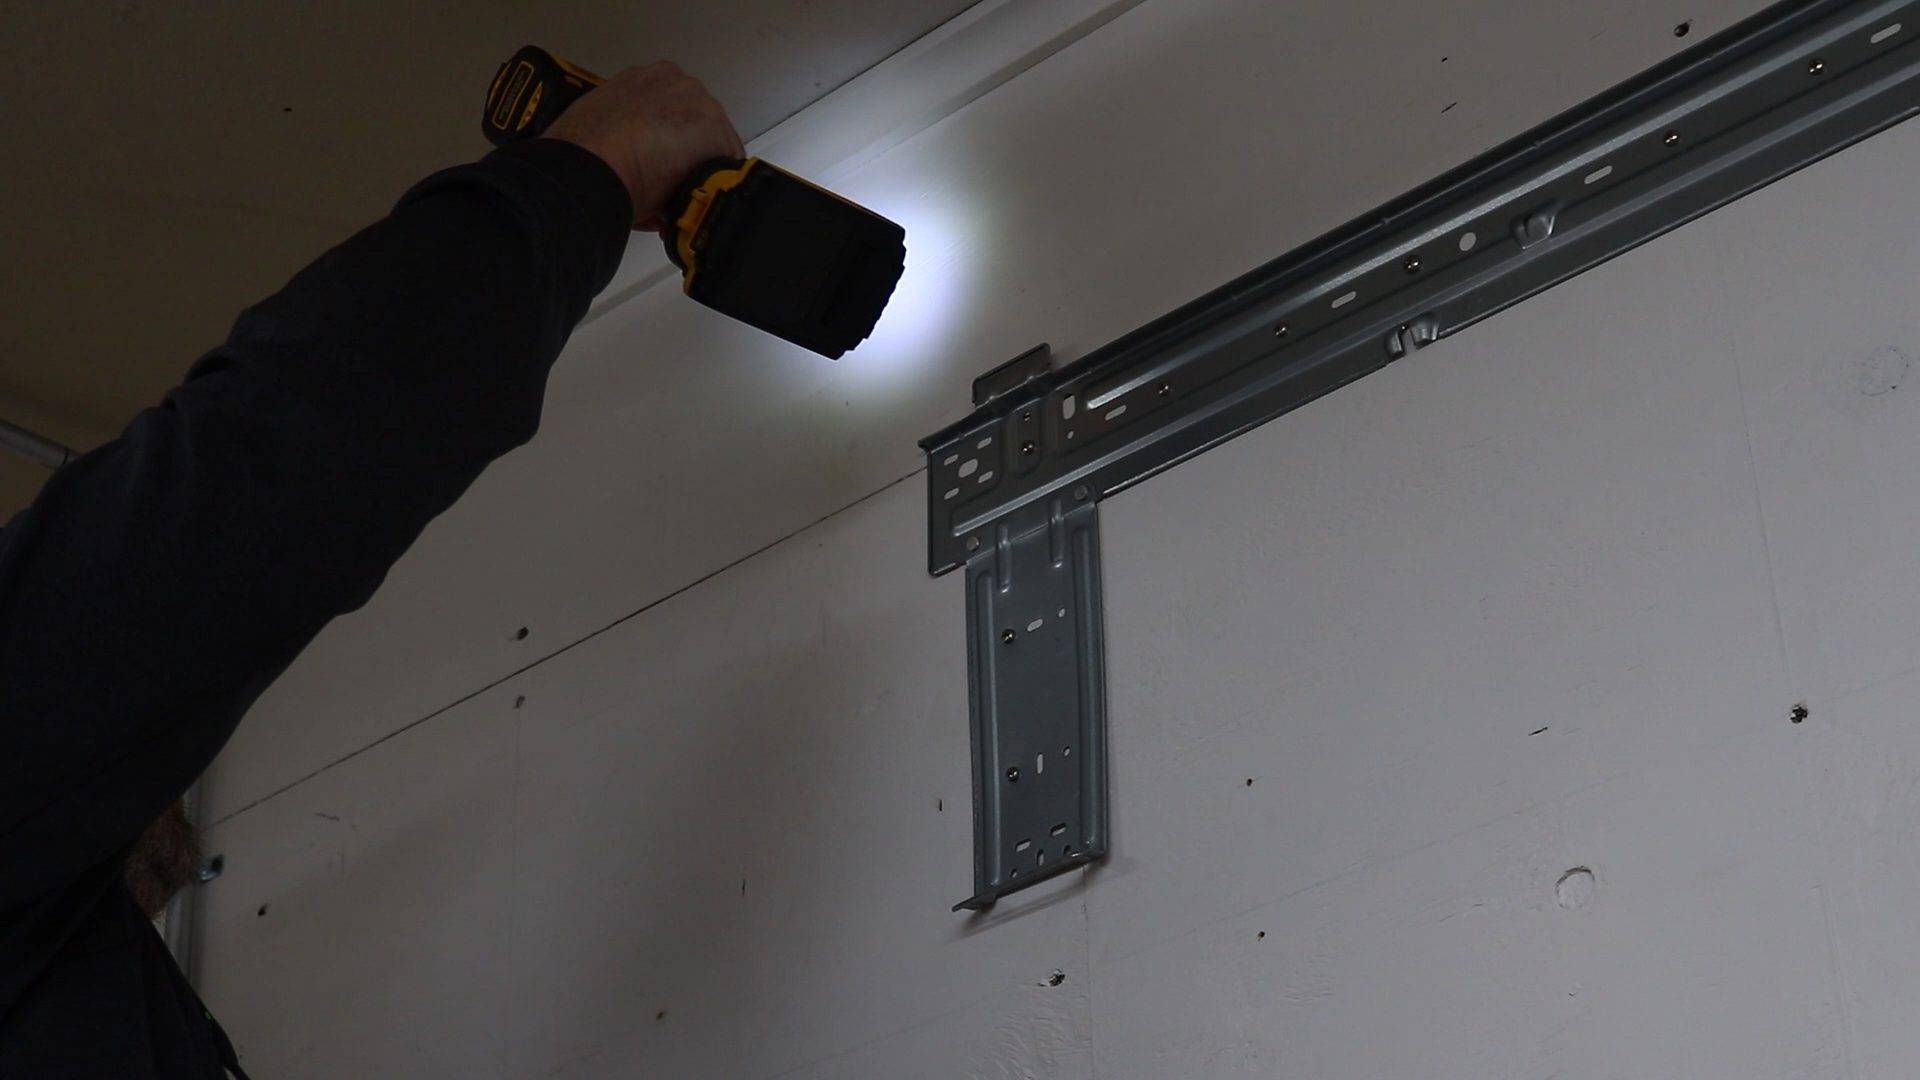
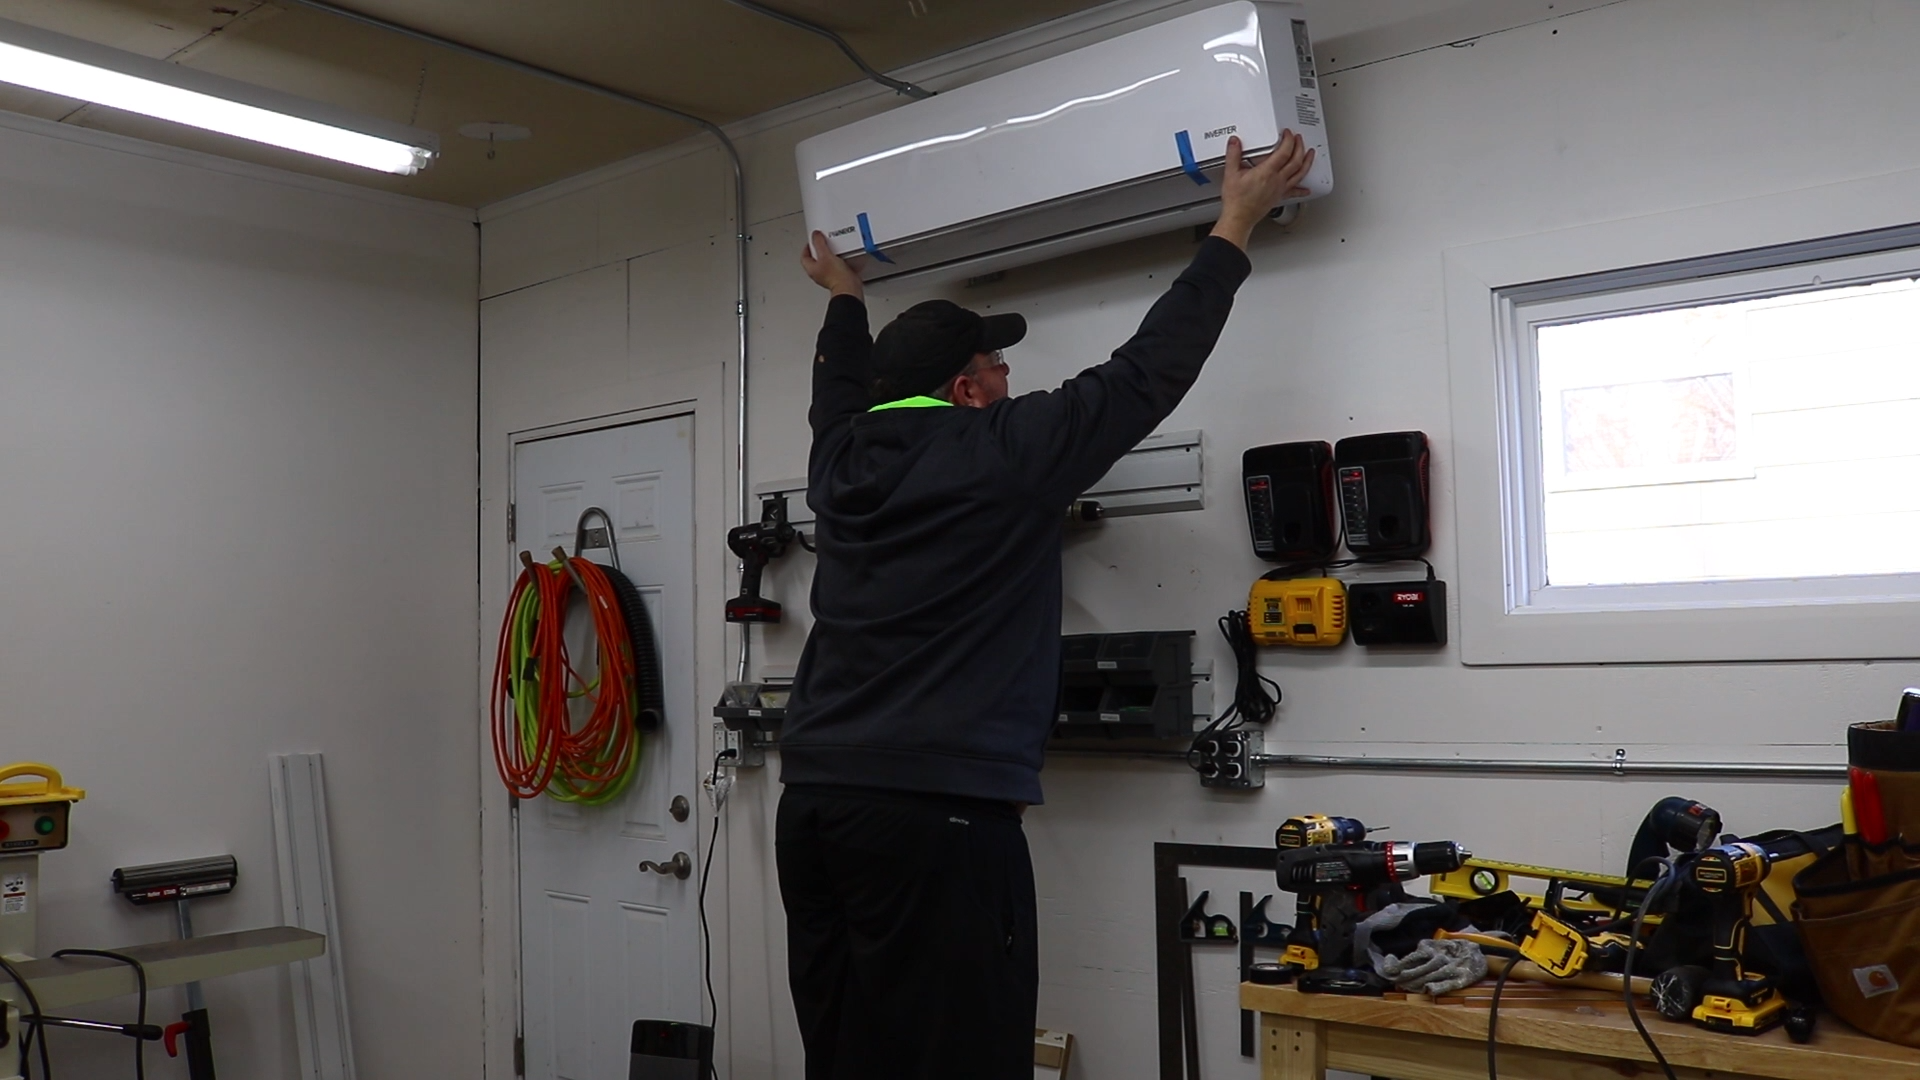
I ordered my unit online directly from Pioneer. It shipped free via freight and was delivered in a few days. There are a lot of stories about items being damaged during freight shipping but everything showed up well packaged and handled with care. After I unpacked everything the first step was to remove the mounting plate from the indoor unit and get it mounted to the wall.
The instructions provide a mounting diagram so you can ensure that you have the correct clearance from the ceiling and surrounding objects as well as where to cut the lineset hole in relation to the mounting plate. I measured and marked the location of the mounting plate on the wall.
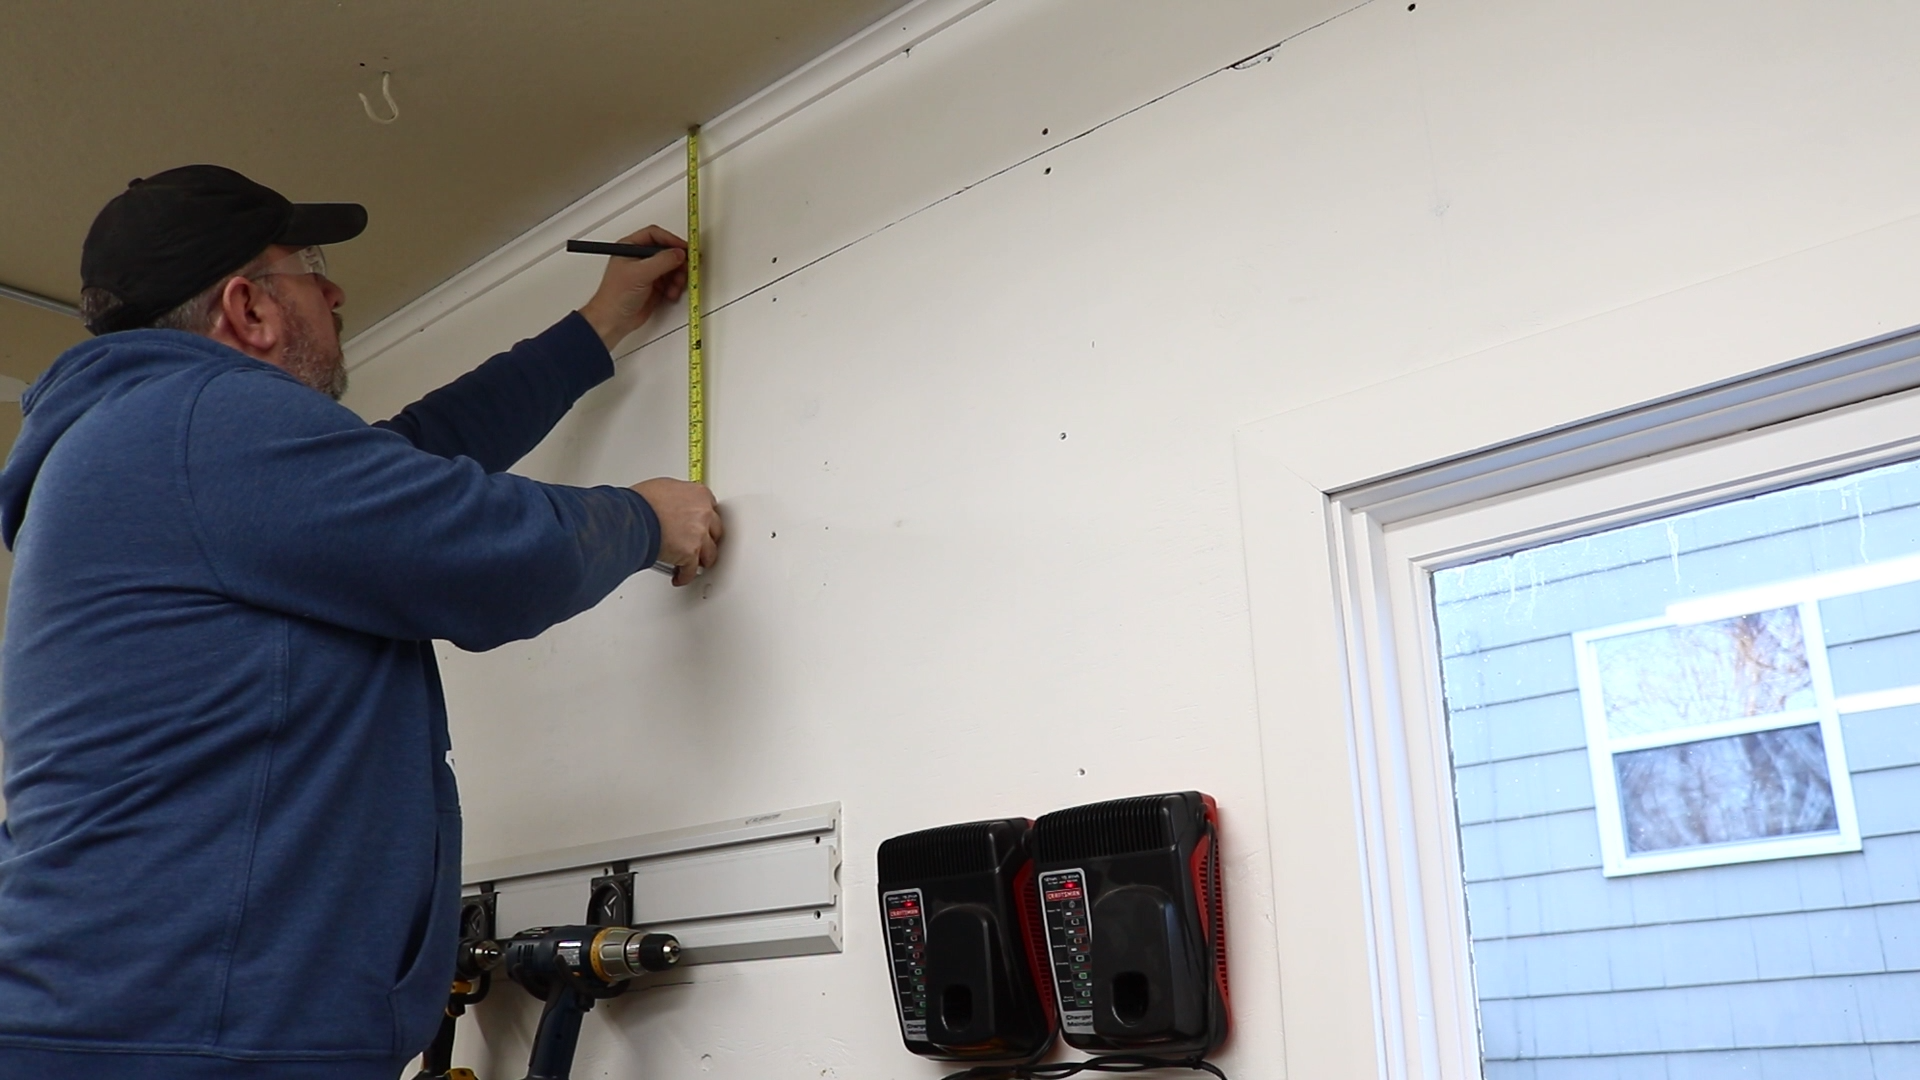
I then attached the mounting plate with some 3/4″ screws. My walls are plywood so this was very easy. The kit came with plenty of anchors if you are mounting onto drywall.

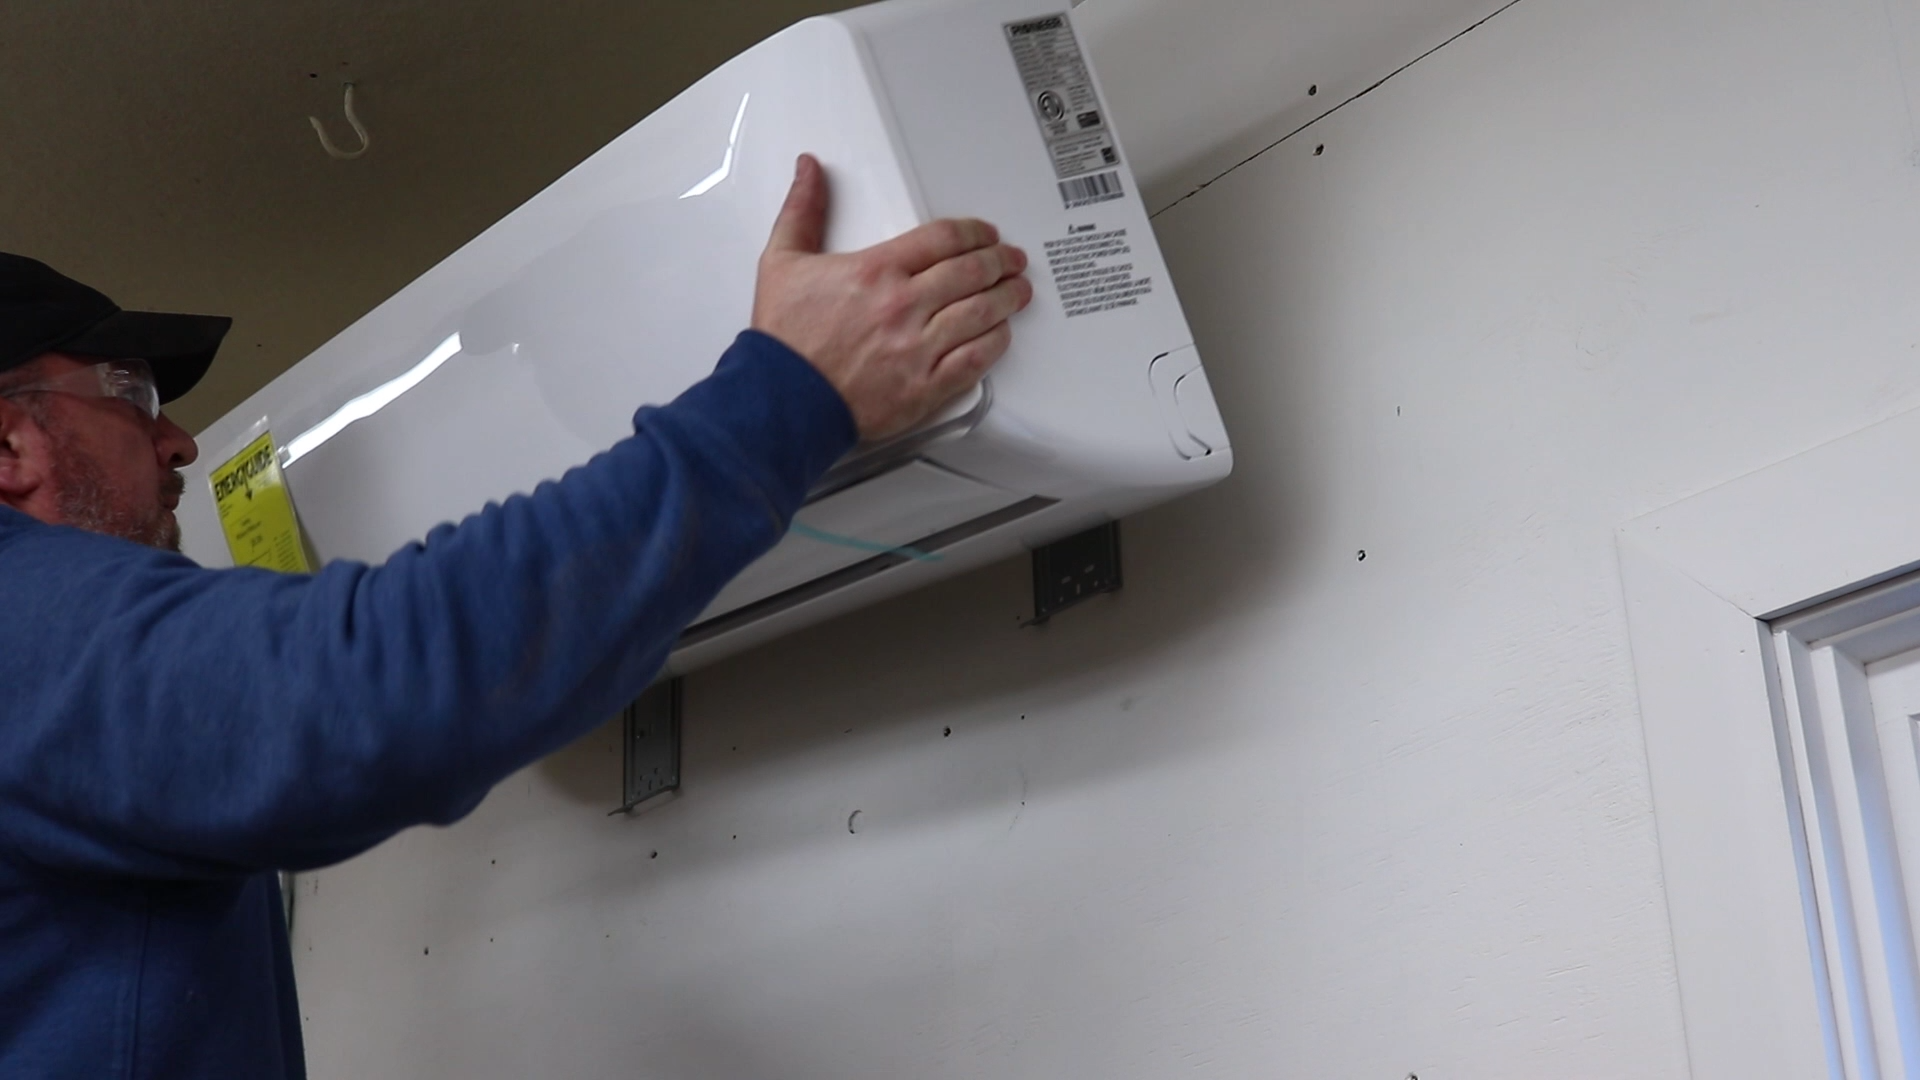
Once the plate was attached I did a test fit with the indoor unit to make sure everything was level and would attach properly. It’s vital that you get the indoor unit mounted level.
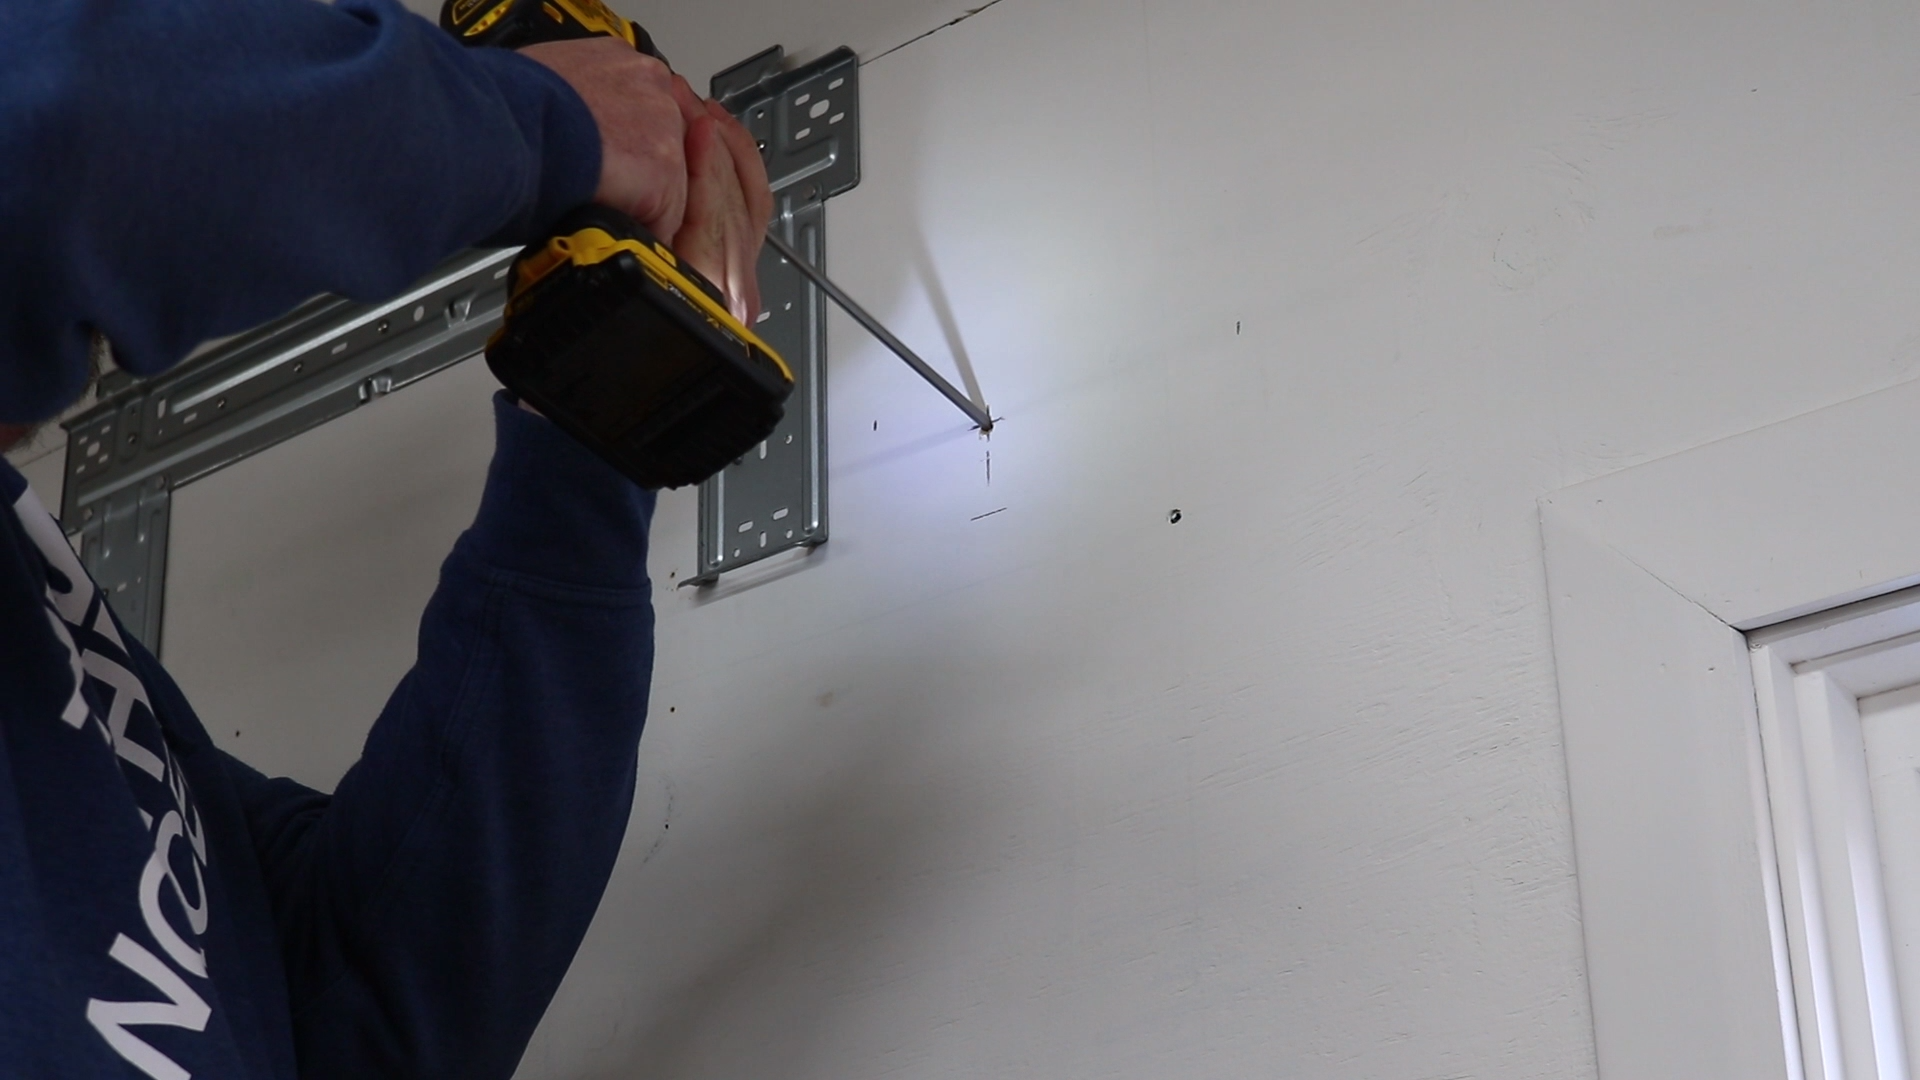
I removed the indoor unit and then marked the location of the lineset hole.
It’s import that the lineset whole is drilled so it slopes down from inside to out. I used a long 1/4″ drill bit to get the proper angle and drill through the entire wall.
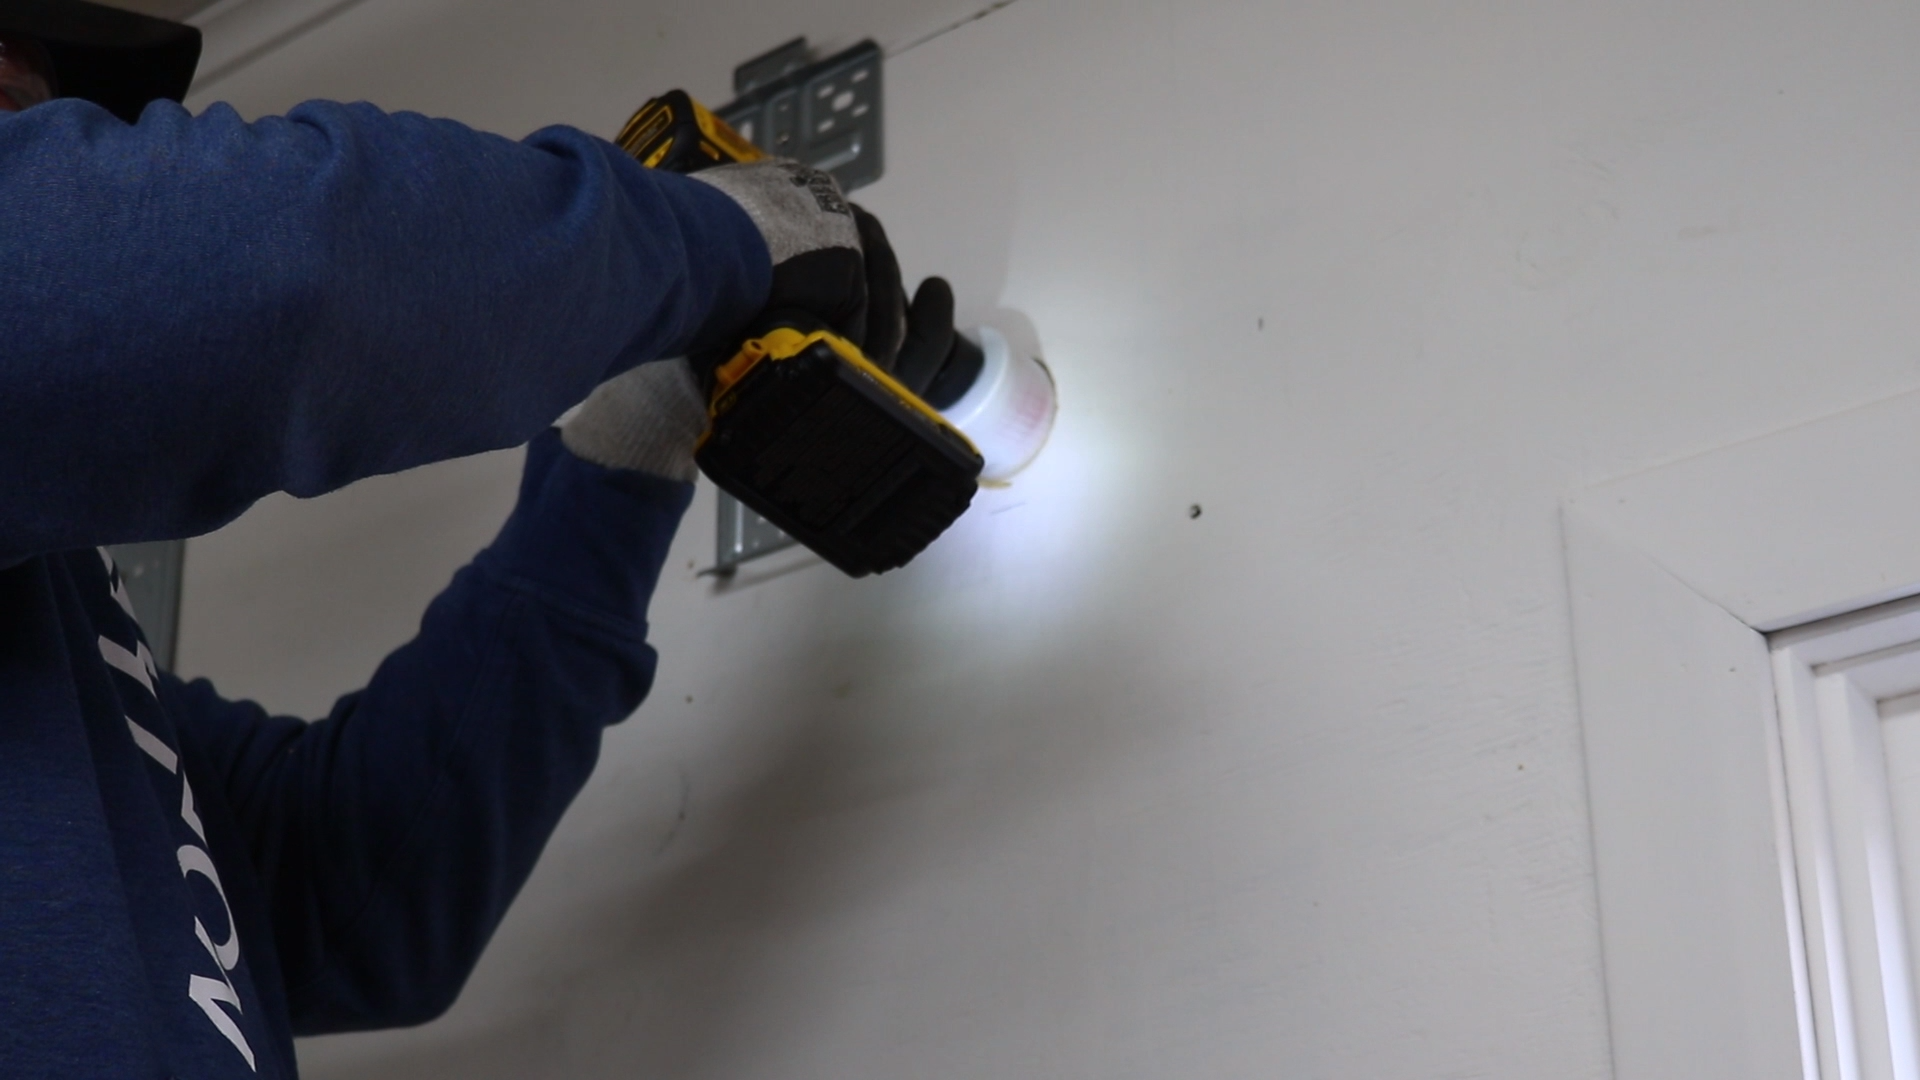
A 2 1/2″ hole saw was used to cut the hole on the inside of the shop wall.
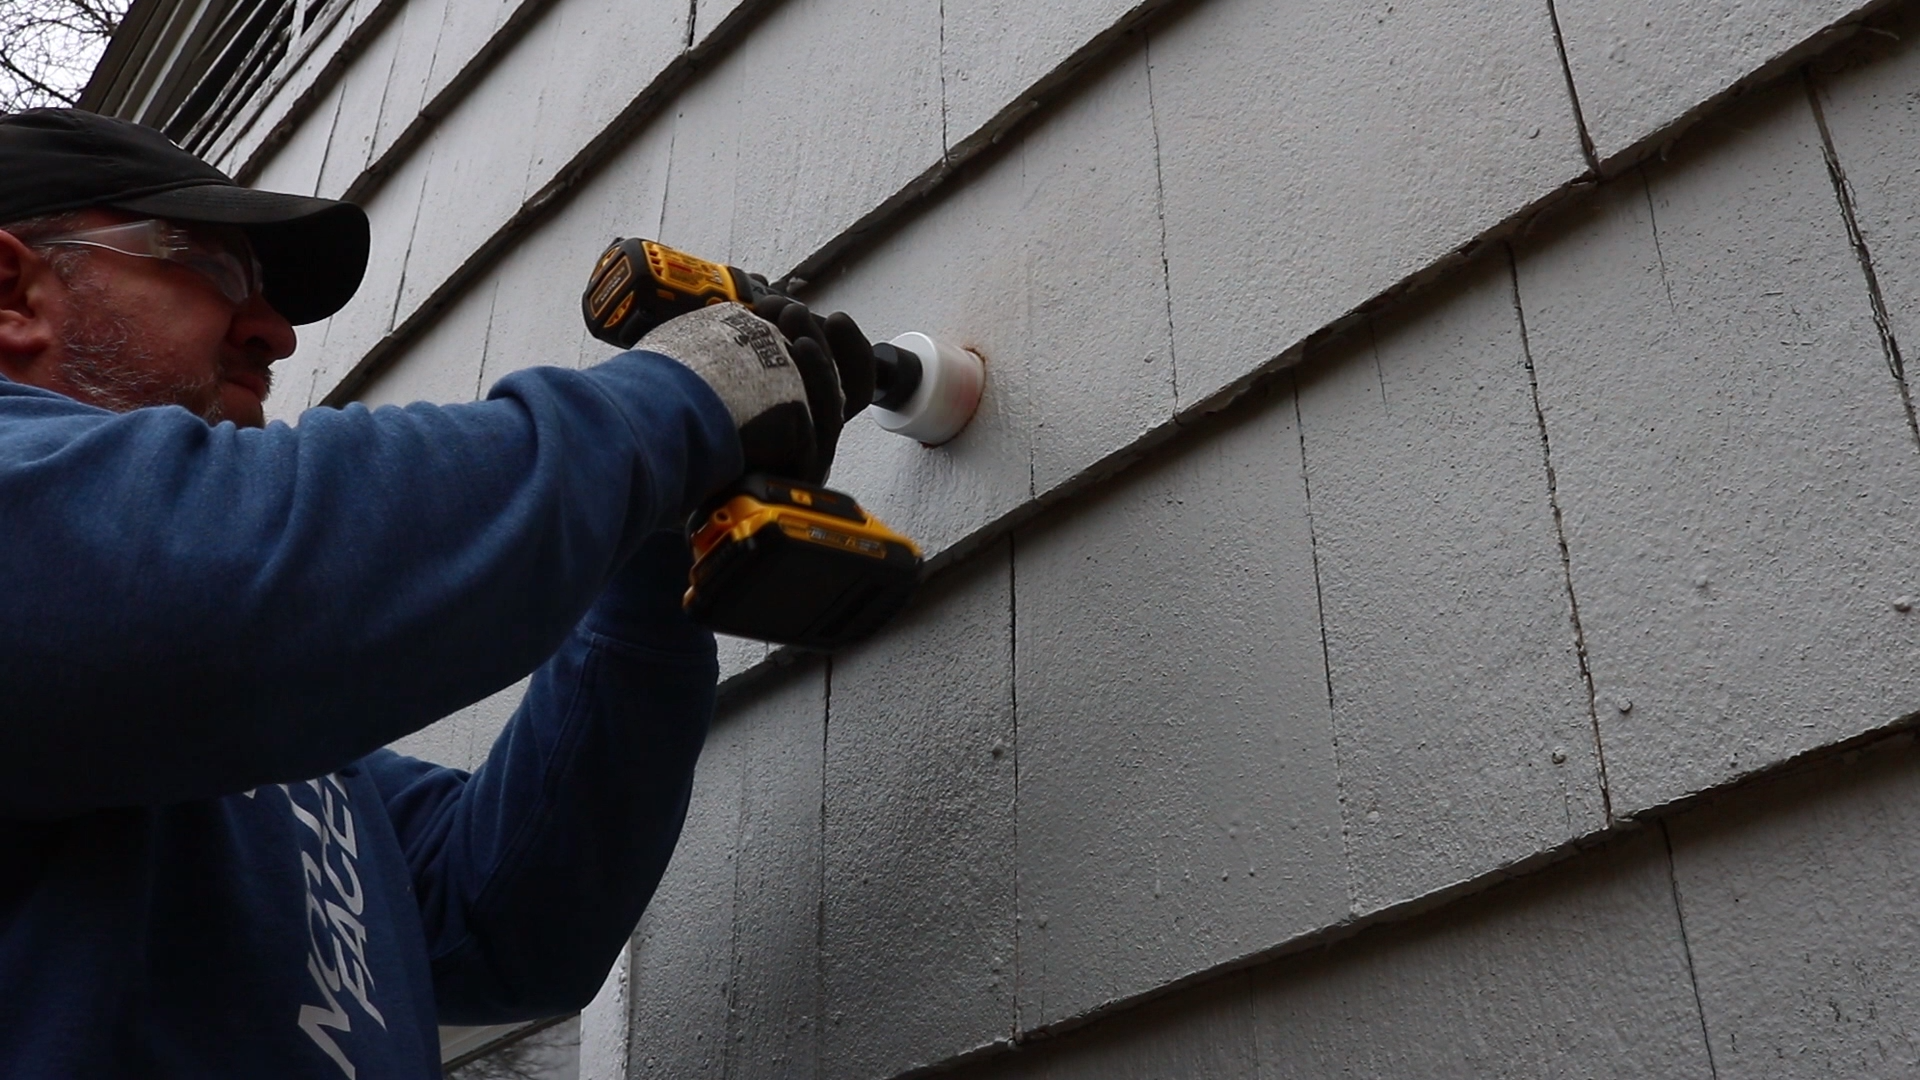
I then moved to the outside and cut hole with the a slight upward angle.
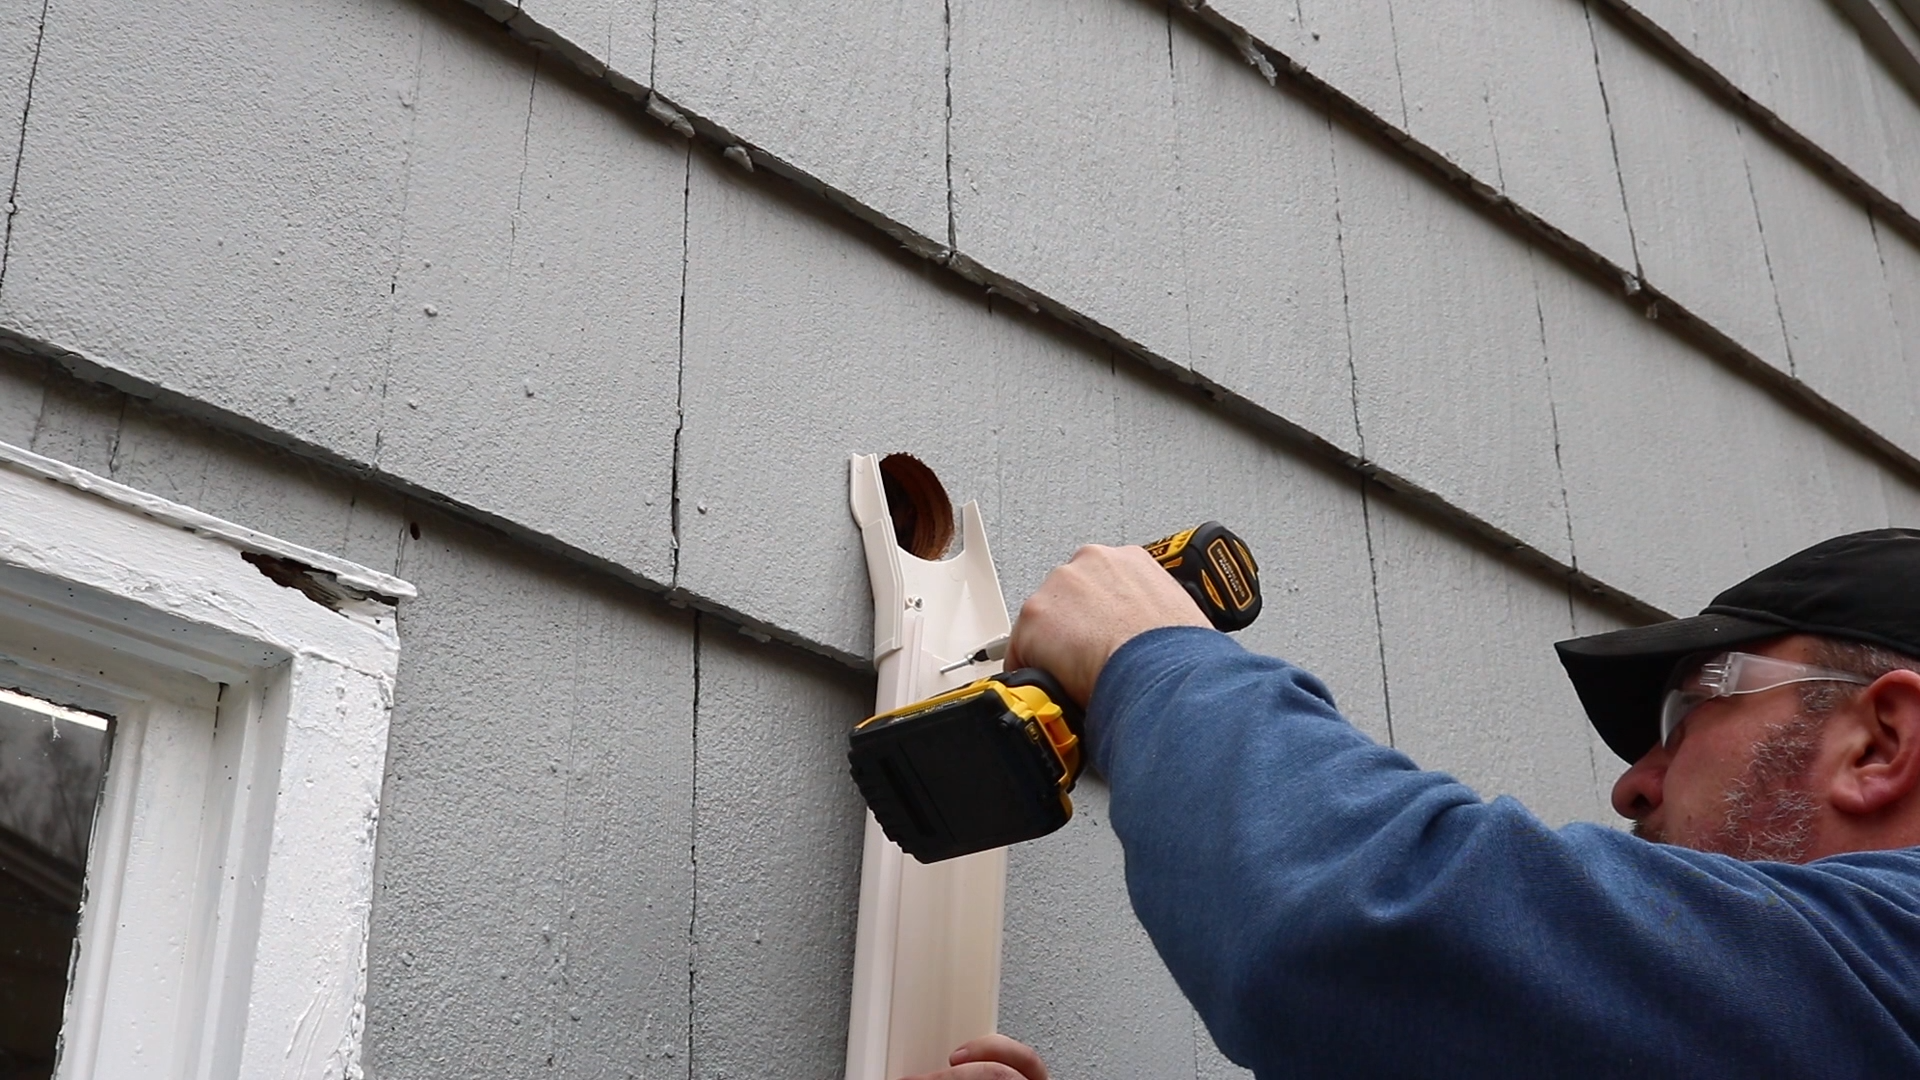
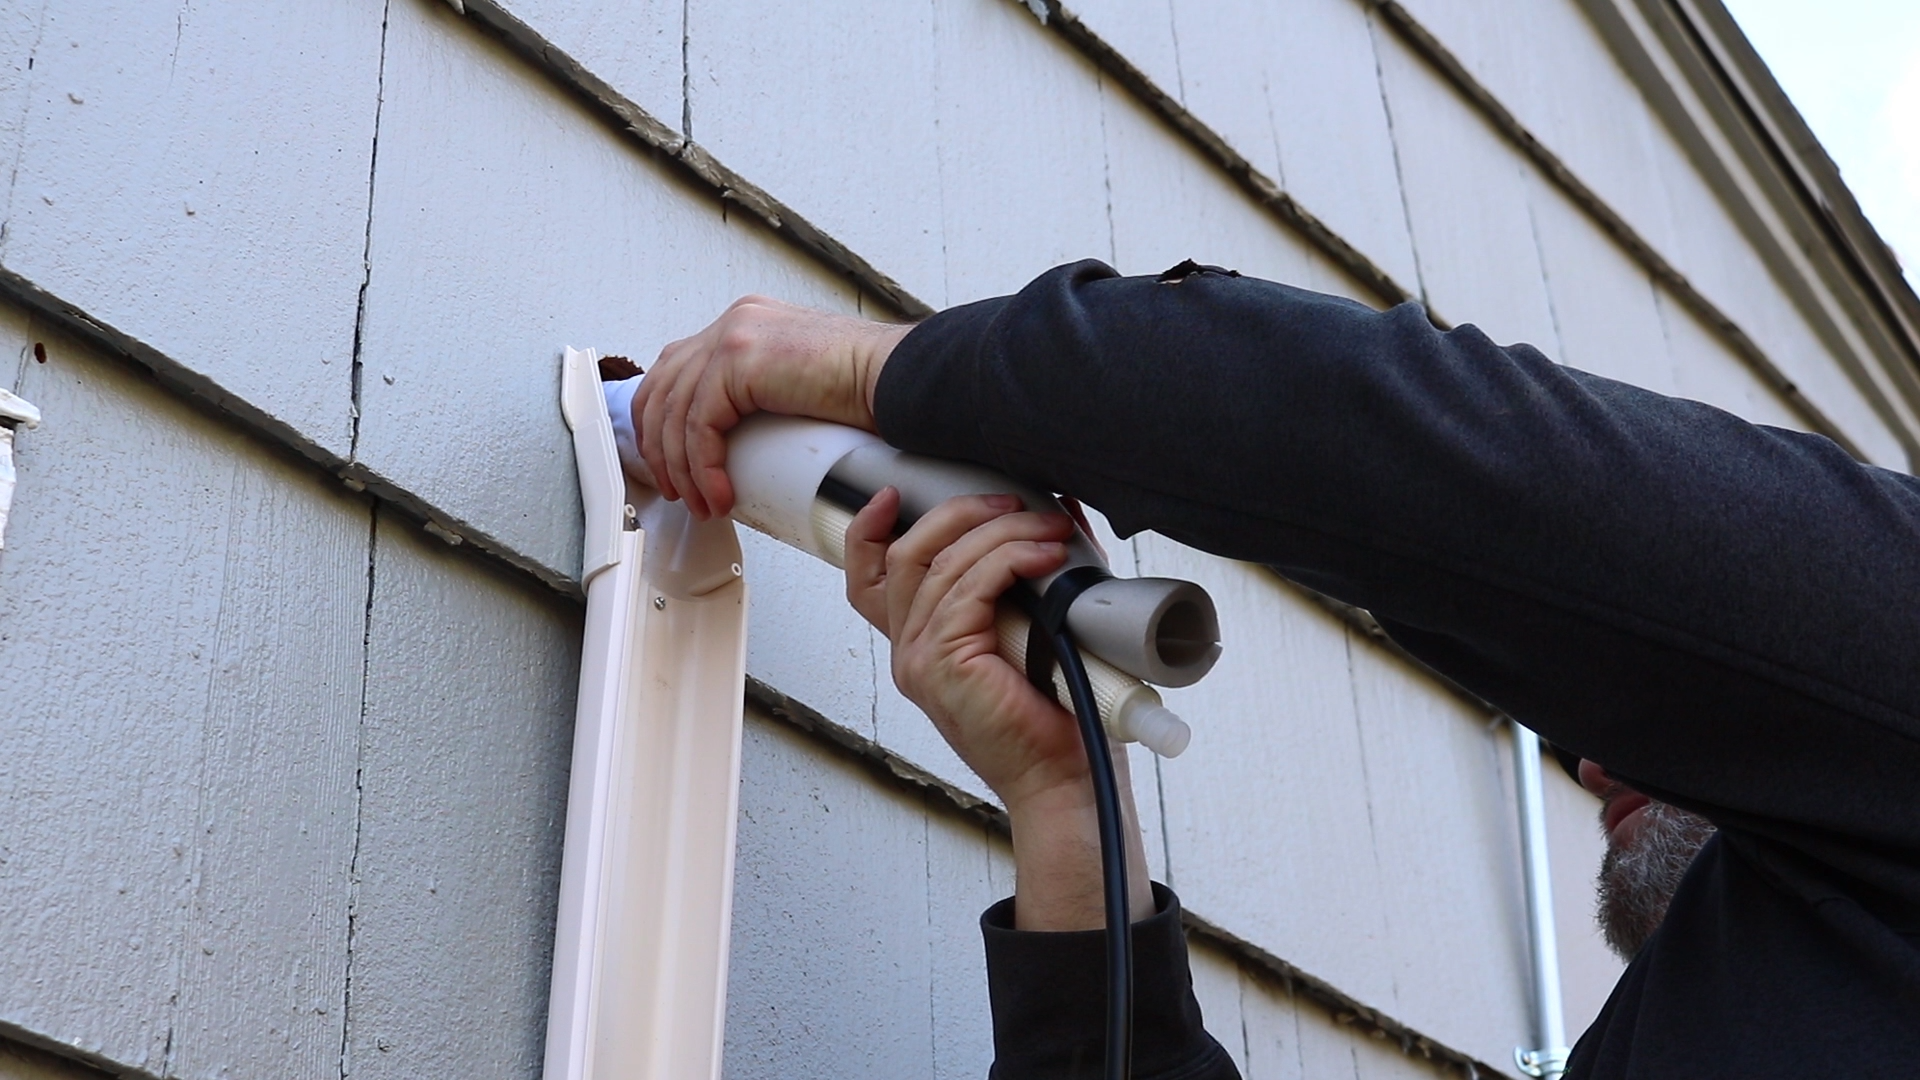
With the lineset hole cut I mounted the lineset cover on the outside of the shop. This lineset cover was an extra charge on top of the cost of my unit. It covers up to 12 feet of lineset and comes with a couple of right angle pieces so you can make turns if necessary.
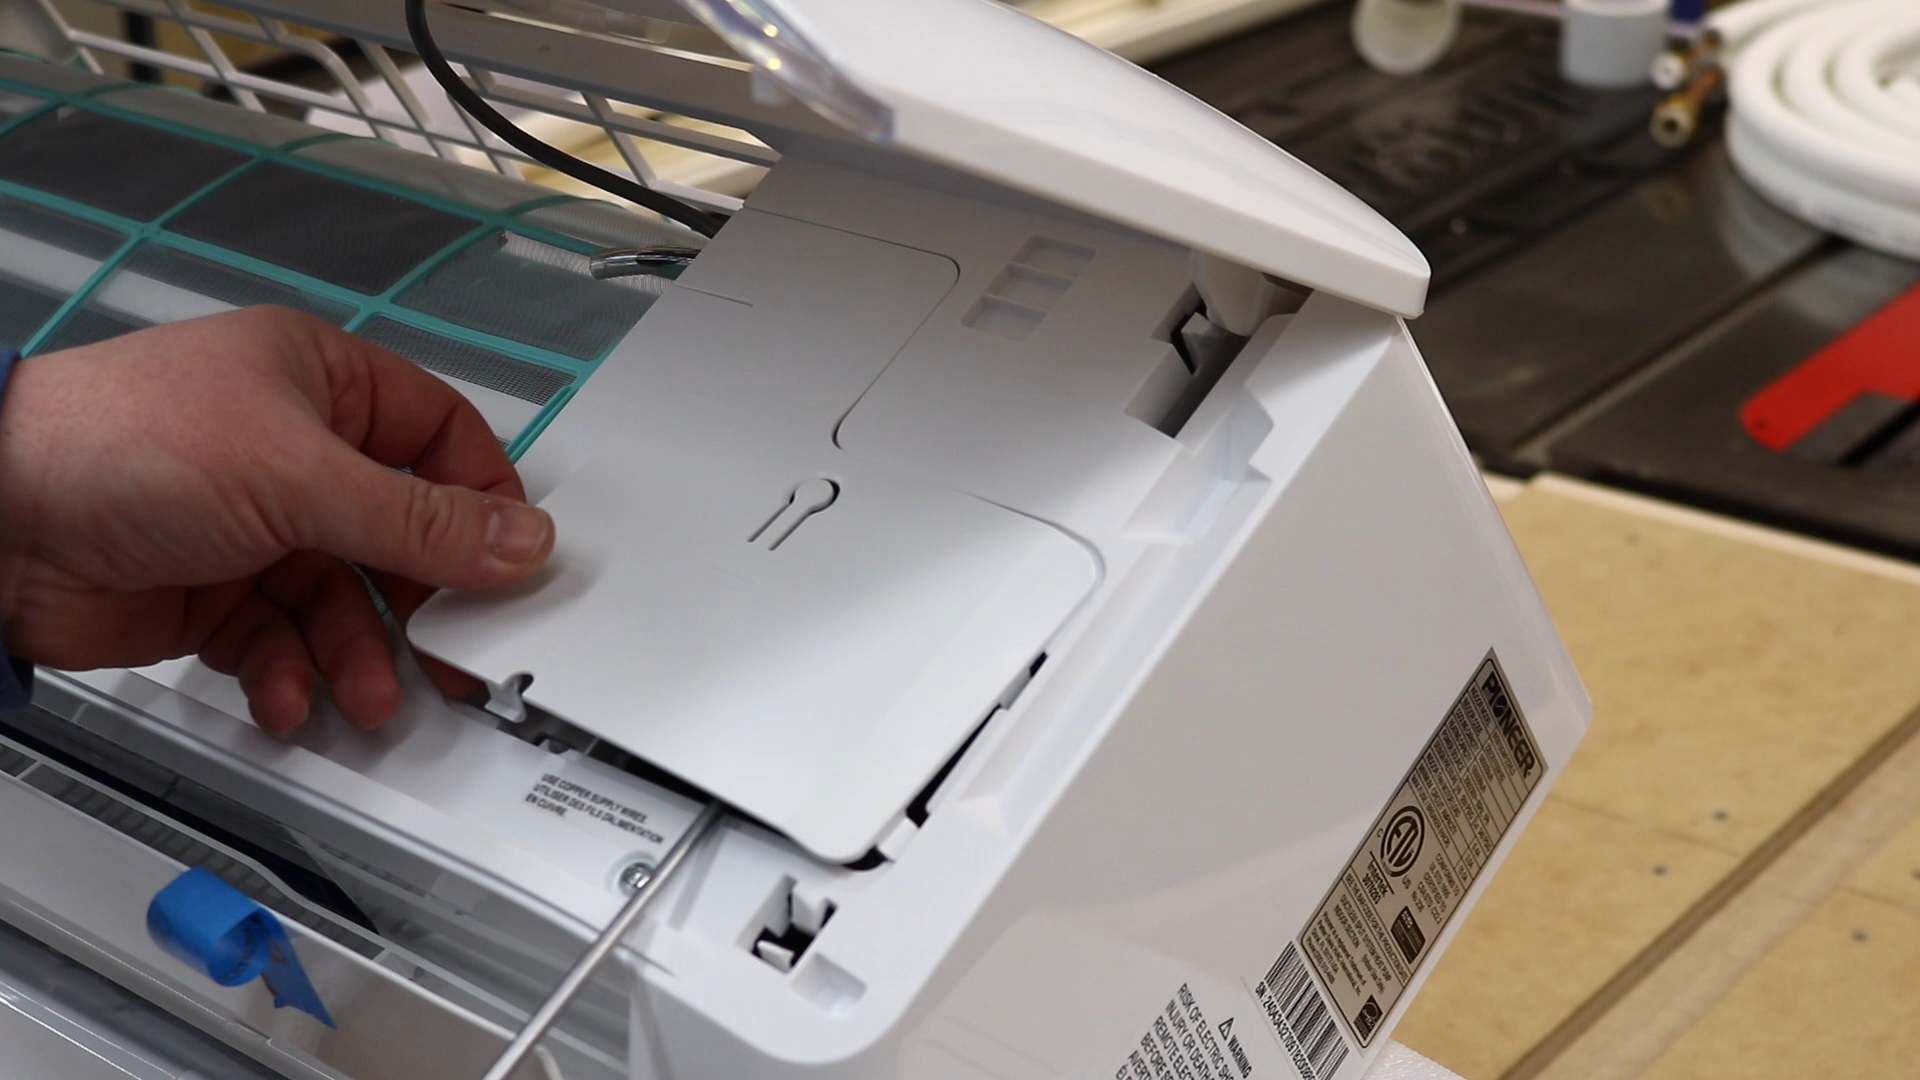
It was time to start wiring the indoor unit. I started by removing the wiring terminal cover on the front of the indoor unit.
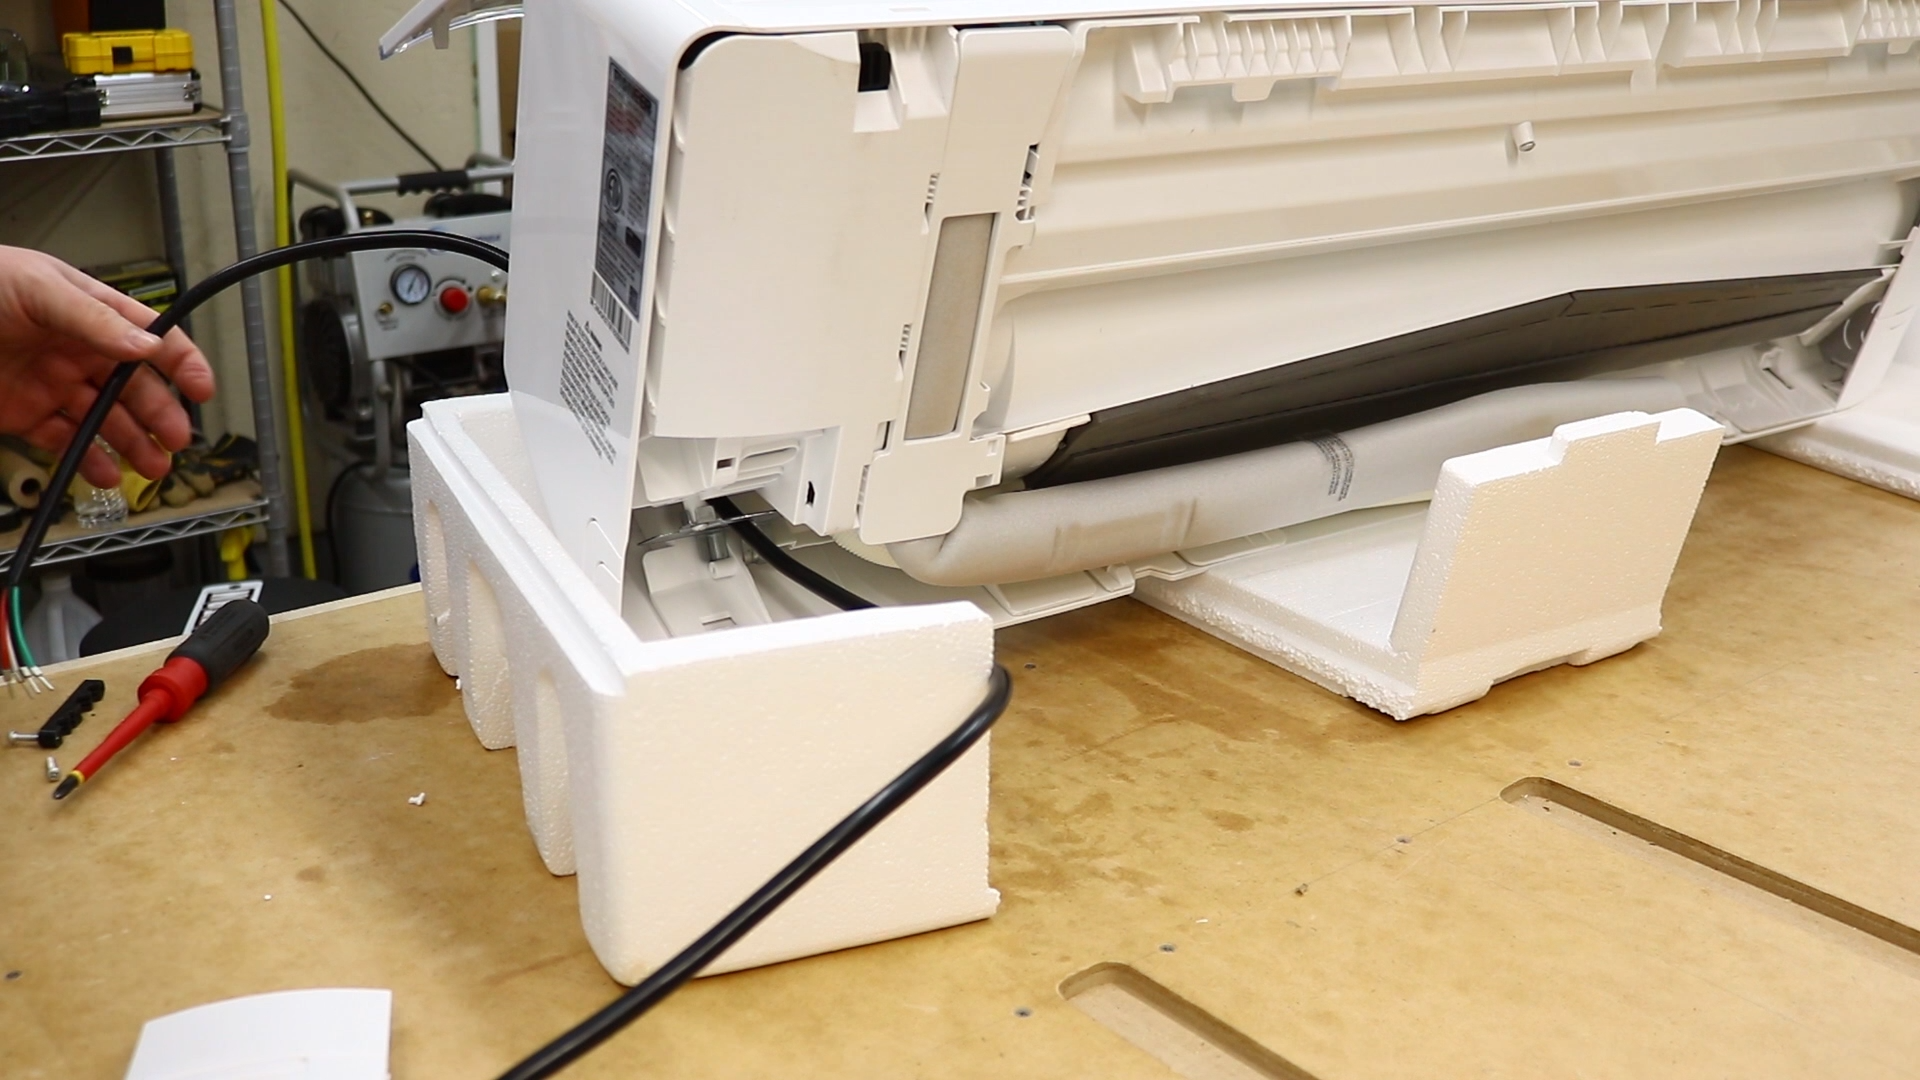
I then flipped the unit over and fed the signal wire through the back. The signal wire connects the indoor unit to the outdoor unit. It carries the power and information to the indoor unit.
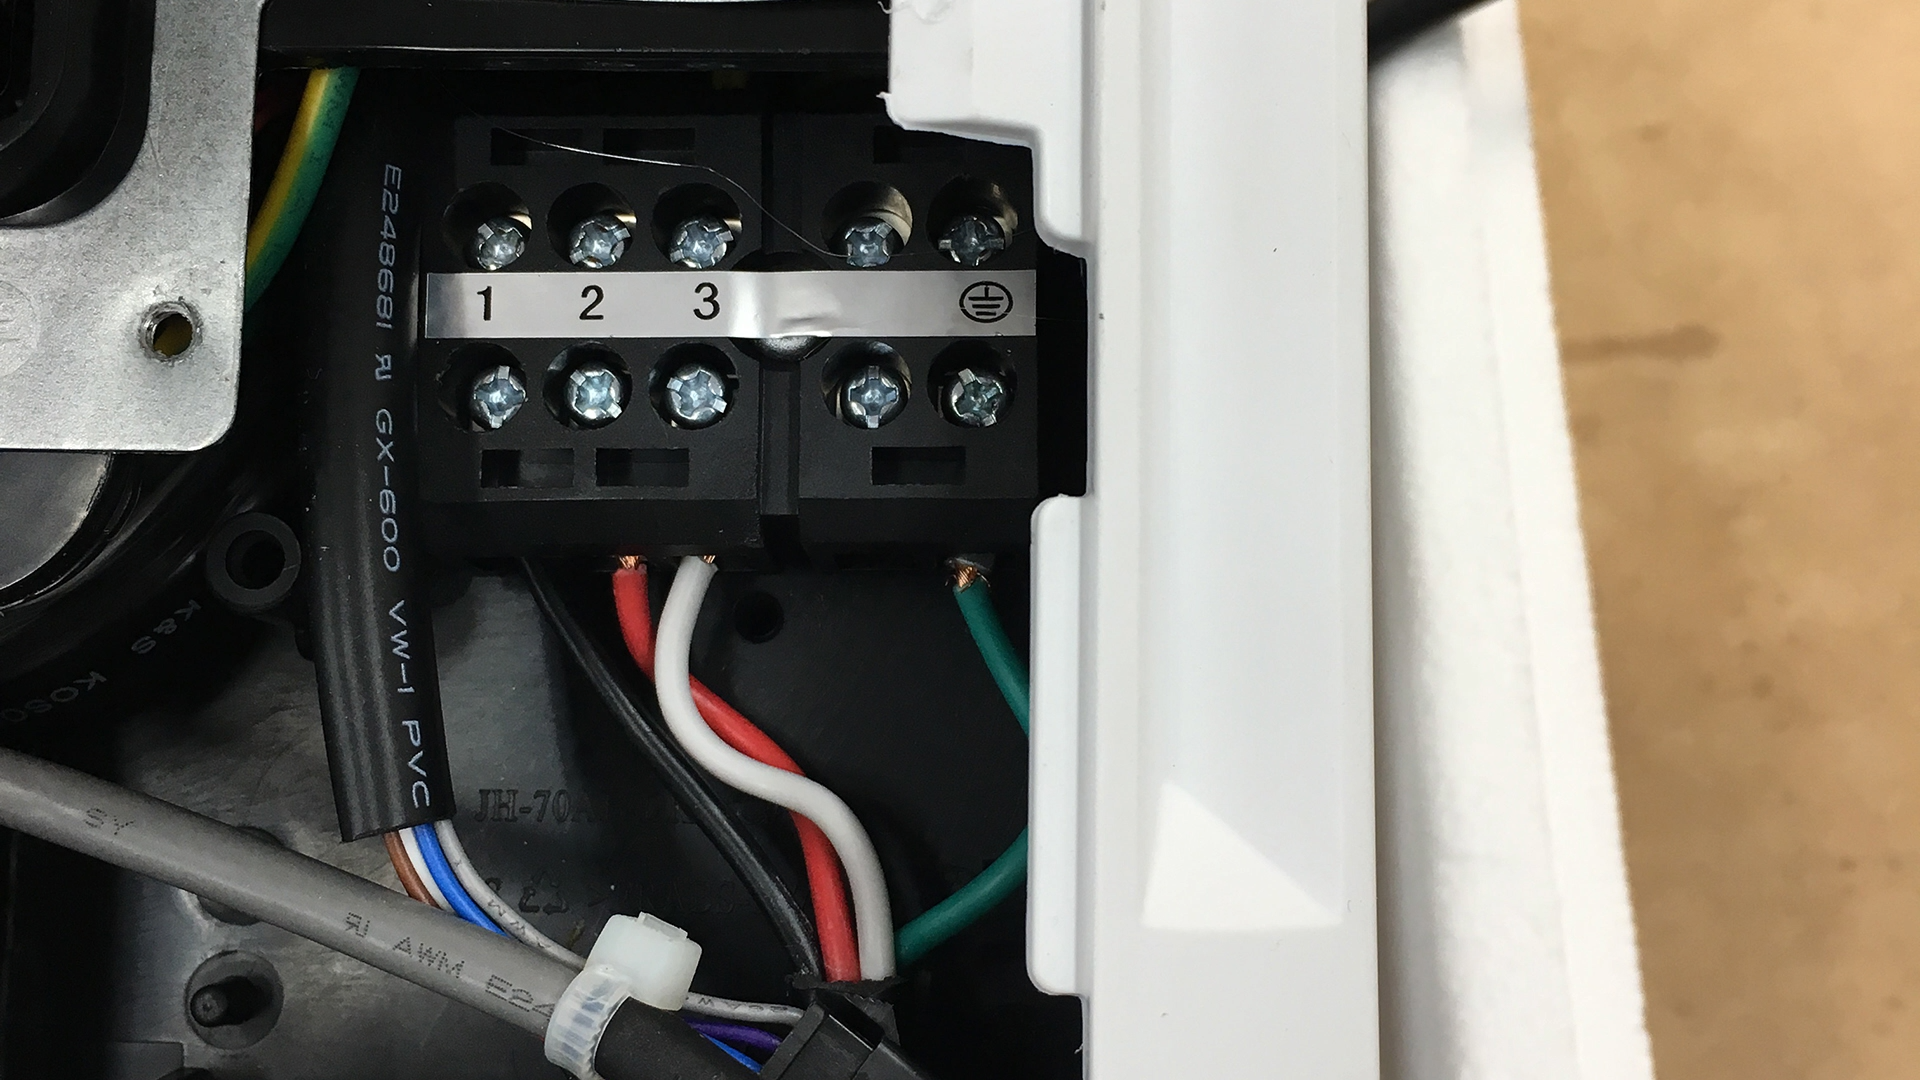
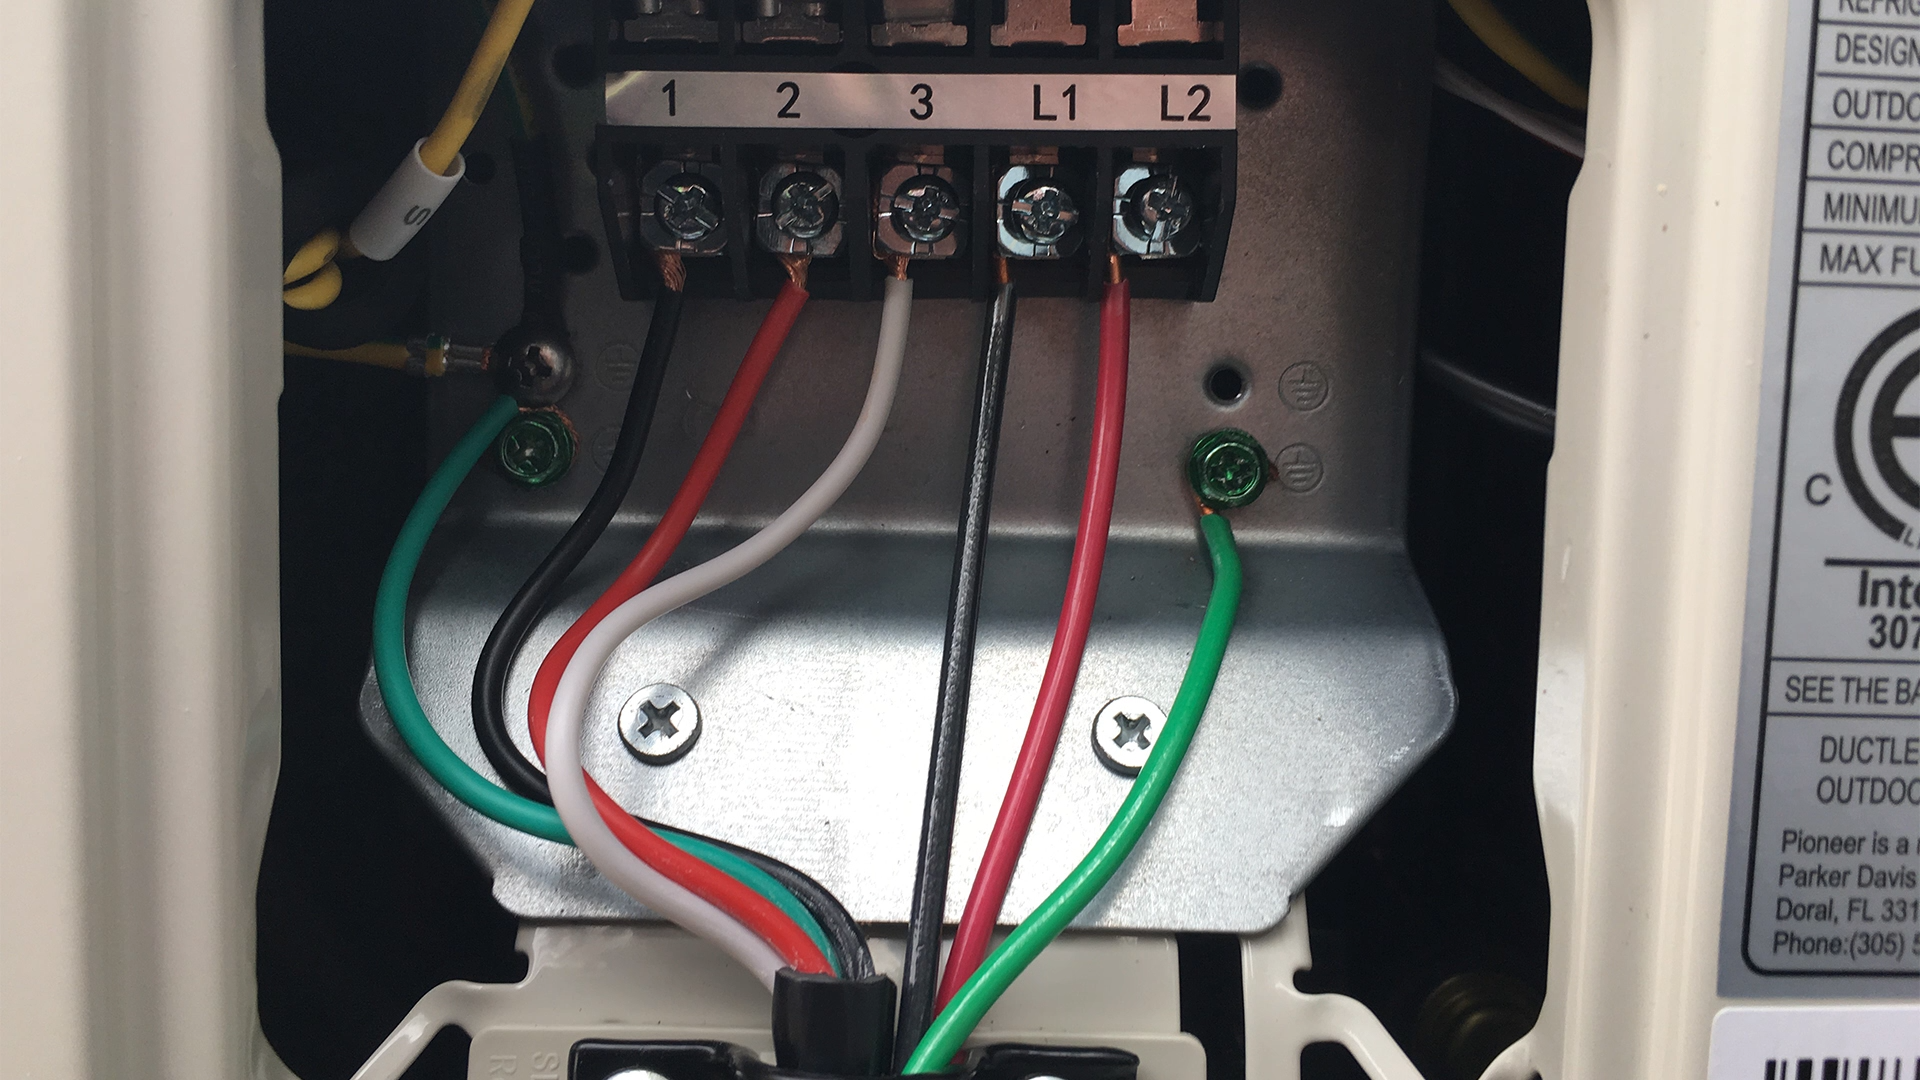
Wiring was very easy but before I closed everything up I snapped a photo. The terminals are only marked 1, 2, 3 and ground. It doesn’t matter which color goes to which terminal as long as you wire it the same on both units.
I then replaced the indoor unit terminal cover.
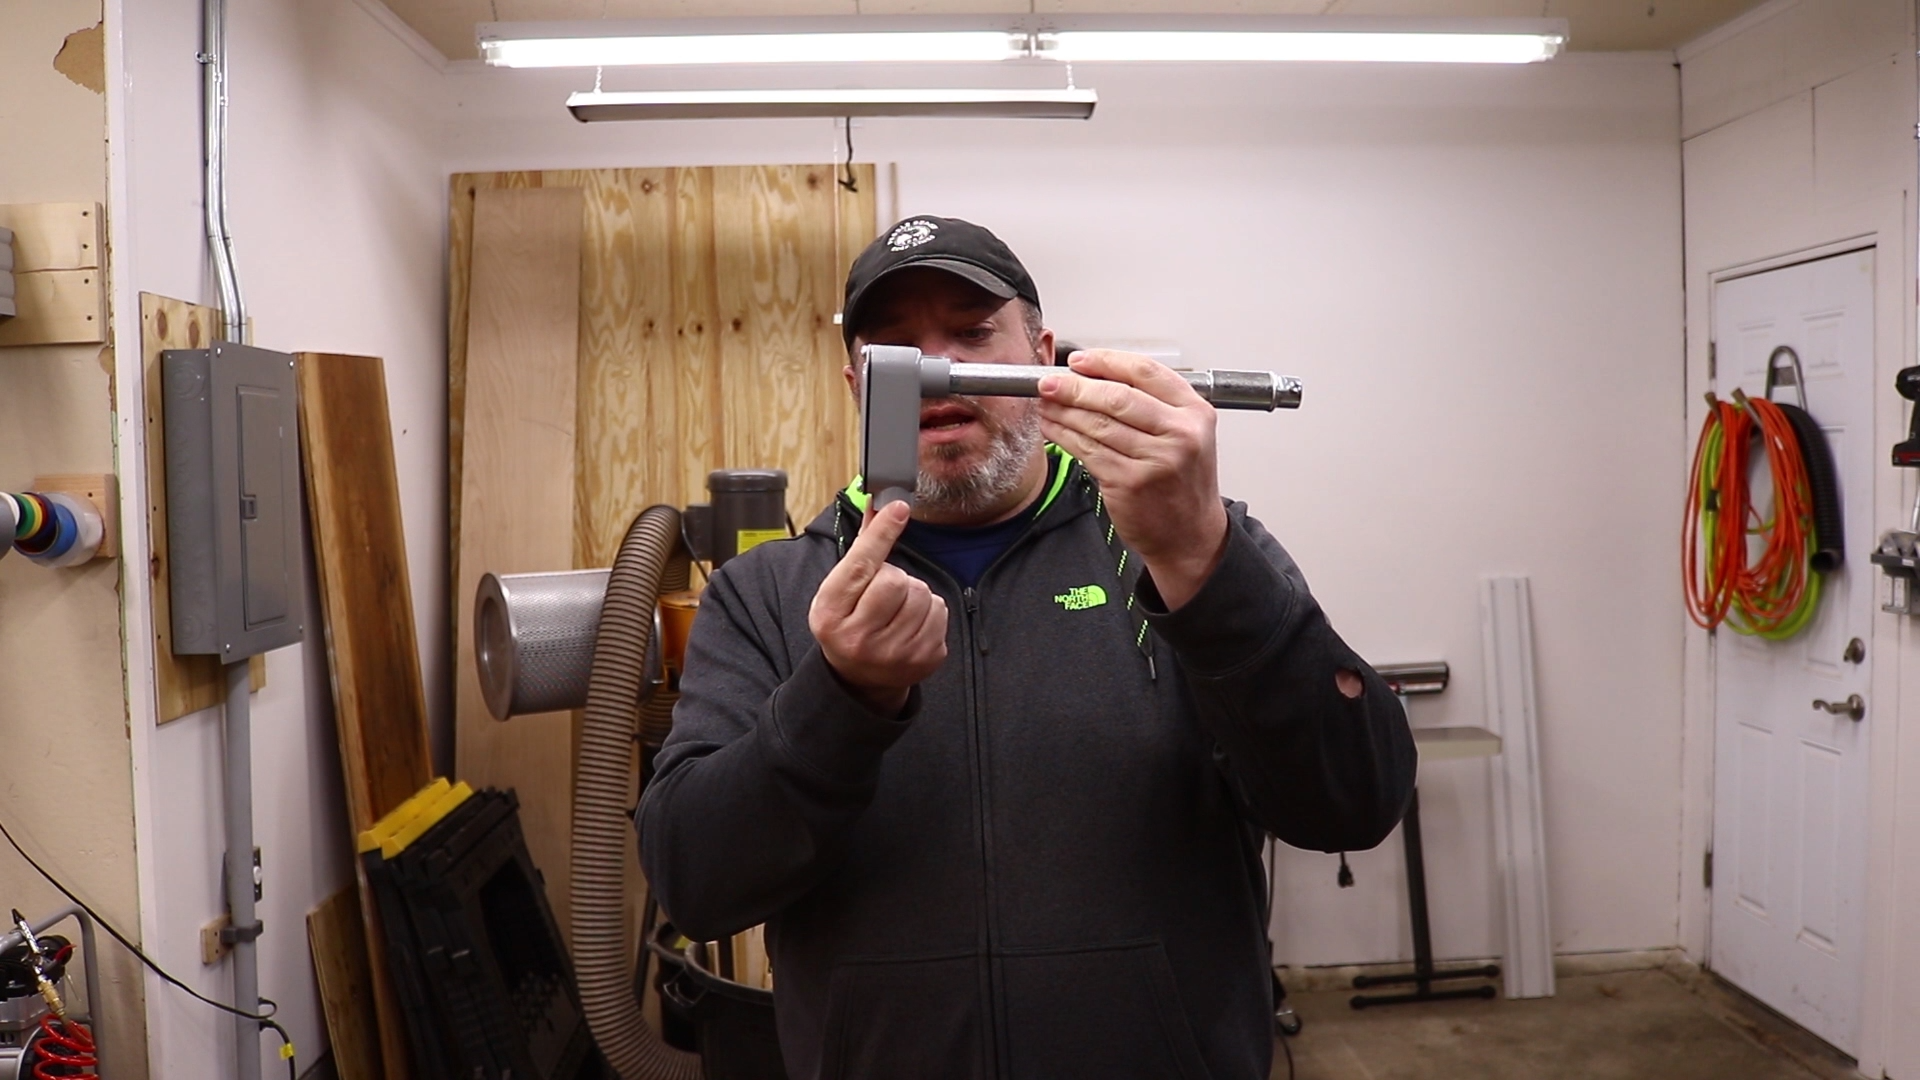
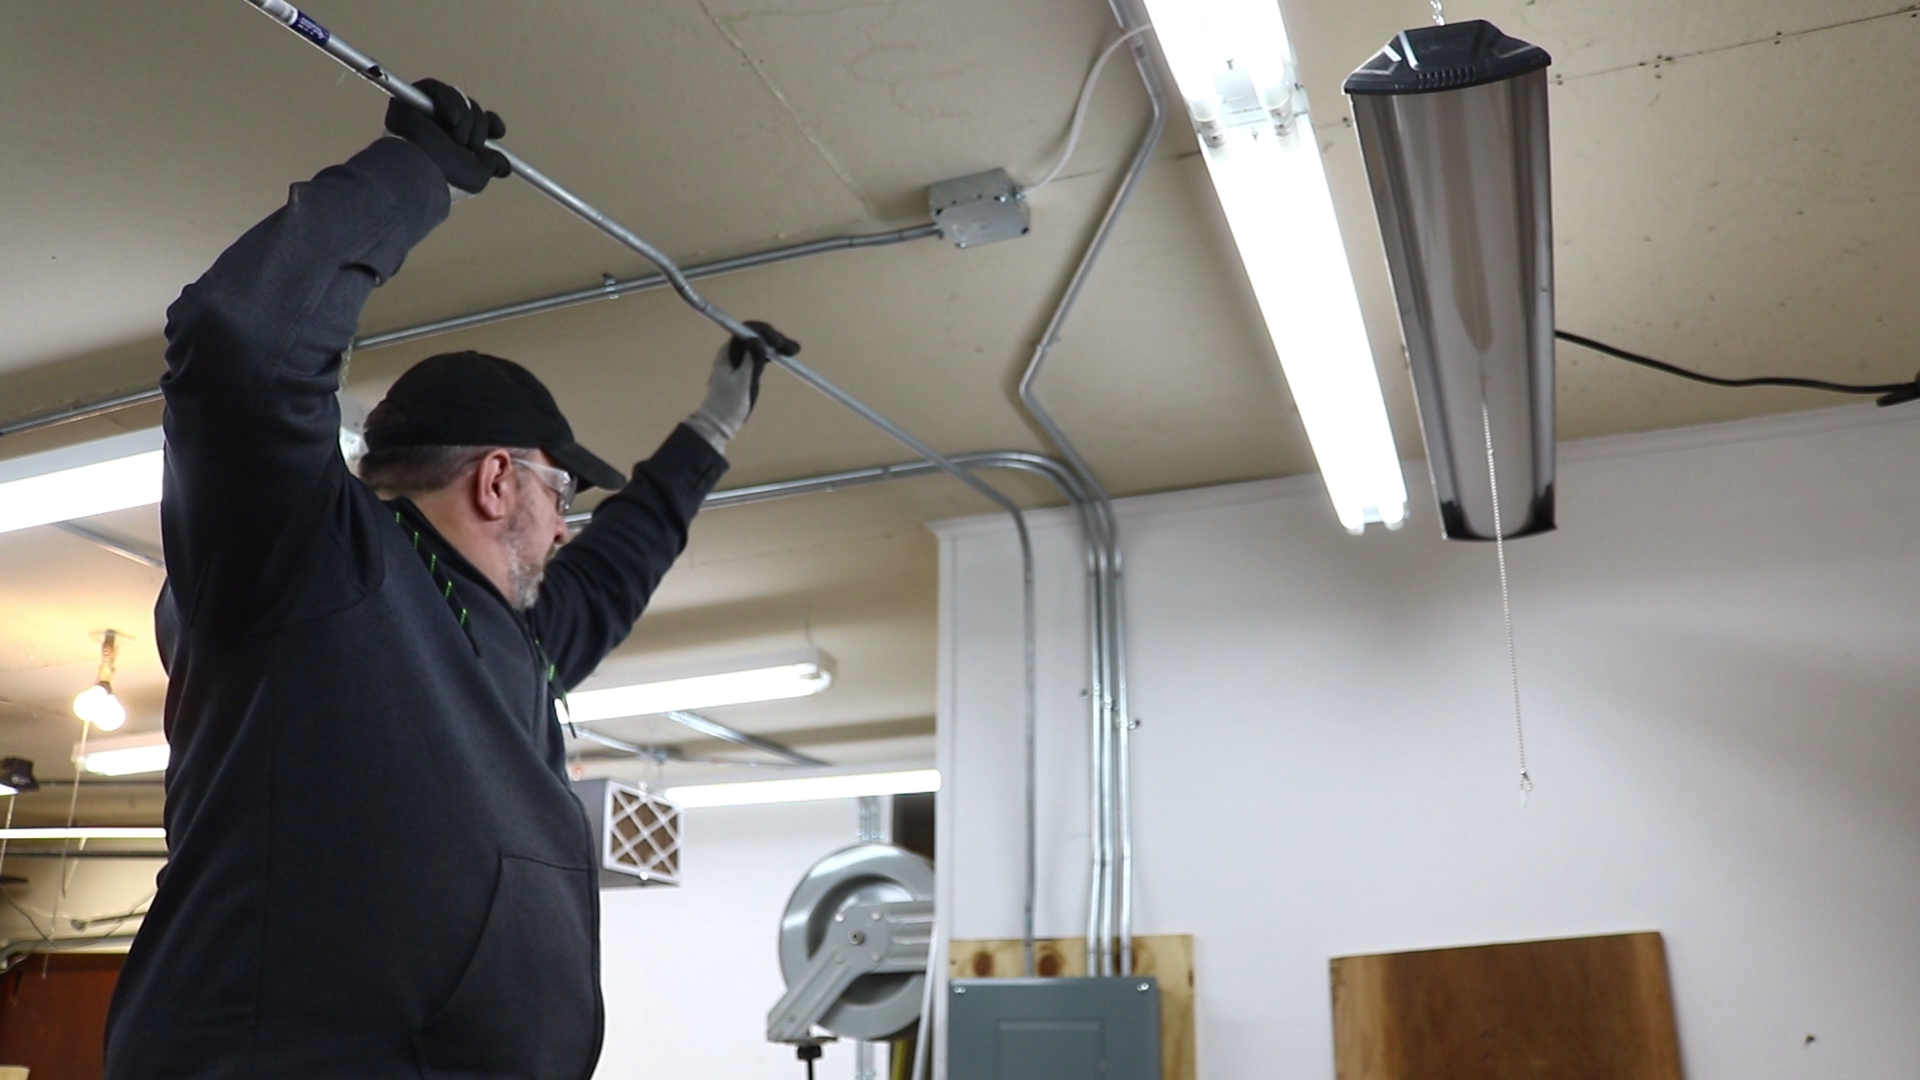
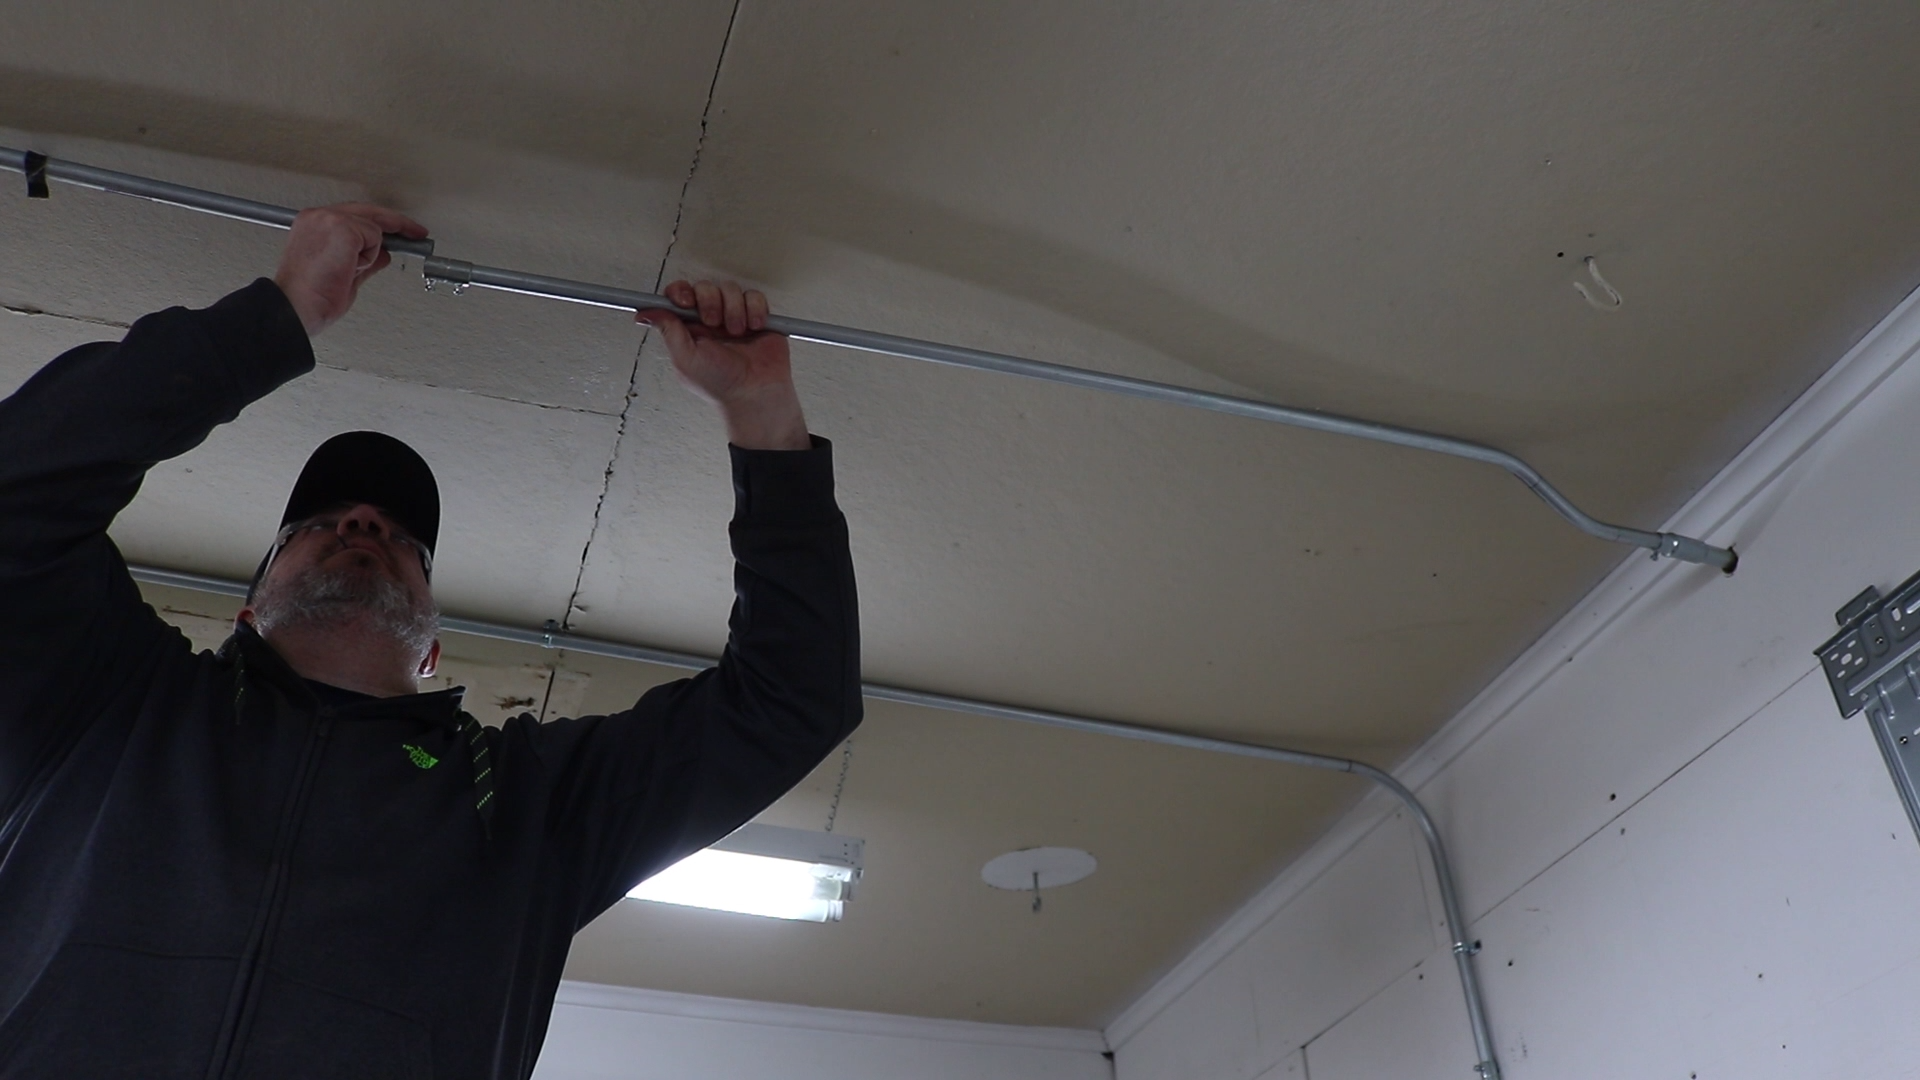
Before I permanently mounted everything I needed to get power to the outside of the shop. It probably would have been better to start with this step but it really doesn’t matter one way or another. The electrical in my garage is all surface conduit so I needed to get conduit through the wall and to the outside of the shop. Before I could go through the wall I had to dip down to avoid some framing. To make this connection easy and raintight, I decided to use a galvanized EL and nipple which would then connect to the EMT on the inside of the shop.
If you are ever working with EMT conduit and need to make bends, I highly recommend the Quick Bend app. It’s available for free on Android and iPhone and I can’t imagine trying to figure out the bends with using some sort of app. You select the type of bender you have, enter in the bend angle and the offset and it tells you where to make your bends and how much length you will lose due to the bends. This screenshot is just showing offset bends. They also have three and four point saddles, 90 degree bench, and much more.
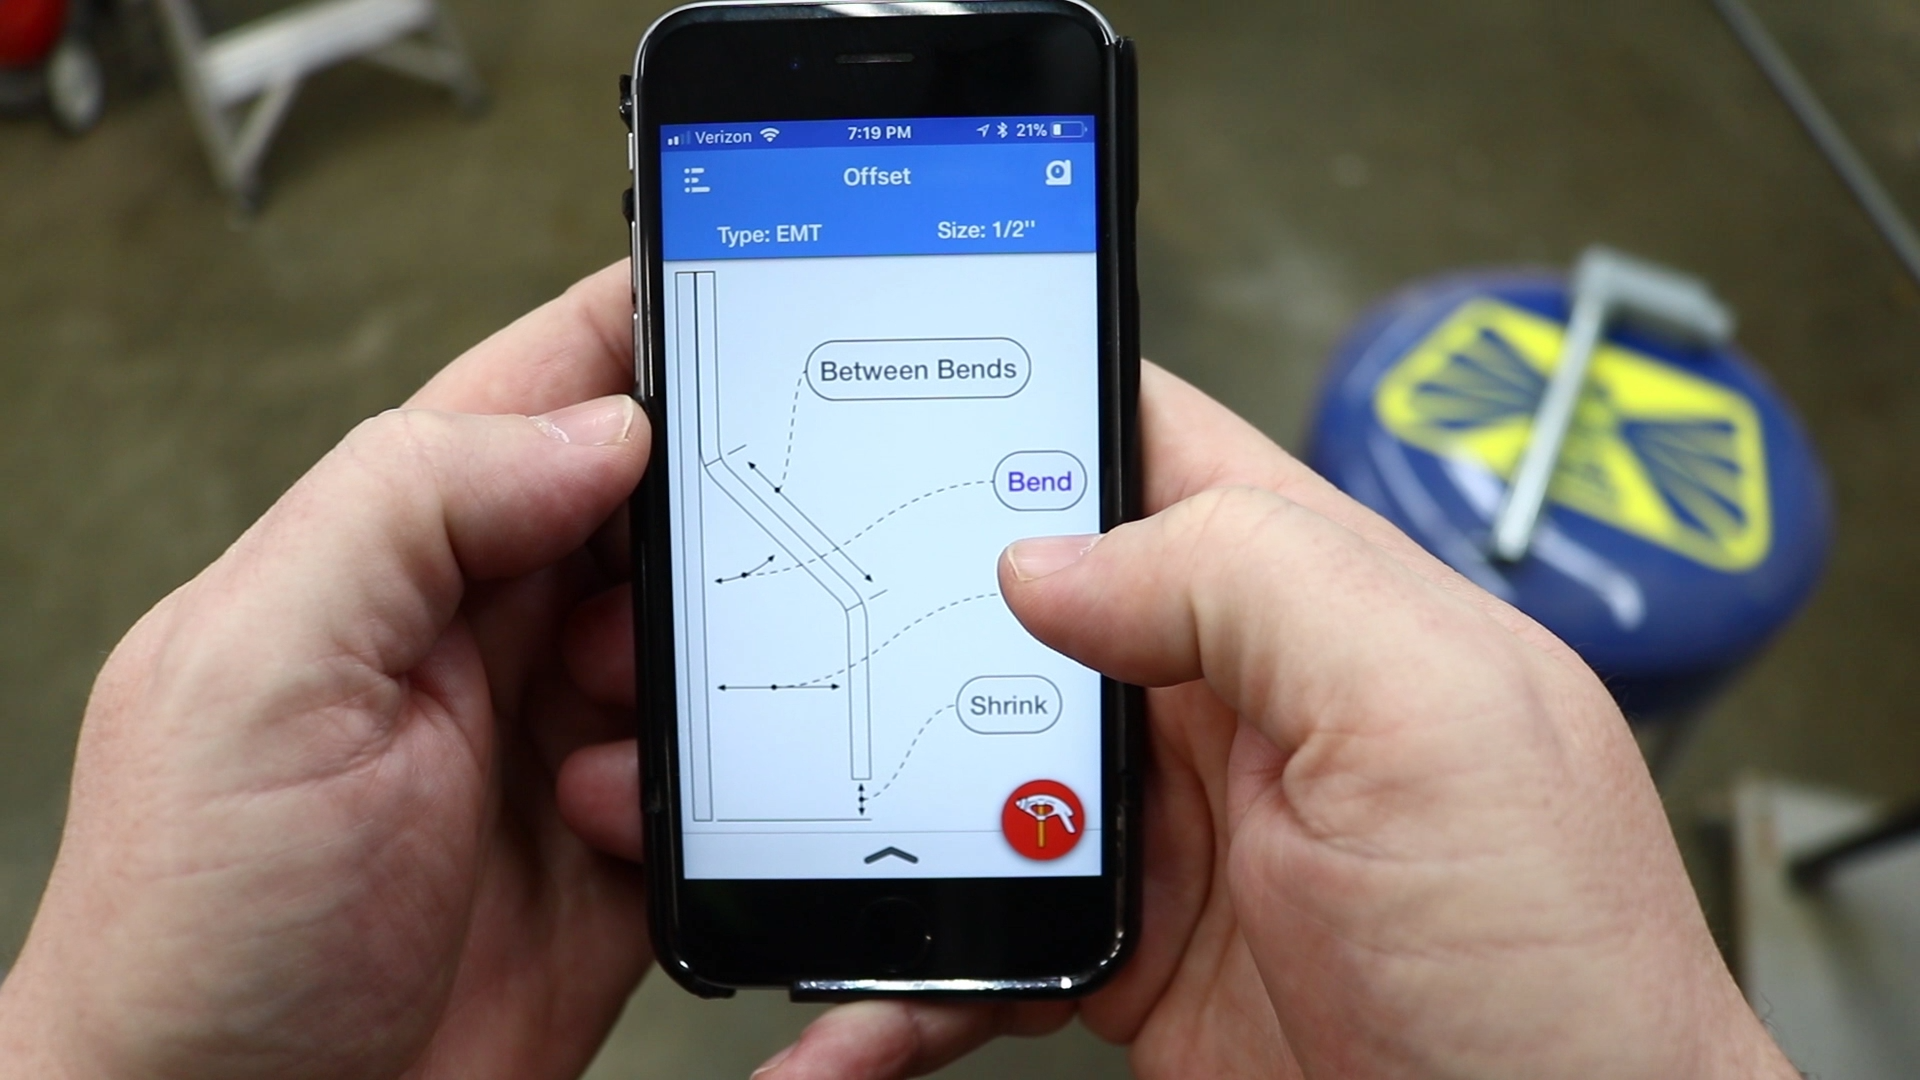
I had to make an 1 1/2″ offset to run the EMT into my panel. Once I marked the EMT I was able to make the bends with my Klein conduit bender. If you ever need to learn about bending conduit I highly recommend Sparky Channel on YouTube. I learned a great deal from that channel when I was upgrading my shop electrical.

My EMT was ready so I needed to remove the cover from my subpanel and install an EMT connector.
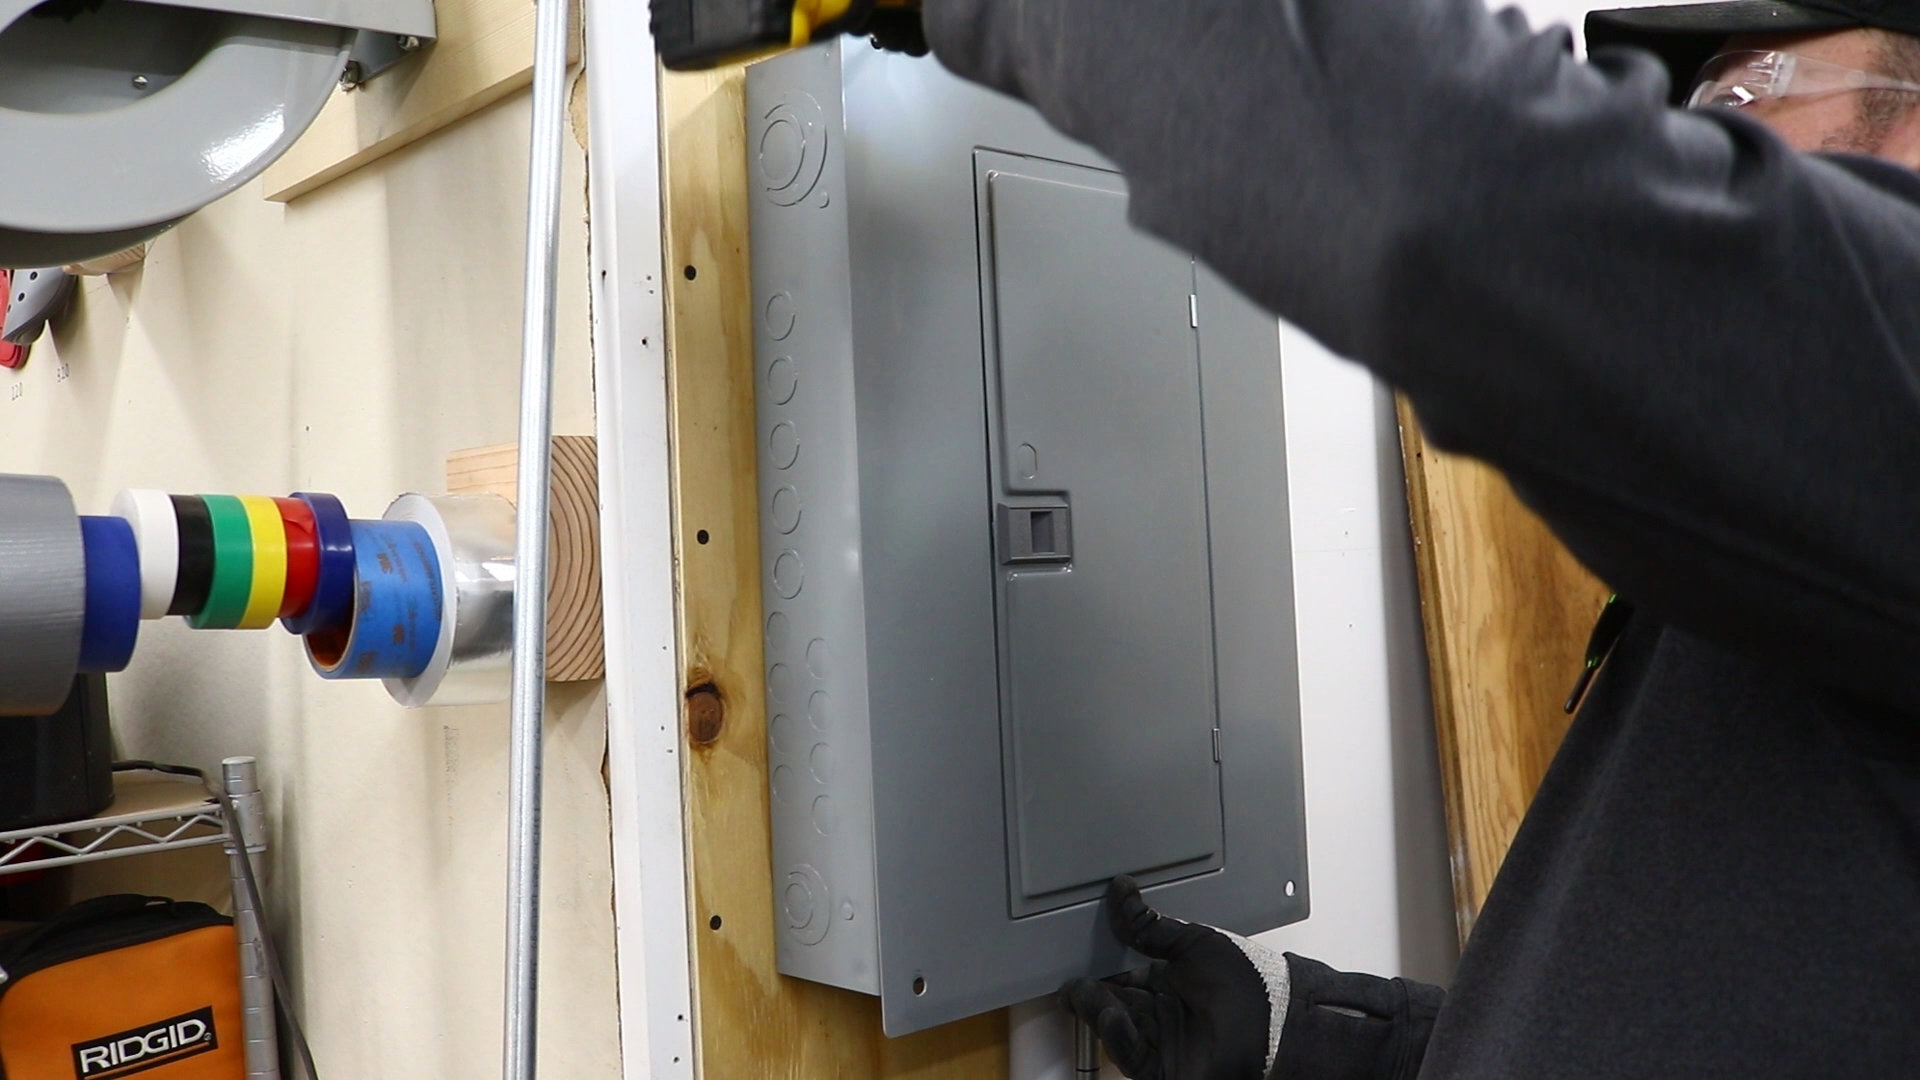
I shut off the power and removed one of the half inch knockouts.
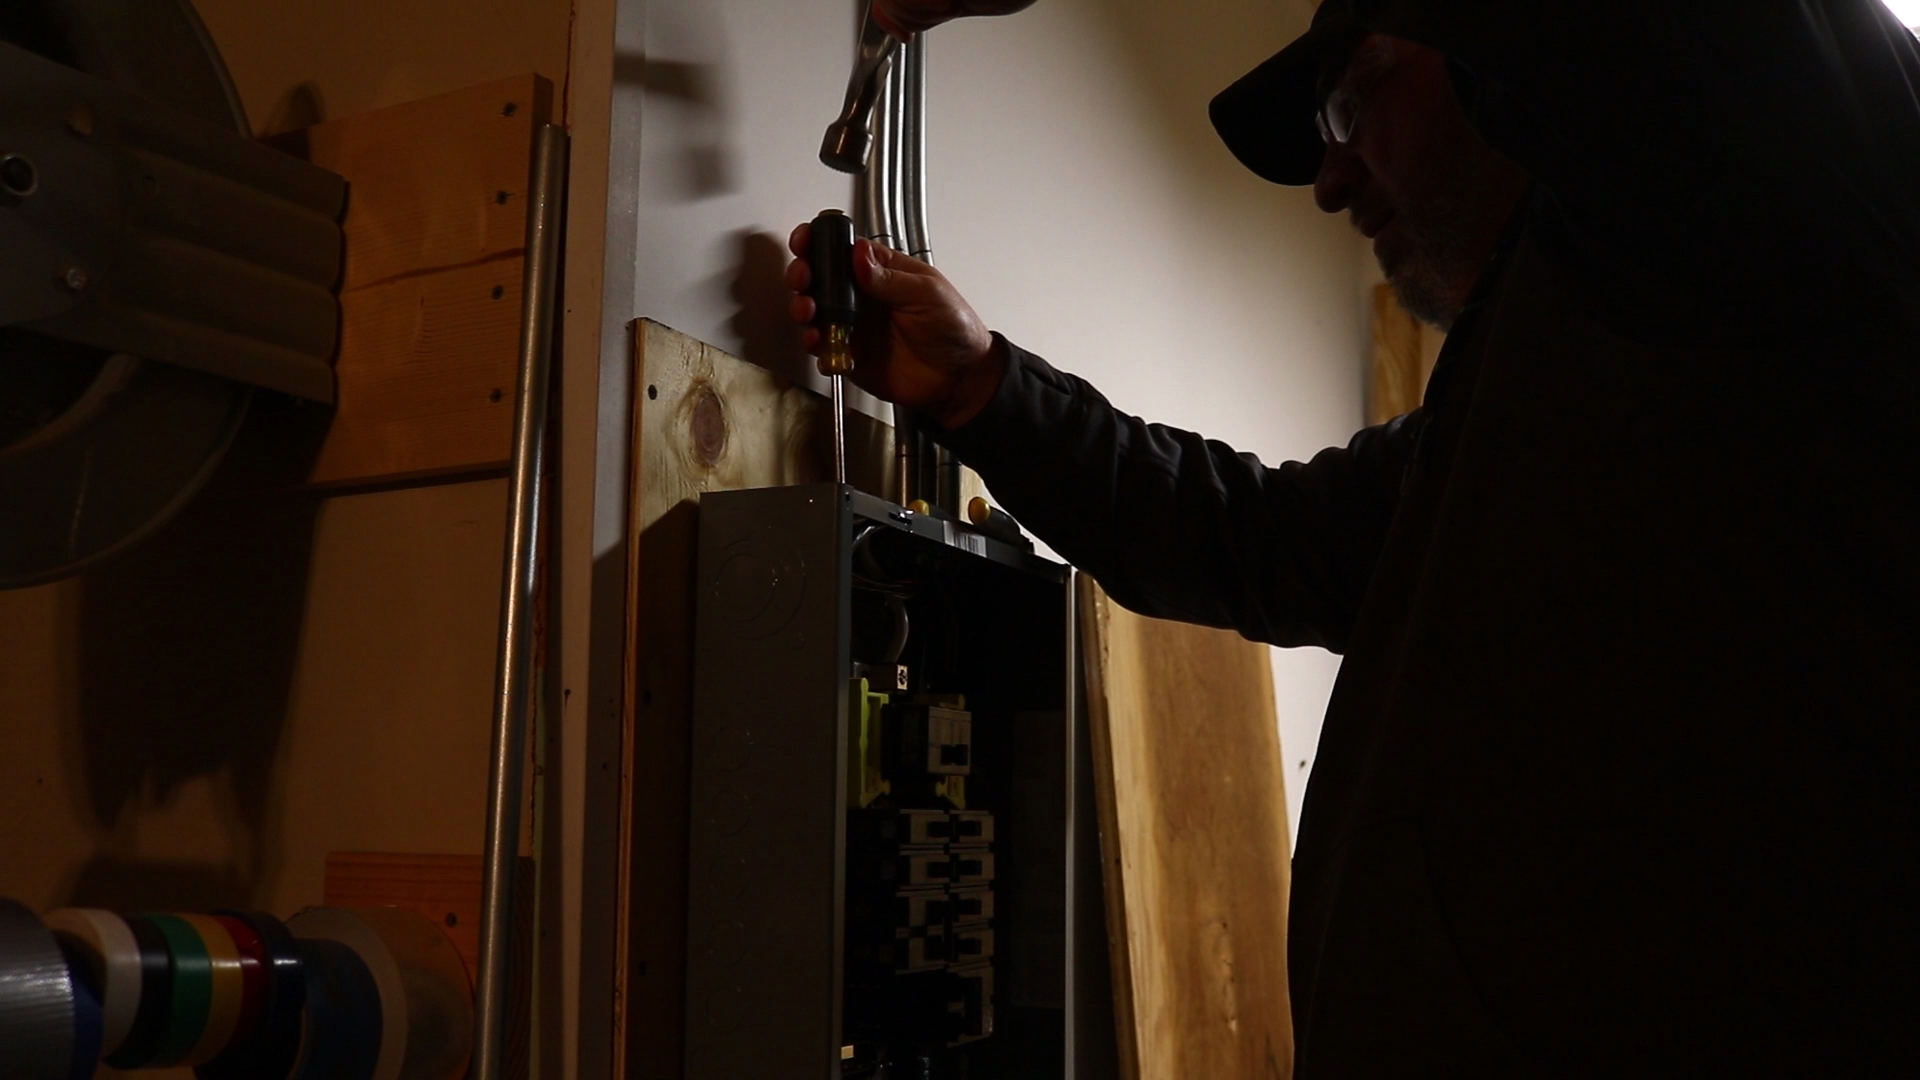
The EMT connector was then attached.

I replaced the panel cover and turned the power back on and could place the EMT into the panel.
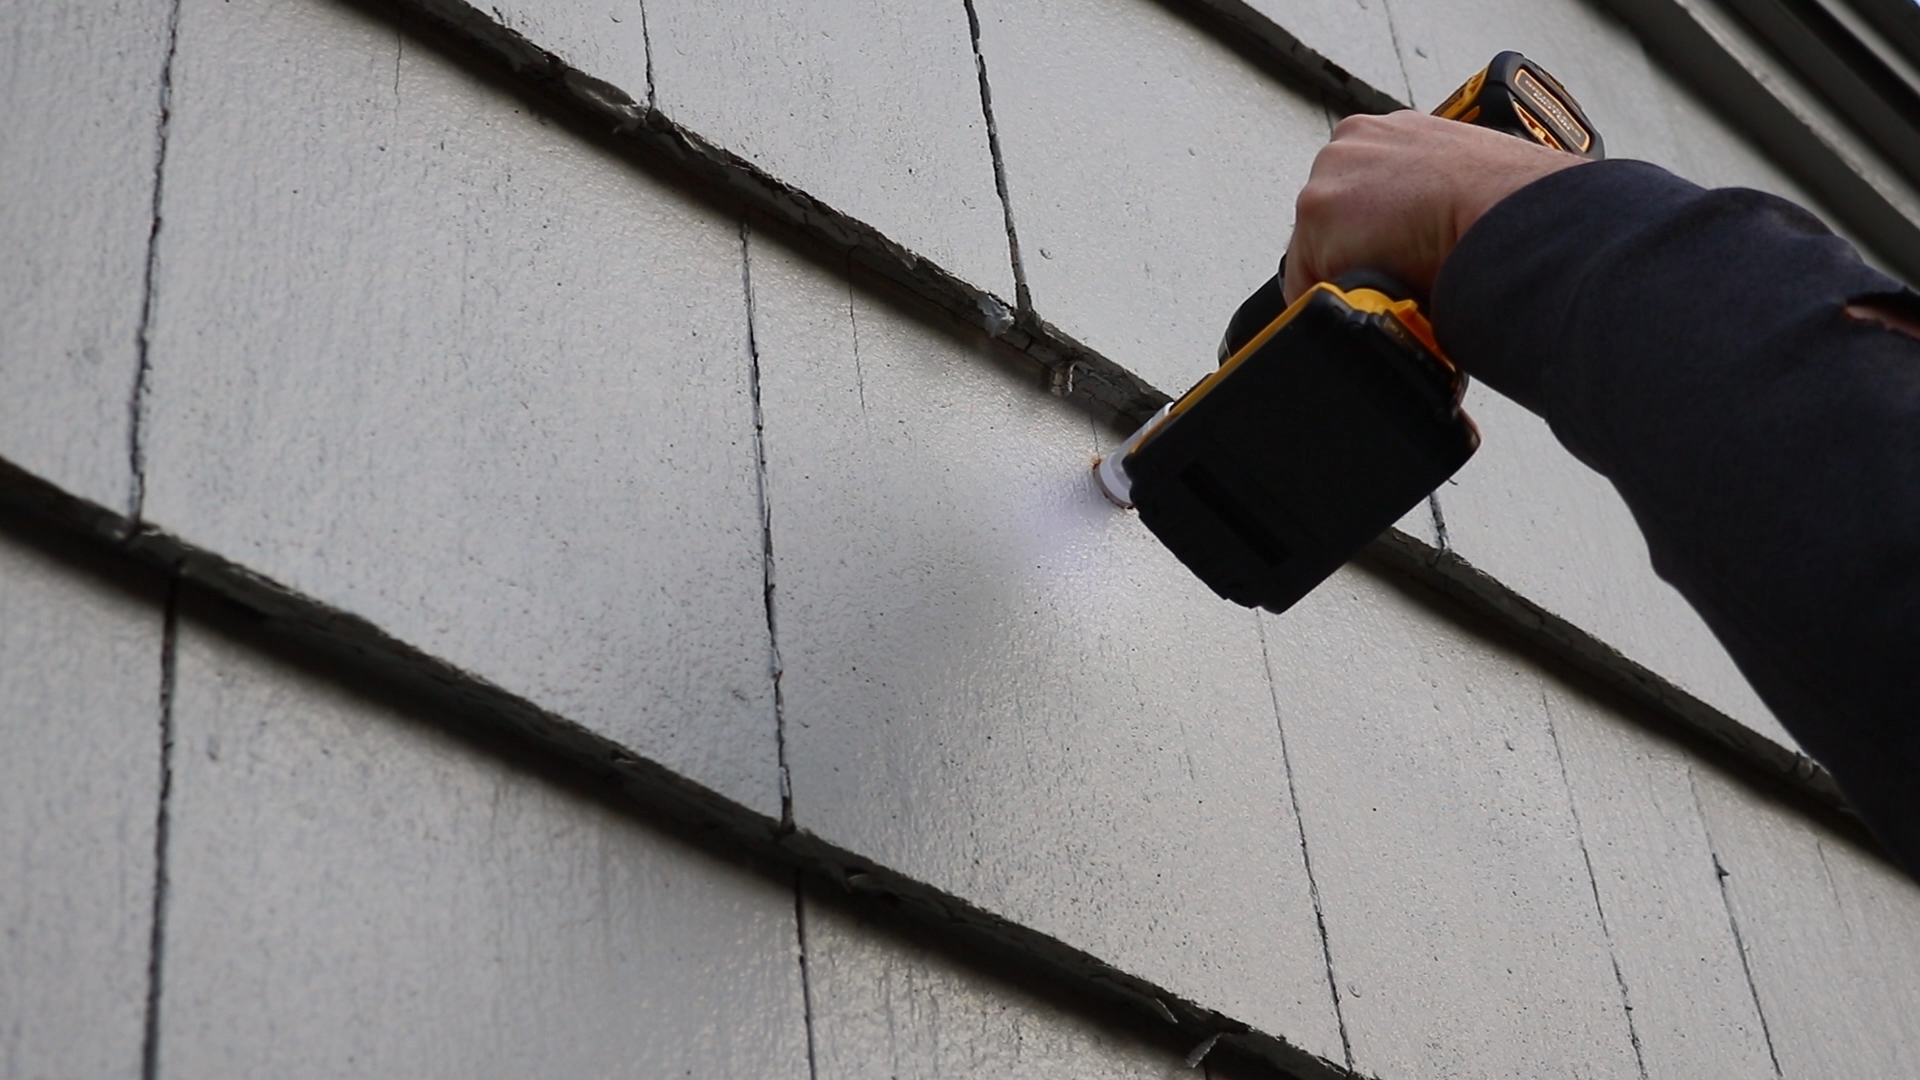
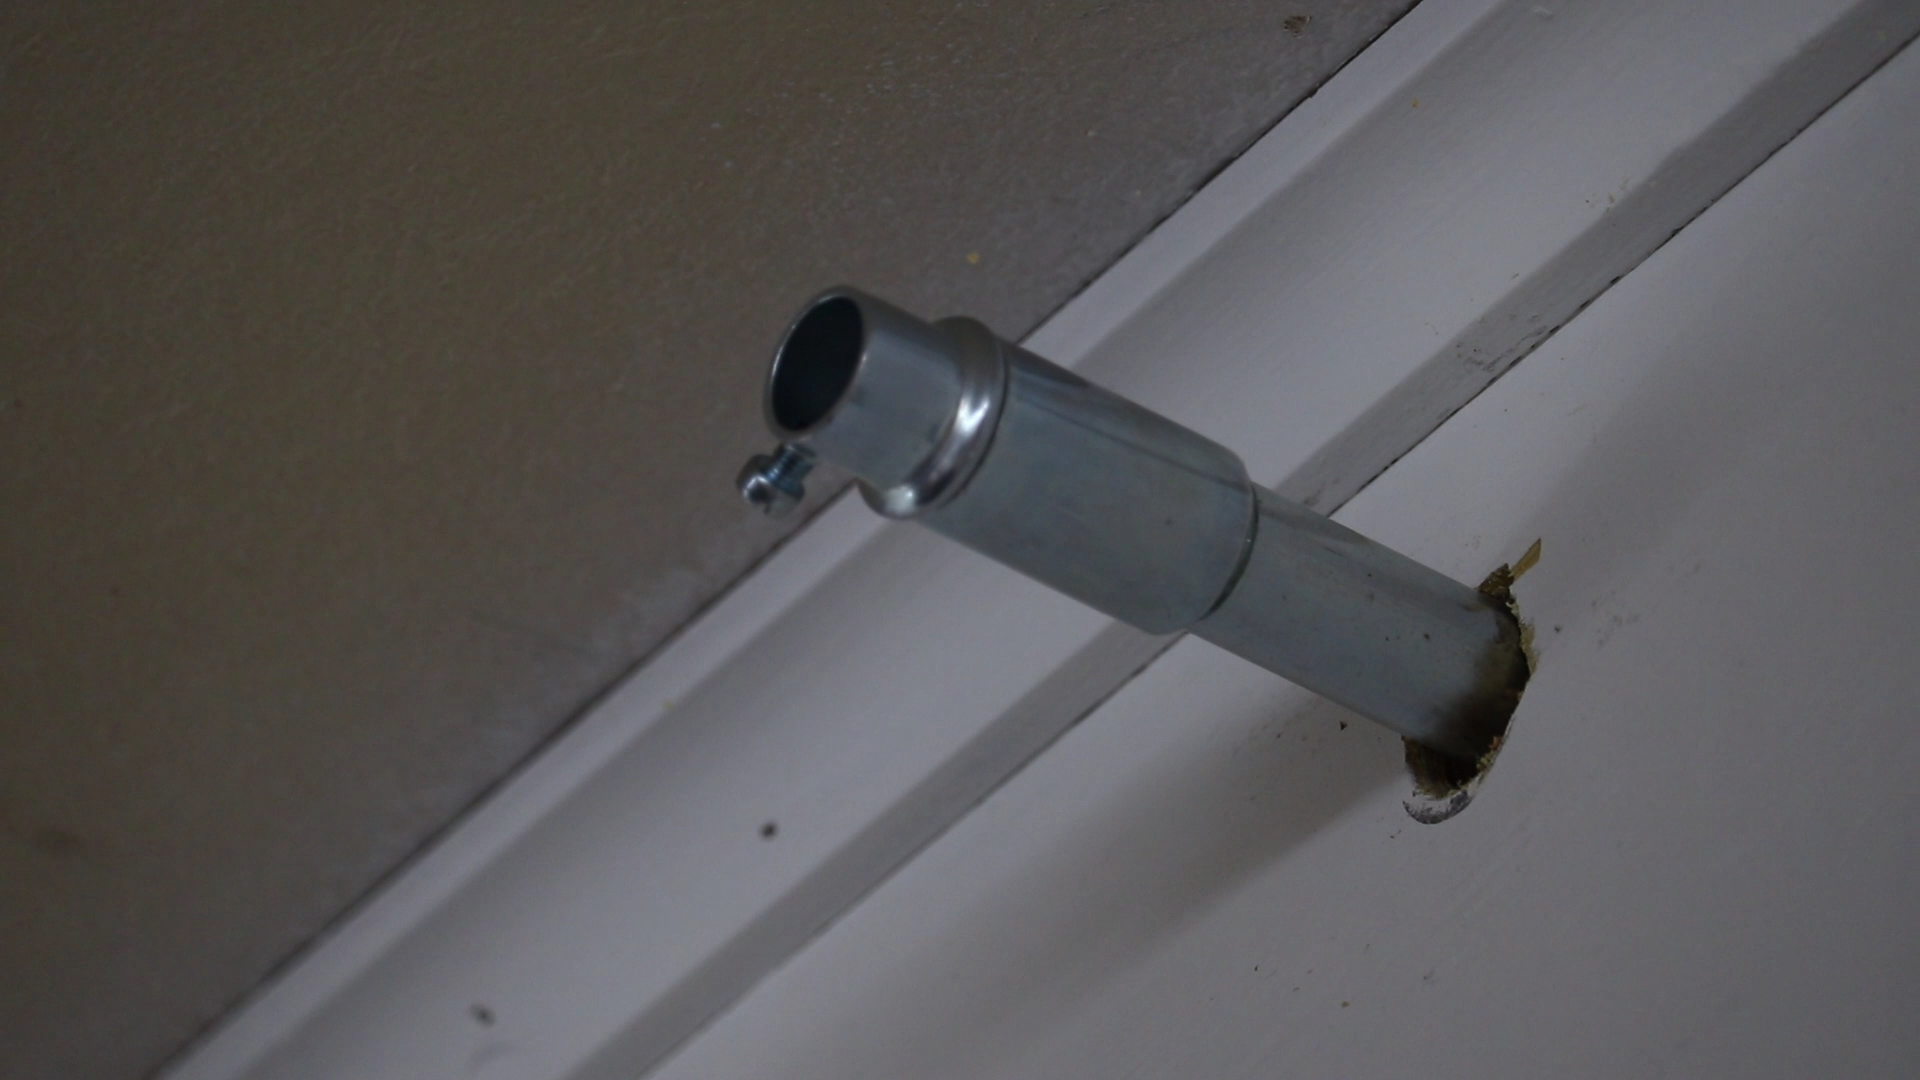
To make the penetration through the wall I used that same long 1/4″ drill bit to make a pilot hole and then used a 3/4″ hole saw to cut through on the inside of the shop.
I was then able to make a corresponding hole on the outside.
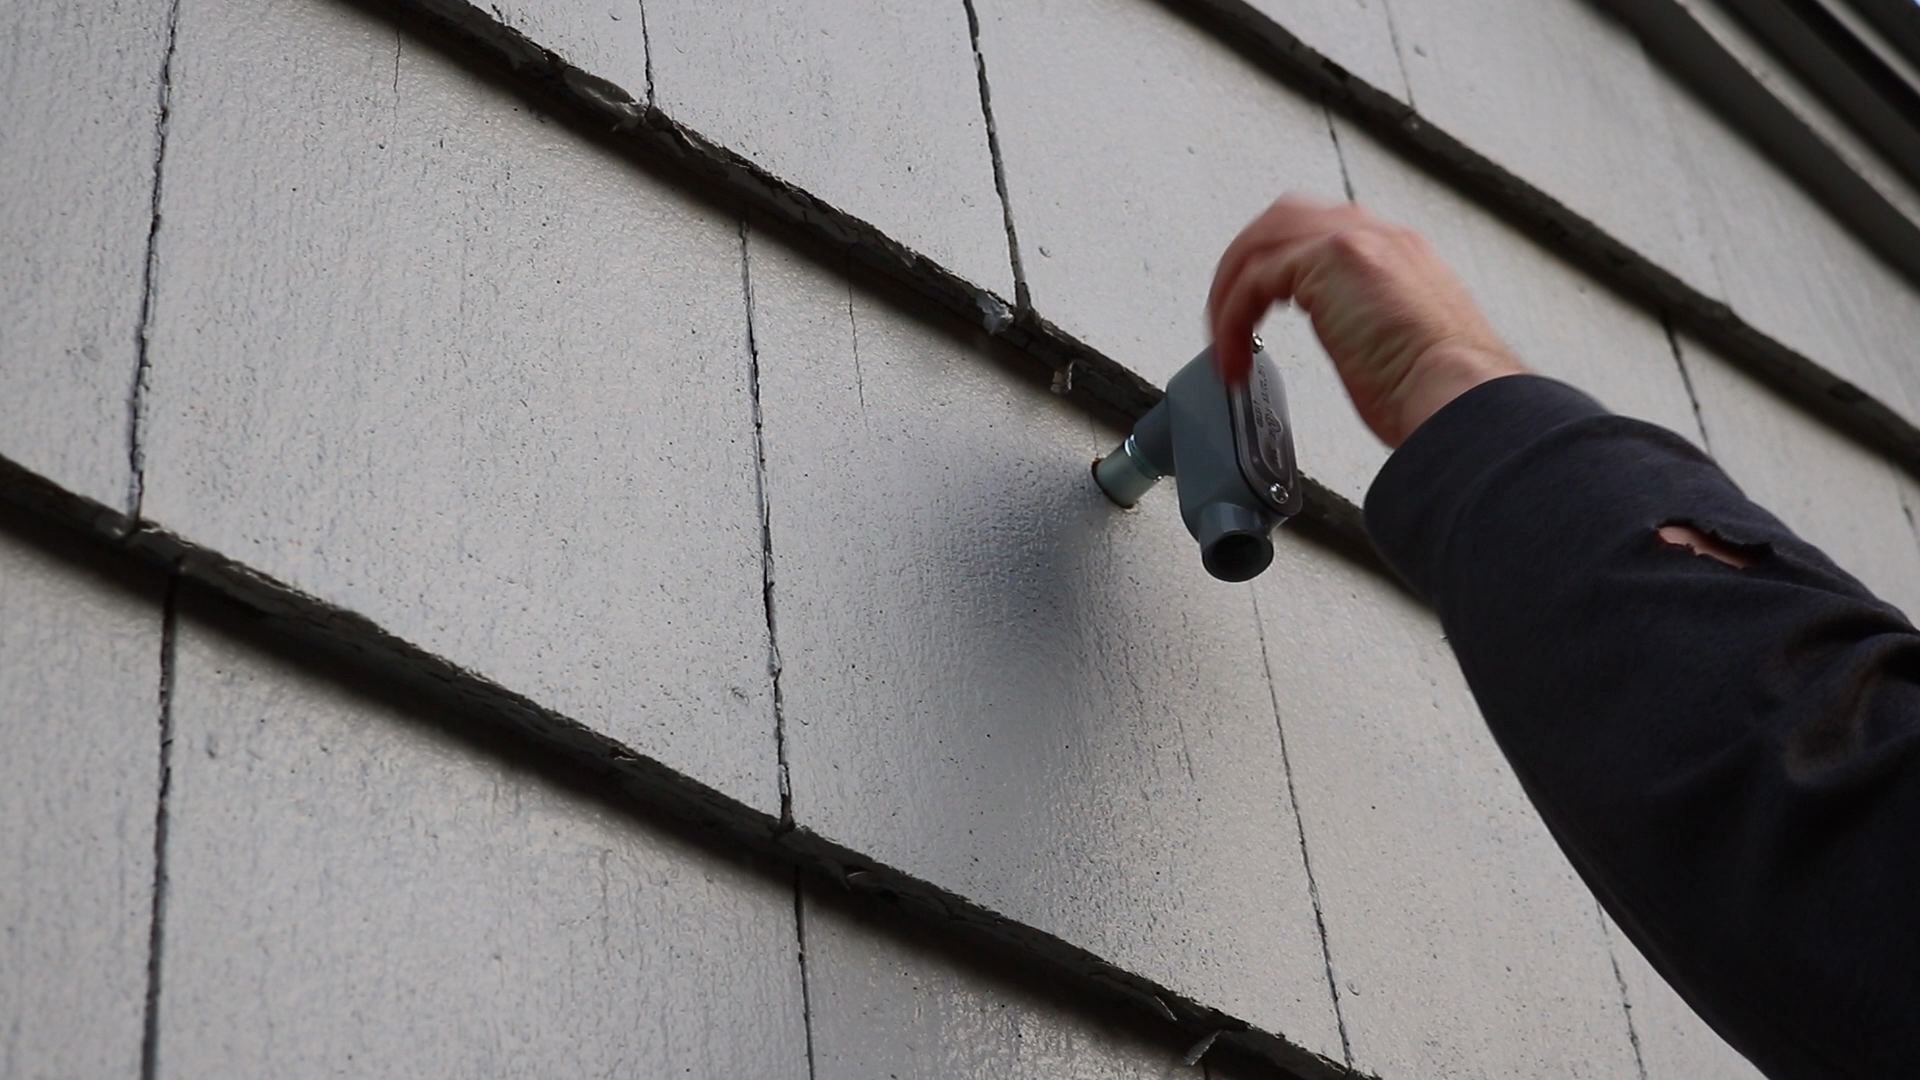
I then placed the nipple/EL assembly into the wall.
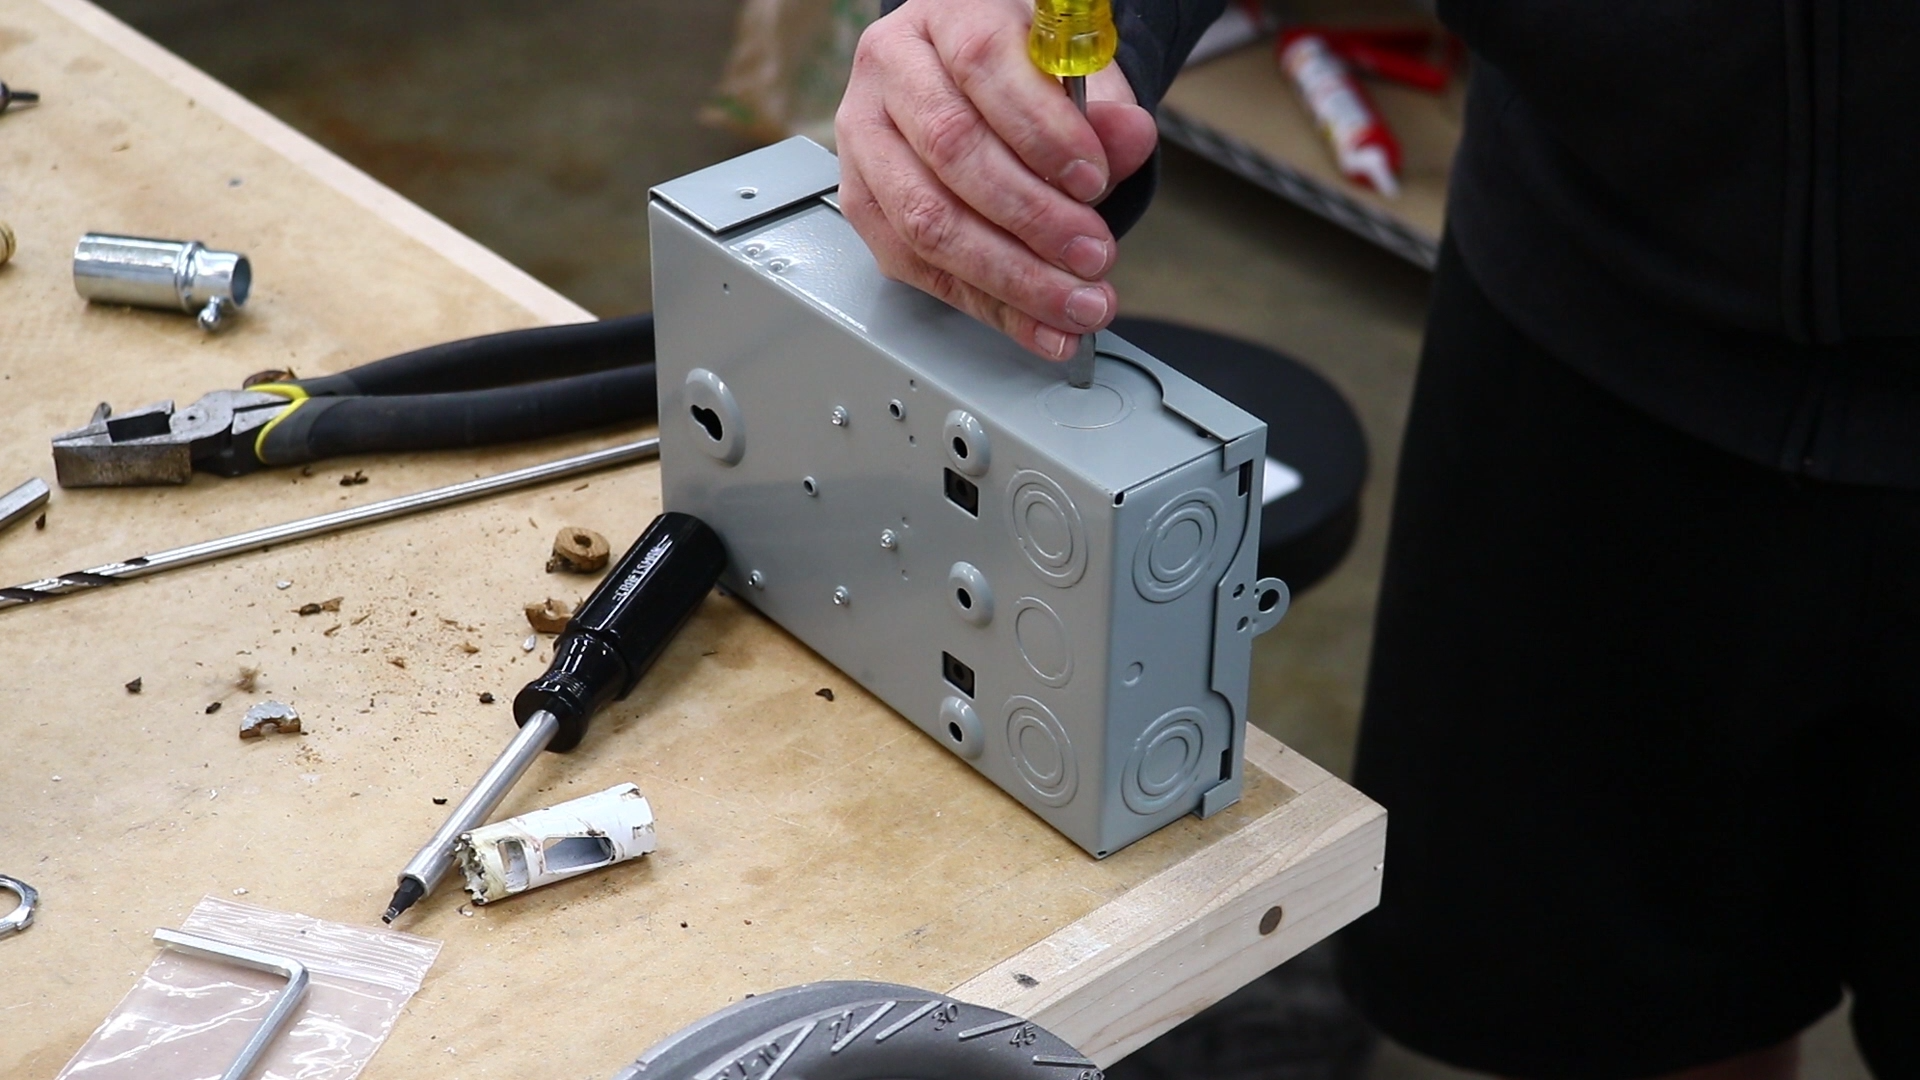
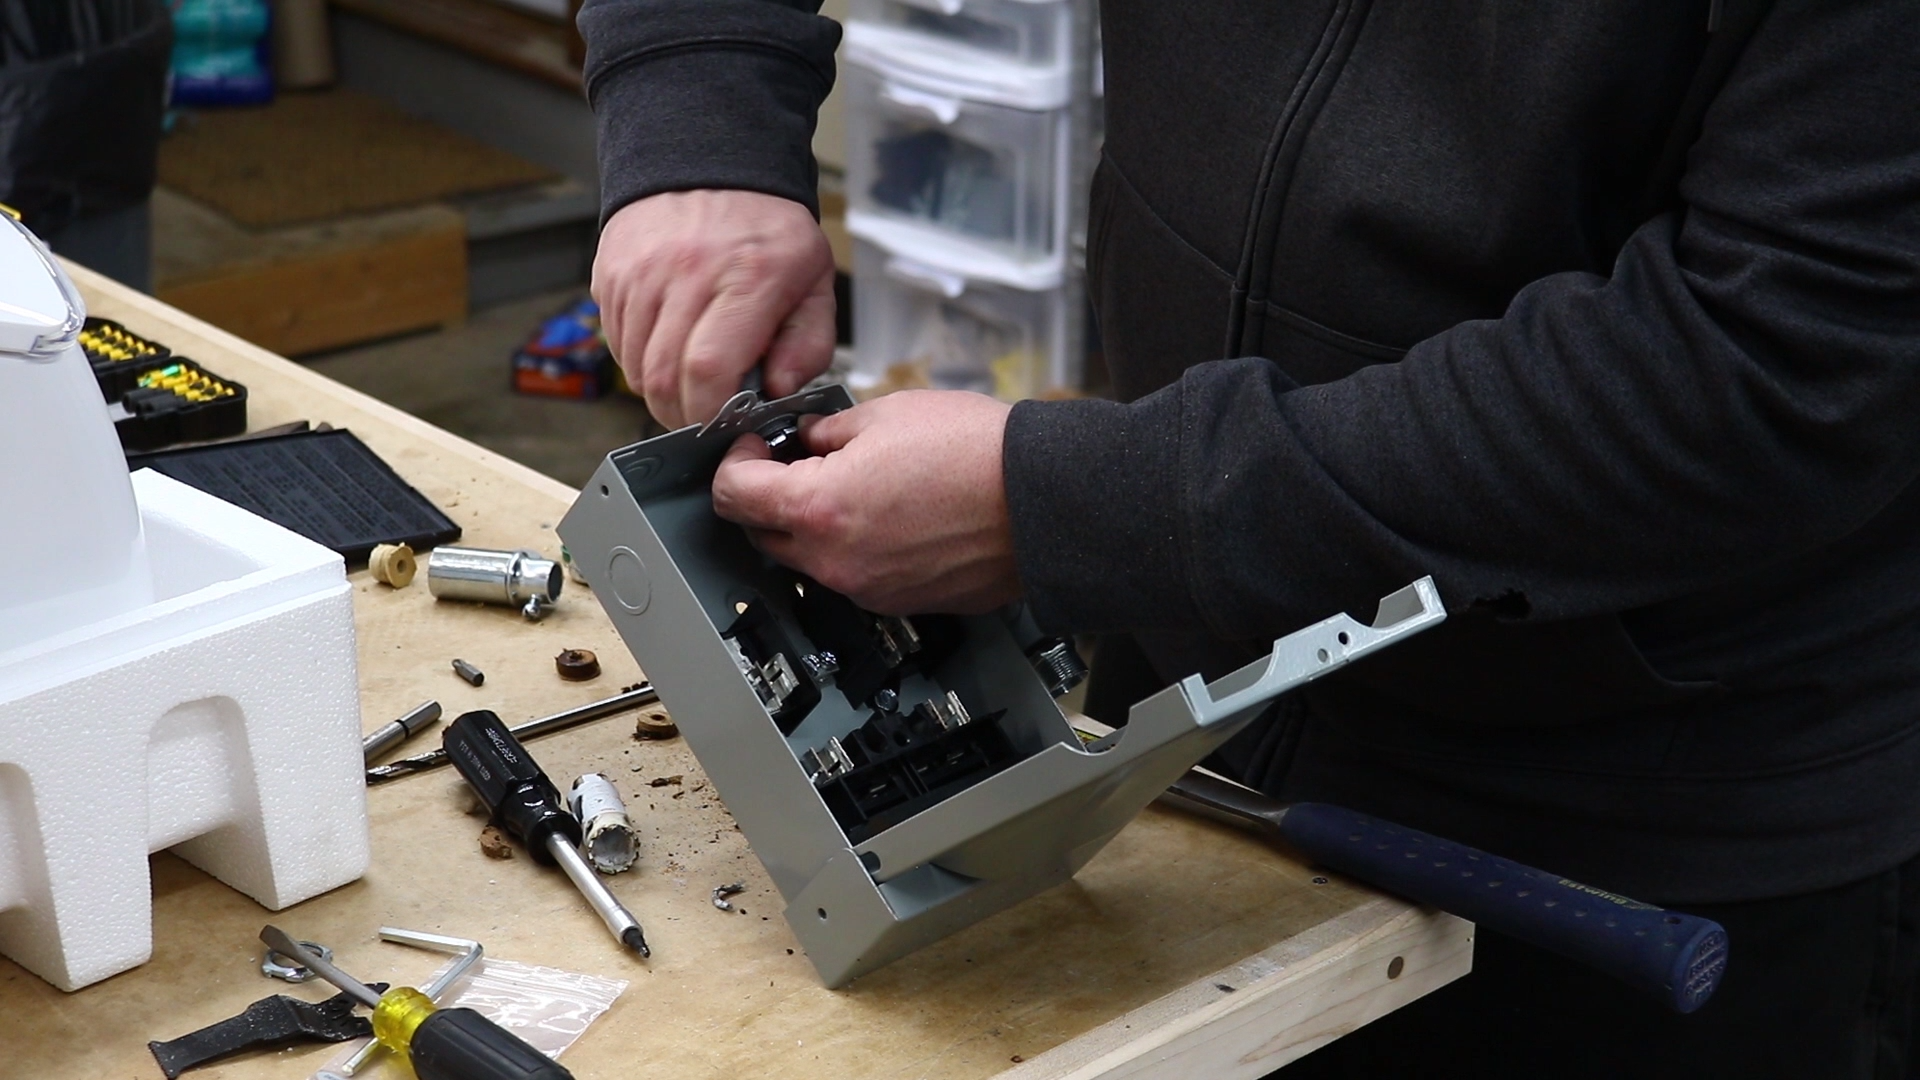
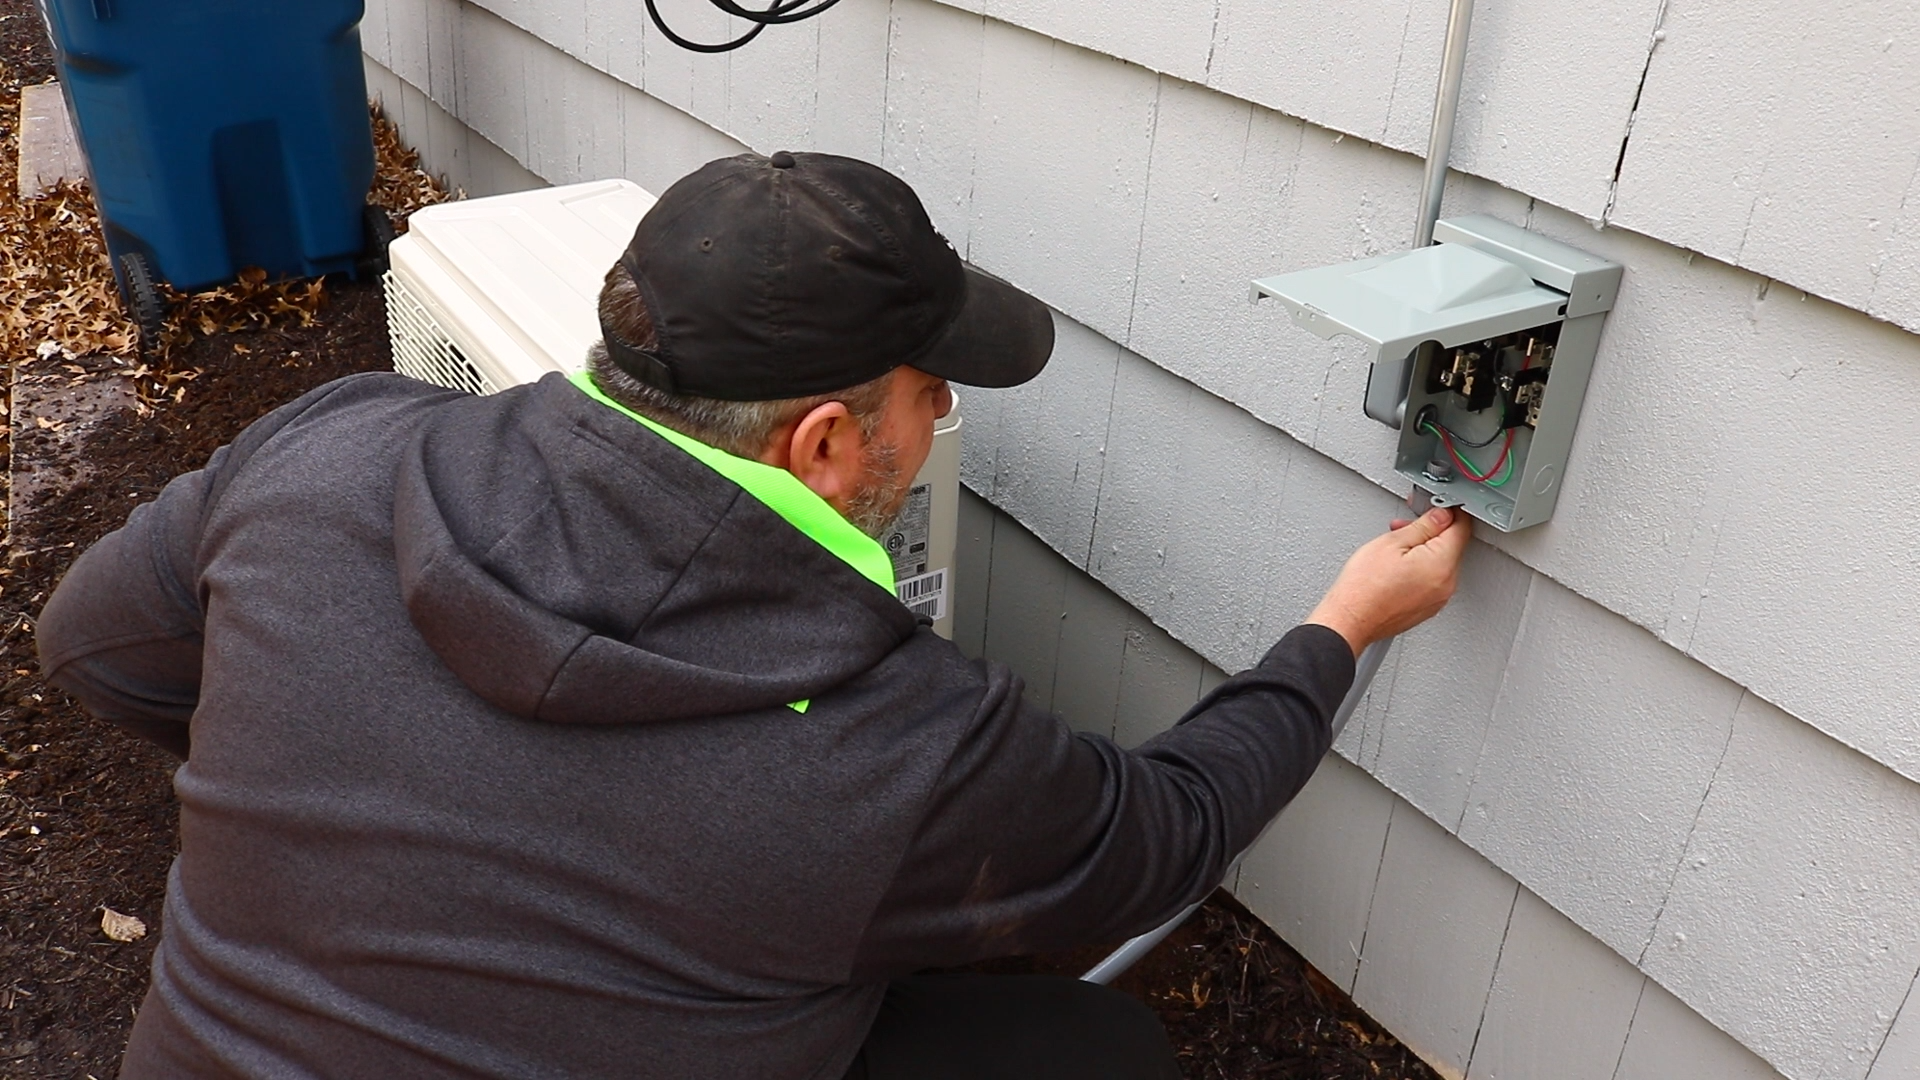
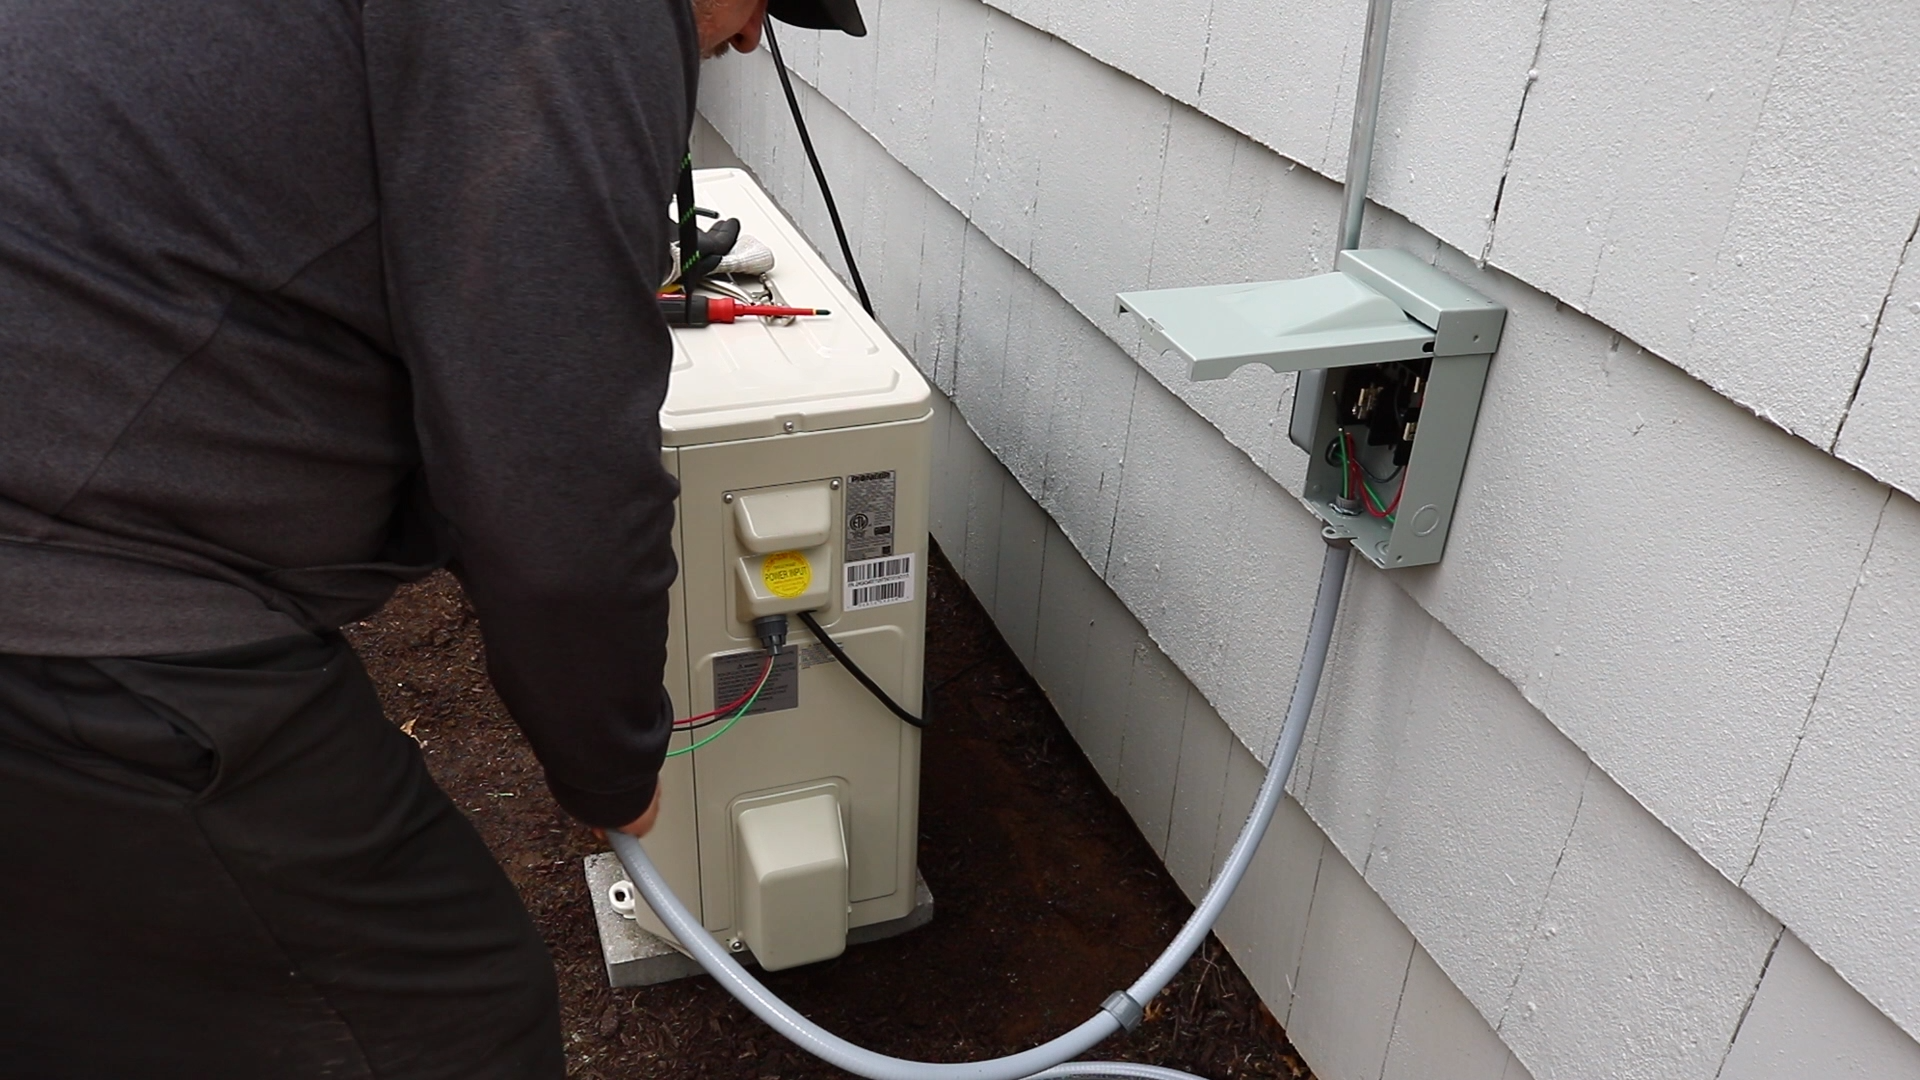
All HVAC equipment requires a disconnect within site of the unit. I got a 30 amp disconnect and will be mounting it right next to the unit on the outside of the shop. I removed knockouts on the side and bottom for the incoming and outgoing connections.
On the side, I attached another EL that would accept the conduit running along the outside wall of the shop.
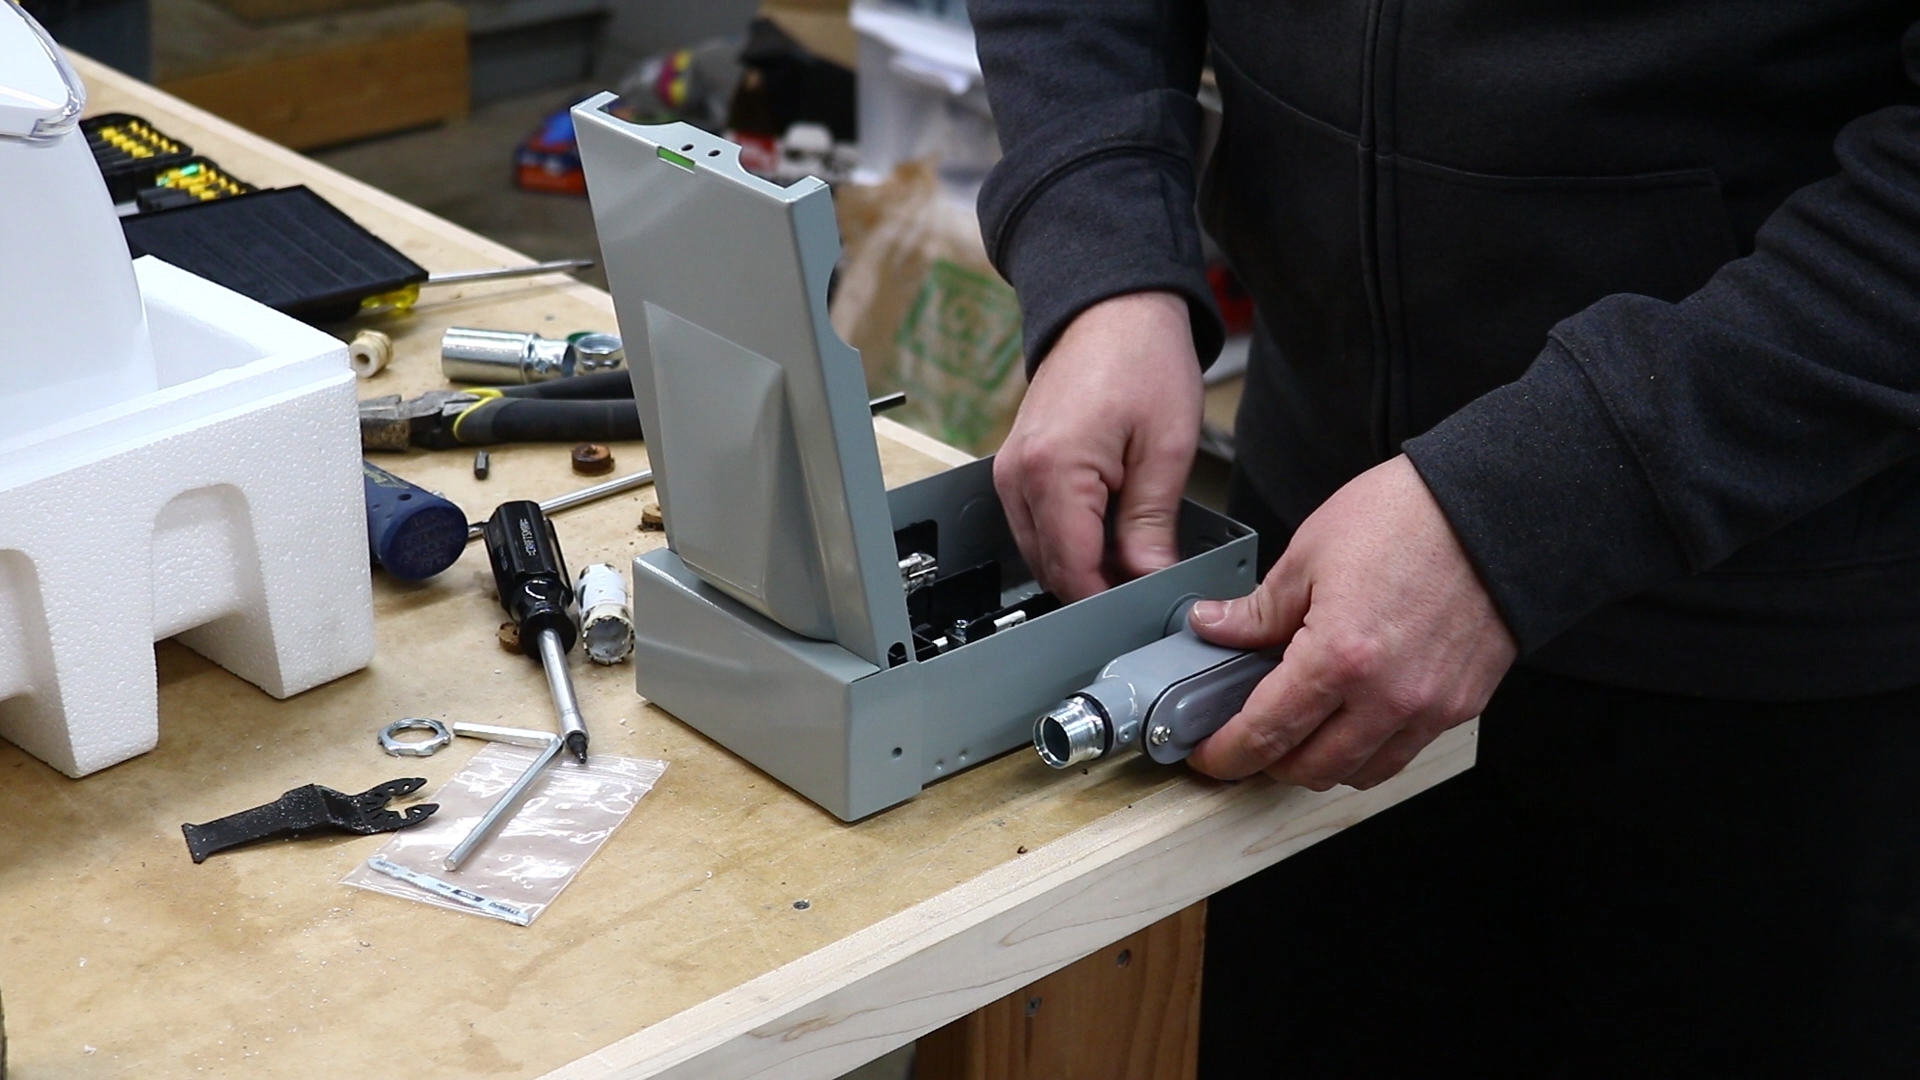
A liquidtight fitting was used on the bottom of the disconnect.
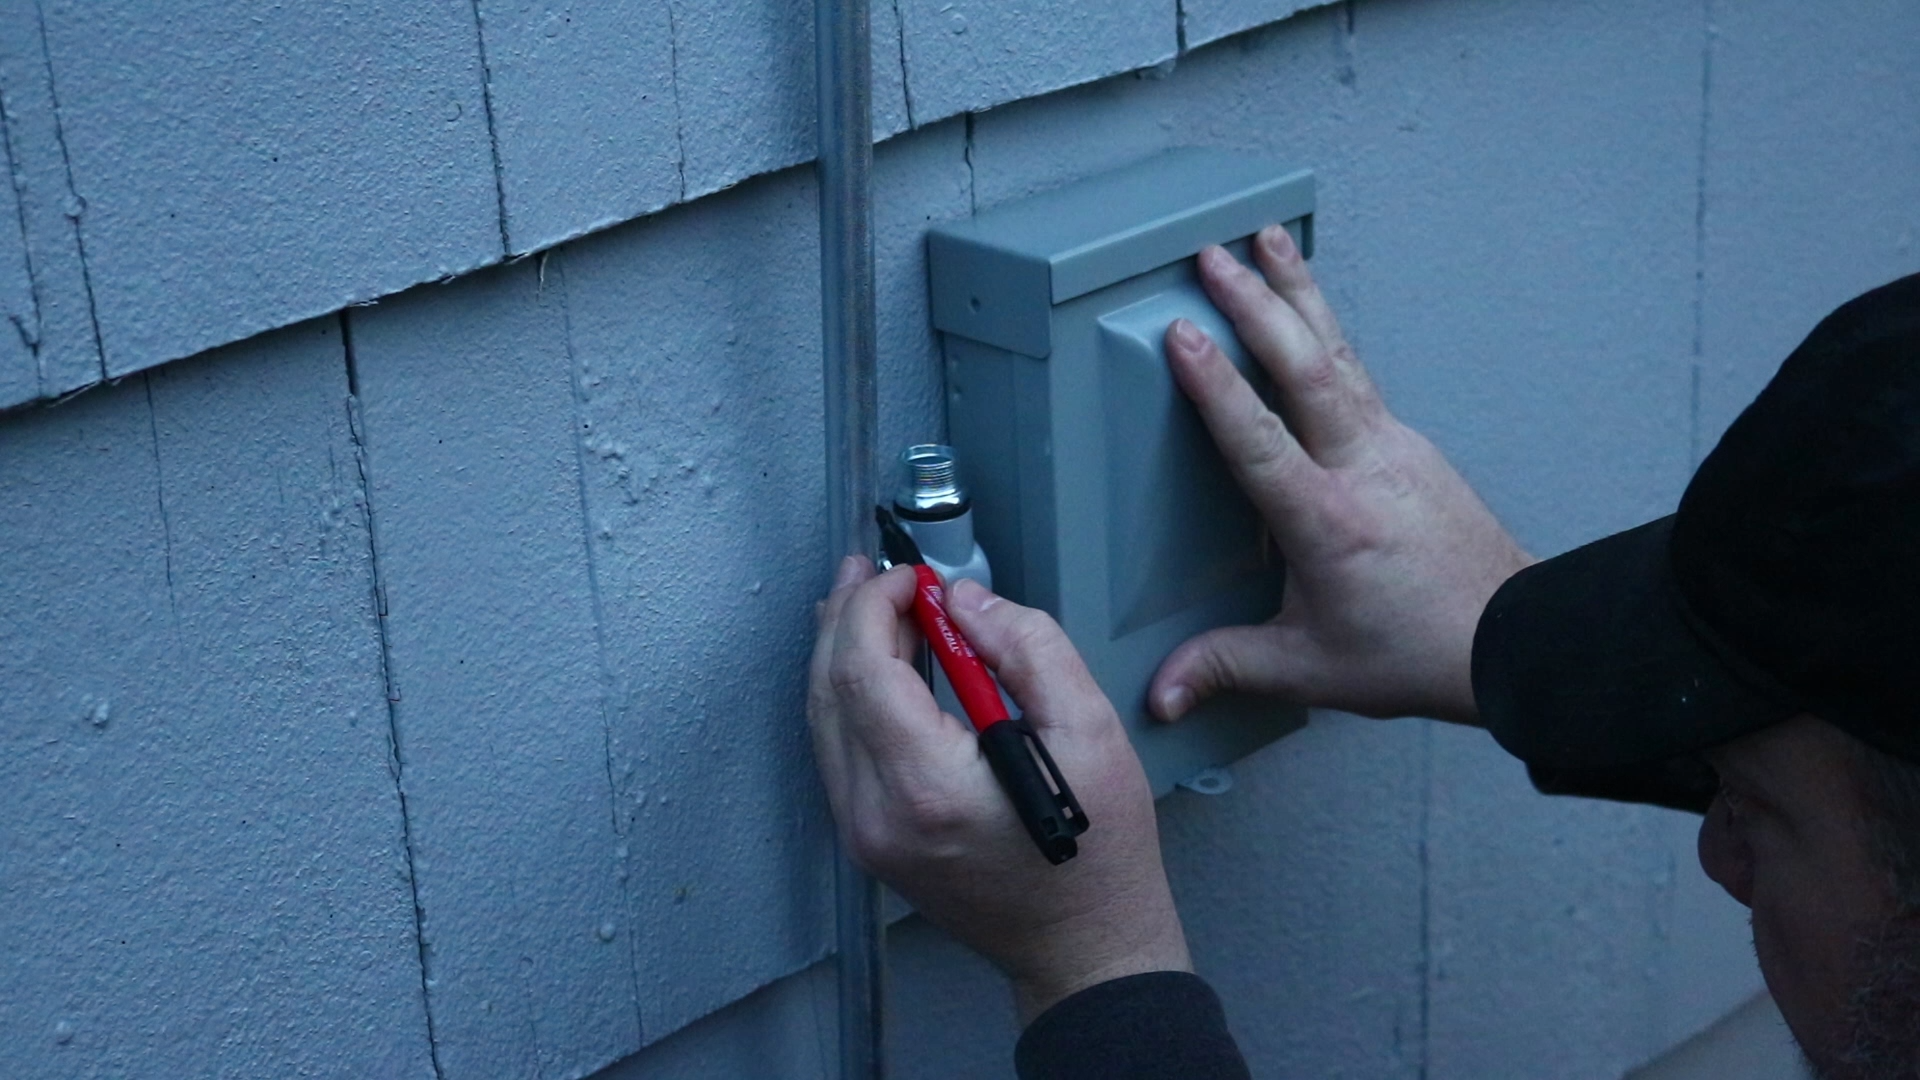
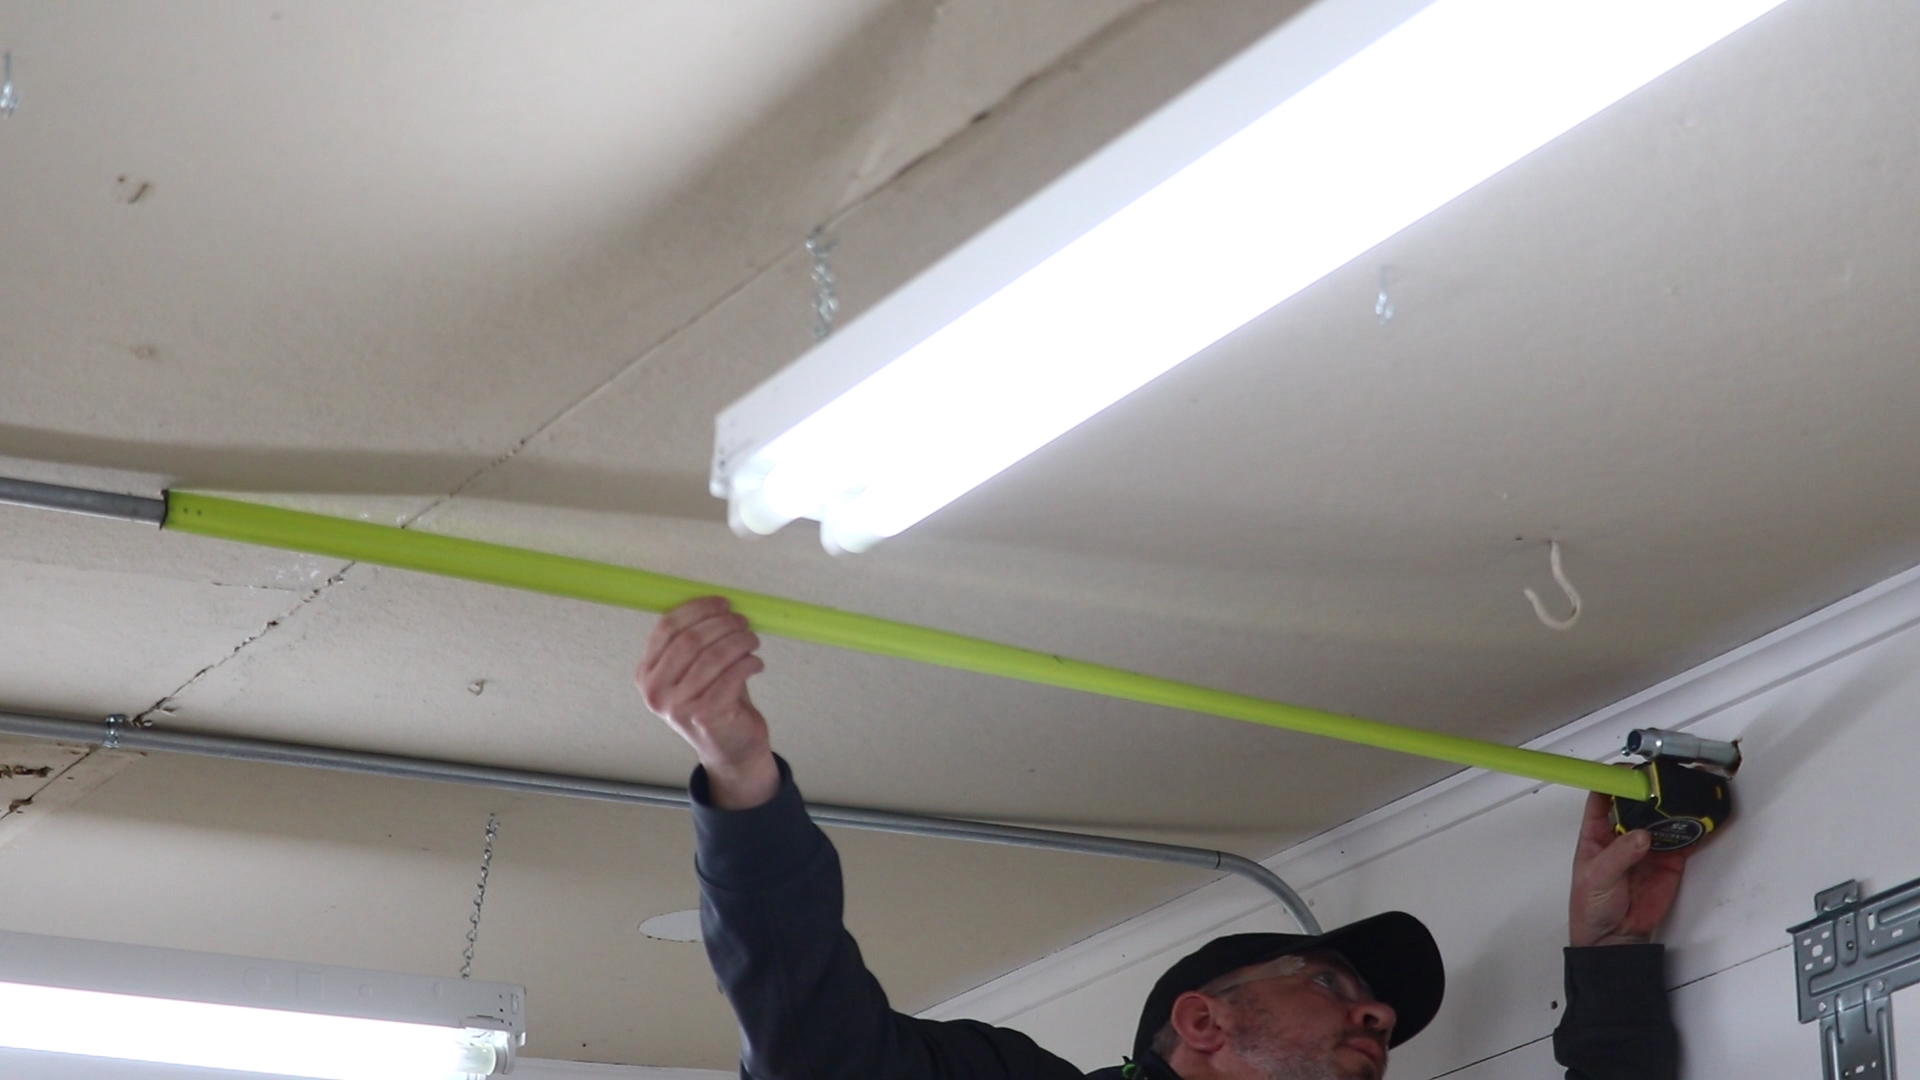
I took the disconnect outside and marked the conduit so I could cut it to length.
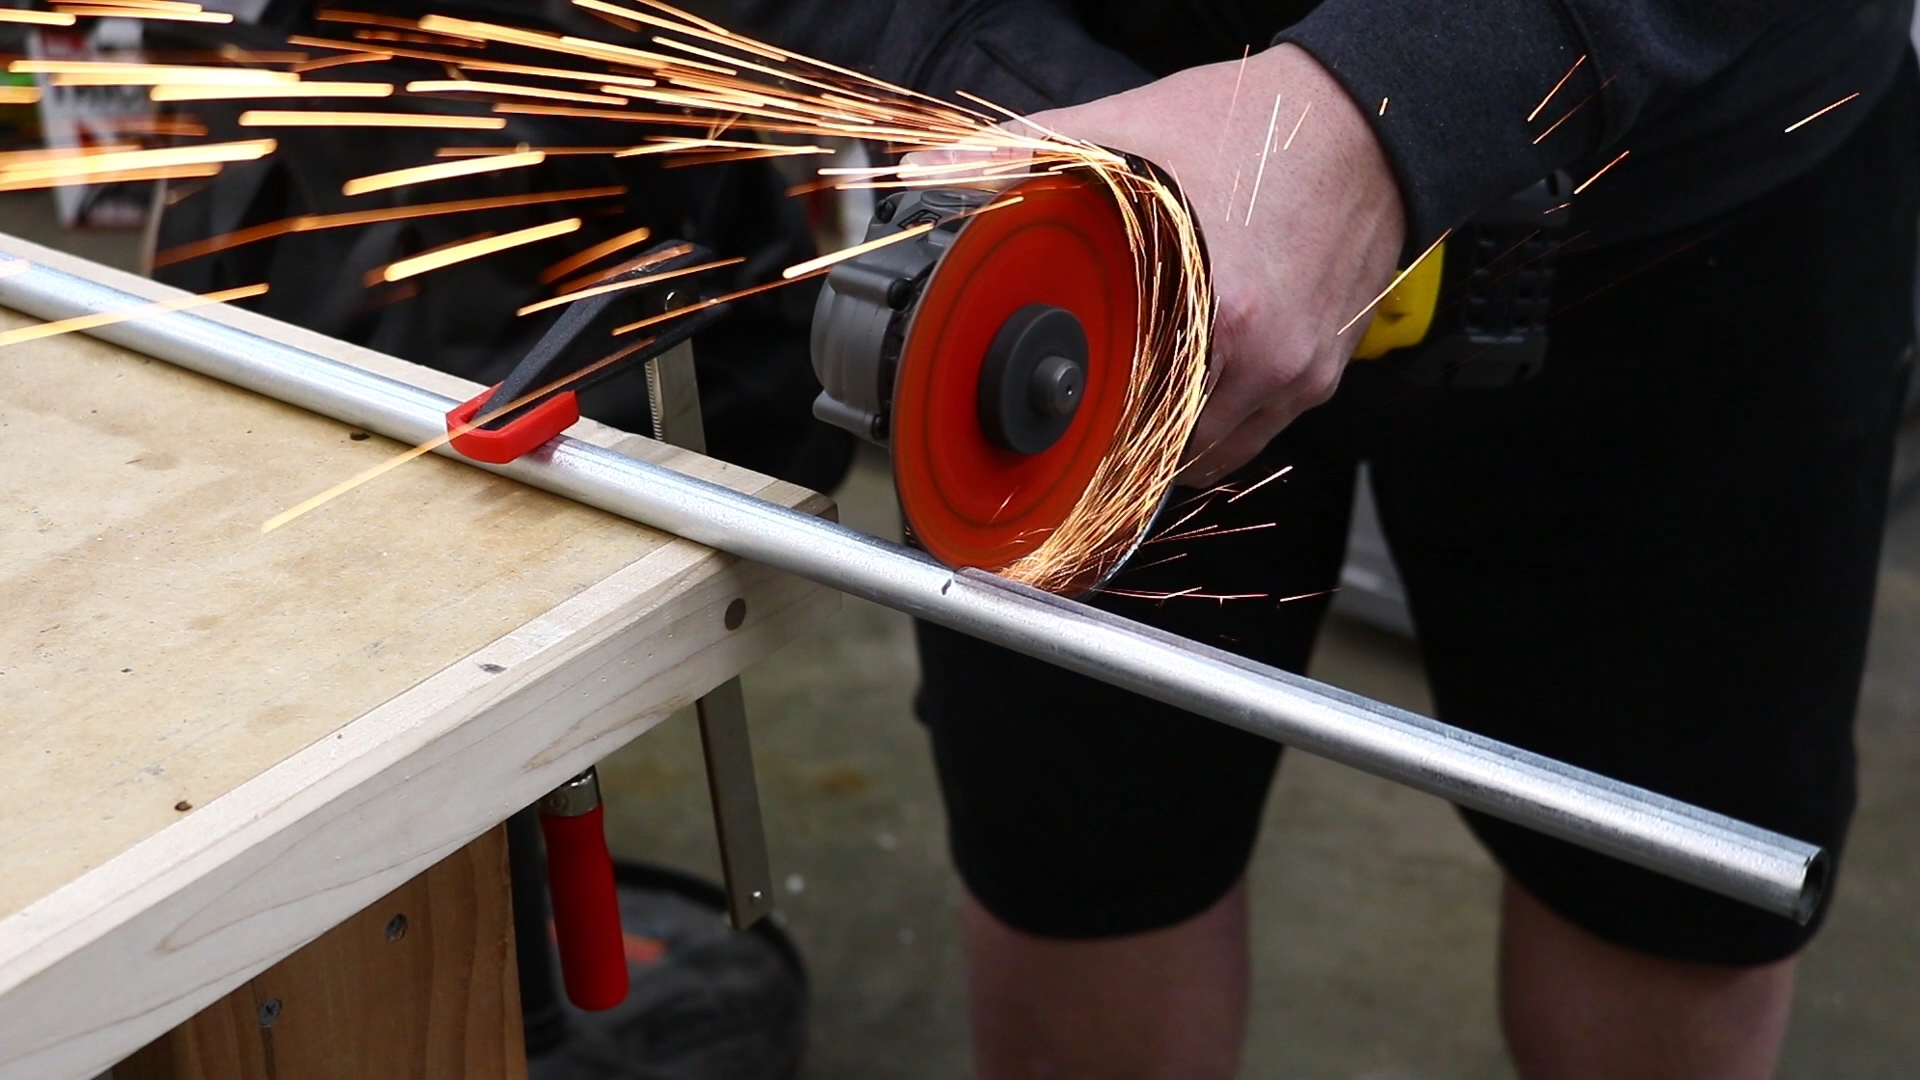
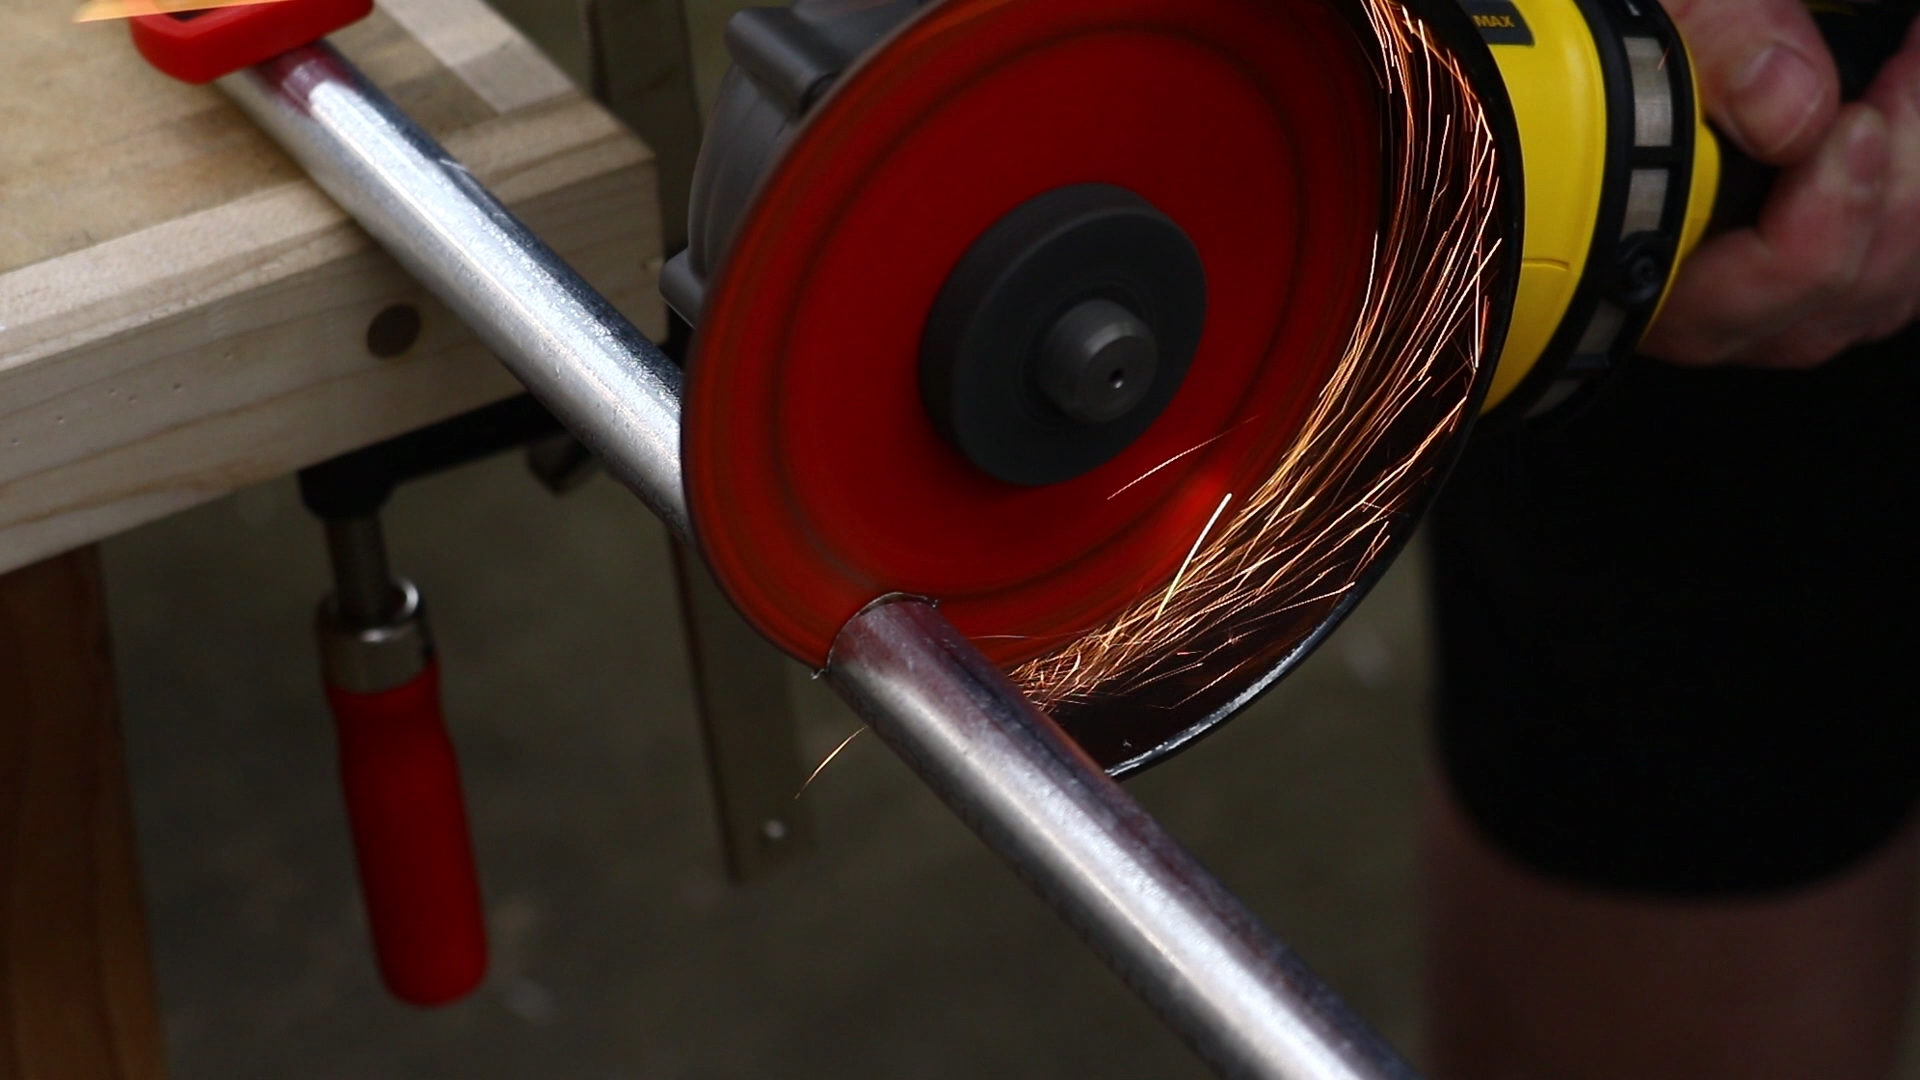
I used my angle grinder to cut the EMT to length.
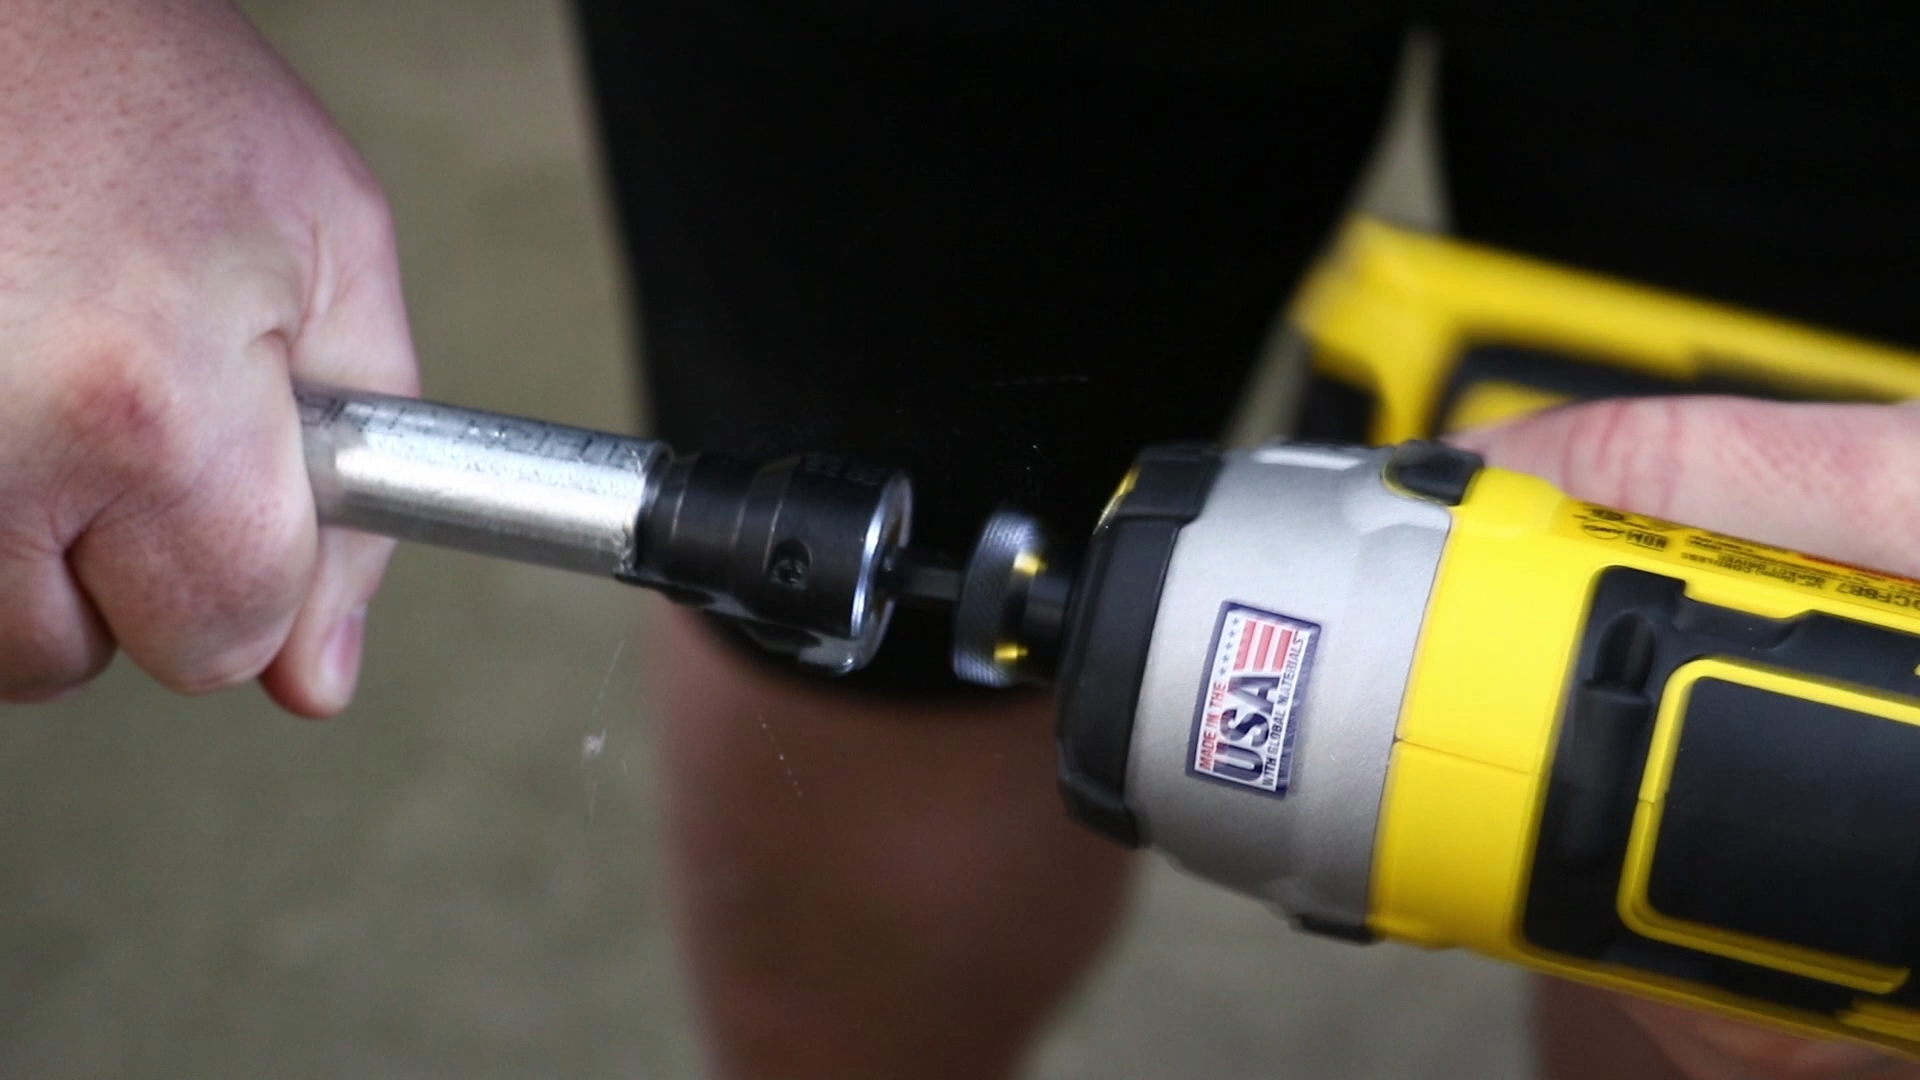
After you cut EMT there will be some nasty burrs that you need to remove. The best tool for that job is a conduit reamer. Attach it to a drill or, more preferably, an impact driver and it will smooth the freshly cut EMT so it doesn’t cut you or mangle your wire.
An EMT connector was attached to the nipple.
I then measured the amount of conduit needed to finish off the inside run and cut it to length again with my grinder.
I placed the EMT and then tightened down the connectors.
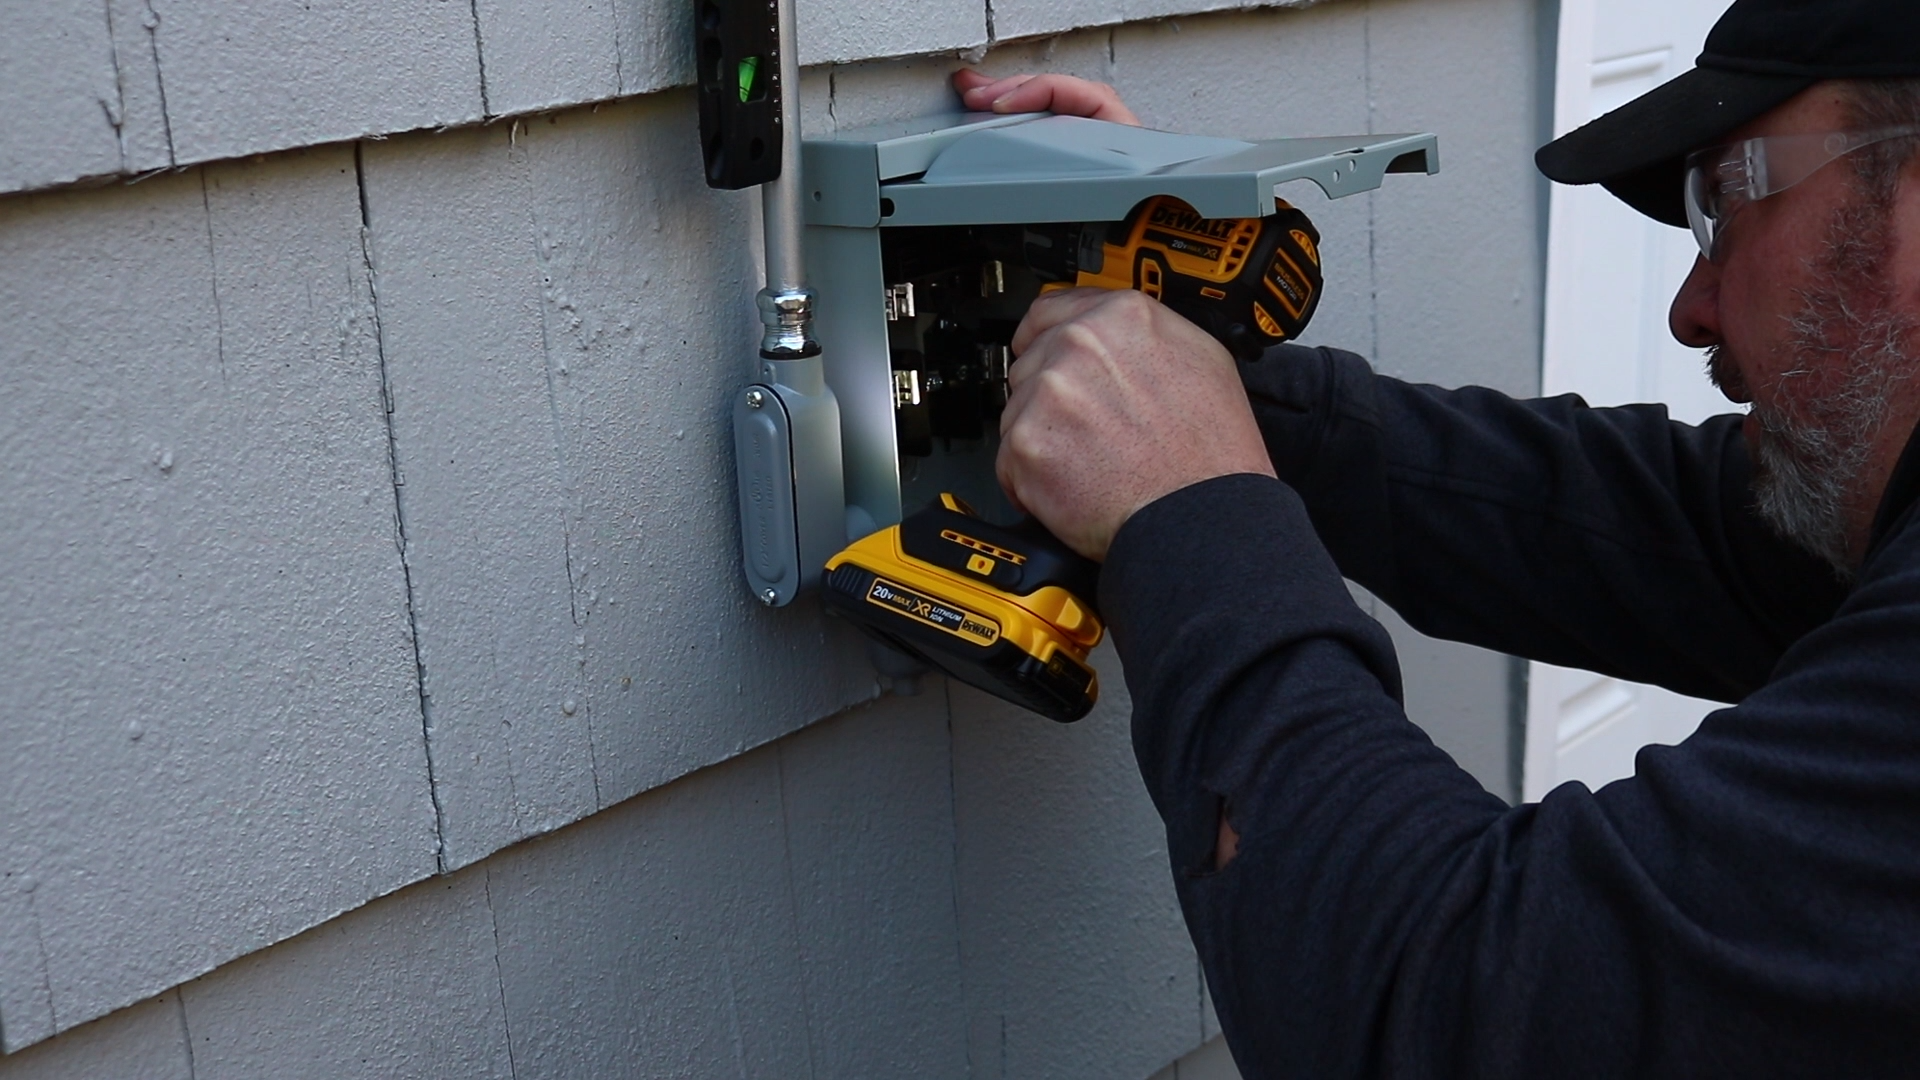
The EMT I cut earlier was then attached to the EL with a raintight fitting and mounted the disconnect to the outside wall of the shop.
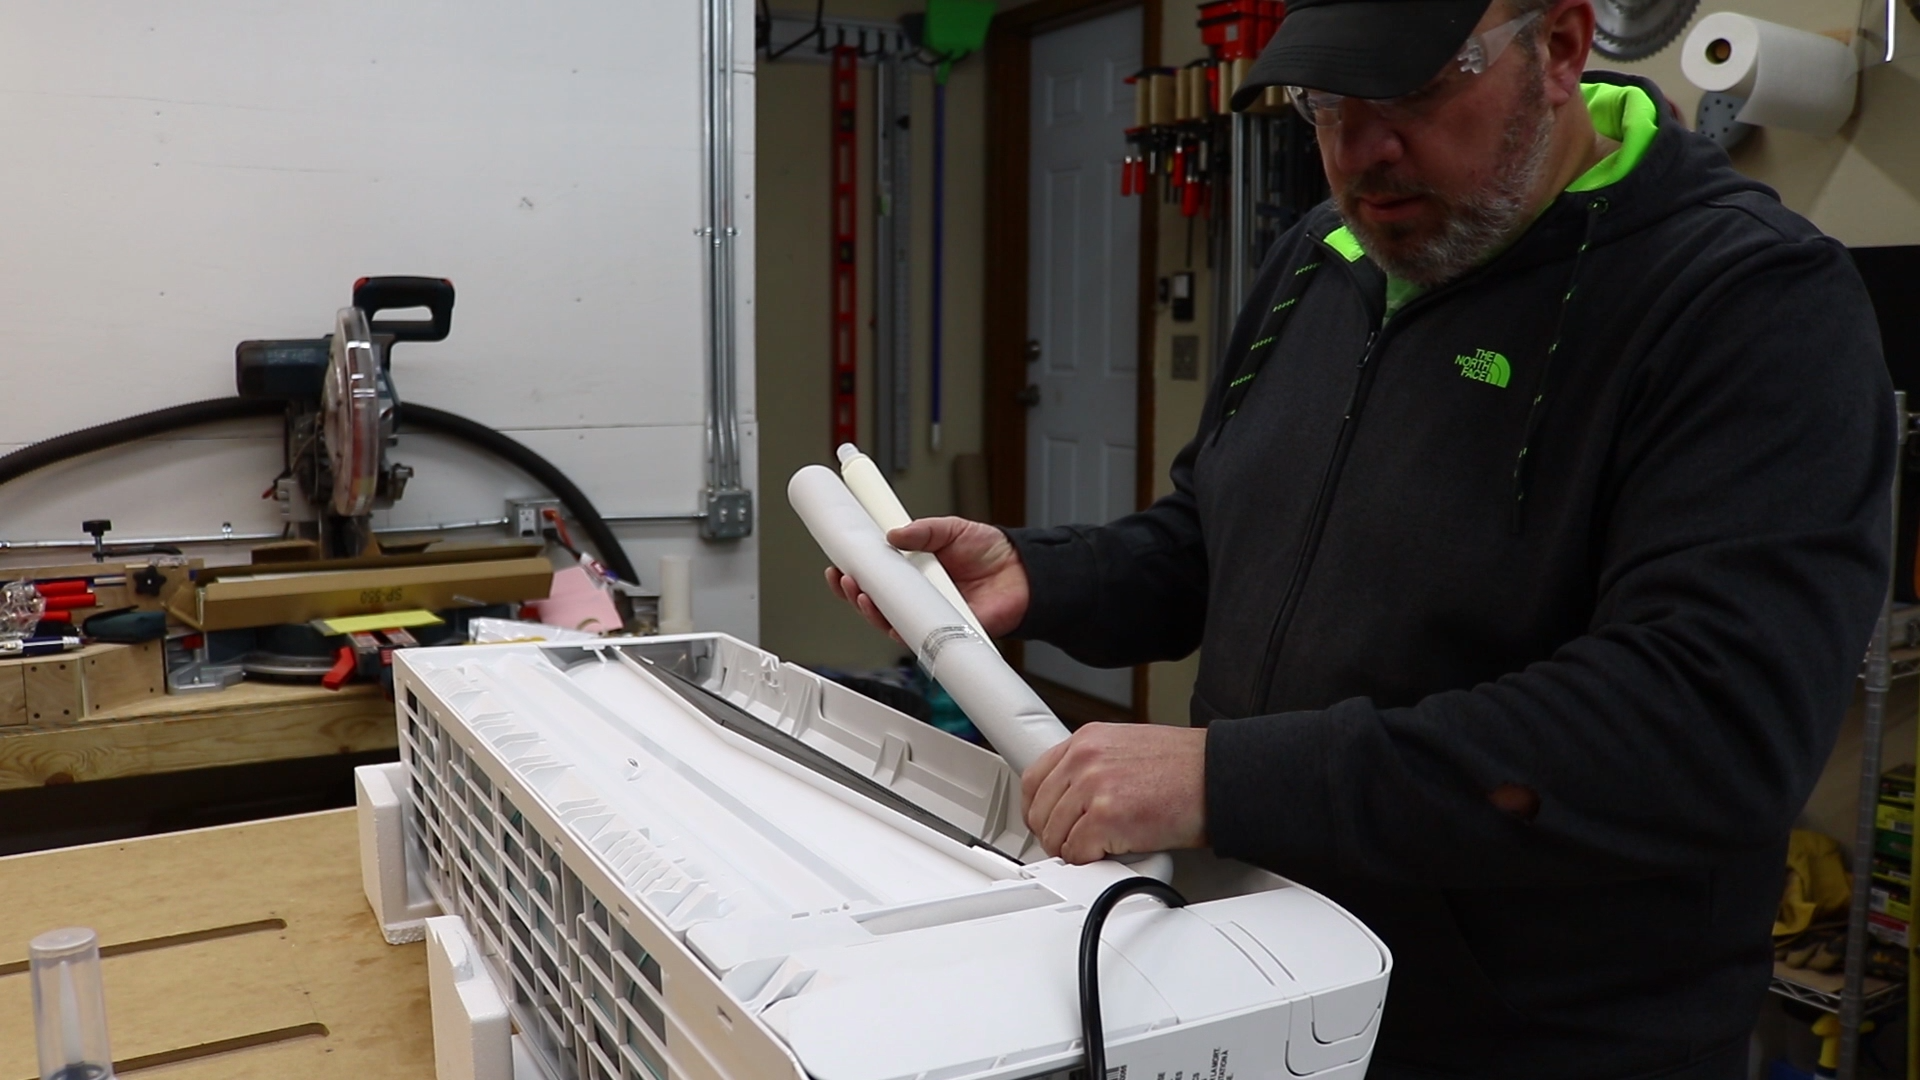
To prepare the indoor unit for mounting I needed to bend the lineset to it went out the back of the unit and sloped slightly downward to match the angle of the hole I cut earlier. It’s is critical when bending the lineset that you do not kink the copper pipe. If you forget this, the instructions will remind you at least 50 times.
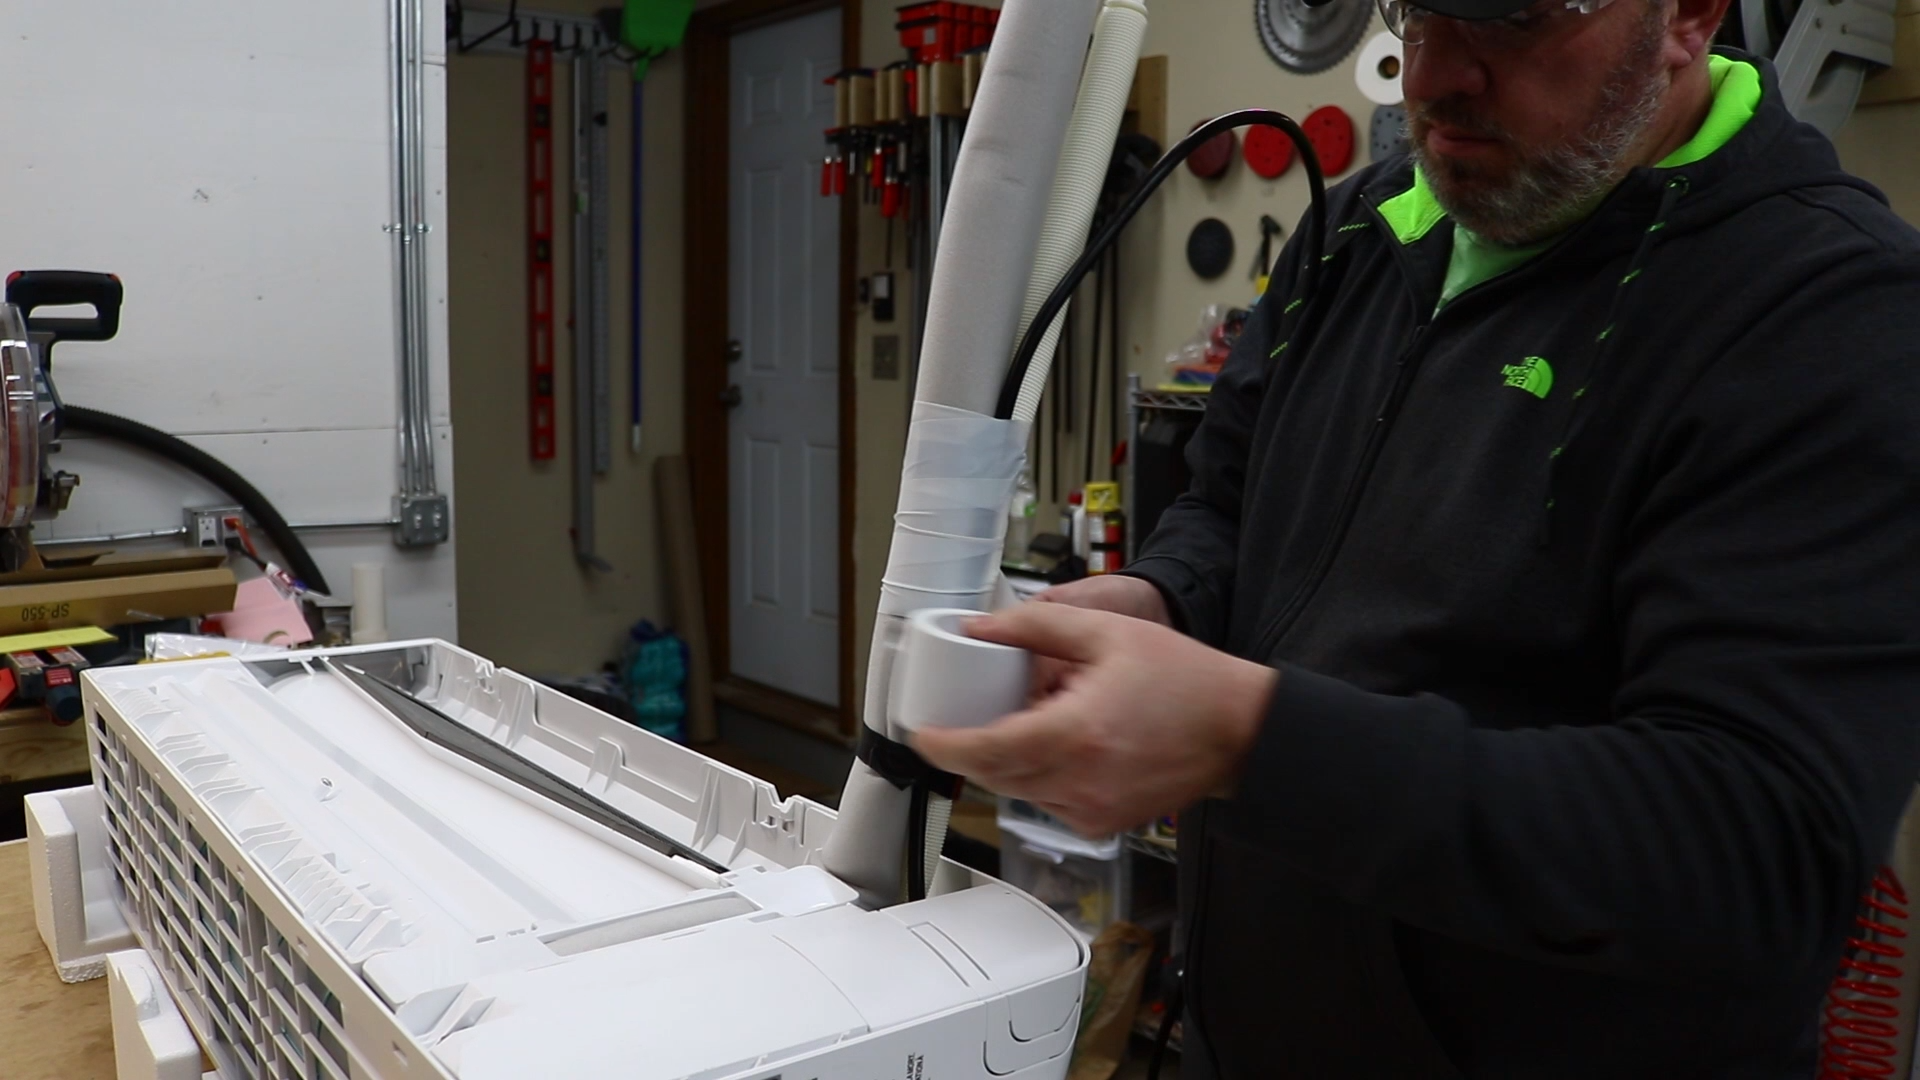
After straightening the lineset I tightly wrapped it with insulation wrap and electrical tape so it would fit nicely through the hole to the outside of the shop.
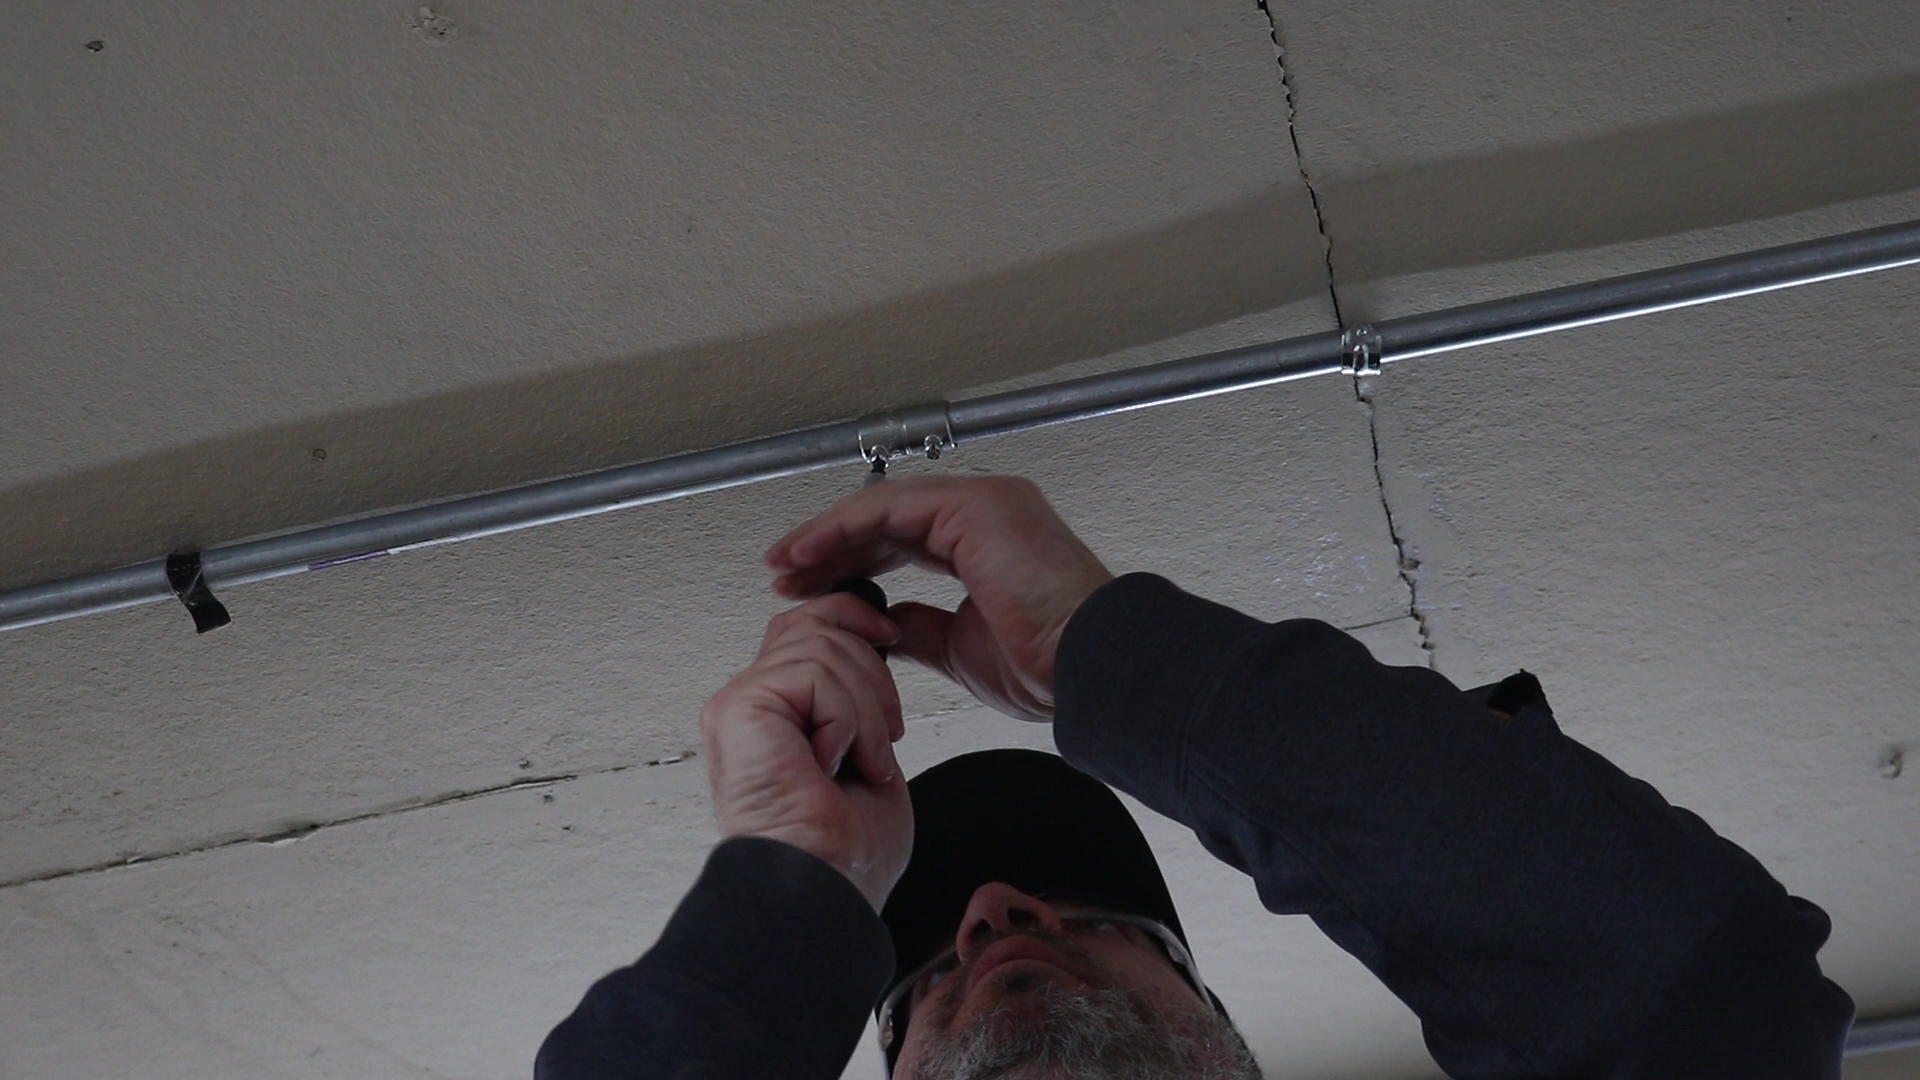
I fed the signal wire through to the outside in preparation of mounting the indoor unit.

I then lifted the unit into place while simultaneously feeing the signal wire and lineset through the hole. Two more hands would have come in handy during this step. I just realized the etymology of the word “handy”.
Once outside, I needed to bend the lineset so it would run down the outside wall. I started to do this but since I had an HVAC tech coming I decided to leave it along and let him handle to ensure I wouldn’t kink anything.
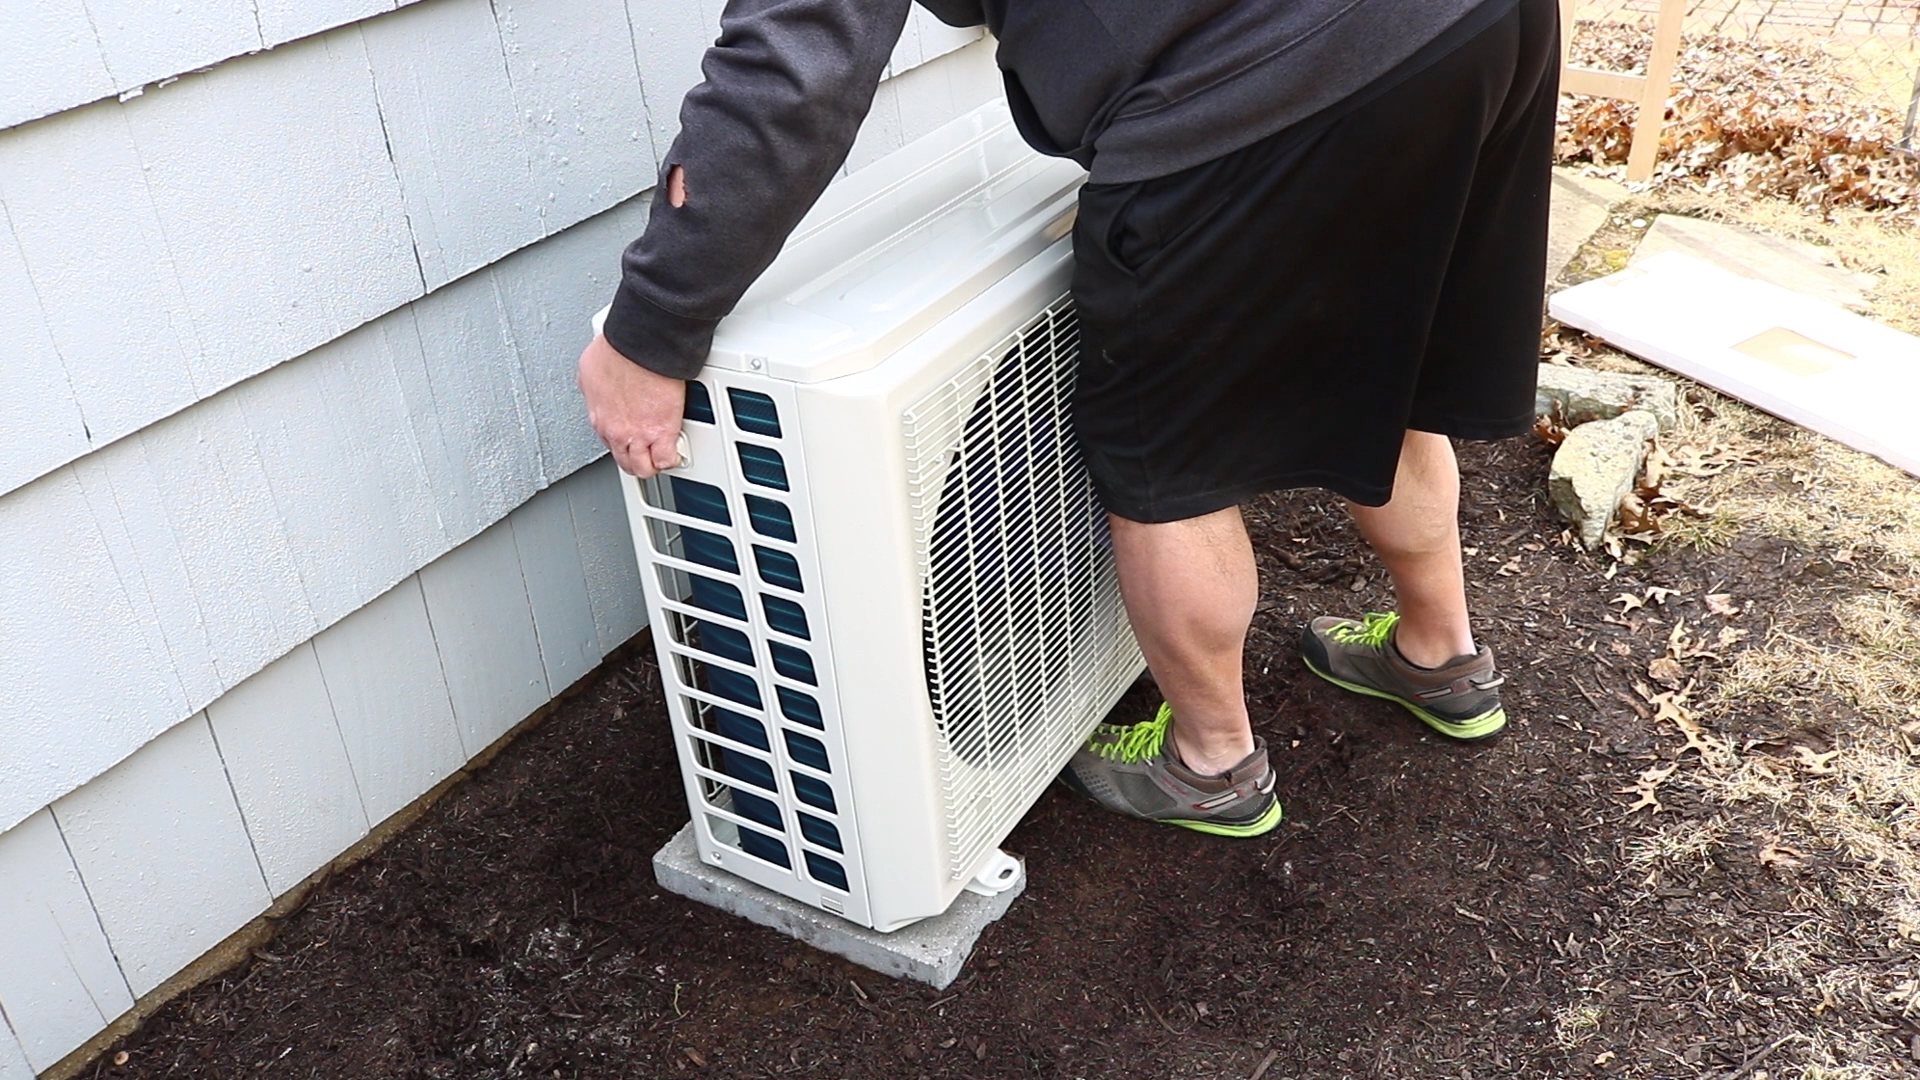
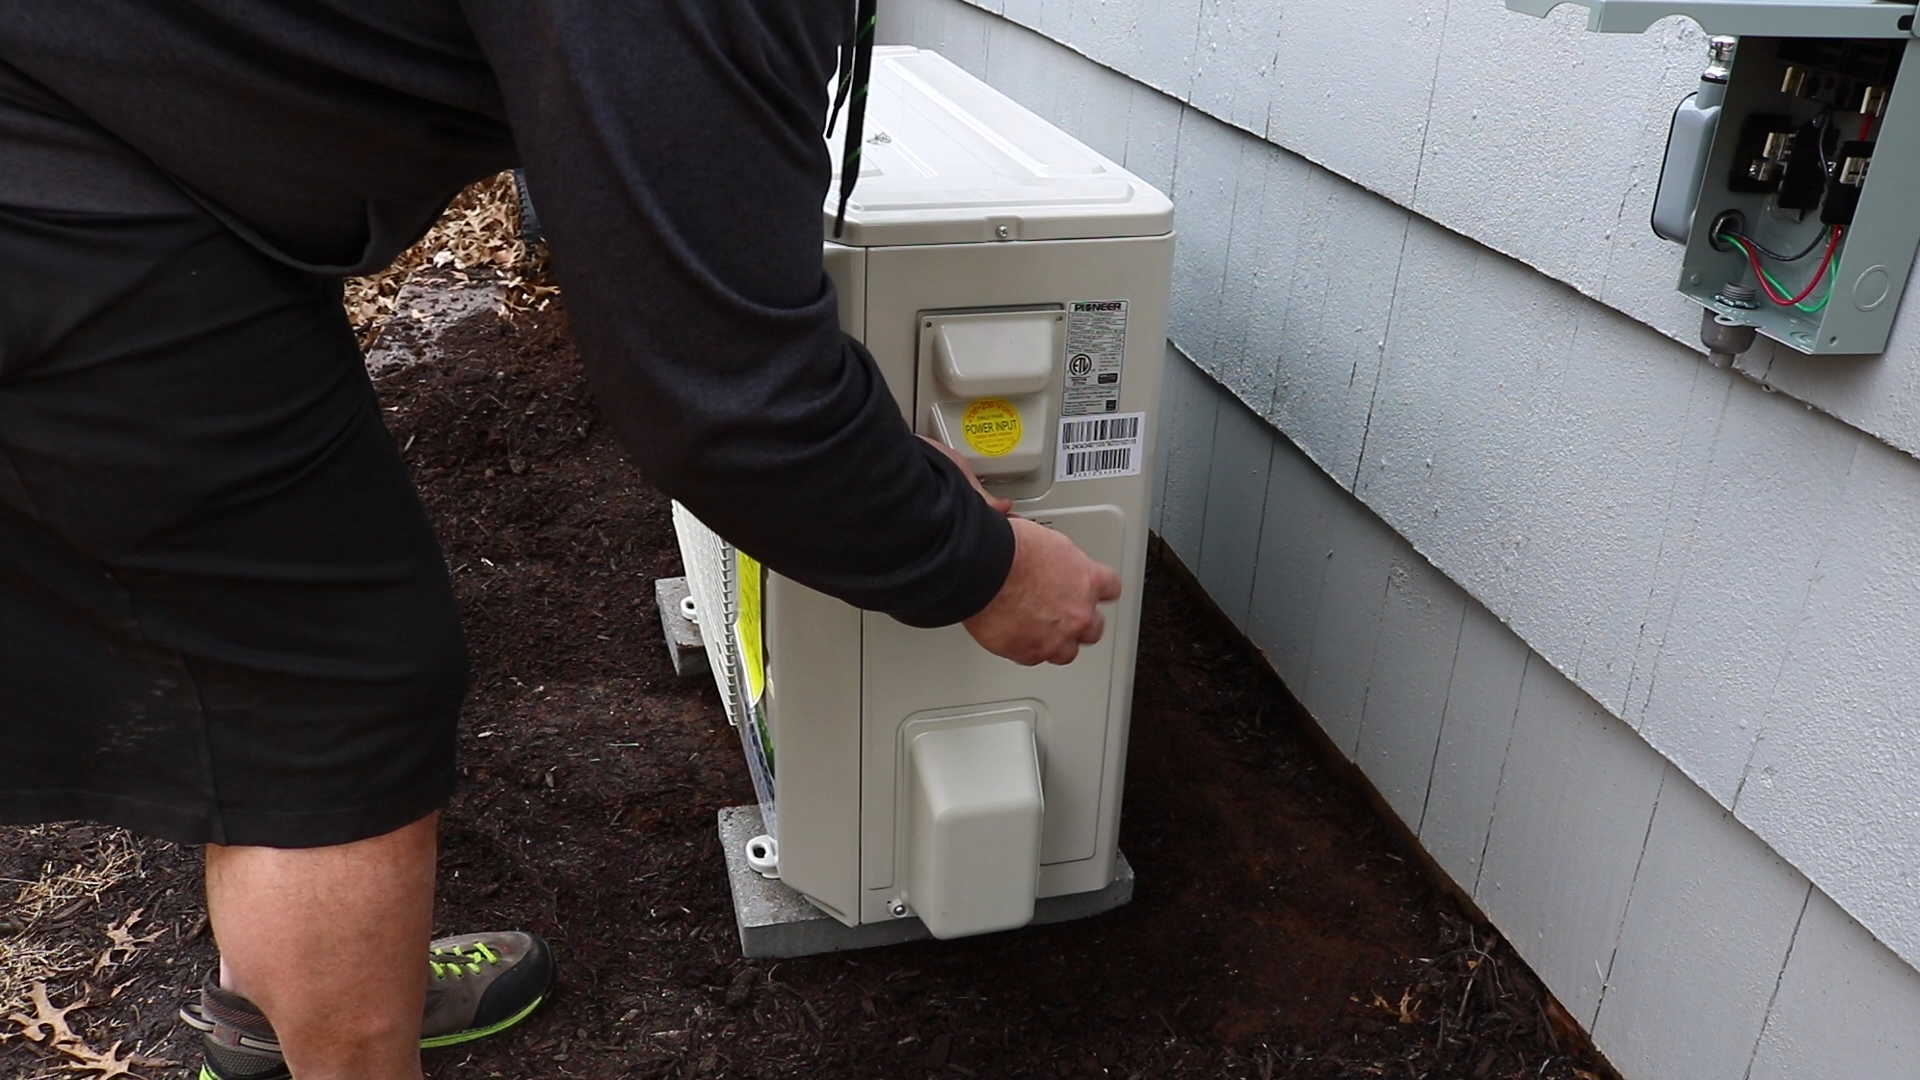
I then turned my attention to the outdoor unit. When I ordered the unit I bought a wall mounting bracket. After looking at the bracket and how it would fit on my wall I decided not to use and opted to mount the unit on the ground with these two pavers for a base. The most critical thing here is to make sure they are level.
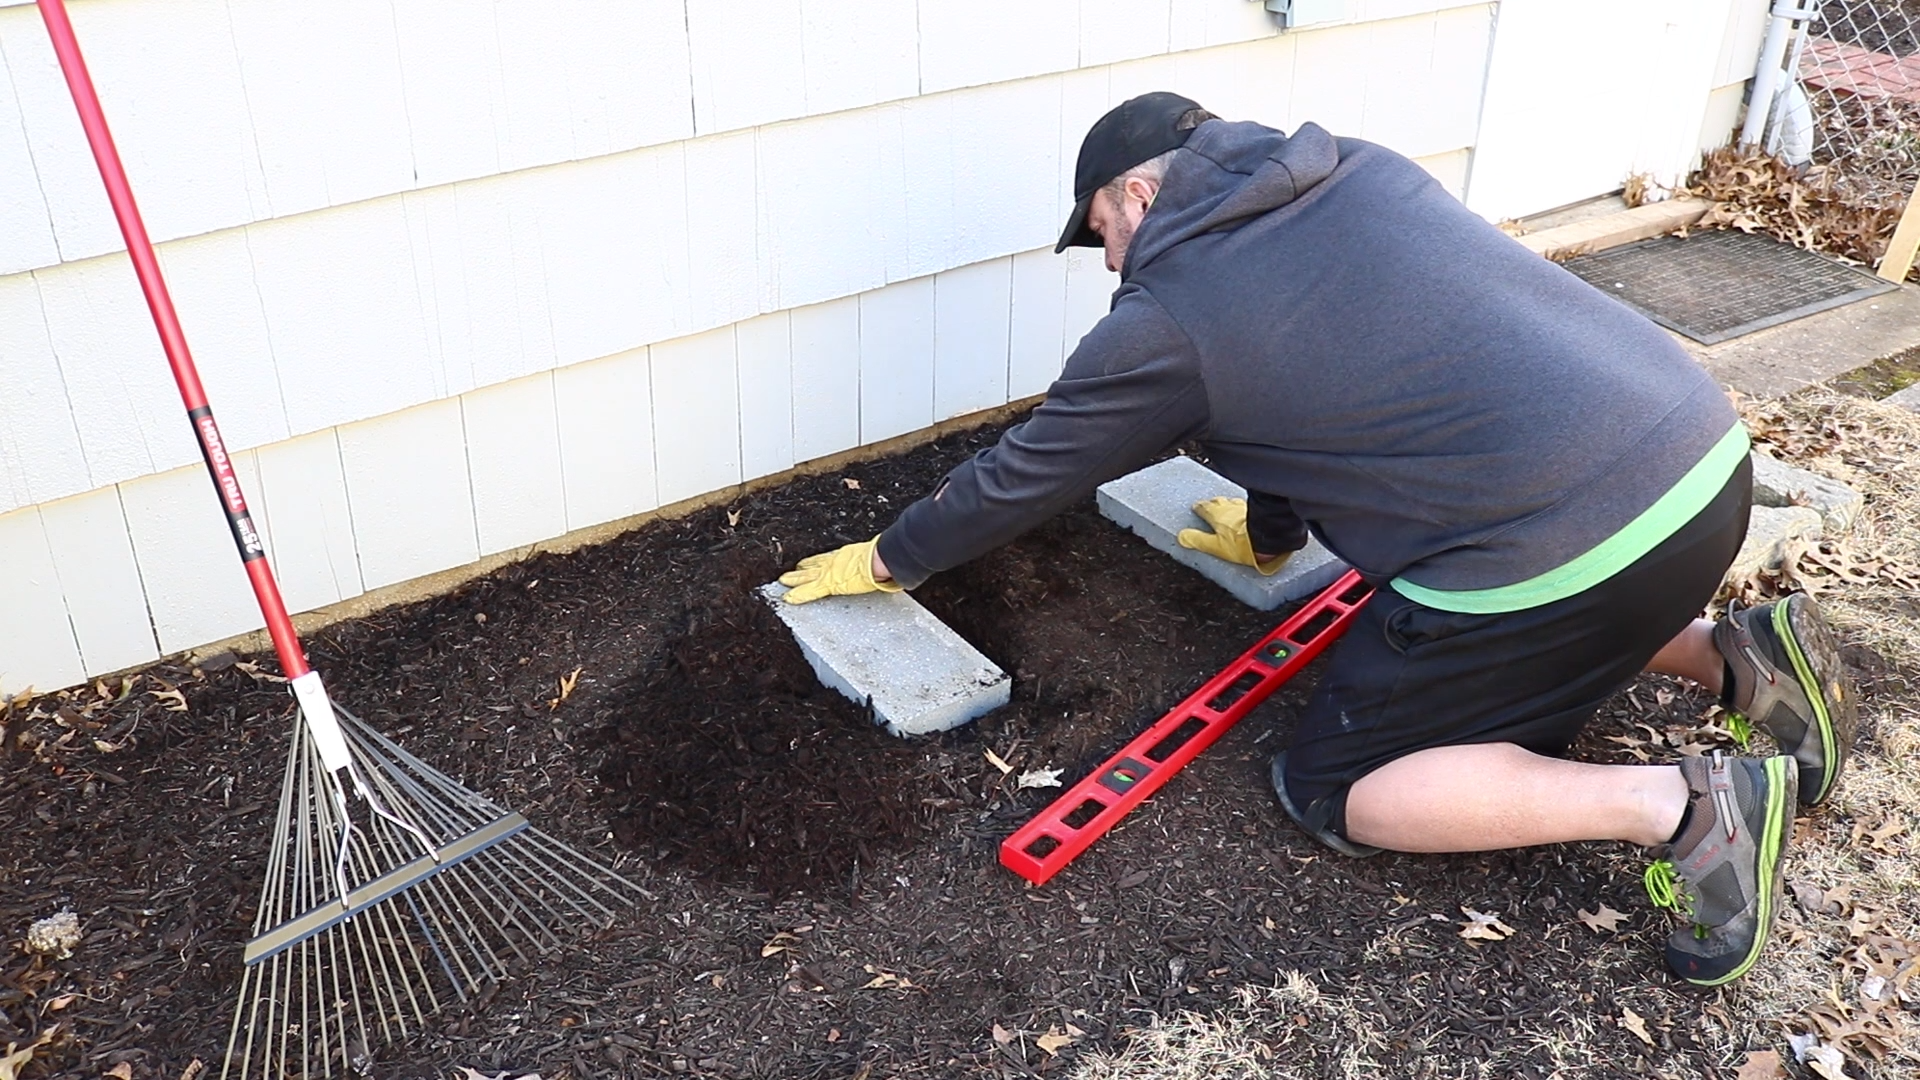
I then placed the outdoor unit on the pavers.
I now needed to run power to the disconnect so I turned off the power and started fishing three 12 gauge THHN wires through the conduit to the outside. My experience with fish tape has been awful so I just did this by hand. I ran almost all of my shop electrical by hand and found it to be much easier than dicking around with the fish tape.
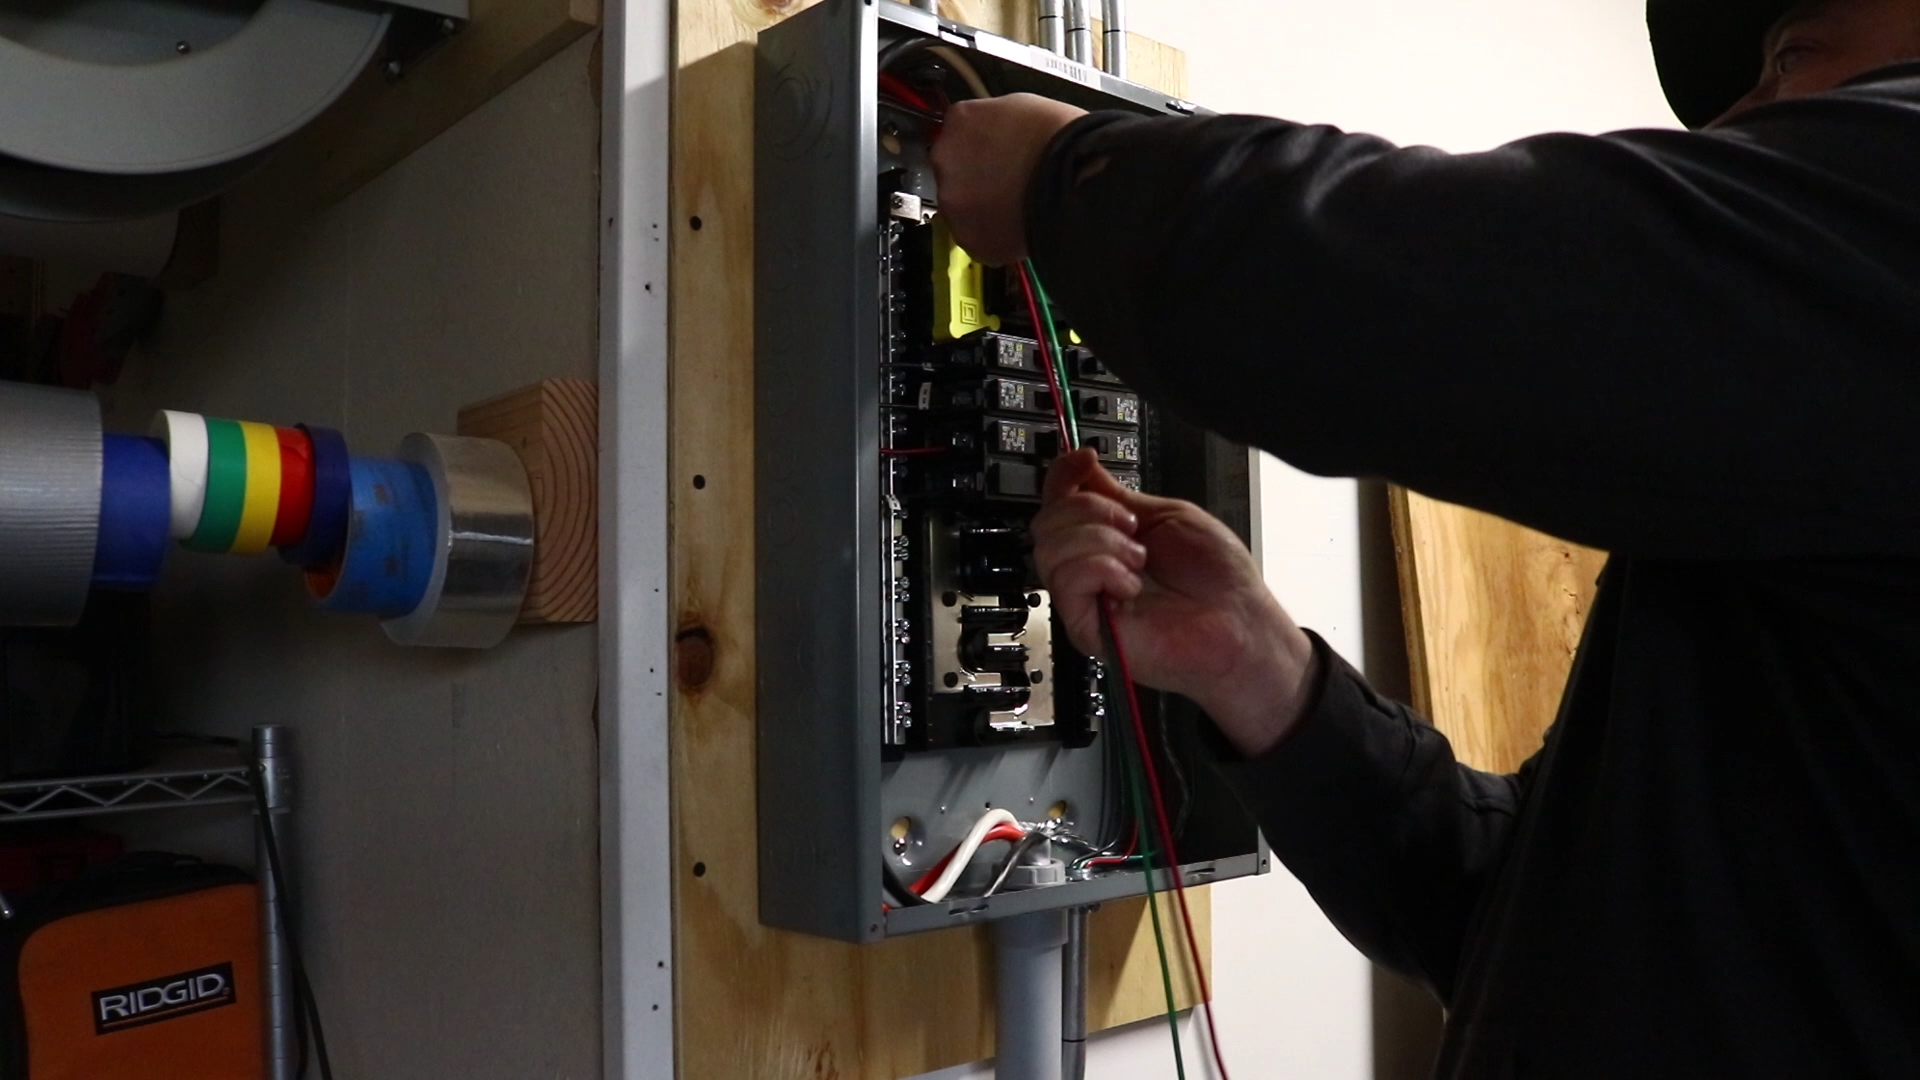
The THHN needed to be looped around and fed down the exterior EMT.
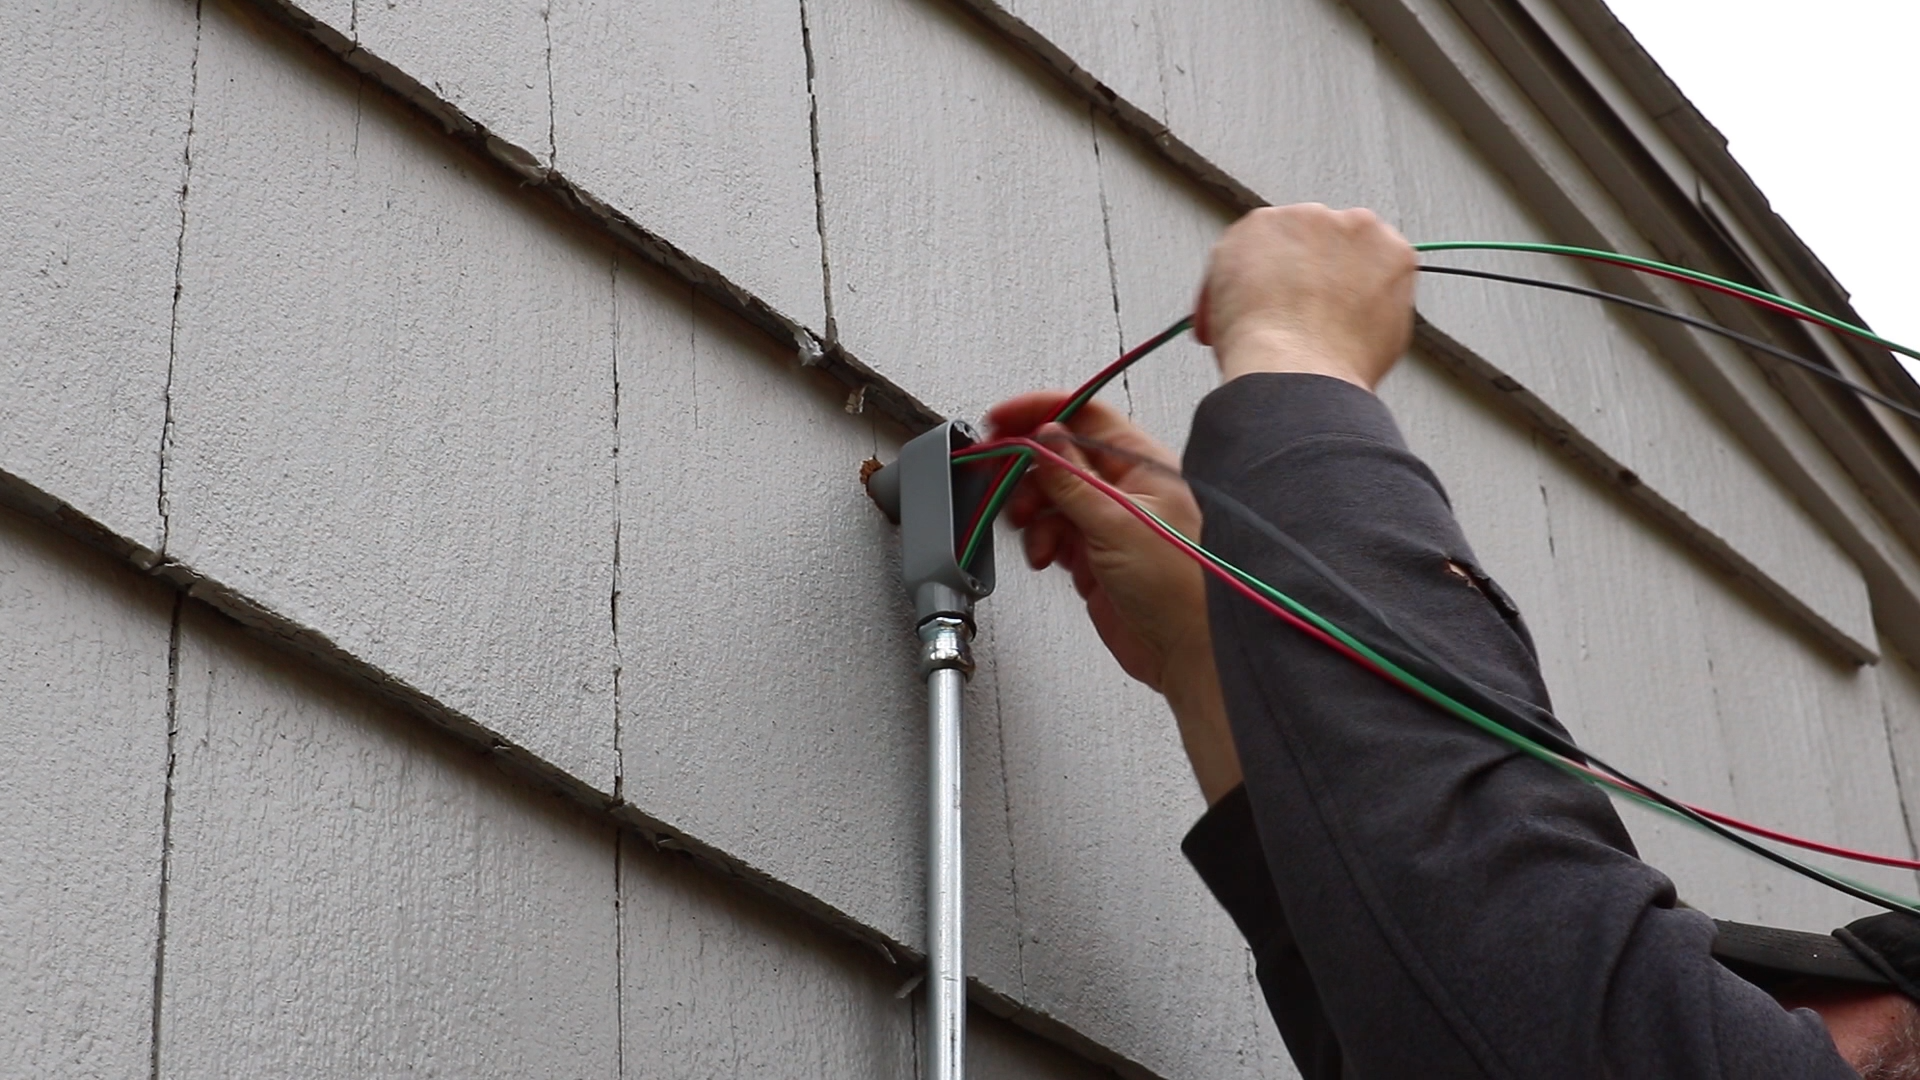
It was then run through the EL and into the disconnect where I stripped and connected to the appropriate terminals.

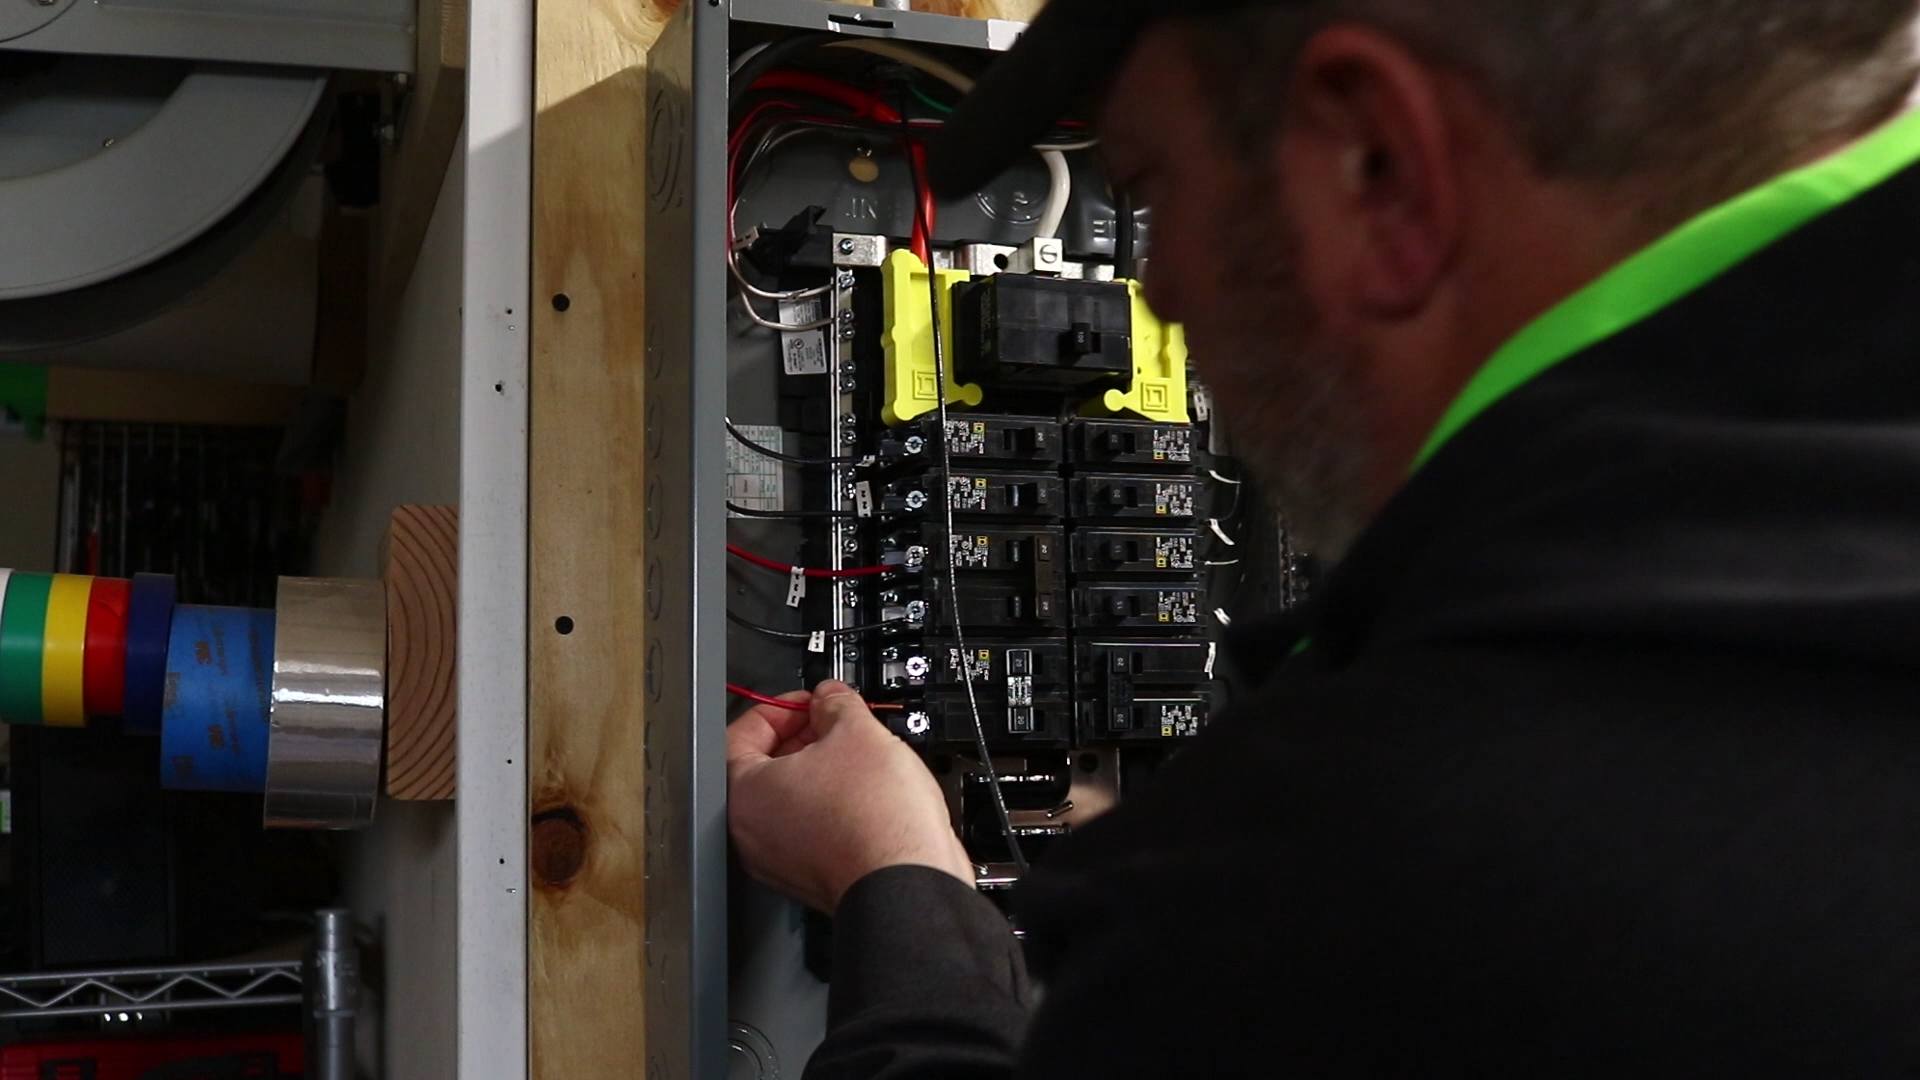
Once connected at the disconnect, I cut the wires to length and connected them to a two pole 20 amp breaker on my panel.
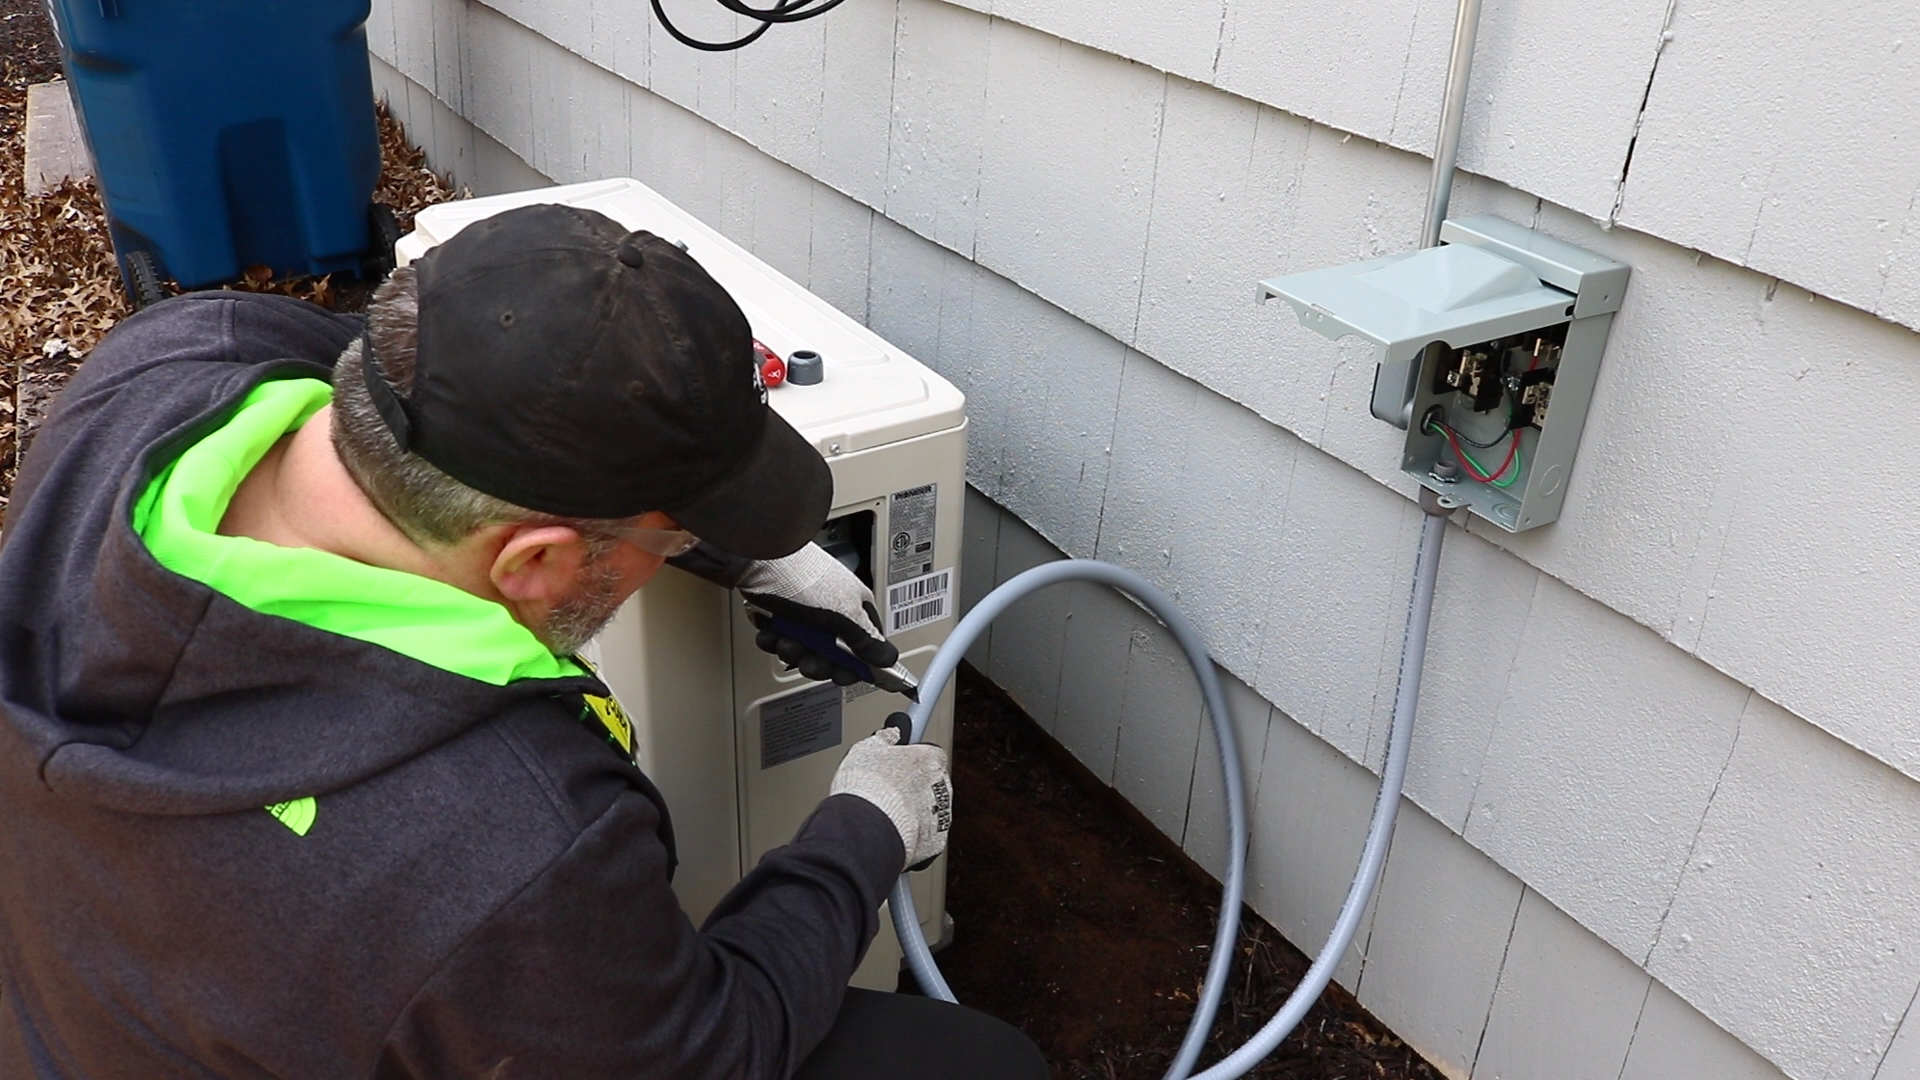
I removed the terminal cover to start wiring the outdoor unit.
I then connected liquidtight conduit to the disconnect. Liquidtight is a weather resistant, flexible PVC conduit that feels like rubber.
I then cut the liquidtight to size.
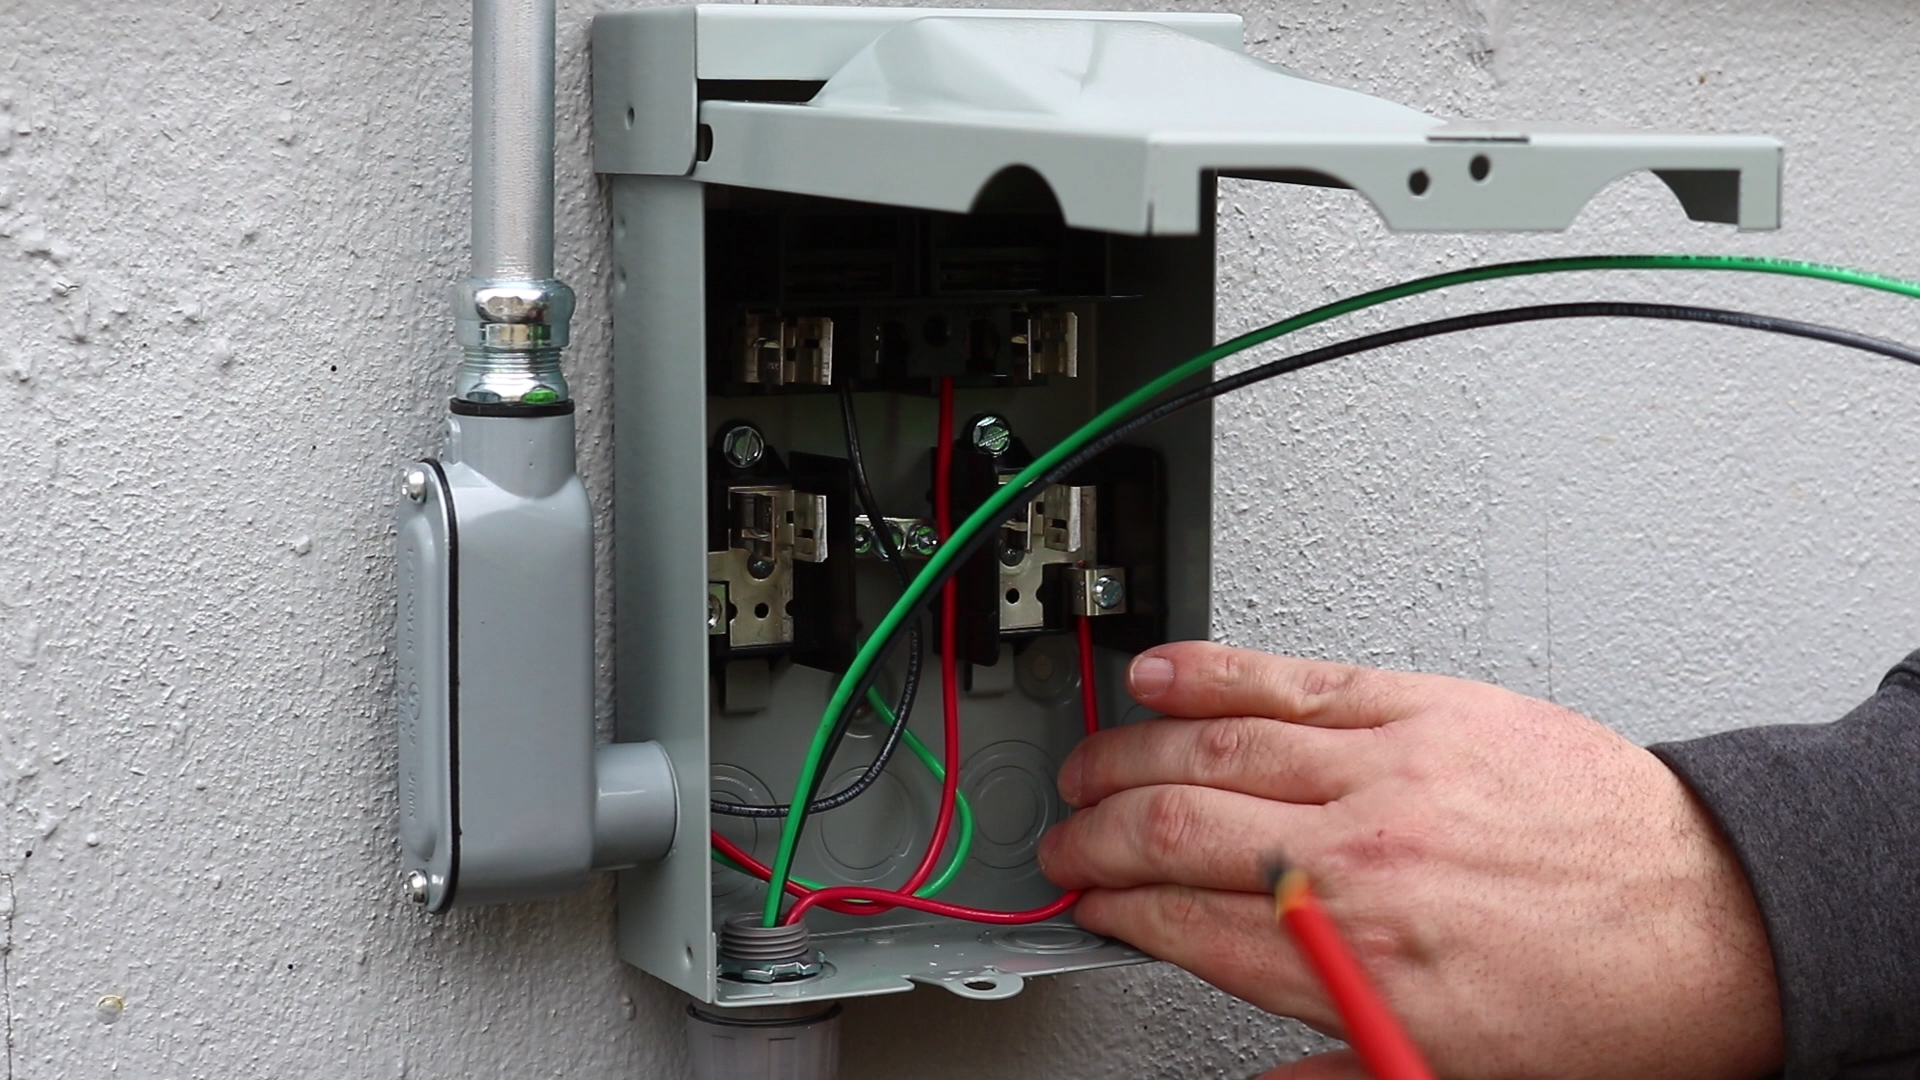
It was now time to connect the signal wire and power to the outdoor unit. I referred to the photo I took earlier and connected the signal wires to their corresponding terminals. To connect the power I wired the two hot conducts (red and black) to L1 and L2 and the green wire to the ground.
I then replaced the terminal cover on the outdoor unit.
With the terminal cover replaced I could connect the liquidtight to the terminal cover. Make sure you dont wire the unit and the disconnect before connecting the liquidtight. You want one end loose and then you can cut the wires to size.
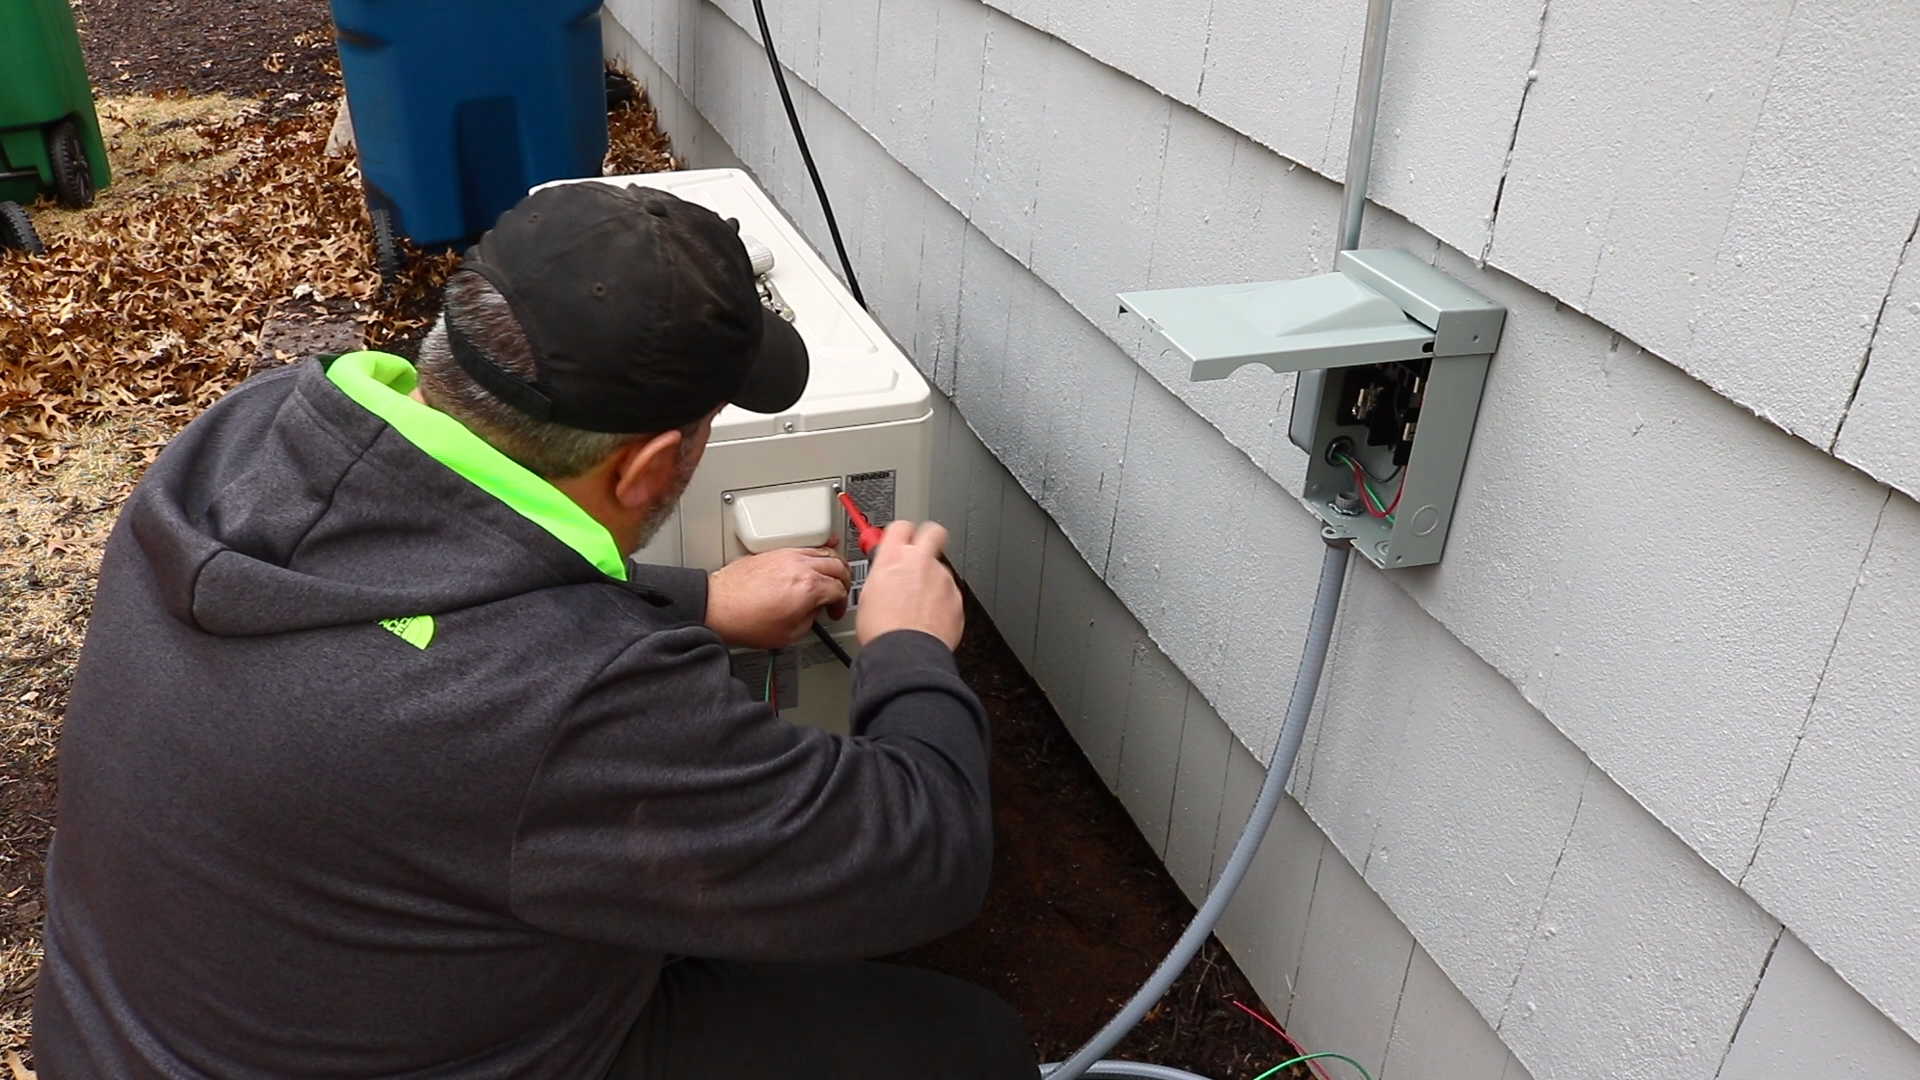
To wire the disconnect box, I connected the two hots to the load terminals and the ground to the grounding bar.
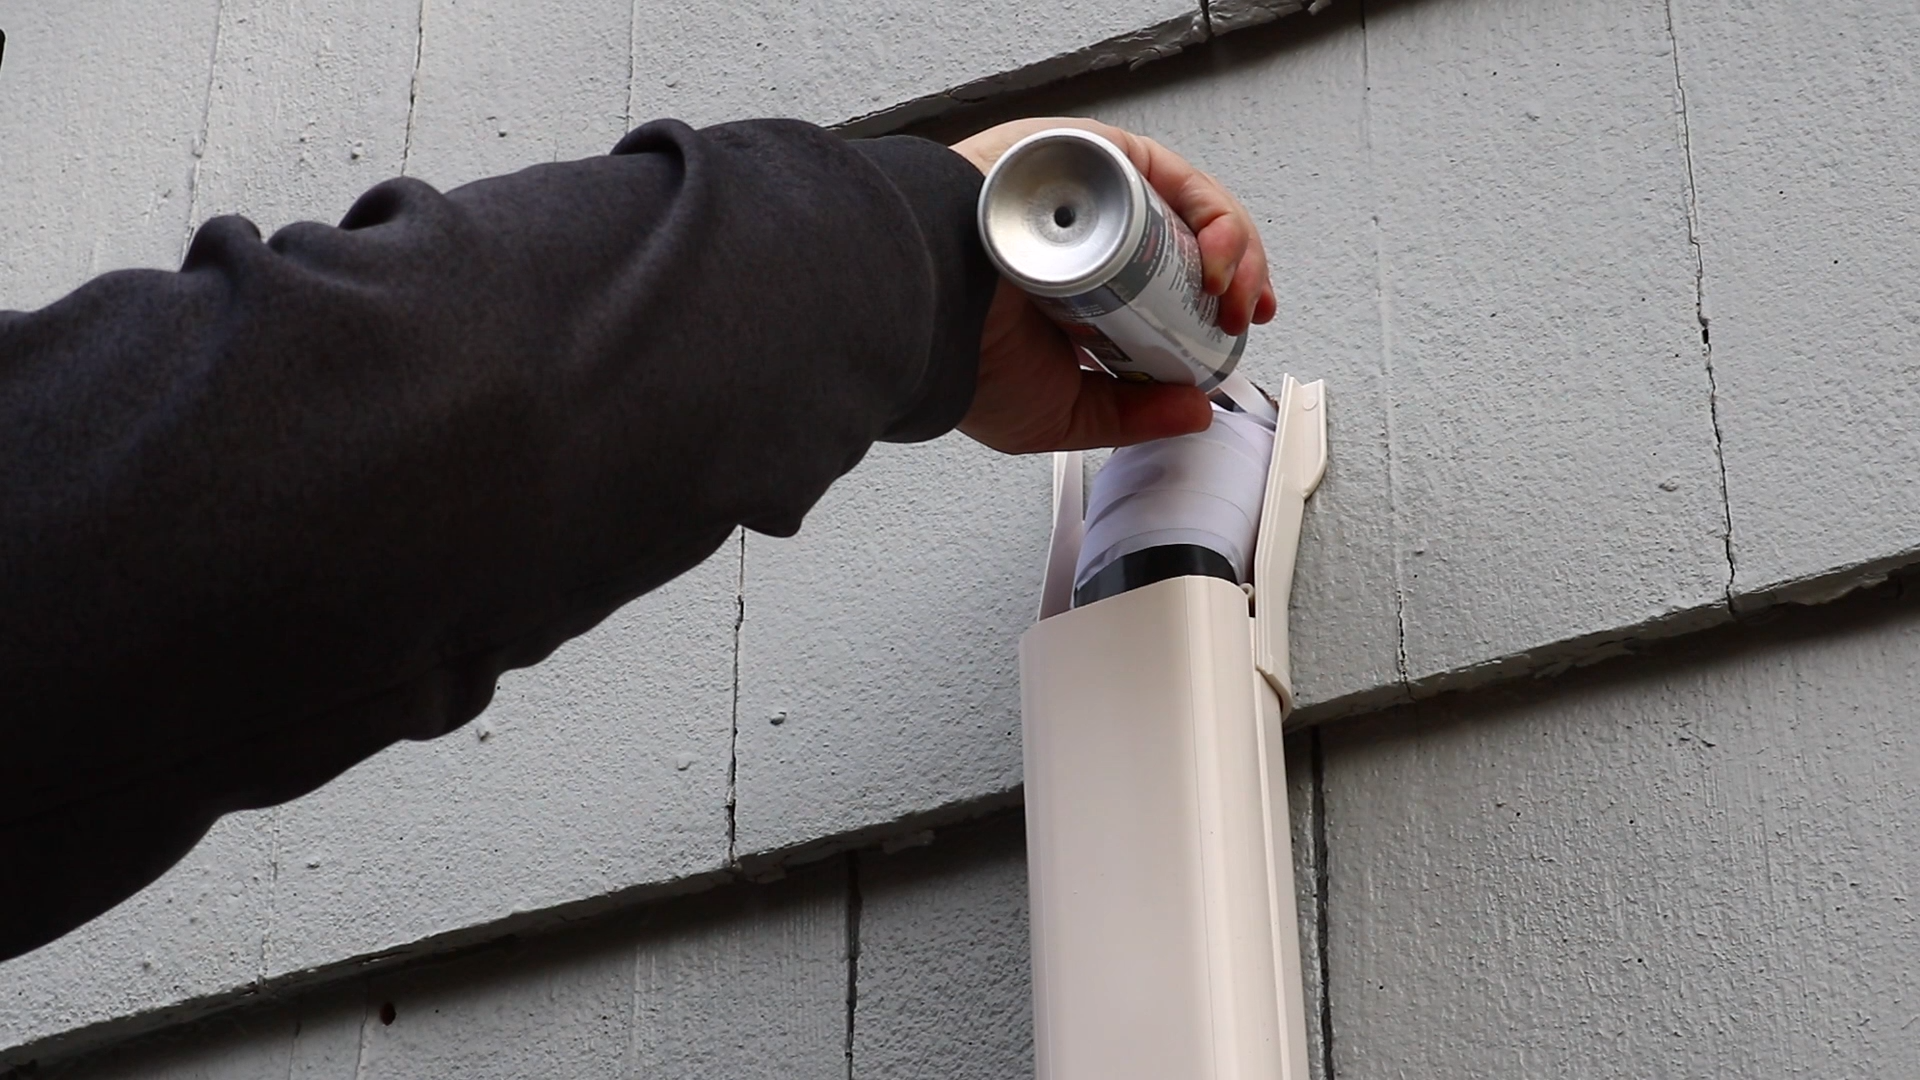
At this point of the install, my part was pretty much done. My HVAC tech showed up and made the final connections and vacuumed the lines. His part took a few hours mainly because he had to make a run to get a fitting for his vacuum. While he was doing those final connections I sealed up the wall penetrations with the some Flex Shot clear rubber sealant.

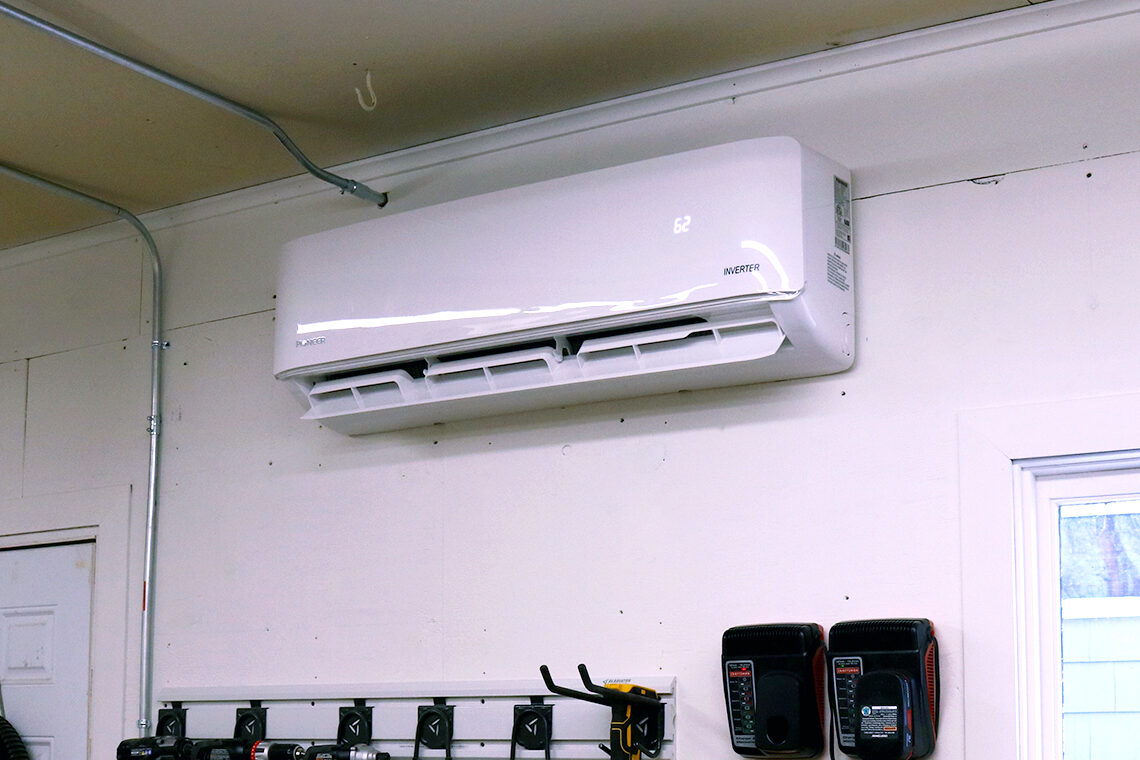
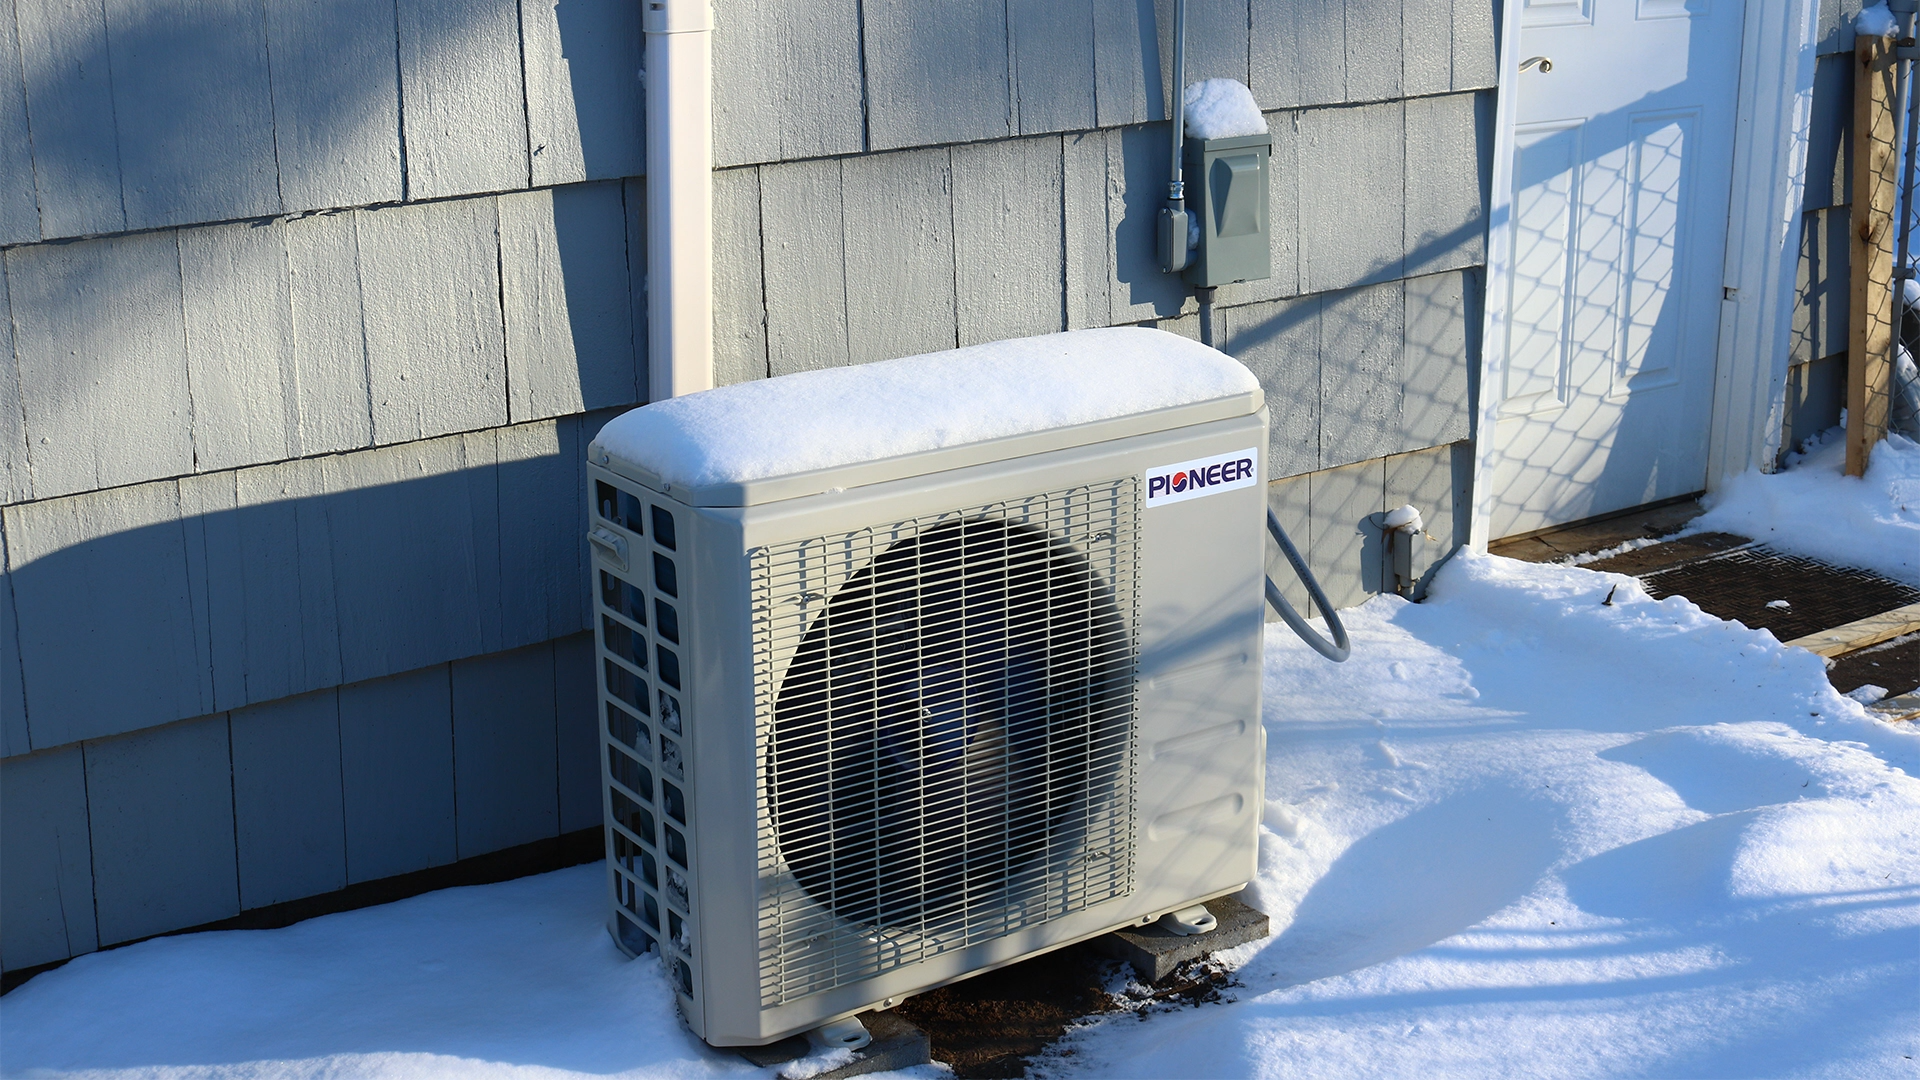
And done. I was in a rush to get this done because it has to be above a certain temperature to get a good vacuum on the system. As you can see by this picture, it snowed and got pretty chilly the day after installation.
How’s Life With a Mini Split?
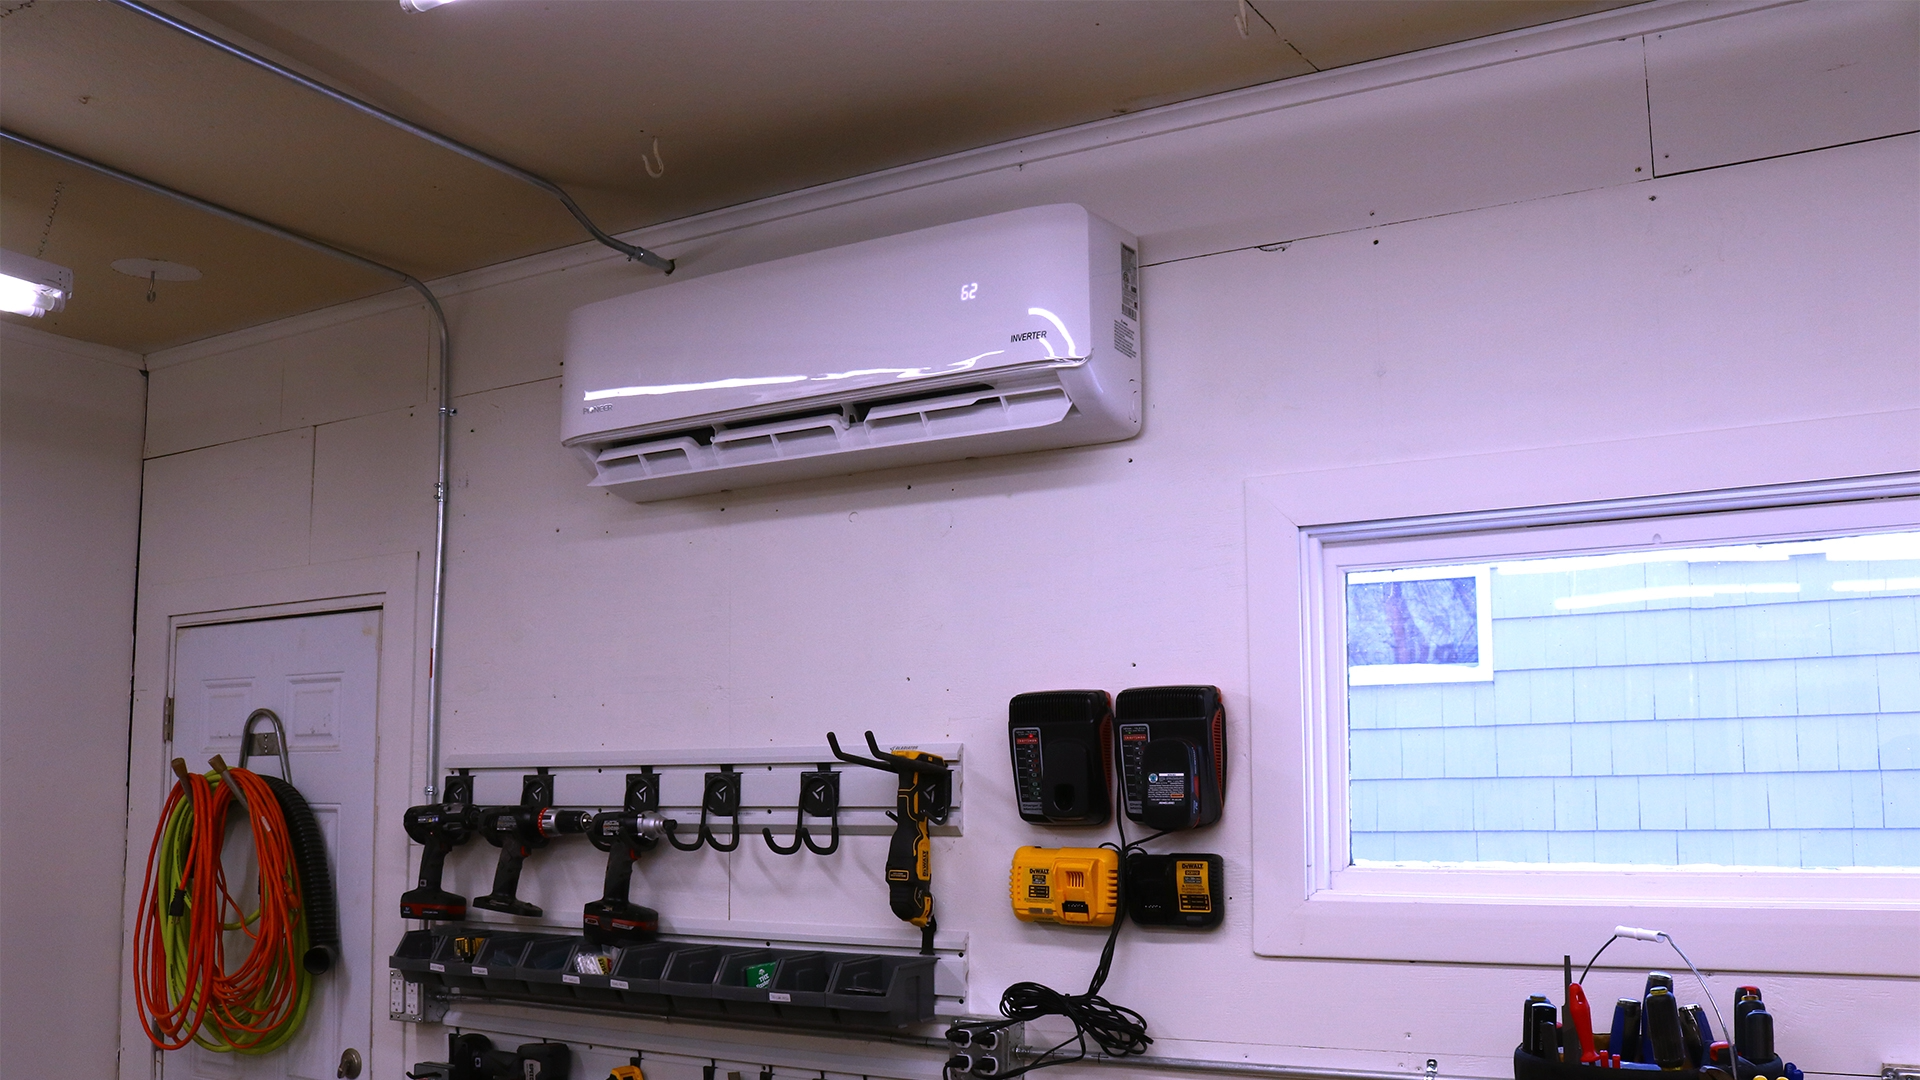
So far, so good. I’ve had the mini split in place for a couple of weeks and it’s performed well. It got really damn cold (down to around 0) and it did struggle but that’s mainly because of my ceiling. There is one thing I do not love about mini splits. From what I have researched, the lowest heat setting is usually around 60 degrees. On my unit in particular, it’s 62. I would much rather be able to set this around 50-55 when I am not in the shop. That’s warm enough to keep for the glues and finishes but won’t break the bank.
Speaking of bank, so far, running this unit is costing me an average of $1-2 per day. On those really cold days/nights it cost about $3 but my ceiling issues are playing a large role in that cost. At some point this spring I will hopefully be addressing those issues.
One of the really great things about this unit is the low noise output. It’s super quiet. Both the indoor and outdoor units.
Thus far, I am very pleased with this purchase. It’s made being in the shop so much more comfortable. I’ll have to wait a few months to test out it’s cooling performance.
If you have any thoughts or questions regarding my mini split installation, please leave them in the comments section below.
Till next time!


48 Comments
from what I can see the signal wire does not go through any conduit but goes right to the unit.
That is correct. It is wrapped up with the lineset and then fed into the unit. Thanks for your comment!
Thanks. I am thinking about whether I should place the outdoor unit ground level or mount it to my foundation. My foundation is fieldstone which possibly is problematic with regards to drilling into it to secure mounting platform
I was initially planning on mounting to the exterior but the mounts I bought were pretty rickety and I didn’t have time to get new ones. Thus far, I have no complaints with it being on the ground.
You mentioned you let the hvac tech bend the lineset. After observing him do this do you feel it is all that tricky?
Na, it’s pretty straightforward. I knew he’d be fiddling with it anyway so I just left it to him to bend.
I have installed a “Mr Cool diy” mini split and it is working great so far…just picked up a smaller 12k unit and came across your video….got to say VERY well done ! Thanks for taking the time to do it….
Dan in sunny and hot Florida
Thanks, man! Appreciate that! Here’s to mini splits!
Great post, thank you for the detail. I’m about to install the same unit this weekend.
The only thing I’m trying to figure out is fixing the outdoor unit to the ground. I will have it on pavers as you did, but how did you make sure it would tip or blow over? Do you have it bolted to the pavers?
Thank you!
Mine is just sitting on the pavers. Unless I am in a hurricane I cant see it tipping over. The HVAC guy that did the final connections said it would be fine as long as it was level. I’d check with your manufacturer for your specific unit.
Thanks!
Does anybody know how to Fix error P0?
My email address is [email protected]
Thanks in advance
Here’s a link to the error codes: https://removeandreplace.com/2017/06/19/pioneer-air-conditioner-mini-split-error-codes-and-troubleshooting-guide/
No idea what it means but it could mean a bad compressor. 🙁 I’d reach out to the manufacturer.
Please let us know what you find out.
Thanks!
So many reasons why non-informed should never attempt a professional project….Signal wire carries high voltage and can cause fatal shock if grounded by human contact yet you mention it is not carried in the power conduit, but outside of line set path as a bundle. Bad news. That’s just the beginning of the mistakes, but I won’t comment further for fear of others thinking that they can overcome all probable problems by simple online commentary. HIRE A INFORMED, FACTORY TRAINED, QUALIFIED, LICENSED INSTALLER. If not, the risk of property damage or saftey of occupants conveys to you.
I had a licensed HVAC technician review all work that I did on this unit. The signal wire is weatherproof cable rated for outdoor use. It is wrapped with the lineset per the instructions. Maybe I am misunderstanding you but I dont see the issue you are trying to point out. I also pointed out at the very beginning of this video that anyone interested in doing this should work with an electrician/hvac tech before starting.
Do you have any good videos/resources regarding bending the copper tubing and using the vacuum pump and gauges? There are a number of tools out there for bending the tubing and I was wondering which approach is best.
Unfortunately, I don’t. I left that part to the HVAC tech. It’s a really small part of the job but it’s probably the most important part so it cost very little to have someone else handle it. I would check out YouTube.
I understand flaring the copper tubing is involved except if you use the entire length of lineset that comes with the unit.
Correct, but I only needed about 10 feet of lineset and didn’t want the rest rolled up on the outside of the house.
I am looking to see if I can position the outside unit so that I do not have to cut and flare the copper tubing. If one orders a 10 foot line set I assume that is the length of the actual Lineset separate from the section attached to the indoor unit. It appears to me, from your video, that about 1 foot of lineset extends to the outside once the inside unit is hung from its bracket. This would give me a rough idea as to where I can mount the outside unit.
You seem really determined to do all of the work yourself, which is great! If that’s the case, I would recommend you check out a Mr Cool DIY unit. https://amzn.to/2NY99dw
They are designed specifically for DIY installs. They are supposed to be nice units. Please let me know how it all turns out.
What did it cost you for the HVAC guy to do his portion of the work?
$150 if I remember correctly.
I am rerouting wiring from existing 30 amp outlet to the disconnect and discovered the existing wiring is 4 wire including one bare ground. So I red, black,white and bare. The red and black are the two lines and my question is do I use the bare wire as the ground and just cap off the white
I would think that would be okay but I’d definitely check with an electrician.
Awesome job will be putting one in my garage when I can get around to it very helpful thanks LJC.
Thanks! And thanks for watching!
The diagram showing the center of the hole for the lineset in relation to the actual position of the bracket is confusing
It’s been a while, but isn’t there a template you can tape to the wall to show all of the locations?
Really good info here, thank you. I am doing the same as you, hire hvac for final hook-up mainly to qualify for warranty. I am a new build 2×6 walls. The unit will be centred over a large window. I want to run the lineset to the outdoor unit 4’ along the wall away from window, then 4’ away from house to a poured pad on the ground (if that makes sense) could I, or should I run lineset inside of wall? And can the lineset go underground? Thanks, Doug
Thanks, Doug!
I am not sure if you can run the lineset underground but I am also not sure why you’d want/need to. I wouldn’t run the lineset in the wall just in case something happens and you need access. The way I look at it, you have an ugly thing sitting right next to your house so the lineset on the outside doesn’t really make it any uglier.
Good luck on your install!
Tim, Thanks for taking your time to share this.
How did you get this system to run with no refrigerant piping. I know you said the HVAC guy would be doing it, but I don’t see it anywhere. Is that be cause he did such a bad job you didn’t want to show it. I don’t get it.
How about work permits and inspections- any required for refrigerant piping and electrical work?
To my way of thinking the refrigerant piping- routing/insulation/connections/evacuation/charging/ trimming is perhaps the most important part of the job- yet nothing shown or explained. Nothing.
Sorry to say it, but your hard work fell way short for me- and I do have some experience.
Dan, there is refrigerant line but I did not do the connections. I hired an HVAC tech to handle that part. He did a great job as far as I know. No issues with the unit thus far. And, yes, that is the hardest and most important part but you can save a significant amount of money by handling the rest yourself. I saved probably $2k.
Sorry you didn’t get much out of this video. I showed the steps that I was comfortable handling myself. If you want to know how to hook up the refrigerant lines and do the vacuuming there are plenty of resources available.
Thanks for watching.
Thank you for sharing this ultimate guide for DIY mini split type aircon installation. The images were really a big help to see the actual way of installation. Hats off to you Sir.
Thanks! I appreciate you taking the time to read the article.
Tim –
It appears to me, you did a pretty decent “DIY” installation of your Mini-split heat pump, all things considered!
I read each of the replies from everyone else and while the majority of them are positive, I could not help but determine that the only ones that weren’t came likely from HCAV professionals.
Not to bash these fellas but clearly they did not understand the disclaimers made throughout your post and the fact that you hired an HVAC professional to “finalize” your project. Good job.
As an HVAC professional, I get where they are coming from but let’s keep it 100 here – you clearly defined in your disclaimer the importance of hiring professionals. You have an active DIY blog/page and replied to each respondent. Your competency level of “how to do” likely exceeds the average person but this was clearly an informational post and as I understood it, not intended to advertise yourself as an HVAC guru!
Finally – good job on keeping it professional when those guys were clearly attempting to shine a light of fault on your processes…
Good job!
Thanks for the comments!
Came hear just to say thanks for the great video. I’m a modest DIY and felt like you hit all the important points that most DIY people need to know to feel confident about tackling this project. I agree with you that it is wise to pay $150 (or whatever) for the HVAC pro to do his little magic thing but then save yourself $2k by doing all the heavy lifting yourself.
Sorry you have to deal with all the haters. There was a time in this country where common sense, general tools and general knowledge was all a person needed to make a place to live. Specialization should open doors, not slam them shut.
Thanks, Allen! Yeah, definitely saved money but also had a professional to check everything I did. He said I did it all exactly as he would have so nothing more I could really do.
I’m thinking about installing a mini split at my cabin that sits up on cinder blocks and enclosed with trailer skirting. Not at all an air tight situation. Could the outside unit be installed underneath the cabin to keep it out of site and out of the weather?
Hey Fred, thanks for the comment. If it has the correct clearances I would guess it would be okay but I’d definitely recommend reaching out to the manufacturer on that issue. Thanks
Great posts. Stunning, Thanks for the excellent outline
Thanks!
Hi Tim, thanks for the detailed post. I have similar units. Have you had issue with condensation, particularly in the hot/humid summer? I am having that issue and trying to brainstorm how to fix it. Thanks!
Hey Julie, I haven’t had any problems with condensation. All of the condensation drains outside via the condensation drain line. Sorry I can’t be of more help.
The link to the Sparky Channel is obsolete. Someone hacked his channel, so he created a new one.
https://www.youtube.com/channel/UC9fxRCgiys5D1VCFLNW0uXA
This is really appreciated that you have presented on how to install ductless mini split are discussed over here, I love all the information shared. It will be very helpful to understand about the quality control for a renovation. This is a lovely and informative post.I must say this, if you get time can visit Comfortgroup.co.nz for ideas on this topic.
Hey Tim,
Thanks for the awesome video on installing mini-split. I’m about to install one this week and really found this video helpful and now the task is not so daunting as I await the delivery of wire and conduit. I’ll definitely subscribe to your videos. Thanks again Tim
My pleasure, Jim! Good luck on your install. You will love it!